Antes de utilizar su nuevo producto Steren, lea este instructivo para evitar
cualquier mal funcionamiento.
PRECAUCIONES
IMPORTANTE
• No exponga el producto a temperaturas
extremas.
•Siempre utilice un paño suave y seco para
limpiarlo.
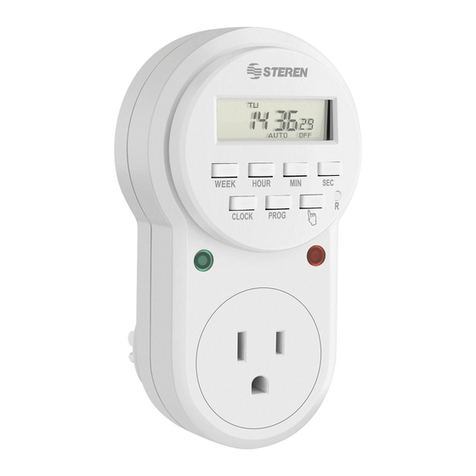
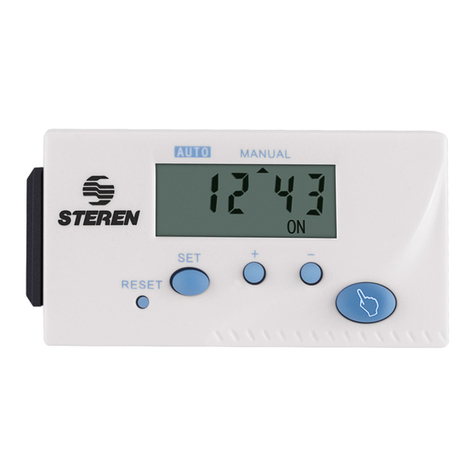
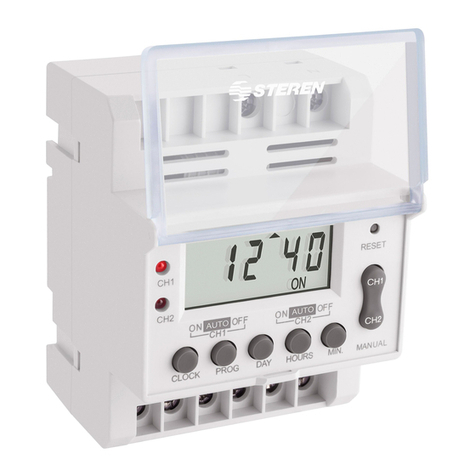
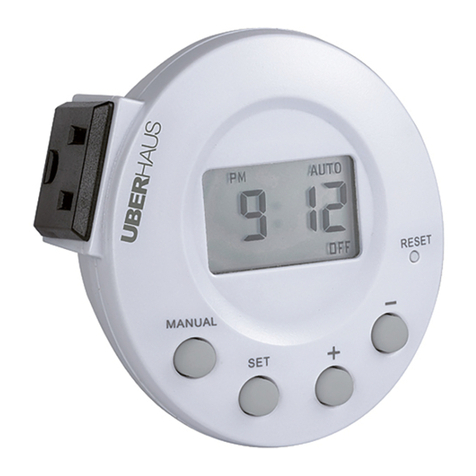
1. MENU: Use para ajustar la hora actual y
programar la hora de apagado/encendido del
dispositivo conectado.
2. + / -: Permite aumentar/disminuir las
horas/minutos en la hora actual de los
eventos a programar.
3. COUNTDOWN: Permite congurar una
cuenta regresiva para apagar el dispositivo
conectado.
4. MANUAL: Cambia entre los distintos
modos de operación del dispositivo:
- ON: Siempre encendido, funciona como
un contacto normal energizado.
- Auto ON: Mantiene encendido el dispositivo
conectado hasta que llega la hora de apagado
de algún evento programado.
- OFF: Siempre apagado.
- Auto OFF: Funciona de acuerdo con los
eventos pogramados.
5. RESET: Presione para borrar todas las
conguraciones.
6. OK: Presione para confirmar un ajuste.
7. Conecte el dispositivo que quiere con-
trolar.
8. Conexión a la corriente eléctrica.
La información que se muestra en este manual sirve únicamente como referencia
sobre el producto. Debido a actualizaciones pueden existir diferencias. Por favor,
consulte nuestra página web (www.steren.com) para obtener la versión más reciente
del instructivo.
CARACTERÍSTICAS
ESPECIFICACIONES
Su nuevo temporizador le permite programar
hasta 9 eventos de activación o desactivación
de un equipo eléctrico.
Cuenta con una batería recargable interna para
conservar la programación y la hora. Además
recibe cargas de hasta 1725 W o 15 A.
Si sale de casa durante períodos largos, cuenta
con una función de activación / desactivación
aleatoria, que enciende y apaga los equipos
programados a distintas horas simulando la
presencia de personas dentro de la casa.
INSTRUCCIONES
CONTROLES
Ajuste de la hora actual:
Antes de utilizar el temporizador por primera vez, asegúrese de ajustar la hora y fecha actual.
1. Oprima el botón MENU hasta que aparezca la leyenda CLOCK.
2. Enseguida oprima el botón OK para ajustar el día de la semana en el que se encuentra, utilice
los botones + o - para elegir el dia, y vuelva a presionar OK.
3. Elija la hora actual con los botones + o -, en seguida oprima OK y repita la misma operación
para elegir los minutos.
4. Oprima el boton MENU por dos segundos hasta que aparezca la hora congurada con dos
puntos (:)parpadeando y el ícono CLOCK haya desaparecido.
Los días de la semana sólo aparecen en inglés:
Mo= Lunes, Tu= Martes, We= Miércoles, Th= Jueves, Fr= Viernes, Sa= Sábado y Su= Domingo.
Combinación de días de la semana:
Su equipo cuenta con 4 formas diferentes de programación del día de la semana.
Presione el botón + o - continuamente durante el Modo de Programación para ver cada una de
las opciones.
- Toda la semana: Selecciona todos los días de la semana. En pantalla aparece: Mo, Tu, We, Th,
Fr, Sa, Su.
- Por día: Selecciona sólo un día de la semana.
- De Lunes a Viernes: Aparece en pantalla Mo, Tu, We, Th, Fr.
- Sólo Sábado y Domingo: Selecciona sólo el n de semana. En pantalla aparece: Sa, Su.
Presione el botón RESET si desea borrar todas las programaciones e iniciar nuevamente.
Cuenta regresiva:
Si desea congurar el apagado de un evento en cuenta regresiva, presione COUNTDOWN hasta
que aparezca CTD, en seguida oprima COUNTDOWN cuantas veces sea necesario hasta marcar
el tiempo deseado en el que se apagará el equipo.
Puede programar hasta 9 eventos diferentes.
- Los días de la semana aparecen en inglés.
- En el modo de encendido permanente, asegúrese de que el equipo conectado al temporizador
se encuentra encendido.
- No utilice equipos electrónicos con encendido digital.
Programación de eventos:
Antes de comenzar la programación asegúrese de que el equipo muestra la hora y día actual.
1. Presione el botón de MENU. hasta que en la pantalla aparezca el evento número 1 ON, (esto
quiere decir evento 1, hora y día de encendido) para programar.
2. Presione el botón OK para programar el día que desea, selecciónelo con los botones + o -. En
caso de que requiera que su dispositivo se encienda todos los días o varios días de la semana
oprima + o - hasta que aparezca parpadeando el día o días seleccionados y vuelva a presionar el
botón OK (vea combinación de días de la semana).
3. A continuación, el número de las horas comenzará a parpadear, ajuste la hora que desea
programar con los botones + o - y repita la operación para ajustar los minutos.
4. En seguida presione el botón MENU para continuar con la programación de la hora y el día en
que desea apagar el evento 1, en la pantalla aparecerá la leyenda 1 OFF.
5. Presione OK y repita las instrucciones anteriores para establecer el dia y la hora de apagado.
En caso de que la pantalla no se active, cargue la batería del TEMP-08E conectando la
unidad a la corriente eléctrica durante 1 hora y presione el botón Reset.
El diseño del producto y las especicaciones pueden variar sin previo aviso.
Product design and specications are subject to change without notice.
Producto: Temporizador digital de 9 eventos
Modelo: TEMP-08E
Marca: Steren
PÓLIZA DE GARANTÍA
Esta póliza garantiza el producto por el término de un año en todas sus partes y mano de obra, contra cualquier defecto de fabricación y
funcionamiento, a partir de la fecha de entrega.
CONDICIONES
1.- Para hacer efectiva la garantía, presente esta póliza y el producto, en donde fue adquirido o en Electrónica Steren S.A. de C.V.
2.- Electrónica Steren S.A de C.V. se compromete a reparar el producto en caso de estar defectuoso sin ningún cargo al consumidor. Los gastos de
transportación serán cubiertos por el proveedor.
3.- El tiempo de reparación en ningún caso será mayor a 30 días,contados a partir de la recepción del producto en cualquiera de los sitios donde
pueda hacerse efectiva la garantía.
4.- El lugar donde puede adquirir partes, componentes, consumibles y accesorios, así como hacer válida esta garantía es en cualquiera de las
direcciones mencionadas posteriormente.
ESTA PÓLIZA NO SE HARÁ EFECTIVA EN LOS SIGUIENTES CASOS:
1.- Cuando el producto ha sido utilizado en condiciones distintas a las normales.
2.- Cuando el producto no ha sido operado de acuerdo con el instructivo de uso.
3.- Cuando el producto ha sido alterado o reparado por personal no autorizado por Electrónica Steren S.A. de C.V.
El consumidor podrá solicitar que se haga efectiva la garantía ante la propia casa comercial donde adquirió el producto. Si la presente garantía se
extraviara, el consumidor puede recurrir a su proveedor para que le expida otra póliza, previa presentación de la nota de compra o factura respectiva.
DATOS DEL DISTRIBUIDOR
Nombre del Distribuidor _________________________________________
Domicilio _____________________________________________________
Producto _____________________________________________________
Marca _______________________________________________________
Modelo ______________________________________________________
Número de serie _______________________________________________
Fecha de entrega ______________________________________________
ELECTRÓNICA STEREN S.A. DE C.V.
Camarones 112, Obrero Popular, 02840, Del. Azcapotzalco, México, D.F.
RFC: EST850628-K51
STEREN PRODUCTO EMPACADO S.A. DE C.V.
Biólogo Maximino Martínez No. 3408 Int. 2, 3 y 4, San Salvador Xochimanca,
Del. Azcapotzalco, México, D.F. 02870, RFC: SPE941215H43
ELECTRÓNICA STEREN DEL CENTRO, S.A. DE C.V.
Rep. del Salvador 20 A y B, Centro, 06000, Del. Cuauhtémoc, México. D.F.
RFC: ESC9610259N4
ELECTRÓNICA STEREN DE GUADALAJARA, S.A.
López Cotilla No. 51, Centro, 44100, Guadalajara, Jal. RFC: ESG810511HT6
ELECTRÓNICA STEREN DE MONTERREY, S.A.
Colón 130 Pte., Centro, 64000, Monterrey, N.L. RFC: ESM830202MF8
ELECTRÓNICA STEREN DE TIJUANA, S.A. de C.V.
Calle 2a, Juárez 7636, Centro, 22000, Tijuana, B.C.N. RFC: EST980909NU5
En caso de que su producto presente alguna falla, acuda
al centro de distribución más cercano a su domicilio y
en caso de tener alguna duda o pregunta por favor llame
a nuestro Centro de Atención a Clientes, en donde con
gusto le atenderemos en todo lo relacionado con
su producto Steren.
Centro de Atención a Clientes
01 800 500 9000
• Alimentación: 120 V~ 60 Hz 15 A máx. • Salida: 120 V~ 60 Hz 15 A máx.
8
7
