16 17
Art. 226 /Art. 227 /Art. 228
Elektrische Rückenspritze Ergo 12 l, 15 l und 20 l
Art. 226 /Art. 227 /Art. 228
Elektrische Rückenspritze Ergo 12 l, 15 l und 20 l
Für
weitere
Informationen
zum
Produkt
senden
Sie
uns
bitte
eine
E-Mail
an
[email protected].Abonnieren Sie unseren Newsletter um aktuelle Informationen von Stocker zu erhalten:
www.stockergarden.com/newsletter
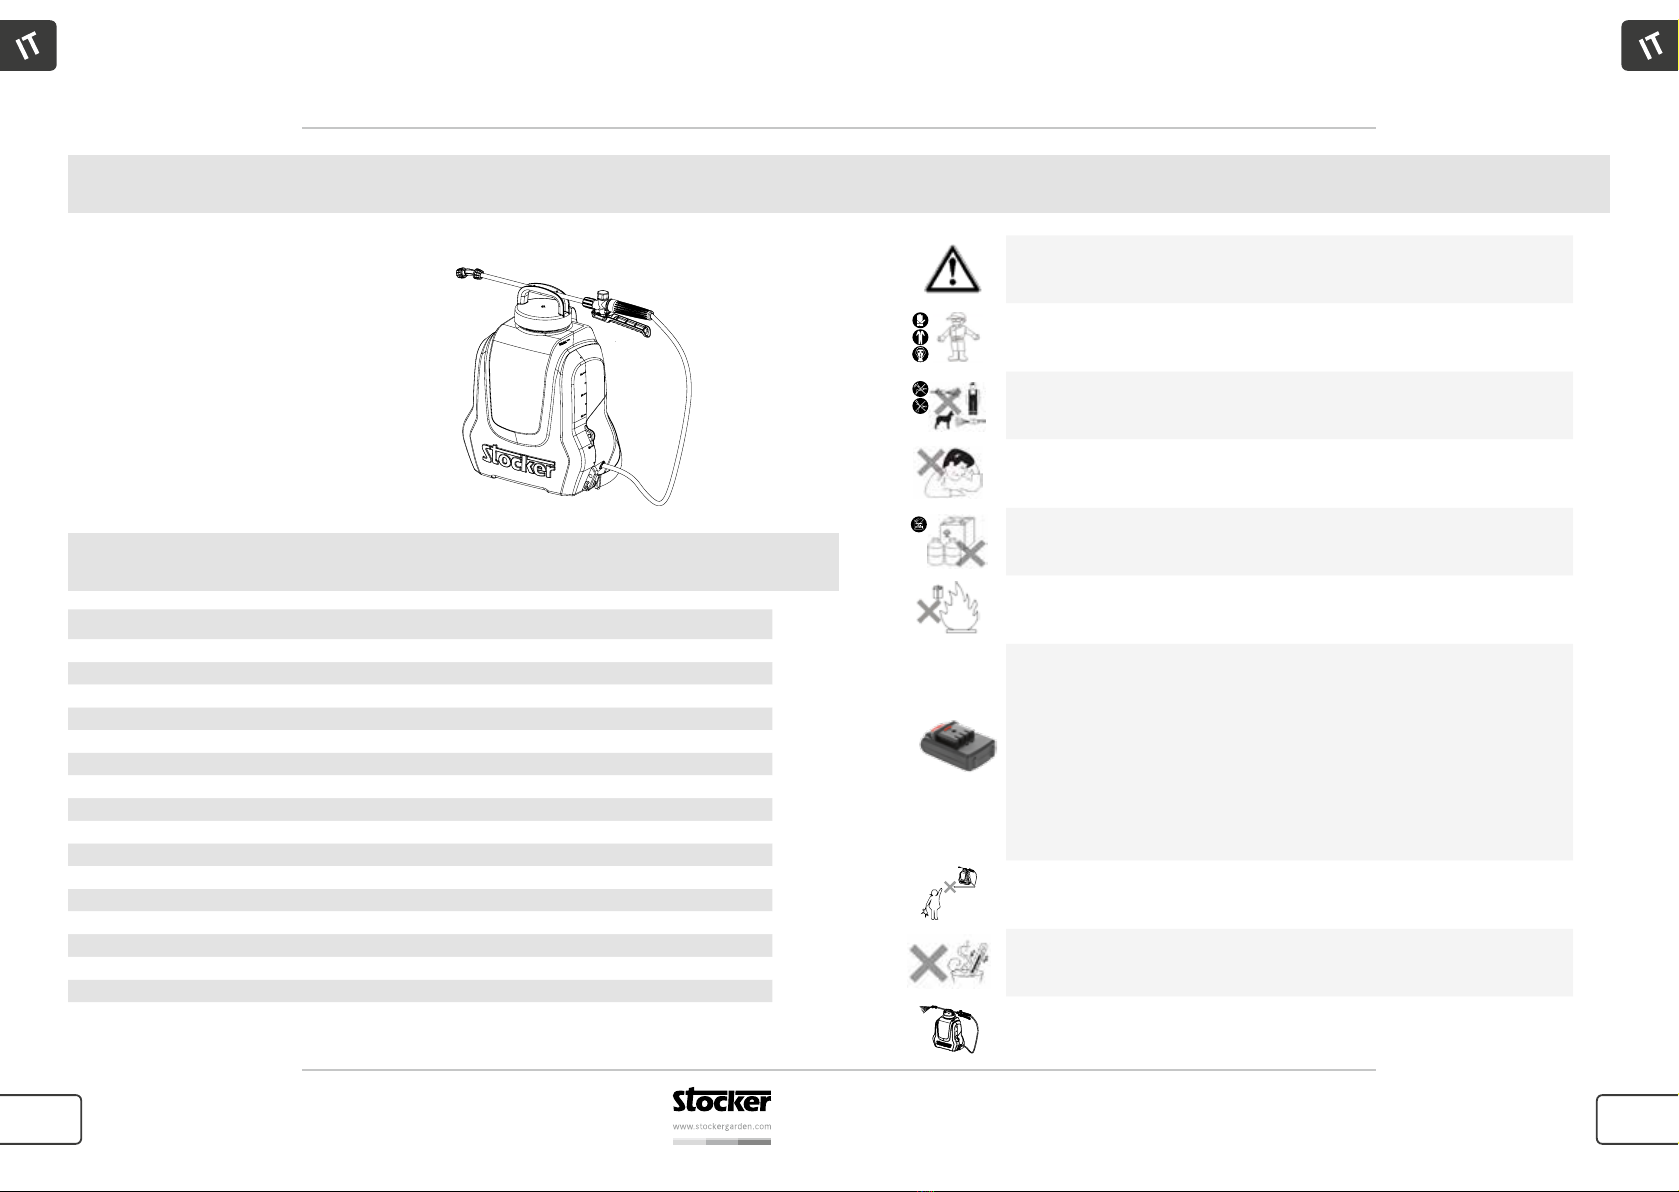
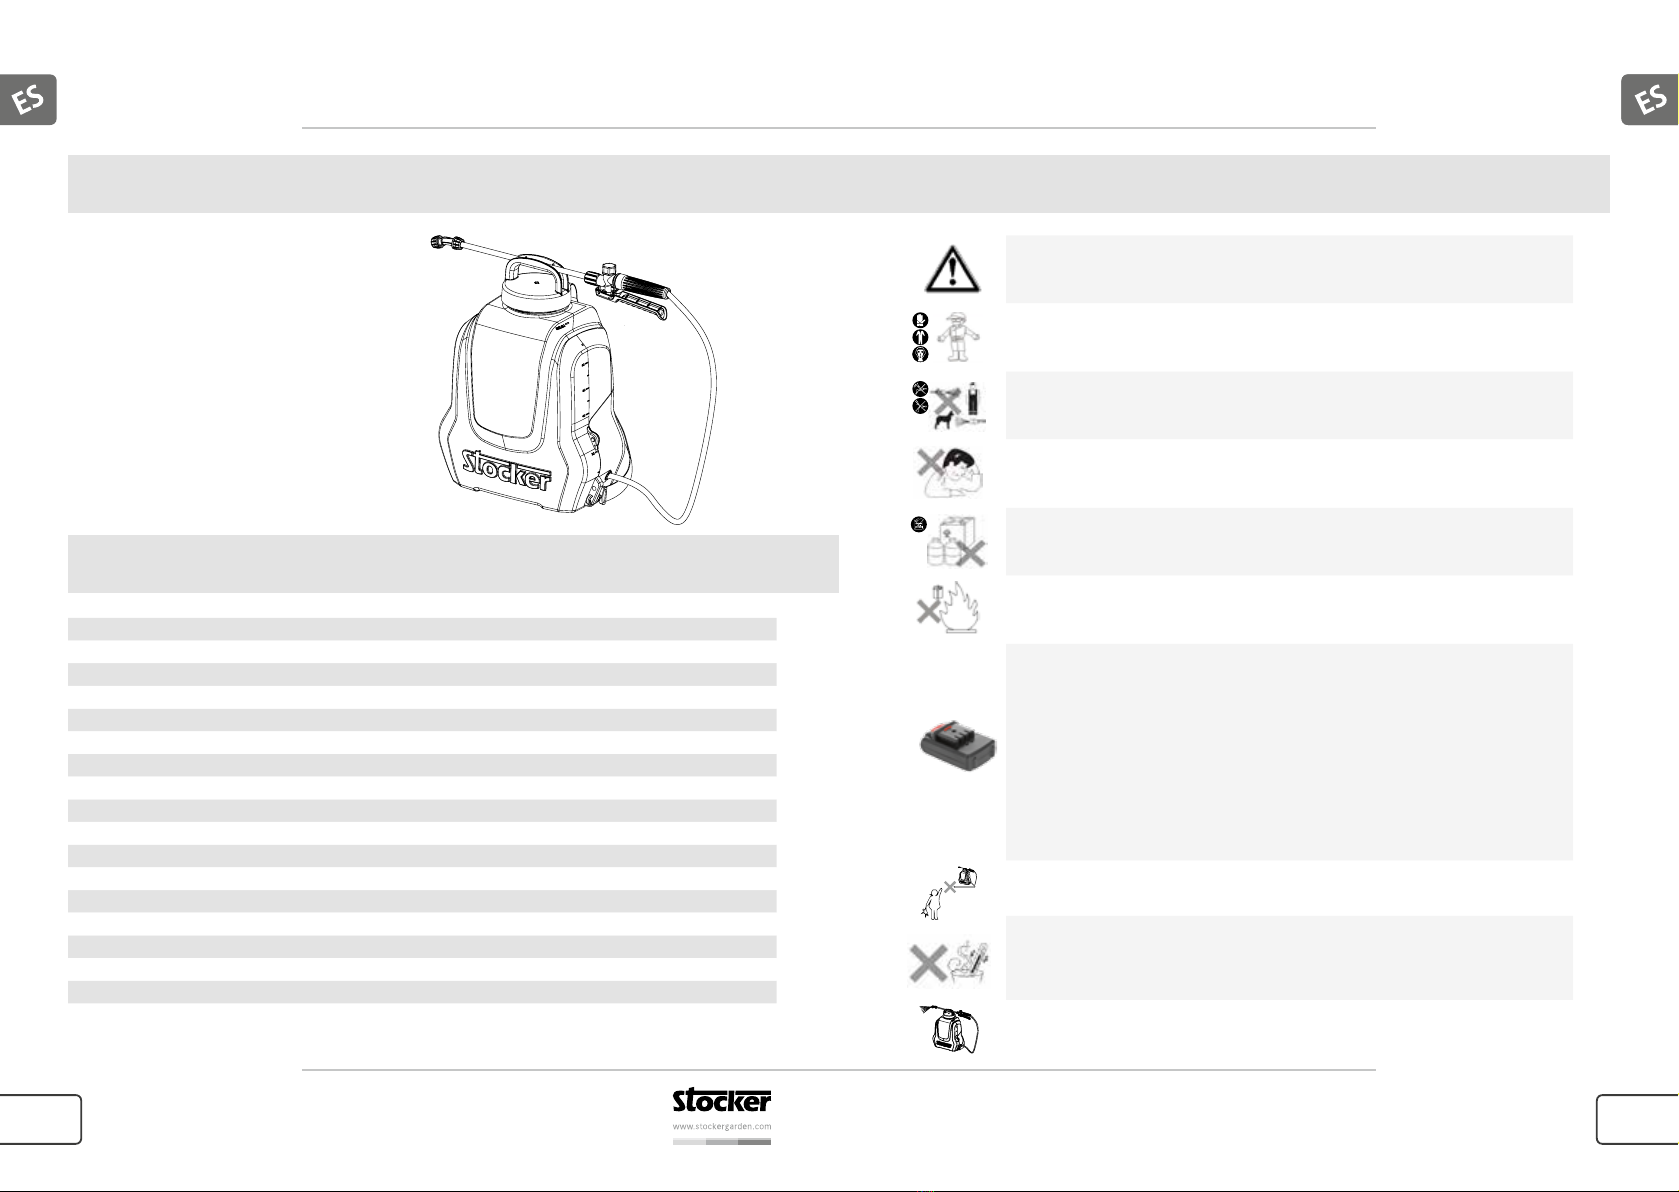
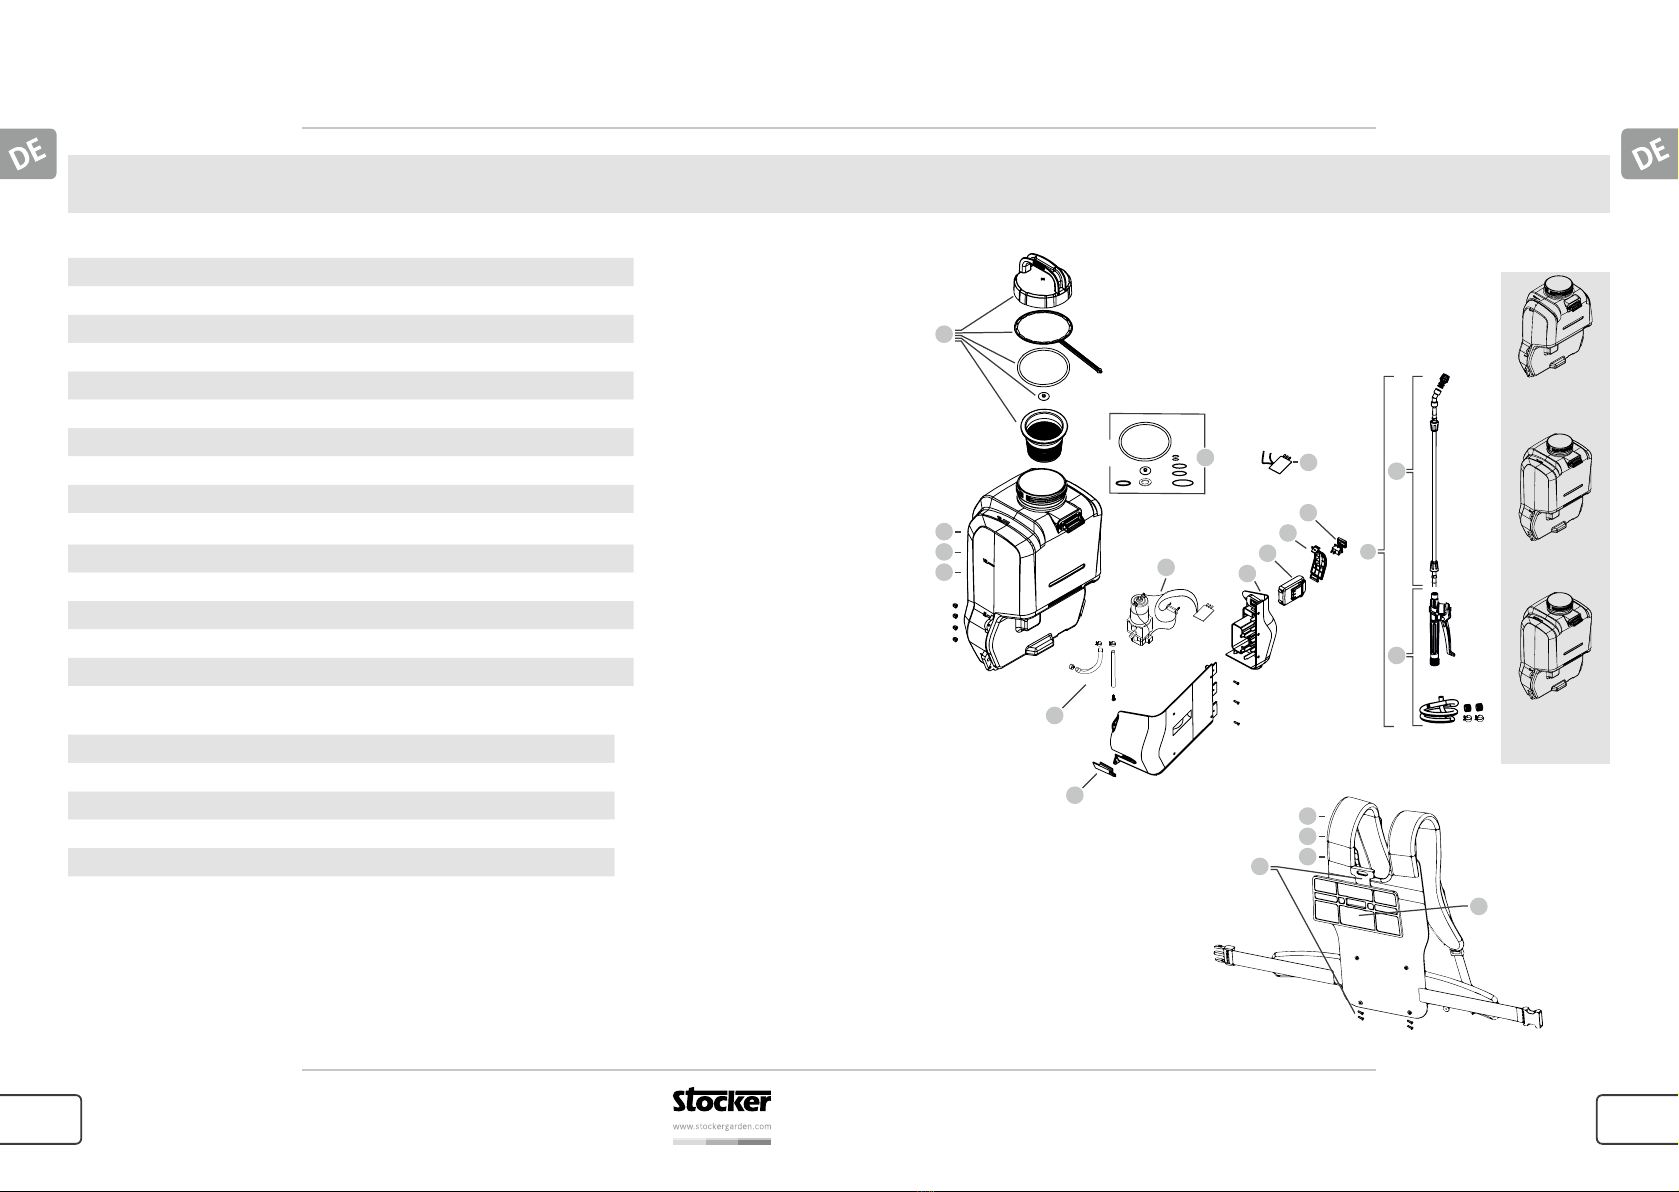
1. Schultergurt
2. Behälter
3. Li-Ionen Batterie
4. Akku-Ladegerät
5. Schlauch
6. Fiberglas-Lanze
7. Aluminium-Lanze
8. Messbecher
9. Gebrauchsanleitung
Lieferumfang
Technische Daten
Sicherheitshinweise
Lesen Sie die Gebrauchsanleitung vor der Verwendung des Gerätes gut durch!
Bewahren Sie die Gebrauchsanleitung sicher auf.
Tragen Sie beim Umgang mit gefährlichen Stoffen geeignete Schutzausrüstung
(wasserundurchlässige Arbeitshandschuhe, Gummistiefel, usw.)
Sprühen Sie niemals auf Menschen, Tiere, gegen den Wind oder in Gewässer.
Personen mit schwacher Gesundheit sollten nicht mit Pestiziden in Kontakt
geraten. Chemische Substanzen nicht verschlucken und Hautkontakt vermeiden.
Nicht geeignet für entzündliche Flüssigkeiten, ätzende Stoffe, Lösungsmittel,
hochkonzentrierte Pestizide.
Die Batterie niemals verbrennen oder auseinander nehmen. Entsorgen Sie die
Batterie fachgerecht auf einem Recyclinghof.
Das Aufladen der Batterie sollte nur in Innenräumen stattfinden. Laden Sie die Batterie mit
Hilfe des im Lieferumfang enthaltenen Ladegeräts auf. Entnehmen Sie der Rückenspritze
die Batterie und setzen Sie sie in das Ladegerät ein. Das rote Leuchten bedeutet, dass die
Batterie aufgeladen wird. Der Ladevorgang ist beendet, sobald das grüne Licht aufleuchtet.
Setzen Sie nur Batterien in das Ladegerät ein die dafür zugelassen sind und verwenden
Sie die Batterie nur für diese Rückenspritze. Wird die Batterie für einen längeren Zeitraum
nicht verwendet, sollte sie alle 6 Monate aufgeladen werden. Bewahren Sie die Batterie
an einem kühlen trockenen Ort mit einer Raumtemperatur zwischen 15° und 30° C auf.
Bewahren Sie die Batterie nicht in der Nähe von Metallgegenständen und Geräten auf,
welche starke elektrostatische Ladungen oder Magnetfelder erzeugen.
Bewahren Sie die Rückenspritze außerhalb der Reichweite von Kindern auf und
setzen Sie sie nicht direktem Sonnenlicht aus.
Nicht geeignet für Flüssigkeiten mit Temperaturen über 40° C. Die Rückenspritze
sollte nicht bei einer Temperatur über 40°C oder unter -10° C verwendet
werden.
Machen Sie vor dem Gebrauch eine Probe mit sauberem Wasser. Vor dem
Füllen und der Lagerung immer Druck ablassen.
Artikel Art. 226 Art. 227 Art. 228
Füllmenge max.: 12 Liter 15 Liter 20 Liter
Max. Betriebsdruck: 5 bar 5 bar 5 bar
Min. Betriebsdruck: 3 bar 3 bar 3 bar
Batterie: 18V/2,2A 18V/2,2A 18V/2,2A
Motorleistung: 30 W 30 W 30 W
Max. Sprühdistanz: 9 m 9 m 9 m
Autonomie bei 3 bar Druck: 3,5 h 3,5 h 3,5 h
Autonomie bei 5 bar Druck: 2,5 h 2,5 h 2,5 h
Nettogewicht: 3540 g 3778 g 4038 g
Abmessungen: 21 x 33,5 x h 48,5 cm 25 x 32,5 x h 53 cm 26 x 33,5 x h 56 cm
Lanzenlänge: 68 cm 68 cm 68 cm
Schlauchlänge: 125 cm 125 cm 125 cm
Wasserfluss l/m*: 1,5 - 2,9 l/m 1,5 - 2,9 l/m 1,5 - 2,9 l/m
Schlauchdurchmesser innen: 6,4 mm 6,4 mm 6,4 mm
Schlauchdurchmesser außen: 11,2 mm 11,2 mm 11,2 mm
Ladezeit: 2 Stunden 2 Stunden 2 Stunden
*berechnet mit mitgelieferter Düse und ohne Düse bei maximalem Druck.