manuals.online logo
Brands
  1. Home
  2. •
  3. Brands
  4. •
  5. Style selections
  6. •
  7. Window Blind
  8. •
  9. Style selections 70816 User manual

Style selections 70816 User manual

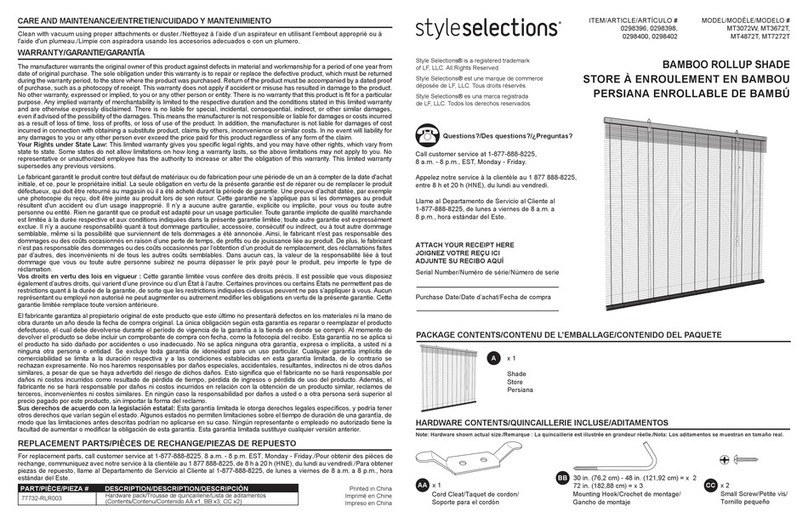
MODEL/MODÈLE/MODELO #70816 - 70818
FRENCH DOOR ROLLUP SHADE
STORE À ENROULEMENT POUR PORTE FRANÇAISE
PERSIANA ENROLLABLE PARA PUERTA ESTILO FRANCÉS
Questions?/Des questions?/¿Preguntas?
Call customer service at 1-877-888-8225,
8 a.m. - 8 p.m., EST, Monday - Friday.
Appelez notre service à la clientèle au 1 877 888-8225,
entre 8 h et 20 h (HNE), du lundi au vendredi.
Llame a nuestro Departamento de Servicio al Cliente al
1-877-888-8225, de lunes a viernes de 8:00 a.m. a 8:00
p.m. hora estándar del Este.
PACKAGE CONTENTS/CONTENU DE L’EMBALLAGE/CONTENIDO DEL PAQUETE
HARDWARE CONTENTS/QUINCAILLERIE INCLUSE/ADITAMENTOS
Long Screw/
Vis longue/
Tornillo largo
X 2
Short Screw/
Vis courte/
Tornillo corto
X 4
Cleat Screw/
Vis pour le taquet/
Tornillo para soporte
x 2
Cord Cleat/
Cale de cordon/
Soporte para el cordón
x 1
Small Spacer Ring/
Petites bagues d’espacement/
Anillo separador pequeño
x 4
Large Spacer Ring/
Grandes bagues d’espacement/
Anillo separador grande
x 2
Hold Down Bracket/
Support de retenue/
Abrazadera de fijación inferior
x 2
AA BB CC DD
EE
A
Printed in China
Imprimé en Chine
Impreso en China
ONE-YEARLIMITEDWARRANTY/GARANTIELIMITÉEDEUNAN/UNAÑODEGARANTÍALIMITADA
A
OPERATING INSTRUCTIONS/MODE D'EMPLOI/INSTRUCCIONES DE FUNCIONAMIENTO
2. When sufficient pulling force is applied to the pull cord, the release ring
pops out of the receiver slot, allowing the cord to travel freely. To restore
to pull cord to normal operation, re-insert (snap in) the release ring back
into the receiver slot.
X 1
ATTACH YOUR RECEIPT HERE
JOIGNEZ VOTRE REÇU ICI
ADJUNTE SU RECIBO AQUÍ
Serial Number/Numéro de série/Número de serie
Purchase Date/Date d’achat/Feacha de compra
ITEM/ARTICLE/ARTÍCULO
#0012723, 0013501, 0338455
REPLACEMENT PARTS LIST/LISTE DES PIÈCES DE RECHANGE/LISTA DE PIEZAS DE REPUESTO
Lorsque le cordon est tiré suffisamment fort, la bague de déverrouillage
sort du logement de la fixation; vous pouvez ainsi ajuster le cordon
librement. Pour refaire fonctionner le cordon normalement, réinsérez
(enclenchez) la bague de déverrouillage dans le logement de la fixation.
Cuando se aplica la fuerza suficiente para jalar al cordón, el anillo de liberación sale de la ranura del recibidor, lo cual
permite que el cordón se mueva con facilidad. Para volver a colocar el cordón para su funcionamiento normal, vuelva a
insertar (a presión) el anillo de liberación en la ranura del recibidor.
FF GG
For a period of one (1) year from the date of purchase, the manufacturer will replace this window covering with one of equal or superior value,
if this window covering is found to be defective in material or workmanship. To obtain warranty service contact our customer service depart-
ment at 1-877-888-8225. This warranty does not cover damage of defects caused by or resulting from improper maintenance, negligent or
improper use, abuse, misuse, neglect, accidents, act of God, alteration, commercial use, installation, removal or reinstallation.
This warranty is restricted to normal consumer use within the United States and Canada.
MANUFACTURER WILL NOT BE LIABLE FOR INCIDENTAL OR CONSEQUENTIAL DAMAGES, SOME STATES DO NOT ALLOW THE
EXCLUSION OR LIMITATION OF INCIDENTAL OR CONSEQUENTIAL DAMAGES, SO THE ABOVE LIMITATION OR EXCLUSION MAY
NOT APPLY TO YOU. This warranty gives you specific legal rights, and you may also have other rights which vary from state to state.
Le fabricant remplacera cette parure de fenêtre par une autre d’une valeur égale ou supérieure si elle présente un défaut de matériaux ou de
fabrication dans une période de un (1) an suivant la date d’achat. Pour effectuer une réclamation, communiquez avec notre service à la
clientèle au 1 877 888-8225. Cette garantie ne couvre pas les dommages ou les défauts résultant d’un entretien inadéquat, d’une
négligence, d’un usage abusif ou inapproprié, d’un accident, d’un cas de force majeure, d’une modification, d’un usage commercial, de
l’installation, du retrait ou de la réinstallation. Cette garantie est valable uniquement si l’article s’avère défectueux dans des conditions
normales d’utilisation aux États-Unis ou au Canada. LE FABRICANT N'EST PAS RESPONSABLE DES DOMMAGES ACCESSOIRES OU
CONSÉCUTIFS. CERTAINS ÉTATS OU CERTAINES PROVINCES NE PERMETTENT PAS L’EXCLUSION OU LA LIMITATION DES
DOMMAGES ACCESSOIRES OU CONSÉCUTIFS, DE SORTE QUE LES LIMITATIONS ET EXCLUSIONS CI-DESSUS PEUVENT NE PAS
S’APPLIQUER À VOUS. Cette garantie vous confère des droits précis. Il est possible que vous disposiez également d’autres droits, qui
varient d’un État ou d’une province à l’autre.
Por un período de un (1) año desde la fecha de compra, el fabricante reemplazará esta cubierta para ventanas con una de valor igual o
superior si se descubre que esta cubierta para ventanas tiene defectos en el material o en la mano de obra. Para obtener el servicio de
garantía, llame al Departamento de Servicio al Cliente al 1-877-888-8225. Esta garantía no cubre el daño o los defectos causados o resul-
tantes por mantenimiento incorrecto, uso negligente o inadecuado, abuso, mal uso, descuido, accidentes, desastres naturales, alteraciones,
uso comercial, instalación, remoción o reinstalación. Esta Garantía se restringe al uso del consumidor normal dentro de Estados Unidos y
Canadá. EL FABRICANTE NO SERÁ RESPONSABLE DE DAÑOS ACCIDENTALES O RESULTANTES, ALGUNOS ESTADOS NO
PERMITEN LA EXCLUSIÓN O LIMITACIÓN DE DAÑOS ACCIDENTALES O RESULTANTES, DE MODO QUE LA EXCLUSIÓN O
LIMITACIÓN ANTERIOR PUEDE NO APLICARSE EN SU CASO. Esta garantía le otorga derechos legales específicos pero podría tener
también otros derechos que varían de estado a estado.
For replacement parts, call customer service 1-877-888-8225./Pour obtenir des pièces de rechange, communiquez avec notre
service à la clientèle au 1 877 888-8225./Para obtener piezas de repuesto, llame al Servicio al Cliente al 1-877-888-8225.
PART/PIÈCES/PIEZAS DESCRIPTION/DESCRIPTION/DESCRIPCIÓN QUANTITY/QUANTITÉ/CANTIDAD
Hardware Box includes all of the following/La boîte de quincaillerie inclut tout ce qui suit/La caja de aditamentos incluye lo siguiente:
AA
Long Screw/Vis longue/Tornillo largo
2
BB Short Screws
/Vis courte/Tornillo corto
4
CC
Cleat Screw/Vis pour le taquet/Tornillo para soporte
2
DD Cord Cleat/
Cale de cordon/Soporte para el cordón
1
EE
Small Spacer Ring/Petites bagues d’espacement/Anillo separador pequeño 4
FF
Large Spacer Ring/Grandes bagues d’espacement/Anillo separador grande
2
GG
Hold Down Bracket/Support de retenue/Abrazadera de fijación inferior 2
PART/PIÈCES/PIEZAS DESCRIPTION/DESCRIPTION/DESCRIPCIÓN PART #/N° DE PIÉCE/PIEZA NO.
HH Hardware Box/Boîte de quincaillerie/Caja de aditamentos 4CZ000HW2LA
2
PREPARATION/PRÉPARATION/PREPARACIÓN
Before beginning installation of product, make sure all parts are present. Compare parts with package contents list and
hardware contents list. If any part is missing or damaged, do not attempt to assemble, install or operate the product. Contact
customer service for replacement parts.
Estimated Assembly Time: 15-25 minutes
Tools Required for Assembly (not included): Measuring tape, drill with 1/16 in. bit, pliers, and pencil.
Avant de commencer l’installation du produit, assurez-vous d’avoir toutes les pièces. Comparez le contenu de l’emballage avec
la liste des pièces et celle de la quincaillerie. S’il y a des pièces manquantes ou endommagées, ne tentez pas d’assembler,
d’installer no d’utiliser le produit. Communiquez avec le service à la clientèle pour obtenir des pièces de rechange.
Temps d’assemblage approximatif : de 15 à 25 minutes
Outils nécessaires pour l’assemblage (non inclus) : ruban à mesurer, perceuse, foret de 1/16 po, pinces et crayon.
Antes de comenzar a instalar ek producto, asegúrese de tener las piezas. Compare las paiezas con la lista del contenido del
paquete y la de los aditamentos. No intente ensamblar, instalar ni usar el producto se falta alguma pieza o si éstas están
dañadas. Comuníquese con el Servicio al Cliente para obtener pieza de repuesto.
Tiempo aproximado de ensamblaje: 15 a 25 minutos.
Herramientas necesarias para el ensamblaje (no se incluyen): Cinta métrica, taladro con broca de 1/16, pinzas y lápiz.
SAFETY INFORMATION/CONSIGNES DE SÉCURITÉ/INFORMACIÓN DE SEGURIDAD
ASSEMBLY INSTRUCTIONS/INSTRUCTIONS POUR L’ASSEMBLAGE/INSTRUCCIONES DE ENAMBLAJE
OPERATING INSTRUCTIONS/MODE D’EMPLOI/INSTRUCCIONES DE FUNCIONAMIENTO
1. Locate the 2 predrilled holes at
the top of the headrail of the
shade (A) behind the valance.
Hold the shade (A) level at the
height desired at the top of the
door. Mark exact location of
each hole on the door
with a pencil (not included).
Please read and understand this entire manual before attempting to assemble, operate, or install the product.
Assurez-vous de lire et de comprendre l’intégralité de ce manuel avant de tenter d’assembler le produit.
Lea y comprenda completrmente este manual antes de intentar ensamblar, usar o instalar el producto.
Repérez les deux trous prépercés situés dans le haut du
caisson du store (A), derrière la cantonnière. Maintenez
le store (A) à la hauteur désirée au-dessus de la porte.
Marquez l’emplacement exact de chacun des trous sur la
porte à l’aide d’un crayon (non inclus).
Ubique los 2 orificios previamente taladrados en la parte
superior del cortinero de la persiana (A) detrás de la
cenefa. Sostenga la persiana (A) a la altura deseada y
en la parte superior de la puerta. Marque la ubicación
exacta de cada orificio en la puerta con un lápiz (no se
incluye).
Percez un avant-trou à chaque marque de crayon. Insérez
des vis longues (AA) dans les trous du caisson et placez
les grandes bagues d’espacement (FF) sur ces vis
longues (AA) à l’arrière du caisson. Alignez les vis
longues (AA) et les grandes bagues d’espacement (FF)
sur les avant-trous de la porte et fixez-les avec une
perceuse (non incluse).
Taladre previamente con una marca de lápiz. Coloque los
tornillos grandes (AA) a través de los orificios del cortinero
y ponga los anillos separadores grandes (FF) en los
tornillos grandes (AA) en la parte posterior del cortinero.
Alinee los tornillos largos (AA) y los anillos separadores
grandes (FF) con el orificio previamente taladrado en la
puerta y asegure con el taladro (no se incluye).
Descendez le store (A) à la hauteur désirée, placez les
attaches (GG) aux extrémités de la traverse inférieure et
marquez-en l’emplacement avec un crayon. Percez les
avant-trous et fixez les attaches (GG) avec les vis courtes
(BB) en utilisant les petites bagues d’espacement (EE) si
nécessaire. Insérez les chevilles des attaches (GG) dans
les trous de chaque extrémité de la traverse inférieure du
store (A).
Baje la persiana (A) a la altura deseada y coloque las
abrazaderas de fijación inferior (GG) en la parte inferior
del riel en cada extremo y marque la ubicación con un
lápiz. Taladre previamente los orificios y coloque las
abrazaderas de fijación inferior (GG) con tornillos cortos
(BB) con ayuda de los anillos separadores pequeños (EE)
si fuera necesario. Fije los extremos de la clavija de las
abrazaderas de fijación inferior (GG) en los extremos del
riel inferior de la persiana (A).
2. Predrill each pencil mark. Insert
large screws (AA) through holes
of the headrail and place large
spacer rings (FF) on large screws
(AA) on the backside of the
headrail. Align large screws (AA)
and large spacer rings (FF) with
predrilled hole in the door and
secure with drill (not included).
3. Lower shade (A) to desired height
and place hold down brackets
(GG) to bottom rail on each end
and mark location with a pencil.
Predrill holes and mount hold
down brackets (GG) with short
screws (BB) using small spacer
rings (EE) if needed. Attach pin
ends of hold down brackets (GG)
into the ends of the bottom rail of shade (A).
1
4. Place cord cleat (DD) to the right
of shade (A) out of reach of
children and install with cleat
screws (CC). Raise or lower
shade (A) to desired height and
wrap excess cord around cord
cleat (DD).
4
2
3
Placez le taquet de cordon (DD) à
droite du store (A), hors de la portée des enfants, et
fixez-le à l’aide des vis (CC). Réglez la hauteur du store
(A) et enroulez l’excédent du cordon autour du taquet de
cordon (DD).
Coloque el soporte para cordón (DD) a la derecha de la
persiana (A) alejado del alcance de los niños e instale los
tornillos de soporte (CC). Levante o baje la persiana (A) a la
altura deseada y enrolle el excedente alrededor del soporte
para cordón (DD).
6 in. OR LESS/
15 CM OU MOINS/
15,24 CM O MENOS
CORD STOP/
BUTOIR POUR CORDON/
TOPE DEL CORDÓN
DD
CC
Predrilled hole
AAA
FF
xx
GG A
EE
ADVERTENCIA
6” o menos
WARNING
153mm (6 in)
or less
Inner cords can pull out to form a loop, which
can STRANGLE a young child.
153mm (6 po)
ou moins
MISE EN GARDE
Las cuerdas internas pueden sacarse para formar un lazo
en que puede ESTRANGULARSE un niño pequeño.
• Los dispositivos de paro de la cuerdas interna
pueden diminuir este riesgo si están situados
correctamente en el halado de las cuerdas.
• Si los dispositivos de paro de cuerda interna son más
de 6 pulgadas (153 mm) por debajo del riel superior
cuando está bajada completamente la persiana,
muévalos siguiendo las instrucciones del ajuste de
paro de cuerda interna.
Inner cord stop devices can reduce this risk if
positioned correctly on the pull cords.
If inner cord stop devices are more than 6
inches (153mm) below the headrail when the
blind is fully lowered, move them closer by
following the inner cord stop device
adjustment instructions.
Les dispositifs d’arrêt des cordons intérieurs peuvent
diminuer ce risque s’ils sont placés correctement sur
les cordons.
Si les dispositifs d’arrêt des cordons sont situés
à plus de 153 mm (6 po) en dessous du rail
supérieur quand le store est complètement baissé,
rapprochez-les en suivant les instructions de
réglage du dispositif d’arrêt du cordon intérieure.
Les cordons intérieurs peuvent sortir pour former
une boucle et ÉTRANGLER un jeune enfant.
For more safety information:1-866-662-0666
(Only in Canada) Pour plus de renseignement sur la sécurité :
1-866-662-0666 (Seulement au Canada).
If inner cord stop devices are more than 6 inches below the headrail when the blind is fully lowered, move them closer by loosening
(but do not untie) the knot surrounding the cord stop. Continue holding the cord stop in position and tighten knot by pulling firmly on
tassel.
Si les butoirs pour cordons intérieurs se trouvent à plus de 15 cm sous le caisson lorsque le store est complètement abaissé,
rapprochez-les en desserrant (sans le défaire) le nœud entourant chacun des butoirs. Toujours en maintenant les butoirs en place,
serrez chaque nœud en tirant fermement sur la pampille.
Si los dispositivos de tope del cordón interior están a más de 15,24 cm por debajo del cortinero cuando la persiana se ha bajado por
completo, acérquelos soltando, pero sin desatar, el nudo que rodea al tope del cordón. Siga sosteniendo el tope de la cuerda en su
lugar y jale la borla para apretar el nudo.
De seguridad para obtener más información:
1-866-662-0666 (sólo en Canadá).
1. During normal operation, the pull cord attached to the release
ring is positioned into the receiver slot on the back of shade. 1
Lors d’une utilisation normale, le cordon fixé à la bague de
déverrouillage est inséré dans le logement de la fixation à
l’arrière du store.
Para el funcionamiento normal, el cordón que viene con el
anillo de liberación se coloca en la ranura del recibidor en la
parte posterior de la cortina.

This manual suits for next models

5

Other Style selections Window Blind manuals

Style selections MT3072W User manual

Style selections

Style selections MT3072W User manual

Style selections FS3072C User manual

Style selections

Style selections FS3072C User manual

Style selections AS3072C User manual

Style selections

Style selections AS3072C User manual

Style selections PT7284F User manual

Style selections

Style selections PT7284F User manual

Style selections 0015267 User manual

Style selections

Style selections 0015267 User manual

Style selections 978840204 User manual

Style selections

Style selections 978840204 User manual

Style selections 70106 User manual

Style selections

Style selections 70106 User manual

Style selections 70807 User manual

Style selections

Style selections 70807 User manual

Style selections 75312 User manual

Style selections

Style selections 75312 User manual

Popular Window Blind manuals by other brands

Creation Baumann PLITRIC PLE 12 Assembly instruction

Creation Baumann

Creation Baumann PLITRIC PLE 12 Assembly instruction

Isotra SR1S Assembly manual

Isotra

Isotra SR1S Assembly manual

IKEA KADRILJ 100 instructions

IKEA

IKEA KADRILJ 100 instructions

Velux SSL Directions for use

Velux

Velux SSL Directions for use

Bettio SceniPro Assembly manual

Bettio

Bettio SceniPro Assembly manual

Simu Autosun 2 manual

Simu

Simu Autosun 2 manual

NESLING Coolfit instructions

NESLING

NESLING Coolfit instructions

Vista Simplicity Roller Shades quick start guide

Vista

Vista Simplicity Roller Shades quick start guide

BLINDS2GO PerfectFIT installation guide

BLINDS2GO

BLINDS2GO PerfectFIT installation guide

Velux PAL/PBL manual

Velux

Velux PAL/PBL manual

Nien Made 10793478499762 instructions

Nien Made

Nien Made 10793478499762 instructions

Dometic FP200 Installation and operating manual

Dometic

Dometic FP200 Installation and operating manual

Intelligent Glass Switchable Film installation guide

Intelligent Glass

Intelligent Glass Switchable Film installation guide

Rollos Roller blind S with cassette E46 Assembly and operating instruction

Rollos

Rollos Roller blind S with cassette E46 Assembly and operating instruction

HunterDouglas 5-257 Installation instruction

HunterDouglas

HunterDouglas 5-257 Installation instruction

HunterDouglas Cadence Installation operation care

HunterDouglas

HunterDouglas Cadence Installation operation care

smart home WPC010 instructions

smart home

smart home WPC010 instructions

HunterDouglas Silhouette Installation operation care

HunterDouglas

HunterDouglas Silhouette Installation operation care

manuals.online logo
manuals.online logoBrands
  • About & Mission
  • Contact us
  • Privacy Policy
  • Terms and Conditions

Copyright 2025 Manuals.Online. All Rights Reserved.