manuals.online logo
Brands
  1. Home
  2. •
  3. Brands
  4. •
  5. Sumake
  6. •
  7. Tools
  8. •
  9. Sumake ST-CH314R User manual

Sumake ST-CH314R User manual

SUMAKE PNEUMATIC TOOLS
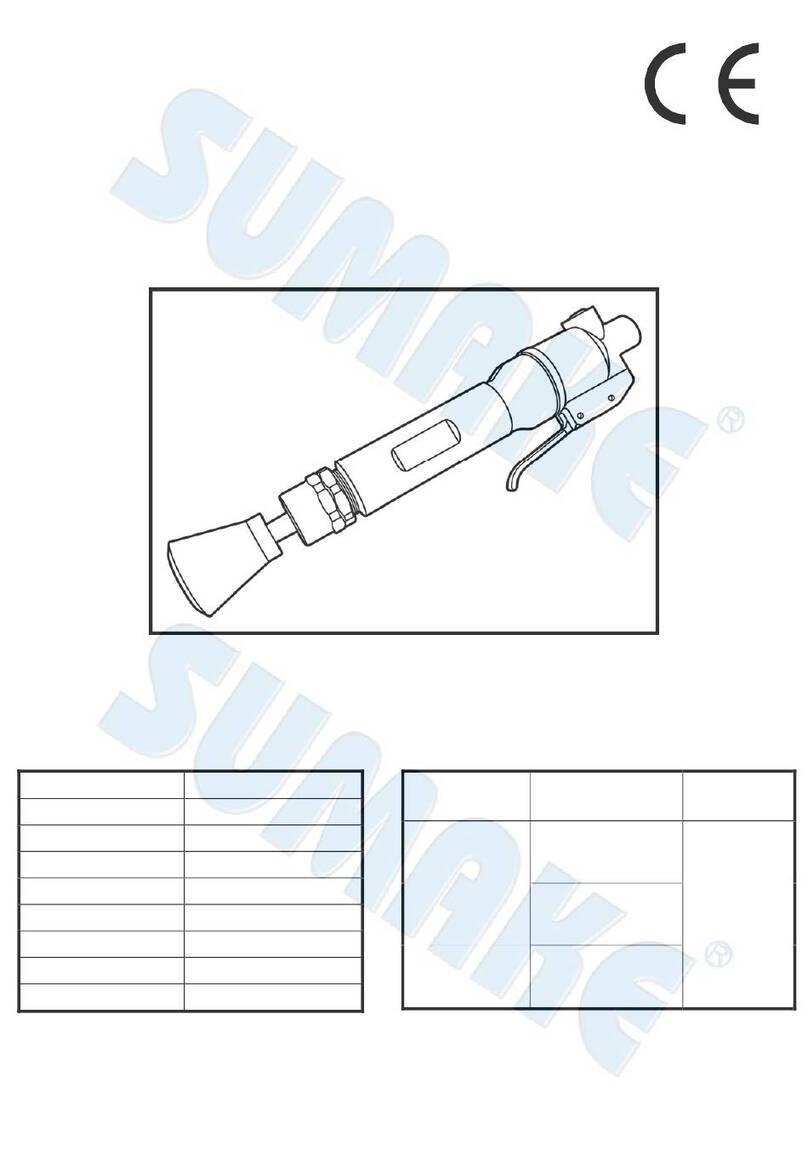
4”Air Chipping Hammer (Round) (Hex)
ST-CH314R, ST-CH314H
SUMAKE INDUSTRIAL CO., LTD
4F,NO.351,Yangguang St.,Neihu District TAIPEI, TAIWAN, ZIP:114-91
Specification:
Blow Per Min
1,900 b.p.m.
Piston Diameter
Φ28.5x76.5mm
Piston Stroke
5-1/3” (135.5mm)
Air Consumption
23 CFM (650 L/min)
Overall Length
17-1/4” (438mm)
Air Inlet (PT)
3/8” (10 mm)
Air Hose (I.D.)
1/2” (13 mm)
Air Pressure
90 psi (6.3 bar)
Net Weight
20.5lb (9.3kg)
Noise and Vibration:
Vibration
EN ISO 28927-10
Noise
EN ISO 15744
Remark
Load:
19.56 m/s²
Sound Pressure Level
load: 104 dB(A)
Please always
wear ear
protector at
environment
noise level > 80
dB(A) due to
risk of impaired
hearing!
Sound power level
load: 115 dB(A)
Uncertainty
K= 1.5 m/s²
Uncertainty
K= 3dB
ST-CH314R(H)-S-2007A-JIF
ECDECLARATION OF CONFORMITY
We: SUMAKE INDUSTRIAL CO., LTD.
4F, No. 351, Yangguang St., Neihu District, Taipei City, Taiwan
declare in sole responsibility that the equipment
Equipment:3" AIR CHIPPING HAMMER (ROUND) (HEX)
Model/ Serial No.:ST-CH313R, ST-CH313H
to which this declaration applies, complies with these normative documents:
Machinery Directive: 2006/42/EC
and conforms to the following EN standard,
EN ISO 12100: 2010
EN ISO 11148-4:2012
Name and Signature/Position Date and Place
2020/7/11
Mike Su –Managing Director Taipei, Taiwan
ST-CH313R(H)-D-2007A-JIF
Foreword
We are the manufacturer and exporter of air tools
since established. We have devote all our efforts
in improving quality and tools?life. As well as
the noise and vibration of tools. Bring all of you
working efficiences, profits, and enjoy using the
tool is our principle.
Features
This air tool is a pneumatic tool that injects high
efficiency into manual chipping, riveting, breaking
of concrete and asphalt etc. Your care in handling
it is, however, important if performance is to be
realized over a long period of time. This booklet is
prepared to equip you with the knowledge
necessary to keep it on the job efficiently.
1. Cautions for Use
1-1 Air pressure
Maximum performance is displayed at the proper
sanding speed, obtaina ble at a gauge pressure of
6.2 bar. Range-wise, this is an air pressure from 5
to 7 bar (70 to 100 psi)
57
1-2 Air line
Use a 3/8?air hose between the compressor and
the tool . Compressed air is cooled and its water
content sep arated, as soon as the air leaves the
compressor.
Tool
Nipple
Coupler Recoil
hose
Leader
hose
Oiler Regulator
Water
separation Air
supply
Drain
daily
A portion of the water content, however, is
condensed in the piping, and can enter the tool
mechanism, and may cause trouble. So, install an
air filter and an oiler between the compressor and
the tool. Use a 3 HP or larger compressor for each
sander.
1-3 Air hose
Clean the hose with a blast of compressed air
before connecting the hose to air tool. This will
prevent both moisture and dust within the hose
from entering the tool and causing possible rust or
malfunction. To compensate for unusually long
hose (over 25 ft), the line pressure should be
increased accordingly.
Drainage
1-4 The approved eye protector, ear -muff,
mouth-muffle, and gloves should be worn when
operate this tool.
1-5 The working place shall be well ventilated.
1-6 Release the on -off device in the case of
energy supply failure.
2. Operation, Adjusting And Replacing
Method
2-1 Inserting a chisel
First disconnect the air horse from this tool. I nsert
the desired chisel from the open end of the quick
change retainer so that the retainer could hold the
protuberance on the chisel shank. Secure the
retainer and the chisel to the gun body by screw
the retainer on the closed end in the clockwise
direction . Loose the retainer and the chisel from
the gun body by screw the retainer on the open
end in the reverse direction.
chisel
screw
out
screw
in gun body
retainer
2-2 On-off device
Please note that the tool never running unless the
insert tool is properly fixed on the gun body. To
operate this tool, just push the trigger, which is on
the grip, down. The tool continuously reciprocating
as one push the trigger down and it stops running as
the trigger is released.
For the sake of safety, put it on hanger or on a soft
flat pad when not in use.
2-3 Replace and adjusting
There is no user serviceable part inside this tool.
Please send the tool to a qualified personnel or our
service section to repair or/and replace worn parts.
3. Maintenance
3-1 Lubrication
Before connecting the hose , apply 4 or 5 drops of
SAE #10 spindle oil at the air inlet. Use ofa thicker
oil can lead to reduced performance or malfunction.
If a thicker oil is used by accident, wipe it away
immediately. Also, every 3 or 4 hours of operation,
oiling is necessary.
3-2 Storage
Avoid storing the tool in a location subject to high
humidity. If the tool is left as it is used , the
residual moisture inside the tool can cause rust.
Before storing and after operation, oil the tool at
the air inlet with spindle oil and run it for a short
time.
3-3 Disposal
If the tool is too seriously damaged to be used
anymore, drop it in a resource recycling can. Never
drop it into fire.
3-4 Ordering service Parts
For further operational and handling information or
for replacement of parts and components, contact
the sale agent from whom you purchased the tool or
the service division of our company.
*In ordering parts and components, give each part
number, name and quantity.
Warning
1. This tool is not insulated for coming into contact
with electric power source.
2. It is forbidden to use this tool in explosive
atmospheres and do not put any combustible
material near the workpiece since it might emit
sparks when working on hard material.
3. Check the wear of the insert tool and the retainer
before operating this tool.
4. Working with this tool will generate dust,
depending on the material being worked on,
could be harmful to the operator
5. This tool can cause the ejection of particles at
chipping or demolishing work , hence the
operator shall wear appropriate protective device
and do not let other person near the work area.
6. The insert tool and the retainer on heavy types
are exposed to heavy strains and can after a long
period of use break due to fatigue.
7. Keep your body balance and beware of the break
of the severed workpiece.
8. If one needs to use the free hand, although it is a
source of vibration damage, we suggest place the
hand by holding the tool in the part between the
retainer and the grip and do not place the hand
on the rear part by pushing the tool. The former
posture provides the operator more balance than
the latter one.
9. Always disconnect the tool from the air power
source when maintenance, placing any insert
tool, and not in use.
10.Never carry the tool by hose and beware of a
whipping compressed air hose.
11.The workpiece shall be fixed by proper device.
ST-CH312(3)(4)-I-2007A-JI
ST-CH312R, ST-CH312H
ST-CH313R, ST-CH313H
ST-CH314R, ST-CH314H
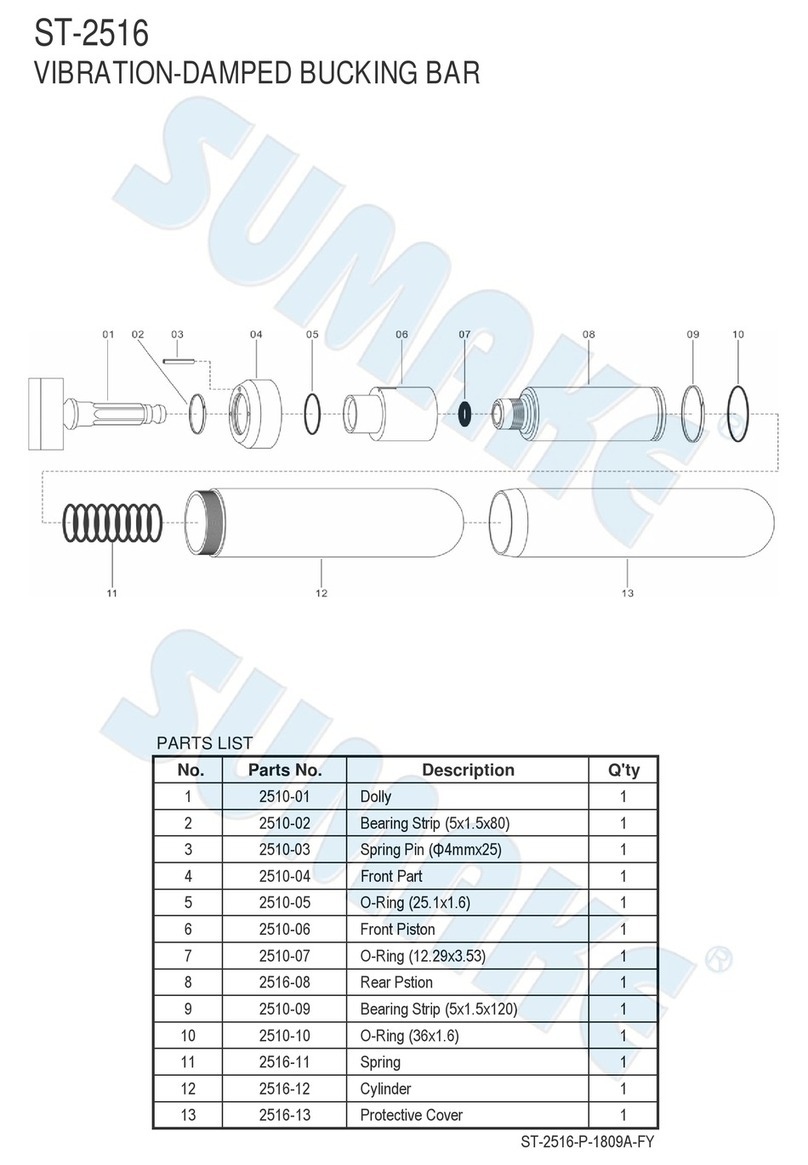
PARTS LIST
No. Parts No. Description Q'ty No. Parts No. Description Q'ty
1 CH312-01 Handle 1 13 CH314-13 Piston (4" Stroke) [ST-CH314R(H)] 1
2 CH312-02 Valve Bushing 1 CH312-14 Cylinder (2" Stroke) [ST-CH312R(H)] 1
3 CH312-03 Valve Stem 1 CH313-14 Cylinder (3" Stroke) [ST-CH313R(H)] 1
4 CH312-04 Valve Spring 1 CH314-14 Cylinder (4" Stroke) [ST-CH314R(H)] 1
CH312-05A Air Inlet Bushing 3/8" (PT19) 1 CH312R-15 Cylinder Bushing (Round) 1
CH312-05B Air Inlet Bushing 3/8" (NPT18) 1 CH312H-15 Cylinder Bushing (Hex) 1
6 CH312-06 Trigger 1 16 CH312-16 Washer 1
7 CH312-07 Spring Pin (Φ6x24L) 117 CH312-17 Cylinder Flange 1
8 CH312-08 O-Ring (D55xW3) 1 18 CH312-18 Handle Bolt (M12) 4
9 CH312-09 Valve Disc 1 19 CH312-19 Washer 8
10 CH312-10 Valve Case 1 20 CH312-20 Bumper 4
11 CH312-11 Dowel Pin (Φ6x24L) 221 CH312-21 Nut (M12) 4
12 CH312-12 Cylinder Cap 1 22 CH312-22 Exhaust Deflector 1
CH312-13 Piston (2" Stroke) [ST-CH312R(H)] 123 CH312-23 Lock Spring 1
CH313-13 Piston (3" Stroke) [ST-CH313R(H)] 124 CH312-24 Oval Collar Retainer 1
ST-CH312(3)(4)R(H)-P-2007A-JI
14
15
5
13
2" AIR CHIPPING HAMMER (ROUND) (HEX)
3" AIR CHIPPING HAMMER (ROUND) (HEX)
4" AIR CHIPPING HAMMER (ROUND) (HEX)

This manual suits for next models

1

Other Sumake Tools manuals

Sumake ST-P6634S User manual

Sumake

Sumake ST-P6634S User manual

Sumake ST-2310/RH User manual

Sumake

Sumake ST-2310/RH User manual

Sumake SMPRF48/O.E. User manual

Sumake

Sumake SMPRF48/O.E. User manual

Sumake ST-2237/R User manual

Sumake

Sumake ST-2237/R User manual

Sumake ST-2404SL User manual

Sumake

Sumake ST-2404SL User manual

Sumake ST-6410HR User manual

Sumake

Sumake ST-6410HR User manual

Sumake STH-12A User manual

Sumake

Sumake STH-12A User manual

Sumake SAF-100 User manual

Sumake

Sumake SAF-100 User manual

Sumake ST-66409 User manual

Sumake

Sumake ST-66409 User manual

Sumake ST-2553A User manual

Sumake

Sumake ST-2553A User manual

Sumake SA-4013 User manual

Sumake

Sumake SA-4013 User manual

Sumake PN-5332P User manual

Sumake

Sumake PN-5332P User manual

Sumake SA-CL110 User manual

Sumake

Sumake SA-CL110 User manual

Sumake ST-2280 User manual

Sumake

Sumake ST-2280 User manual

Sumake ST-7200 User manual

Sumake

Sumake ST-7200 User manual

Sumake ST-2559 User manual

Sumake

Sumake ST-2559 User manual

Sumake SF30M Series User manual

Sumake

Sumake SF30M Series User manual

Sumake HR3 Series User manual

Sumake

Sumake HR3 Series User manual

Sumake HR3 Series User manual

Sumake

Sumake HR3 Series User manual

Sumake ST-2516 User manual

Sumake

Sumake ST-2516 User manual

Sumake ST-2557 User manual

Sumake

Sumake ST-2557 User manual

Sumake SF30A Series User manual

Sumake

Sumake SF30A Series User manual

Sumake ST-P6634SA User manual

Sumake

Sumake ST-P6634SA User manual

Sumake HR3 Series User manual

Sumake

Sumake HR3 Series User manual

Popular Tools manuals by other brands

Gema SRC-TT-B006D Operation manual

Gema

Gema SRC-TT-B006D Operation manual

Wesco WS5123K manual

Wesco

Wesco WS5123K manual

Alto-Shaam CS-100 Installation, operation and maintanance

Alto-Shaam

Alto-Shaam CS-100 Installation, operation and maintanance

Power Fist Air Line Delivery Kit manual

Power Fist

Power Fist Air Line Delivery Kit manual

Welbilt 483700 owner's manual

Welbilt

Welbilt 483700 owner's manual

Hellermann Tyton Autotool CPK hybrid operating instructions

Hellermann Tyton

Hellermann Tyton Autotool CPK hybrid operating instructions

Show Tec Multigrip Clamp manual

Show Tec

Show Tec Multigrip Clamp manual

PROPOINT 8531261 user manual

PROPOINT

PROPOINT 8531261 user manual

unGer Stingray SRKT3B user manual

unGer

unGer Stingray SRKT3B user manual

Gage Bilt GB734 Original instructions

Gage Bilt

Gage Bilt GB734 Original instructions

HCL Smart Band SM-FT-1000 Operation, Parts & Safety Manual

HCL

HCL Smart Band SM-FT-1000 Operation, Parts & Safety Manual

Nederman 876 instruction manual

Nederman

Nederman 876 instruction manual

Snap-On QDTPMS35 instructions

Snap-On

Snap-On QDTPMS35 instructions

Unior 1562 Operating	 instruction

Unior

Unior 1562 Operating instruction

Clarke CONTRACTOR CLJ120 Operation & maintenance instructions

Clarke

Clarke CONTRACTOR CLJ120 Operation & maintenance instructions

Powernail 50P FLEX Operation and maintenance

Powernail

Powernail 50P FLEX Operation and maintenance

Binks Steadi-Grip 80-270 manual

Binks

Binks Steadi-Grip 80-270 manual

IKH IKH6540 instruction manual

IKH

IKH IKH6540 instruction manual

manuals.online logo
manuals.online logoBrands
  • About & Mission
  • Contact us
  • Privacy Policy
  • Terms and Conditions

Copyright 2025 Manuals.Online. All Rights Reserved.