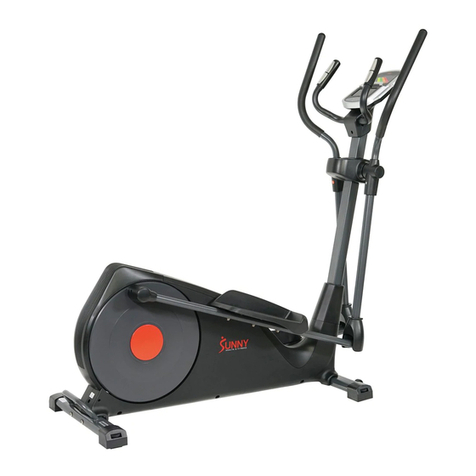
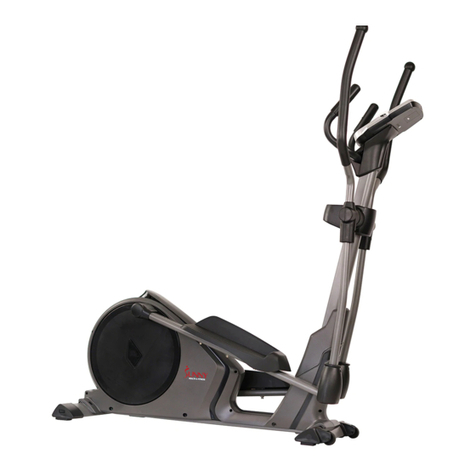
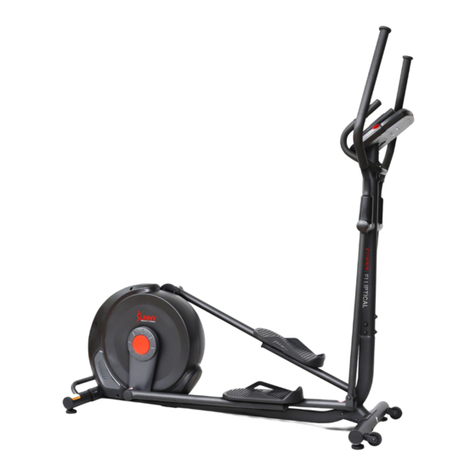
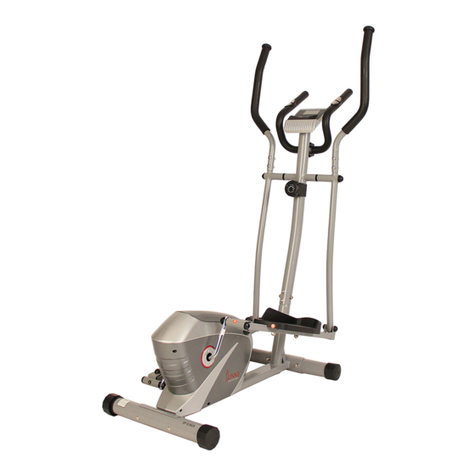
Sunny SF-E3416H User manual

MAGNETIC ELLIPTICAL TRAINER
WITH TABLET HOLDER
SF-E3416H
USER MANUAL
IMPORTANT: Please read this manual carefully before using the product.
Retain owner’s manual for future reference. For Customer Service, please
contact: support@sunnyhealthfitness.com

1
IMPORTANT SAFETY INFORMATION
We thank you for choosing our product. To ensure your safety and health, please use
this equipment correctly. It is important to read this entire manual before assembling
and using the equipment. Safe and effective use can only be achieved if the equipment
is assembled, maintained and used properly. It is your responsibility to ensure that all
users of the equipment are informed of all warnings and precautions.
1. Before starting any exercise program you should consult your physician to
determine if you have any medical or physical conditions that could put your health
and safety at risk, or prevent you from using the equipment properly. Your
physician’s advice is essential if you are taking medication that affects your heart
rate, blood pressure or cholesterol level.
2. Be aware of your body’s signals. Incorrect or excessive exercise can damage your
health. Stop exercising if you experience any of the following symptoms: pain,
tightness in your chest, irregular heartbeat, and extreme shortness of breath,
lightheadedness, dizziness or feelings of nausea. If you do experience any of
these conditions, you should consult your physician before continuing with your
exercise program.
3. Keep children and pets away from the equipment. The equipment is designed for
adult use only.
4. Use the equipment on a solid, flat level surface with a protective cover for your
floor or carpet. To ensure safety, the equipment should have at least 2 feet of free
space all around it.
5. Ensure that all nuts and bolts are securely tightened before using the equipment.
The safety of the equipment can only be maintained if it is regularly examined for
damage and/or wear and tear.
6. It is recommended that you lubricate all moving parts ona monthlybasis.
7. Always use the equipment as indicated. If you find anydefective components while
assembling or checking the equipment, or if you hear any unusual noises coming
from the equipment during exercise, stop using the equipment immediately and
don’t use the equipment until the problem has been rectified.
8. Wear suitable clothing while using the equipment. Avoid wearing loose clothing
that may become entangled in the equipment.
9. Do not place fingers or objects into moving parts of the exercise equipment.
10. The maximum weight capacity of this unit is 250 pounds.
11. The equipment is not suitable for therapeutic use.
12.You must take care of yourself when lifting and moving the equipment so as not to
injure your back. Always use proper lifting technique and seek assistance if
necessary.
13.This equipment is designed for indoor and home use only! It is not intended for
commercial use!
2
EXPLODED DRAWING 1
2
3
4
4
5
67
8
14 23 910
12
13R
14
12
13L
16
24
22
23
21
17 19
18
20
31
34
37 38
56
17
63
3
44
45
46 47
46
49 50
31
32
33
33
37
38
20
21
24
23
22
21
53
29
25R
11
60
60
41
60
61
30 36
21
60
60
70
39
39
32 33
33
35
25L
41
41
60
61
48 49 46
46
70 40
17
56
63 41
44
62
56
63
34
16
62
43L
43R
55
55
64
54
54
54
54
35
47
66 67 68 69
1
27
28
28
51
51
65
19
29
19
29
57
58
59 29
19
17
19
18
42
26
26
38 63
38
56
37
37
71
52B
15
38
37
72 73
75
74
6
5
53 10
S8 S6 S13-14-15 S17-19
52A
29
53

3
EXPLODED DRAWING 2
80
81
82
83 84
84
88 89
90
91
92 93
109
106
107
108
105
98
103
98
94
110
111
112
113
119
114
118
117
116
115
110
77
79L
76L
79R 77
78
77
76R
77
83
95
104
94
95
97
98
99
101
100
99
98
97
96
94 95
96
111112113
78
102
85 87
86
85
57
59
58

4
PARTS LIST
No.
Description
Qty
No.
Description
Qty
1
Computer
1
35
U shape plate
2
2
Middle handlebar
1
36
Arc washer Φ25*Ф6*3.3*R25.2
1
3
Foam grip Φ23*5*445
2
37
Washer d8*Φ16*1.5
7
4
End cap Φ25*16
2
38
Nylon nut L M8*H7.5*S13
7
5
Washer d6*Φ12*1
2
39
Wave washer d19*Φ25*0.3
2
6
Screw ST4*19
2
40
Hinge bolt R Φ16*89*23*1/2*S8
1
7
Handle pulse sensor Φ25
2
41
End cap J40*25*15
4
8
Screw M8*30*S6
2
42
Clamp cover 71*58*40
1
9
Handle pulse wire
1
43L/R
Pedal (left & right)
2
10
Upper sensor wire
1
44
Bolt M10*50*13*S17
2
11
Grommet Φ12*11*Φ3
1
45
Hinge bolt L Φ16*89*23*1/2*S8
1
12
Foam grip Φ26*5*510
2
46
Alloybushing
Φ28*4*Φ24*12*Φ16.1
4
13L/R
Handlebar (left & right)
2
47
Link connector combination
2
14
End cap Φ28*32*Φ50
2
48
Nylon nut R 1/2*20*H8*S19
1
15
Tablet holder
1
49
Spring washer 1/2”
2
16
Bushing Φ32*Φ25*L83
2
50
Nylon nut L 1/2*20*H8*S19
1
17
Bolt M8*40*20*S14 Grade A
6
51
End cap Φ50*45.5*64.5
2
18
Arc washer d8*Φ20*2*R16
2
52A
Tension control knob
1
19
Cap nut M8*H16*S13
6
52B
Upper tension wire
1
20
Long spacer Φ32*Φ19.2*75.5
2
53
Screw M8*16*S6
4
21
Alloy wrap 2 Φ32
4
54
Alloybushing
Φ18*3*Φ14*7*Φ10.1
4
22
Washer d8*Φ32*2
2
55
Connecting rod
2
23
Spring washer d8
4
56
Washer d10*Φ20*2.0
4
24
Bolt M8*16*S14
2
57
Lower tension wire
1
25L/R
Swing rod (left & right)
2
58
Lower sensor wire
1
26
End cap Φ50*Φ61*50
2
59
Main frame
1
27
Front stabilizer
1
60
Ball cap S13
6
28
Carriage bolt M8*60*20*H5
4
61
Ball cap S18
2
29
Arc washer d8*Φ20*2*R30
8
62
Ball cap S16
2
30
Screw M5*16
1
63
Nylon nut M10*H9.5*S17
4
31
Bolt M8*65*30*S14
2
64
Handlebar post
1
32
Spacer Φ14*Φ8.3*48
2
65
Rear stabilizer
1
33
Alloy wrap 1
Φ32*3*Φ28*16*Φ14.3
4
66
Allen wrenchS8
1
34
Bolt M10*42*20*S17
2
67
Allen wrenchS6
1

5
NOTE: Most of the hardware parts needed for assembly have been packaged
separately while some hardware items listed have already been preinstalled in the
machine. If you need to replace hardware parts on the inside of the machine, simply
remove the cover and reinstall the hardware parts as required.
No.
Description
Qty
No.
Description
Qty
68
Spanner S13-14-15
1
94
Bolt M6*12*S10
3
69
Spanner S17-S19 (inner 17)
1
95
Washer d6*Φ16*1.5
3
70
Wave washer d17*Φ25*0.3
2
96
Bolt M6*10*S10
6
71
Computer wire
1
97
Fixing plate t1.5*56*76
2
72
Screw M8*35*18*S6
1
98
Bearing 6001-2RS
4
73
Tablet mounting bar 270*190*3
1
99
Bearing seat Φ72*11
2
74
Screw M5*12*Φ10
2
100
Inertia axle Φ20*103
1
75
Cupula 158*109*1.3
1
101
Inertia wheel 4*Φ200*40
1
76L/R
Cover plate (left & right)
2
102
Washer d6*Φ16*1.5
2
77
Screw ST4.2*16*Φ8
4
103
Idler wheel Φ39*Φ34*24
1
78
Screw ST4.2*19*Φ8
7
104
Wave washer d12*Φ15.5*0.3
1
79L/R
Chain cover (left & right)
2
105
Screw M8*12*Φ10*5*S12
1
80
Nut 7/8”
1
106
Washer d12*Φ17*0.5
1
81
Washer
1
107
Idler wheel connect shaft
1
82
Inside bearing collar 7/8”
1
108
Spring Φ2*Φ12*54*N15
1
83
Ball bearing
2
109
Nut M8*H7.5*S13
1
84
Bearing housing
2
110
Bolt M6*16*S10
2
85
Nut M6*H5*S10
2
111
Spring washer d6
2
86
Bolt M6*45*S10
1
112
Washer d6*Φ12*1.2
2
87
Screw ST4.2*16*Φ7
1
113
Circlip d12
2
88
Outside bearing collar 15/16”
1
114
Screw ST3*10*Φ5.6
5
89
Washer d26*Φ38*1
1
115
Square magnet 40*25*10
4
90
Round magnet Φ15*7
1
116
Magnet locationgrip
45.5*130*10.5
1
91
Belt wheel Φ220*20*S25*4-
Φ6*Φ60-6PJ
1
117
Spring Φ1.5*Φ15*47*N12
1
92
Crank 235*165*67*1/2*20
1
118
Magnetic force board
1
93
Belt 6PJ340
1
119
Magnetic force board axle
Φ12*61*8*45.5*M6
1

6
HARDWARE PACKAGE

7
ASSEMBLY INSTRUCTIONS
27 28
28
65
19
29
19
29
59
29
19
#28 M8*60*20*H5 4pcs
#29 d8*Φ20*2*R30 4pcs
#19 M8*H16*S13 4pcs
S13
#68
STEP 1:
Attach the Front and Rear Stabilizers (No. 27 and No. 65) to the Main Frame (No. 59)
using 4 Carriage Bolts (No. 28), 4 Arc Washers (No. 29) and 4 Cap Nuts (No. 19),
tighten and secure with Spanner (No. 68).

8
64
29
29
53
53
29 53
10
52B
57
58
#67 S6
#53 M8*16*S6 4pcs
#29 d8*Φ20*2*R30 4pcs
10
58
57
52B
59 FI G. 2
FI G. 1
52A
STEP 2:
IMPORTANT: Before attempting to connect the Upper Tension Wire (No. 52B).
Ensure that the Tension Control Knob (No. 52A) is turned all the way to the left (the
lowest level of resistance), this will provide the tension cable with the necessary length
required to connect it.
Connect the Upper Sensor Wire (No. 10) to the Lower Sensor Wire (No. 58) as
shown above in Fig. 1. Ensure that the connection is properly secured before
continuing.
Lower the Upper Tension Wire (No. 52B) from the Handlebar Post (No. 64) and
connect it to the Lower Tension Wire (No. 57), following the tension cable assembly
shown above in Fig. 2.
Attach the Handlebar Post (No. 64) to the Main Frame (No. 59) using 4 Screws (No.
53) and 4 Arc Washers (No. 29), tighten and secure with Allen Wrench S6 (No. 67).
FIG. 1
FIG. 2

9
45
49
50 61
70
#22 d8*Φ32*2 2pcs
24
23
22
25R
60
60
60
24
22
23
60
#24 M8*16*S14 2pcs
#23 d8 2pcs
#70 d17*Φ25*0.3 2pcs
S19
#60 S13 6PCS
#62 S16 2PCS
#61 S18 2PCS
25L
55
#66 S8
64
59
47
47
60
62
#49 1/2" 2pcs
#48 1/2*20*H8*S19 R 1pc
#50 1/2*20*H8*S19 L 1pc
55
60
62
#69
#68
49
61
40
70
48
STEP 3:
Attach Swing Rods (No. 25L and 25R) to the Handlebar Post (No. 64) using 2 Bolts
(No. 24), 2 Spring Washers (No. 23) and 2 Washers (No. 22), tighten and secure with
Spanner (No. 68). Cover both swing rod ends using 6 Ball Caps (No. 60).
Attach Link Connector Combination (No. 47) to the left crank arm using Hinge Bolt L
(No. 45), 1 Wave Washer (No. 70), 1 Spring Washer (No. 49) and Nylon Nut L (No.
50). Tightenand secure with Allen Wrench S8 (No. 66) and Spanner (No. 69). Repeat
this process to complete the assembly on the right side.
*IMPORTANT NOTE: The left Hinge Bolt L (No. 45) must be turned counter-clockwise
to be tightened.
Cover Nylon Nut L and Nylon Nut R (No. 45 and No. 40) using 2 Ball Caps (No. 61).
Cover the nut on lower end of the Connecting Rods (No. 55) on both sides using 2
Ball Caps (No. 62).
IMPORTANT:
When installing, please ensure
that the stickers marked with L
and Ron the Swing Rods of 25L &
25R (Left & Right) are facing the
user to secure the proper direction
of the Swing Rods.

10
ALTERNATE INSTALLATION METHOD:
NOTE: The alternate installation method is highly recommended for users having
difficulty when installing Hinge Bolt L (No. 45) and Hinge Bolt R (No. 40).
STEP 1:
Disconnect the Link Connector
Combination (No. 47) from the
Connecting Rod (No. 55).
STEP 2:
Insert Hinge Bolt L (No. 45) and Hinge
Bolt R (No. 40) through the Wave
Washers (No. 70), then through the hole
of the Link Connector Combination
(No. 47). Screw the Left and Right Hinge
Bolts into their corresponding crank arms.
(*NOTE: When assembling the left side,
you must screw counter-clockwise to
tighten). Next, install the Spring
Washers (No. 49) onto the exposed
threads of Hinge Bolt L (No. 45) and
Hinge Bolt R (No. 40). Then, tighten
Nylon Nut L (No. 50) and Nylon Nut R
(No. 48) onto the corresponding Hinge
Bolt. Lastly, cover both Nylon Nuts with
Ball Caps (No. 61) on each side. You
may now reattach the Link Connector
Combinations (No. 47) to the
Connecting Rods (No. 55).
IMPORTANT:
The Left and Right Hinge Bolts (No. 45 and No. 40)
must fullypenetrate the Link Connector Combination
(No. 47) and crank. This will ensure the stability and
durability of your Elliptical Trainer.
To install the hinge bolt properly, keep it perfectly
straight as the bolt passes through the pedal arms and
the crankshaft. If the hinge bolt is connected to the
crankshaft at an angle, damage to both the hinge and
crankshaft mayoccur.
45
49
50 61
70
24
23
22
25R
60
60
60
61 48 49
70 40
24
22
23
60 25L
55
64
59
47
47
60
62
55
60
62

11
#37 d8*Φ16*1.5 4pcs
#38 M8*H7.5*S13 4pcs
#17 M8*40*20*S14 4pcs
55
43L
17
55
37
38
43R
17
37
38
S13
#68
STEP 4:
Attach the left and right Pedals (No. 43L and No. 43R) to the Connecting Rods (No.
55) using 4 Bolts (No. 17), 4 Washers (No. 37) and 4 Nylon Nuts (No. 38). Tighten
and secure with Spanner (No. 68).

12
#17 M8*40*20*S14 2pcs
#18 d8*Φ20*2*R16 2pcs
#19 M8*H16*S13 2pcs
13L
13R
18
17
19
18
25L
25R
19
17
STEP 5:
Insert the left and right Handlebars (No. 13L & No. 13R) into the tops of left and right
Swing Rods (No. 25L & No. 25R). Fix using 2 Bolts (No. 17), 2 Arc Washers (No. 18)
and 2 Cap Nuts (No. 19), tightenand secure with Spanner (No. 68).

13
2
23
8
10
9
#23 d8 2pcs
#8 M8*30*S6 2pcs
64
42
71
1
15
38
37
72 73
15
#74 M5*12*Φ10 2pcs
FI G. 2
73
FI G. 1
#37 d8*Φ16*1.5 1pc
#38 M8*H7.5*S13 1pc
#42 71*58*40 1pc
#72 M8*35*18*S6 1pc
64
73
STEP 6:
Connect the Upper Sensor Wire (No. 10) to the Computer Wire (No. 71). Ensure that
the connection is properly secured before continuing.
Attach the Tablet Mounting Bar (No. 73) to the bottom of the bracket at the top of the
Handlebar Post (No. 64) as shown above in Fig. 1 using 2 Screws (No. 74). Tighten
and secure with Spanner (No. 68).
Attach the Middle Handlebar (No. 2) to the clamp located on the Handlebar Post (No.
64) using 2 Screws (No. 8) and 2 Spring Washers (No. 23), tighten and secure with
Allen Wrench S6 (No. 67). Cover the clamp using the Clamp Cover (No. 42).
Fix the Tablet Holder (No. 15) to the top of the Tablet Mounting Bar (No. 73) as
shown above in Fig. 2 using Screw (No. 72), Washer (No. 37) and Nut (No. 38).
Tighten and secure with Allen Wrench S6 (No. 67).
Place the Computer (No. 1) onto the mount at the top of the Handlebar Post (No. 64)
and slide it down into place. Insert the Handle Pulse Wire (No. 9) into the socket on the
back of the Computer (No. 1). The assembly is complete!
FIG. 1
FIG. 2

14
THE DISPLAY CONSOLE
Our computerized display console on the Sunny Magnetic Elliptical Trainer allows the
user to tailor a personalized workout by monitoring their progress. During a workout,
the display console will alternately and repeatedly display your Time, Speed, Distance,
Calories, and Pulse. With our easy-to-use console, the user can efficiently track their
fitness improvements from one workout to the next.
FUNCTION KEY:
1. MODE: To select your specification mode and/or turn on display
console
FUNCTIONS AND SPECIFICATIONS:
1. SCAN –Repeatedly displays all functions alternately(in the following order)
2. TIME -- Counts the total time elapsed (counts up to 99:59 MIN.)
3. SPEED -- Displays your current pedaling speed (00.00 up to 999.9 KM/H or MPH)
4. DISTANCE -- Measures the totaldistance traveled (0.00-999.99 Kilometer or Miles)
5. CALORIES -- The rate ofcalories burned per hour (0.0-999.9 KCAL)
6. PULSE -- Displays the detected heart rate inbeats per minute (40-240 BPM)
*To measure your heart rate, place the palm of your hands on both contact pads
located on the handlebars.
HOW TO USE:
1. AUTO ON/OFF:
Begin pedaling or press the MODE button to turn on the console. Once the display
console is on, it will remain active while in motion. The display console will
automatically turn off when it has reached approximately 4 minutes without any motion.
2. RESET:
To reset the display console, hold down the MODE button for 3 seconds. You can also
reset the console by removing the batteries.
3. LOCK MODE:
In LOCK MODE, the console will only display the desired statistic. To select the LOCK
MODE setting, press the MODE key when the pointer is on the function you wish to
select.
4. BATTERY/TROUBLESHOOT: The display console uses two AA batteries. If the
display appears improper or becomes difficult to read, please try installing new batteries
before contacting our customer service.

15
TABLET HOLDER ADJUSTMENTS
The viewing angle of Tablet Holder (No. 15) can be adjusted manually without a knob.
The Tablet Holder (No. 15)can be adjusted from a 6 degree angle to a 53 degree
viewing angle as shown in Fig. A and Fig. B.
WARNING!
The Tablet Holder (No. 15) is meant to hold cell phones and tablets ONLY.
Failure to comply with this warning may result in irreversible damage to your new
equipment.
Fi g. A
Fi g. B
FIG. A
FIG. B
Fig. A
Fig. B

16
EXERCISE PROCEDURES
NOTE:
The Sunny Magnetic Elliptical Trainer provides you with various benefits. Striding helps
to improve your physical fitness by increasing your cardiovascular endurance, and tone
your body. If paired witha calorie controlled diet, it can also help you lose weight.
1.THE WARM-UP PHASE:
This stage allows your body to gradually adjust to the increased demand of your heart
by getting your blood flowing. This phase will also reduce the risk of cramp and muscle
injury. It is advised to do a few of the stretching exercises as shownbelow. Eachstretch
should be held for approximately 30 seconds, do not force or jerk your muscles into a
stretch. If it hurts, STOP!
2.THE COOL-DOWN PHASE:
This stage is to let your cardiovascular system and muscles wind down. Start by
reducing the tempo of your workout and continuing for approximately 5 minutes. Next,
repeat the warm-up phase by doing the stretching exercises again, and remember, do
not force your muscles into a stretch!
As you build higher endurance, you may need to train longer and harder. It is advisable
to train at least three times a week, and if possible, space your workouts evenly
throughout the week.
SIDE STRETCH OUTER THIGH
FORWARD
BEND
INNER THIGH
CALF/ ACHILLES
Other manuals for SF-E3416H
1
Table of contents
Other Sunny Elliptical Trainer manuals

Sunny
Sunny T7615 User manual

Sunny
Sunny SF-E906 User manual

Sunny
Sunny SF-E3959 User manual

Sunny
Sunny ENDURANCE Series User manual

Sunny
Sunny P8300 User manual

Sunny
Sunny SF-E3628 User manual

Sunny
Sunny SF-E3865 User manual

Sunny
Sunny SF-E2310 User manual

Sunny
Sunny SF-E3872 User manual

Sunny
Sunny SF-E3889 SMART User manual

Sunny
Sunny SF-E320001 User manual

Sunny
Sunny SF-E321006 User manual

Sunny
Sunny SF-E3862 User manual

Sunny
Sunny SF-E3803 User manual

Sunny
Sunny SF-E905 User manual

Sunny
Sunny SF-E3912 User manual

Sunny
Sunny SF-E1405 User manual

Sunny
Sunny SF-E3908 User manual

Sunny
Sunny SF-E3609 User manual

Sunny
Sunny SF-E1404 User manual