manuals.online logo
Brands
  1. Home
  2. •
  3. Brands
  4. •
  5. Sunny
  6. •
  7. Lighting Equipment
  8. •
  9. Sunny Emergency Exit Series User manual

Sunny Emergency Exit Series User manual

1. Having LED lifetime of over 50,000 hours.
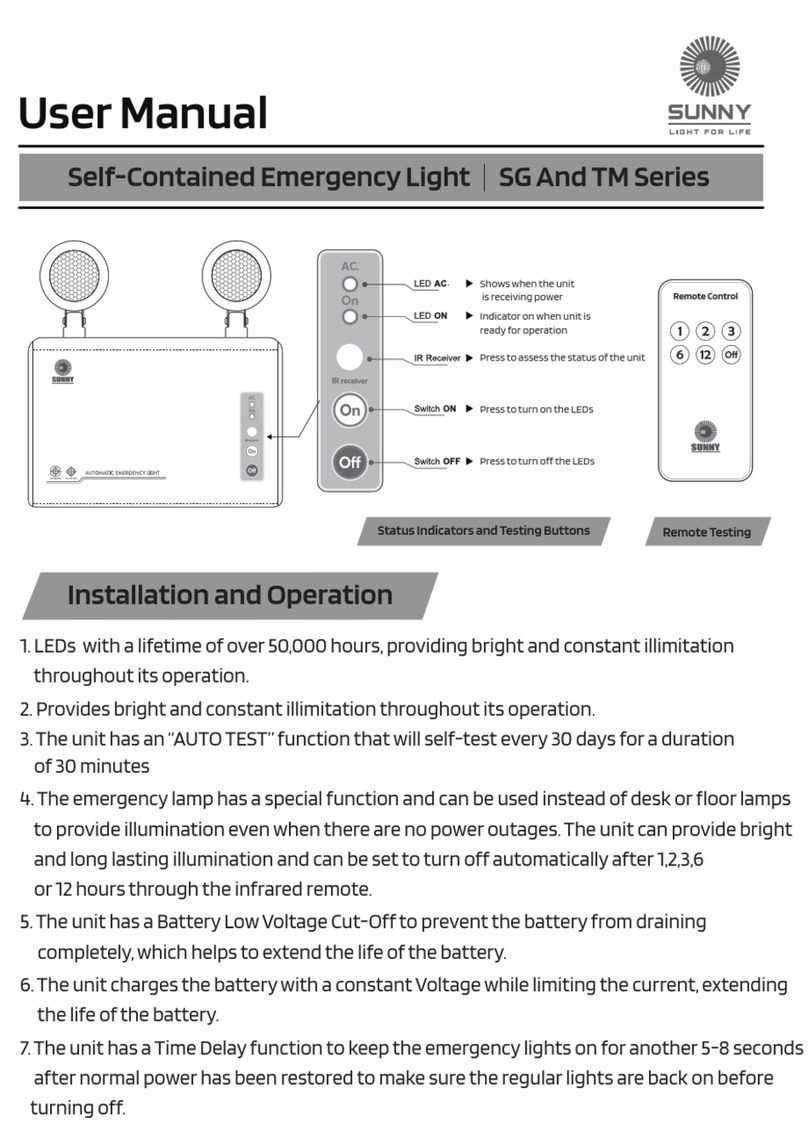
2. The sign is made with clear acrylic sheet that evenly diuse the lightthroughout
the whole sign, even after an extended period of use.
3. Automatically recharged with constant voltage and limited current.
4.The High Temperature type Ni-MH (Nikle Metal Hydride) batteries are suited for
emergency exit signs that are installed in areas with high temperature such as
above ceiling spaces, walkways, fire escapes and other areas.
5. Support long distance testing using the infrared remote (Only Series 4 or
Special Order).
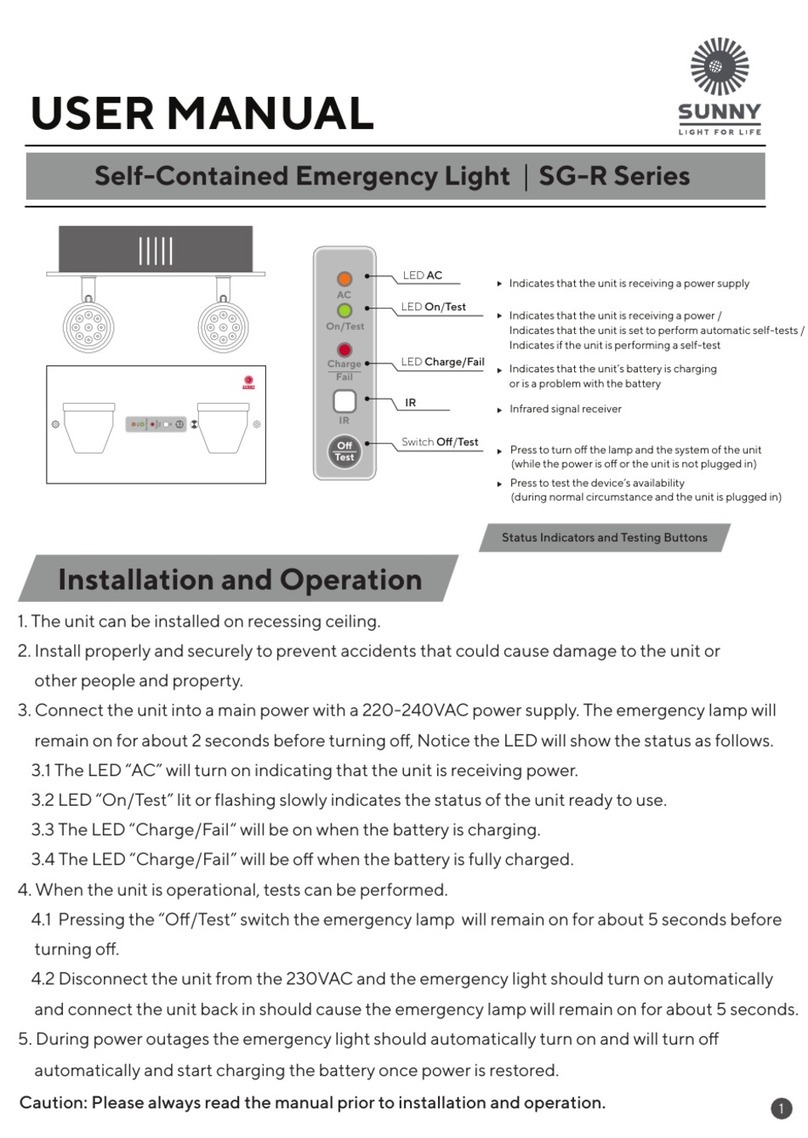
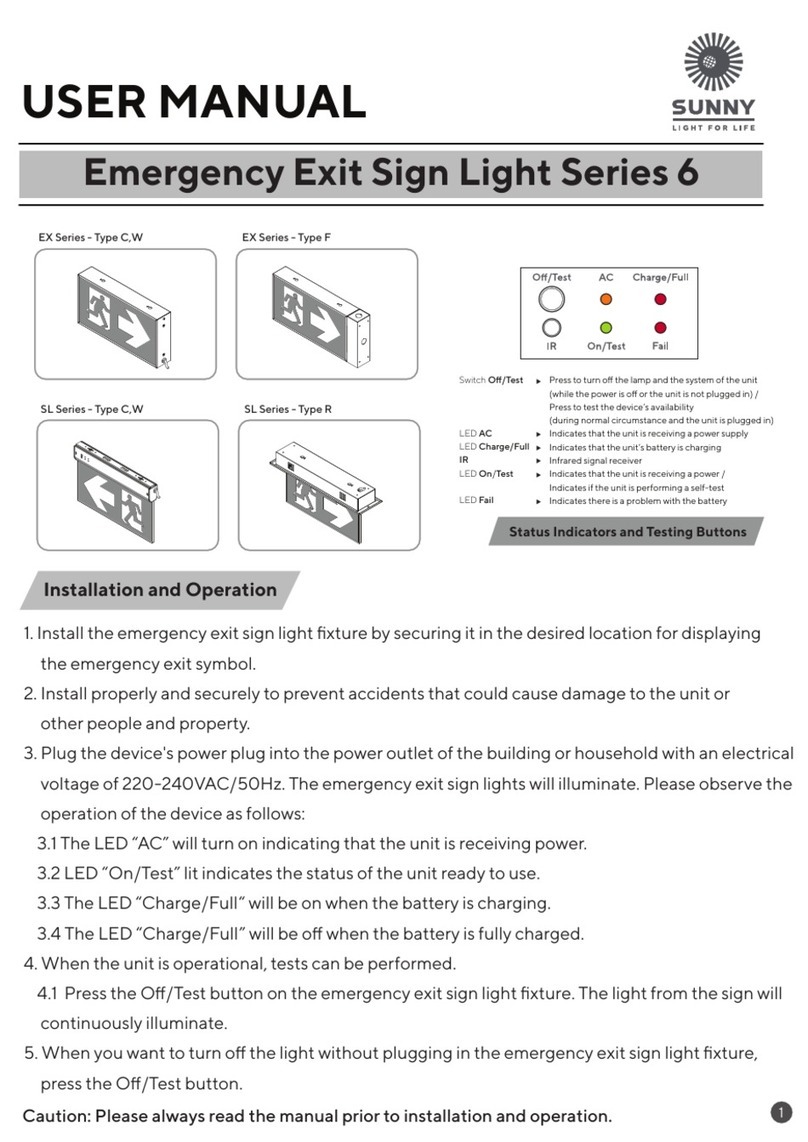
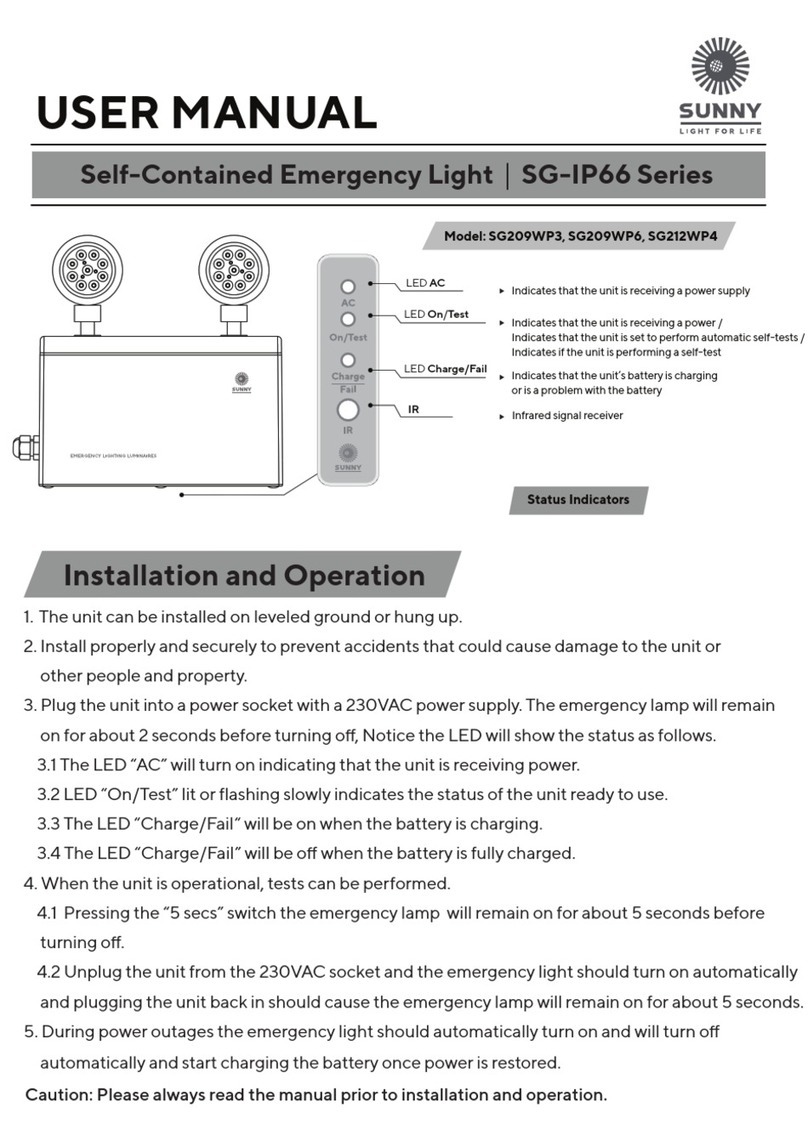
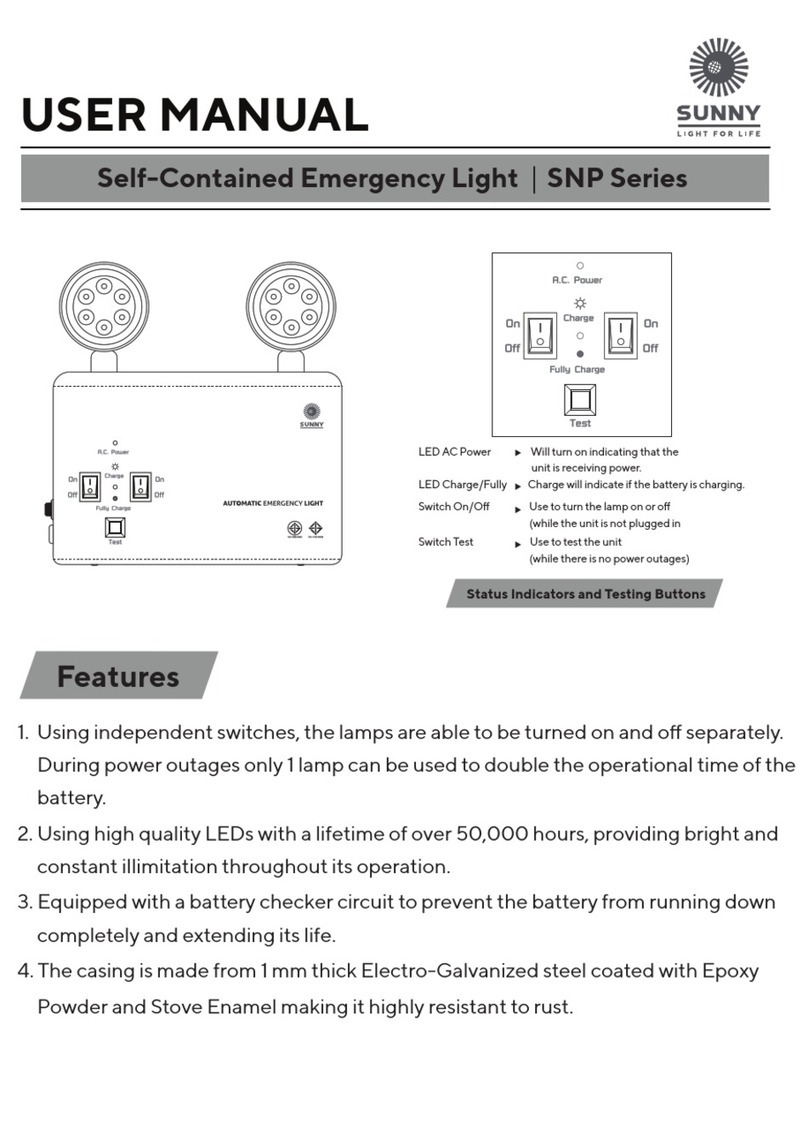
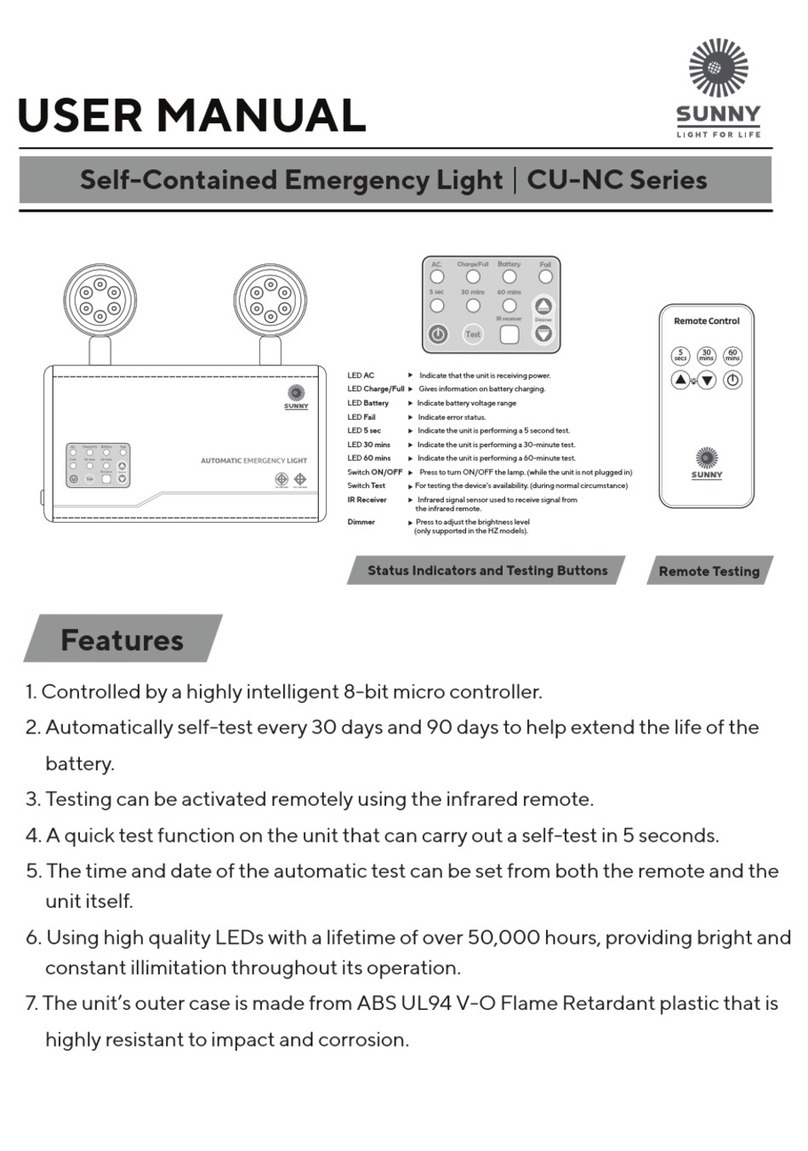
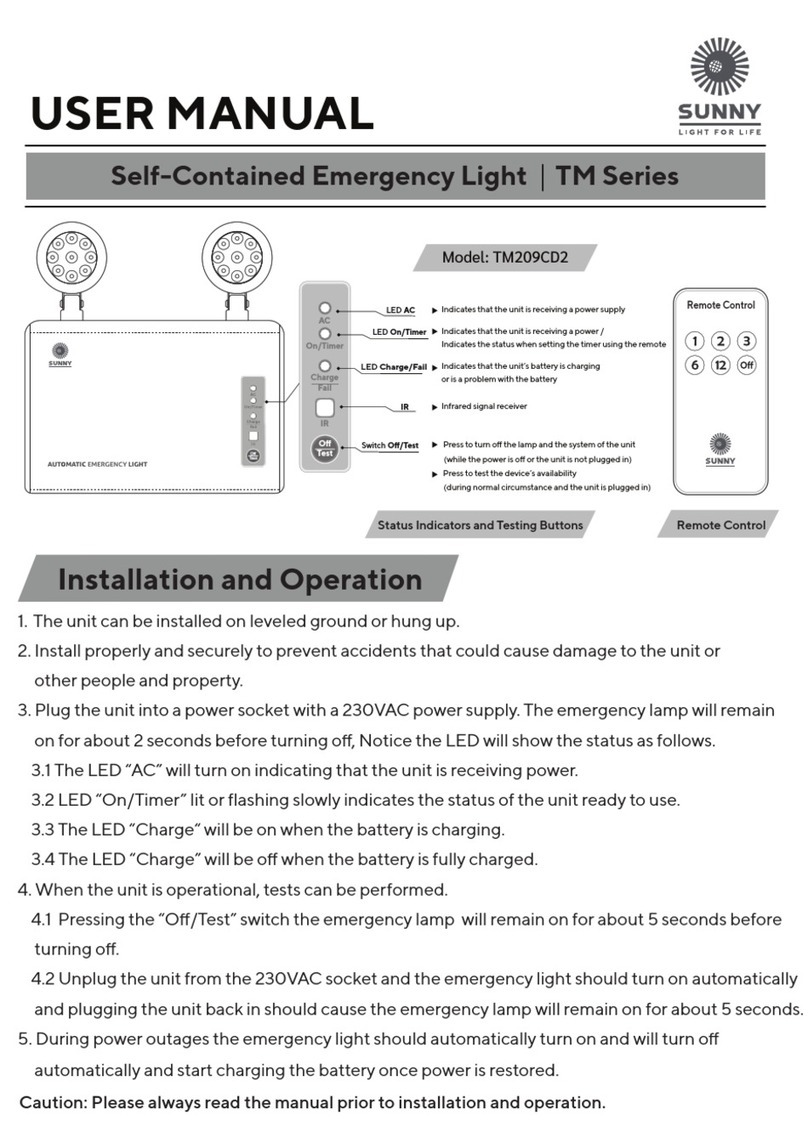
LED AC.
LED Full
LED Charge
Switch ON
Switch TEST
Switch OFF
Indicating input status.
Indicating the battery is fully charged.
Indicating charging status.
For turning on device (not plugged in).
For truning o the device (not plugged in).
For testing device availability
(during normal circumstance).
Slim Line Series Type RSlim Line Series Type C,W
Box Series
USER MANUAL
Emergency Exit Sign Light
Features
Status Indicators and Testing Buttons
1. Test the power outlet to make sure it is providing 220 Volts AC electricity. If this is
not the case, correct the issue before moving for ward to the next step.
2. Install the emergency lighting unit in an area where emergency illumination is
desired. Perform inspection checks to make sure the unit is installed properly to
prevent accidents such as the unit coming loose and falling.
3. Plug the unit into a power outlet with 220 Volts AC 50Hz electricity.
4. Check that the "AC" LED light is on to indicate that the unit is receiving a 220Vac
power supply.
5. Check the “CHARGE” or “FULL” LED light to see the status of the battery.
The “CHARGE” LED will be on when the battery is charging and the “FULL” LED will
be on when the battery is fully charged.
6. Check if the TEST switch is working. When pressed the sign should illuminate
and the “AC” LED should turn o.
7. The ON and OFF switches are used to turn the sign on and o when the
emergency exit sign is not plugged in.
1. The unit should be installed indoor and away from moisture, humidity or
direct sunlight.
2. The unit should be kept within room temperature of around 25 degree Celsius.
3. The battery should be immediately charged after each use to prevent a shorten
battery life.
Installation and Operation
Important Note on Using the Unit
- Unit is not receiving power
after being plugged into a power
socket. The LED lamp does not
illuminate.
- The unit and lamp does not
illuminate when the power goes out
- The unit’s lamp only turns on for
a short duration after the power
has gone out.
- The power socket might not be providing
sucient power.
- The unit’s plug has become loose.
- The 220 Volts AC fuse is blown
- The unit’s lamp is blown out.
- The unit’s lamp is loose from its socket.
- The unit’s battery is not fully charged.
- The unit’s battery might have expired and
need to be replaced
- Check that the power socket is providing
220 Volts AC power.
- Inspect the 220 Volts AC Fuse
- Inspect the units electrical plug.
- Replace the DC fuse.
- Charge the unit’s battery for 10-15 hours.
- Contact our service department for
battery replacement
Surface Ceiling Mounted Surface Wall Mounted
Double Sided
Surface Ceiling Mounted
TYPE C
Surface Wall Mounted
TYPE W
Installation Types
Slim Line
Type C,R,W
Box Light
Recessed Ceiling mounted
TYPE R
Initial Trouble Shooting
Problem Cause What to do
For any further questions about your product
please feel free to contact SUNNY’s customer
service department.
Tel. (+66) 02-948-4450-2
E-mail: [email protected]
1. The product will only be under warranty if the customer fills in the “warranty card”
and return the “return part” to the company within 7 days of purchasing the product.
If this is not done within the specified time then the warranty will be considered void.
2. The warranty only covers the unit’s internal parts for the duration specified by the
company counting from the date of purchase.
3. Please show the warranty card every time when contacting our service department
or the dealer you purchased the unit from.
4. The warranty will be considered void in the following cases.
The unit has been used outside of its intended use specified in the manual.
The unit has been used with equipment that does not meet the specifications
specified within the manual.
The unit has been damaged from impact, for example parts are dented, scratched
missing or distorted.
The unit has been modified or repaired by people not ocially certified by our
company.
The Sticker Warranty Void has been removed or torn.
The unit is damaged from negligence or incompetent use, for example, the
battery is swollen, the batter has been overcharged, the battery has been
damaged from quick charging, the battery has been short-circuited, the battery’s
charged has been completely drained.
The unit has been stored improperly, for example, it was exposed to moisture
causing rust and damage to the internal circuitry.
Damaged was caused by a malfunction in the AC power supply.
Damage from natural disaster such as fire, moisture, submersion in liquids,
chemical damage or from unavoidable circumstances.
Damage from animals or insects.
Note : Please read the manual carefully before installation and operation to understand
how to properly operate the unit.
Terms for Warranty and Service
IsOn Import-Export Co., Ltd.
2915-2917 Ladprao Road, Klongjan,
Bangkapi, Bangkok 10240
Other Sunny Lighting Equipment manuals

Sunny CU Series User manual

Sunny

Sunny CU Series User manual

Sunny TM Series User manual

Sunny

Sunny TM Series User manual

Sunny SGM Series User manual

Sunny

Sunny SGM Series User manual

Sunny SG Series User manual

Sunny

Sunny SG Series User manual

Sunny TM Series User manual

Sunny

Sunny TM Series User manual

Sunny SG Series User manual

Sunny

Sunny SG Series User manual

Sunny SG-R Series User manual

Sunny

Sunny SG-R Series User manual

Sunny SNP Series User manual

Sunny

Sunny SNP Series User manual

Sunny SG-IP66 Series User manual

Sunny

Sunny SG-IP66 Series User manual

Sunny MCU Series User manual

Sunny

Sunny MCU Series User manual

Sunny MESG Series User manual

Sunny

Sunny MESG Series User manual

Sunny MEL Series User manual

Sunny

Sunny MEL Series User manual

Sunny CU-IP66 Series User manual

Sunny

Sunny CU-IP66 Series User manual

Sunny 6 Series User manual

Sunny

Sunny 6 Series User manual

Popular Lighting Equipment manuals by other brands

Emergi-Lite EL-2MRS quick start guide

Emergi-Lite

Emergi-Lite EL-2MRS quick start guide

PANAVISION PANALUX SONARA 4:4 manual

PANAVISION

PANAVISION PANALUX SONARA 4:4 manual

Pentair ONGA owner's manual

Pentair

Pentair ONGA owner's manual

Good Earth Lighting SE1093-BP2-01LF0-G quick start guide

Good Earth Lighting

Good Earth Lighting SE1093-BP2-01LF0-G quick start guide

Starline Roldeck user manual

Starline

Starline Roldeck user manual

TIME LED 781272 Installation and operating instructions

TIME LED

TIME LED 781272 Installation and operating instructions

PRIOS 9628209 instructions

PRIOS

PRIOS 9628209 instructions

Osram OTi50W Installation and troubleshooting guide

Osram

Osram OTi50W Installation and troubleshooting guide

SUNTERRA 300420 owner's guide

SUNTERRA

SUNTERRA 300420 owner's guide

Daisy DMR installation guide

Daisy

Daisy DMR installation guide

nedis WIFILRC10GU10 manual

nedis

nedis WIFILRC10GU10 manual

e-conolight E-CP installation instructions

e-conolight

e-conolight E-CP installation instructions

ONFORU CTB48RGB product manual

ONFORU

ONFORU CTB48RGB product manual

ML Accessories CFR5CCT Installation & maintenance manual

ML Accessories

ML Accessories CFR5CCT Installation & maintenance manual

RL R45711102 manual

RL

RL R45711102 manual

Robe DMX Control 1024 user manual

Robe

Robe DMX Control 1024 user manual

Derungs D hx 35 P SX Operation manual

Derungs

Derungs D hx 35 P SX Operation manual

Chauvet Obsession LED user manual

Chauvet

Chauvet Obsession LED user manual

manuals.online logo
manuals.online logoBrands
  • About & Mission
  • Contact us
  • Privacy Policy
  • Terms and Conditions

Copyright 2025 Manuals.Online. All Rights Reserved.