manuals.online logo
Brands
  1. Home
  2. •
  3. Brands
  4. •
  5. Sunny
  6. •
  7. Lighting Equipment
  8. •
  9. Sunny SG Series User manual

Sunny SG Series User manual

User Manual
Self-Contained Emergency Light SG And TM Series
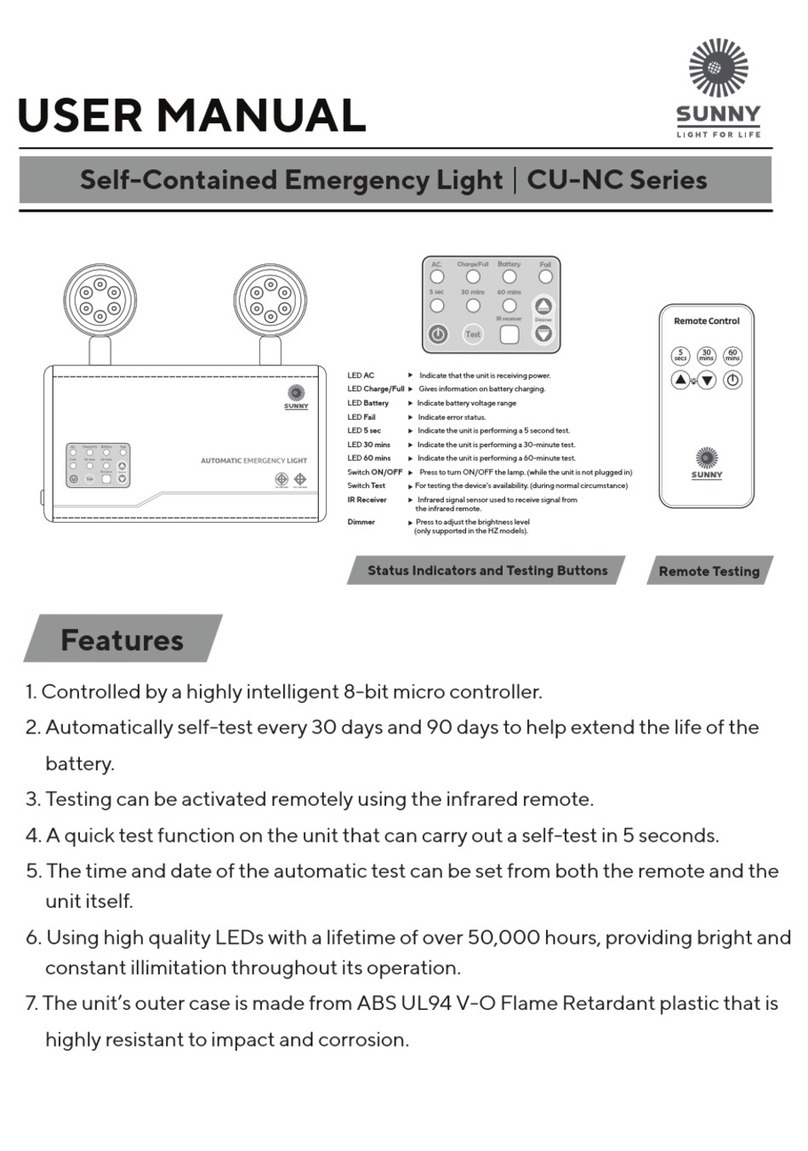
Shows when the unit
is receiving power
Indicator on when unit is
ready for operation
Press to assess the status of the unit
Press to turn on the LEDs
Press to turn off the LEDs
Status Indicators and Testing Buttons Remote Testing
Installation and Operation
1. LEDs with a lifetime of over 50,000 hours, providing bright and constant illimitation
throughout its operation.
2. Provides bright and constant illimitation throughout its operation.
3. The unit has an “AUTO TEST” function that will self-test every 30 days for a duration
of 30 minutes
4. The emergency lamp has a special function and can be used instead of desk or oor lamps
to provide illumination even when there are no power outages. The unit can provide bright
and long lasting illumination and can be set to turn off automatically after 1,2,3,6
or 12 hours through the infrared remote.
5. The unit has a Battery Low Voltage Cut-Off to prevent the battery from draining
completely, which helps to extend the life of the battery.
6. The unit charges the battery with a constant Voltage while limiting the current, extending
the life of the battery.
7. The unit has a Time Delay function to keep the emergency lights on for another 5-8 seconds
after normal power has been restored to make sure the regular lights are back on before
turning off.
Important Note on Using the Unit
Installation and Operation
1. Check to make sure that the power socket of the home or building is providing a 220 Vac
current.
2. Install the unit properly at the location where emergency light is needed. Check to make
sure the unit is properly secured to prevent possible accidents.
3. Plug the unit into a socket that provides 220VAC 50Hz power supply.
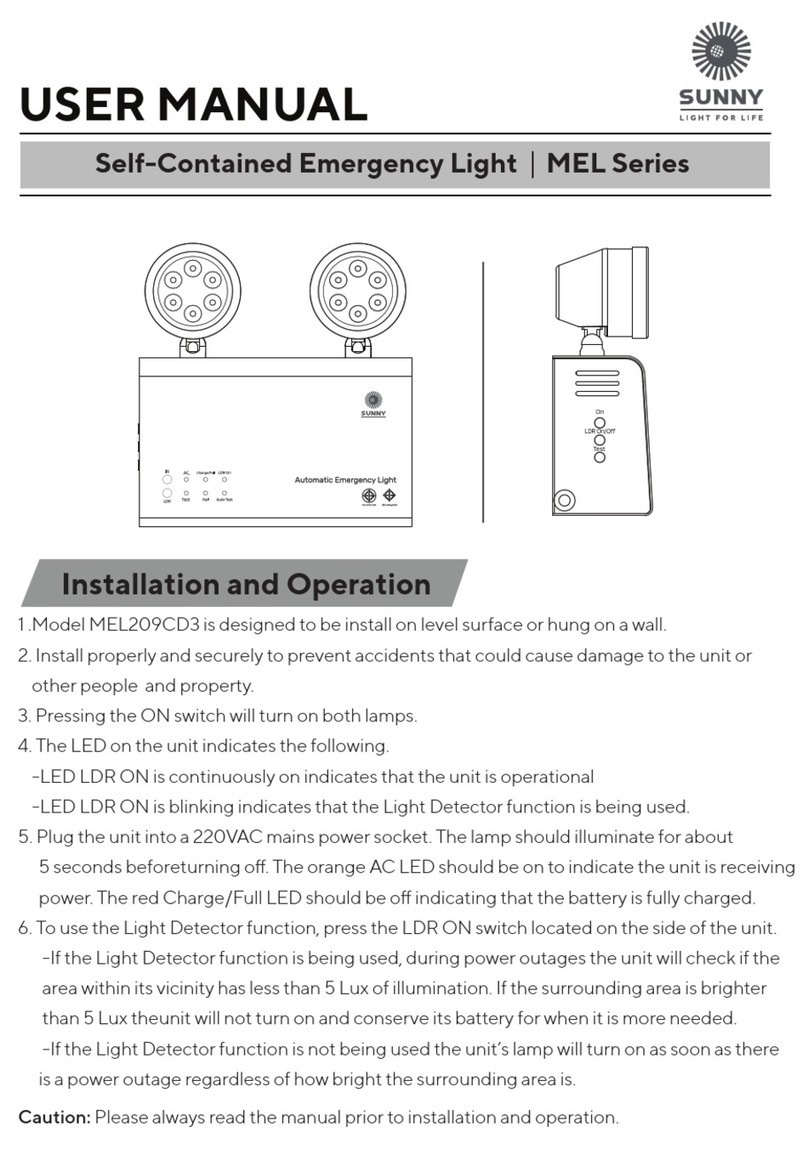
4. Press the “ON” switch and hold down for about 3 seconds until the “LED ON” turns on.
5. After the unit is provided with a 220Vac power supplythe following indicators will show.
5.1 LED AC will turn on showing that the unit is receiving a 220Vac power supply.
5.2 LED ON will turn on to show that the unit is operational.
6. Testing the unit.
6.1 Unplug the unit from the power socket, the unit’s lamp should turn on. After plugging
the unit back into the power socket, the emergency light should turn off automatically
after about 5-8 seconds.
7. The unit can be turned on using the infrared remote and set to stay on for the desired
amount of time, afterwhich the unit will automatically turn off and resume its function
as an emergency light.
8. During power outages the emergency light should automatically turn on and will turn
off automatically and start charging the battery once power is restored.
9.The unit will automatically perform self-tests every 30 days counting from the time
the “ON” switch was pressed. The test will take 30 minutes after which to unit will return
to its normal operation (only available in models SG209-04 and SG509-02)
10. If a power outage occurs during the test the emergency lamp will be activated and
the test will be cancelled.
1. The unit should be installed indoors away from direct sunlight and rain or moisture.
2. The unit should be stored in temperatures under 25 Degree Celsius and the battery
should be charged every 1 months to maintain its operational life.
3. Always press the “ON” switch every time after installation to turn on the unit.
FRONT VIEW
BACK VIEW
SIDE VIEW
รีโมทเทส
Initial Trouble Shooting
Dimension (mm)
Turn on the lamp for 1 hour
Turn on the lamp for 2 hours
Turn on the lamp for 3 hours
Turn on the lamp for 4 hours
Turn on the lamp for 5 hours
Turn off the lamp
- Power not getting to the unit
after plugging in.
The LED AC light does not
turn on.
- The power socket might not have
any power.
- The plug or socket is loose.
- The AC.220V fuse is blown.
- Check the 220VAC power supply.
- Check the plug and socket.
- Contact customer service.
- Emergency light does not
turn on afterthe power went
out.
- Emergency light onlyturns
on for a short time after the
power went out.
- The battery is not fully charged.
- The battery has degraded.
- Fully charge the battery.
- Contact customer service to
replace the battery
ProblemCause What to do
-The unit is not plugged in.
-The lamp is faulty.
-The circuit’s wiring is loose.
-The DC fuse is blown.
-Check that the unit is plugged in.
-Contact customer service.
For any further questions about your product
please feel free to contact SUNNY’s customer
service department.
Tel. (+66) 02-948-4450-2
E-mail: service@sunnyemergencylight.com
1. The product will only be under warranty if the customer lls in the “warranty card”
and return the “return part” to the company within 7 days of purchasing the product.
If this is not done within the specied time then the warranty will be considered void.
2. The warranty only covers the unit’s internal parts for the duration specied by the
company counting from the date of purchase.
3. Please show the warranty card every time when contacting our service department or the
dealer you purchased the unit from.
4. The warranty will be considered void in the following cases.
4.1 The unit has been used outside of its intended use specied in the manual.
4.2 The unit has been used with equipment that does not meet the specications specied
within the manual.
4.3 The unit has been damaged from impact, for example parts are dented, scratched
missing or distorted.
4.4 The unit has been modied or repaired by people not ofcially certied by our company.
4.5 The StickerWarranty Void has been removed or torn.
4.6 The unit is damaged from negligence or incompetent use, for example,the battery is
swollen, the batter has been overcharged, the battery has been damaged from quick
charging,the battery has been short-circuited, the battery’s charged has been
completely drained.
4.7 The unit has been stored improperly, for example, it was exposed to moisture causing
rust and damage to the internal circuitry.
4.8 Damaged was caused by a malfunction in the AC power supply.
4.9 Damage from natural disaster such as re, moisture, submersion in liquids,
chemical damage or from unavoidable circumstances.
4.10 Damage from animals or insects.
Note : Please read the manual carefully before installation and operation to understand
how to properly operate the unit.
Terms for Warranty and Service
IsOn Import-Export Co., Ltd.
2915-2917 Ladprao Road, Klongjan,
Bangkapi, Bangkok 10240
This manual suits for next models

1

Other Sunny Lighting Equipment manuals

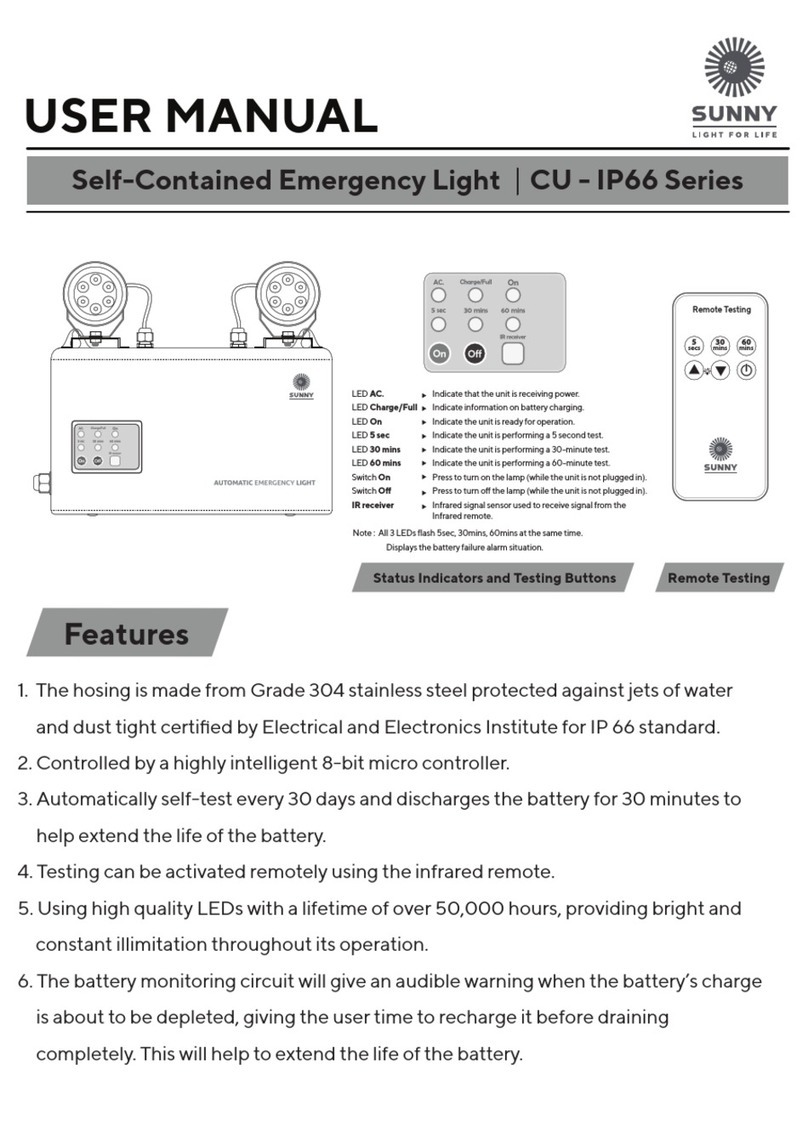
Sunny CU-IP66 Series User manual

Sunny

Sunny CU-IP66 Series User manual

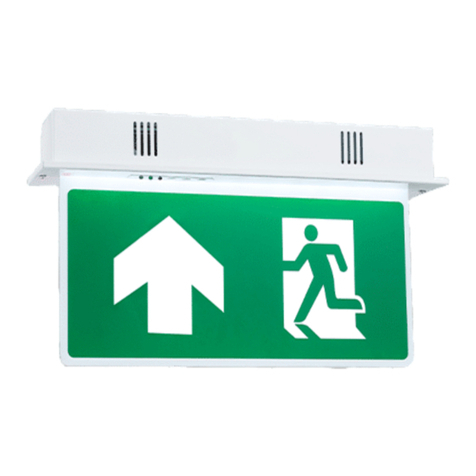
Sunny Emergency Exit Series User manual

Sunny

Sunny Emergency Exit Series User manual

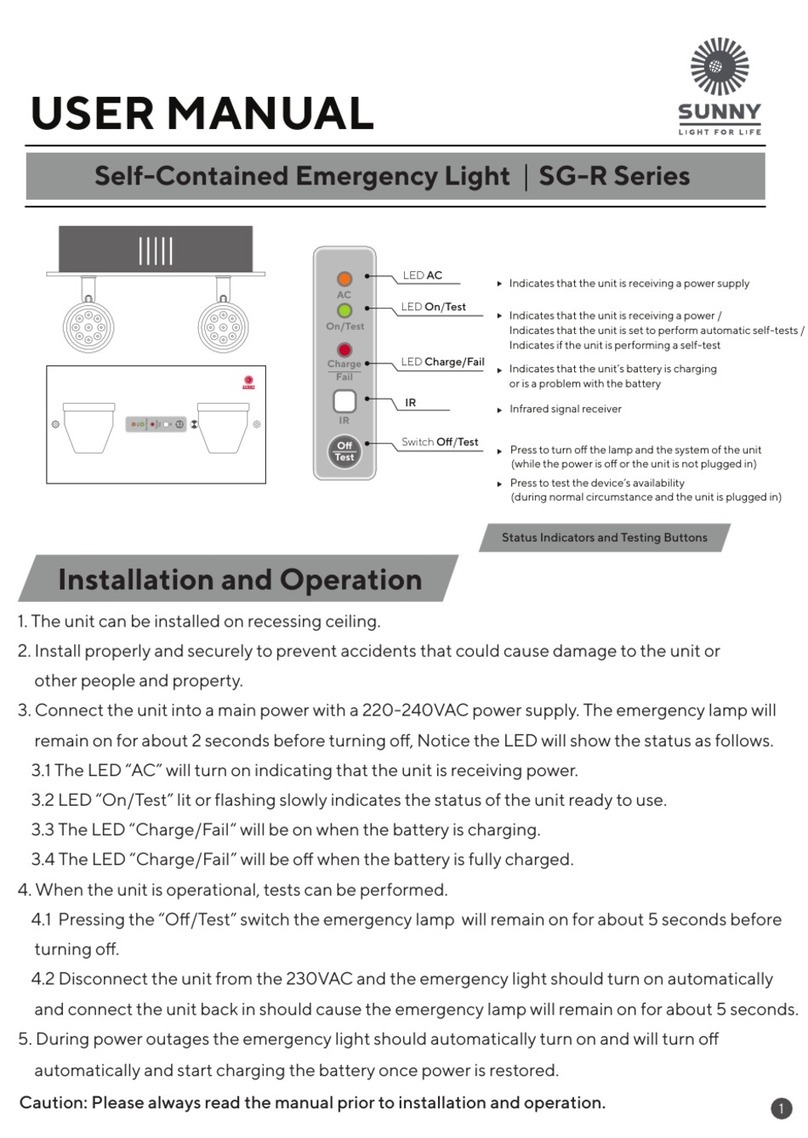
Sunny SG-R Series User manual

Sunny

Sunny SG-R Series User manual

Sunny SG-IP66 Series User manual

Sunny

Sunny SG-IP66 Series User manual

Sunny SG Series User manual

Sunny

Sunny SG Series User manual

Sunny TM Series User manual

Sunny

Sunny TM Series User manual

Sunny MCU Series User manual

Sunny

Sunny MCU Series User manual

Sunny 6 Series User manual

Sunny

Sunny 6 Series User manual

Sunny CU Series User manual

Sunny

Sunny CU Series User manual

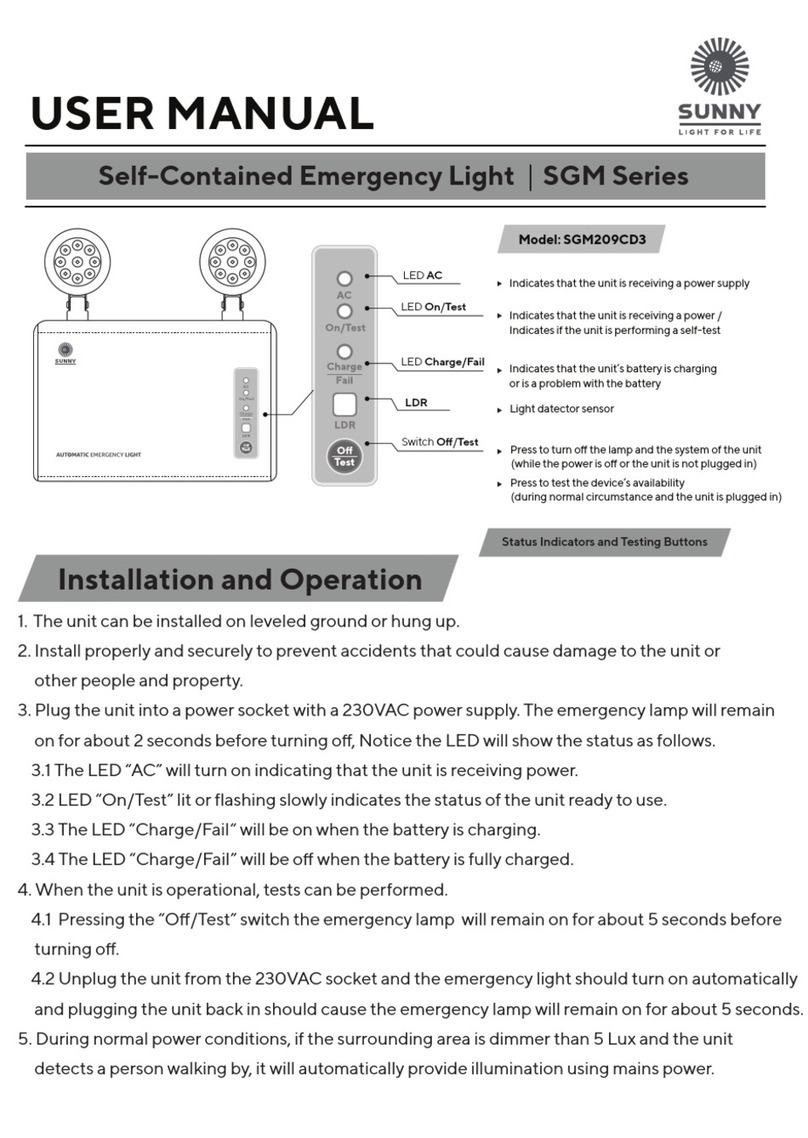
Sunny SGM Series User manual

Sunny

Sunny SGM Series User manual

Sunny TM Series User manual

Sunny

Sunny TM Series User manual

Sunny SNP Series User manual

Sunny

Sunny SNP Series User manual

Sunny MESG Series User manual

Sunny

Sunny MESG Series User manual

Sunny MEL Series User manual

Sunny

Sunny MEL Series User manual

Popular Lighting Equipment manuals by other brands

BADU JET Perla translation of original operation manual

BADU

BADU JET Perla translation of original operation manual

COP Security 15-IL3810 user manual

COP Security

COP Security 15-IL3810 user manual

PoolCop Evolution installer and user manual

PoolCop

PoolCop Evolution installer and user manual

MELINERA 304960 Operation and safety notes

MELINERA

MELINERA 304960 Operation and safety notes

Martin MAC 700 WASH user manual

Martin

Martin MAC 700 WASH user manual

MELINERA HG06007A Operation and safety notes

MELINERA

MELINERA HG06007A Operation and safety notes

ProLights PIXIE BEAM user manual

ProLights

ProLights PIXIE BEAM user manual

KSIX HALO BXPLAFLED02 user manual

KSIX

KSIX HALO BXPLAFLED02 user manual

Festive Lights SL066 quick start guide

Festive Lights

Festive Lights SL066 quick start guide

MJ LED LIGHTNING MJ-1350 user manual

MJ LED LIGHTNING

MJ LED LIGHTNING MJ-1350 user manual

Haushalt International 70282 Directions for Use and Care

Haushalt International

Haushalt International 70282 Directions for Use and Care

Blooma NEGRIL RB170 instructions

Blooma

Blooma NEGRIL RB170 instructions

SGM Giotto spot 400 user manual

SGM

SGM Giotto spot 400 user manual

Chauvet J-Six user manual

Chauvet

Chauvet J-Six user manual

Zhiyun CINEPEER CX100 user guide

Zhiyun

Zhiyun CINEPEER CX100 user guide

DOTLUX Lightshower Series user manual

DOTLUX

DOTLUX Lightshower Series user manual

Christie CA20-AC Installation and setup guide

Christie

Christie CA20-AC Installation and setup guide

Anslut 014212 operating instructions

Anslut

Anslut 014212 operating instructions

manuals.online logo
manuals.online logoBrands
  • About & Mission
  • Contact us
  • Privacy Policy
  • Terms and Conditions

Copyright 2025 Manuals.Online. All Rights Reserved.