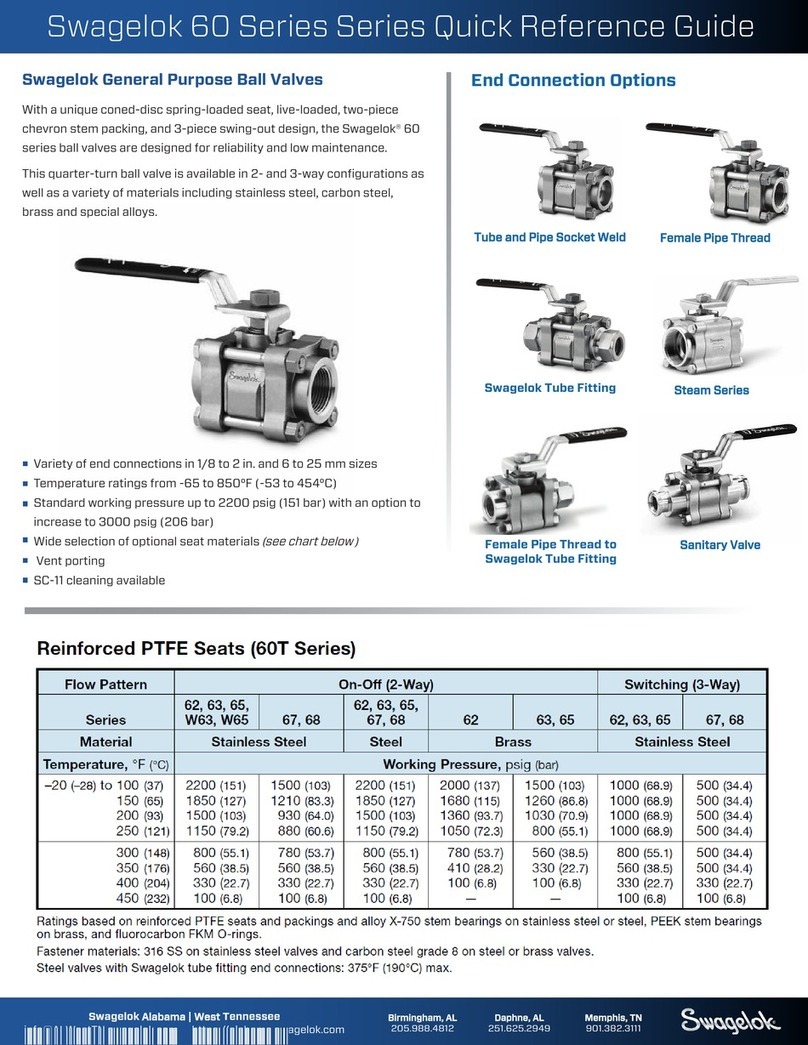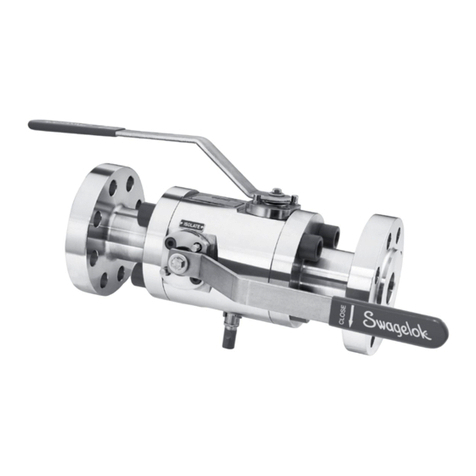
11b. X-pattern assemblies: With the handle positioned toward either side port, loosen and remove the body
bolts/studs. Remove the center body from between the flanges.
12. Remove and discard the seat subassemblies and L-seals. Remove support rings and set aside as these
will be reused.
13. To ensure correct operation, carefully clean the body, support rings and sealing surfaces of the
flanges.
14. Insert the support rings and seat subassemblies (metal spring away from the ball) into the body.
NOTE: “65”, “67”, and “68” Series support rings are installed with the chamfered side toward the ball.
15. Insert the new L-seals (with the plastic backup ring positioned away from the ball) into the center
body flange seal groove area.
16. Reinsert the center body back into place between the flanges. Be sure the L-seals are flush with the
center body, to avoid pinching of the L-seals. Reinstall the body bolt/stud and nut(s).
17. With the valve in the fully “open” position, torque the
body bolts/studs in the alphabetical (crisscross)
sequence shown in the appropriate center body diagram.
Torque to the value listed in the “1st” column of the
chart below, according to the valve series/body material
and fastener type/material. Repeat torque sequence for
the 2nd, 3rd, 4th, and 5th torques.
NOTE: “62” through “65” Series torque values are
the same for bolts or studs. TORQUE CHART in•lb (N•m)
A
BC
Logo
D
X-Pattern
Assemblies
INSTRUCTIONS FOR NO LUBE, 4-BOLT “60” SERIES BALL VALVES
Contents of kit:
(2) Seat subassemblies (1) Upper packing (1) Stem bearing
(1) Lower packing (3) Stem springs* (1) Packing support
(2) L-seals (1) Gland (1) Instruction sheet
*62 series kits do not contain stem springs.
These instructions cover the following standard NO LUBE valves: 60T, 60E, 60C, 60V and N60T.
WARNING: Before servicing any installed valve, you must
• depressurize system
• cycle valve
WARNING: Residual material may be left in the valve and system.
Please Note: Handle all parts carefully and clean before reassembly. DO NOT drop, nick or scratch the ball
or stem. Check ball, stem, and body bolts/studs for wear, corrosion or damage.
1. Leave valve in the “open” position. Note position of the handle before disassembly, as it must be
reassembled in the same position to indicate the proper direction of valve flow.
NOTE: To replace only the seats, disregard steps 2-10 and skip to either step 11a or 11b. To replace both
stem packings and seats, follow all steps except steps 11 and 12.
NOTE: It is important to refer to the exploded view drawings while following the maintenance instruc-
tions.
2. Using a wrench, remove stem nut, stem spring, stop plate, handle and grounding spring. Set all except stem
spring aside as they will be reused. Note the handle position, as it must be replaced in the same position.
Note: 62 series do not use an upper stem spring.
3a. Straight-pattern assemblies: Loosen the body bolts/studs. Remove only the black body bolt/stud.
Swing out the center body. Remove and discard the seat subassemblies and L-seals. Remove the
support rings. Cycle valve to “closed” position and remove the ball. Set support rings and ball aside
as they will be reused.
3b. X-pattern assemblies: Loosen and remove body bolts/studs. Remove center body from between flanges.
Remove and discard the seat subassemblies and L-seals. Remove the support rings. Cycle valve 90˚, to
center (off) position, and remove ball. Set support rings and ball aside as they will be reused.
4.
Remove the lower stem nut, stem springs, and gland. Push stem down into the body and remove.
Remove stem bearing from the stem. Carefully pry packings out of the body using an awl or screw-
driver. Be careful not to scratch or nick the packing bore in the body. Discard the stem bearing(s), stem
springs (63-68 series only), upper packing, lower packing, and packing support as new ones are
provided in the kit.
5. Clean the stem and body bore. DO NOT scratch or nick them.
6. Place stem bearing, chamfer side away from the ball, on stem. Insert stem up into the center body.
7. Place the ball in the center body until the stem tang is engaged and rotate the stem to the “open”
position. The ball should now be secure.
8. Insert the new packings and packing support into the body bore. Place the gland and two stem springs
on stem. The first spring concave side down and the second spring concave side up. Keep packings
level, press into body bore area.
9. Place the stem nut onto the stem. Using the handle to retain the stem, torque the stem nut according to
this chart.
10. Place the grounding spring, handle**, stop plate, stem spring (none in 62 series) (concave side up)
and stem nut on the stem. Torque the stem nut using the same torque values shown in step #9.
**Handle must be in the same position as noted in step 2.
11a. Straight-pattern assemblies: Leave valve in the “open” position. Loosen body bolts/studs. Remove
only the black bolt/stud located above the enclosed body bolt. Swing out the center body. ©1985,1998, 2001 Swagelok Company
MS-INS-60NL
CPC Revision D
February, 2001
Valve Series 62 & 62X 63 & 63X 65 & 65X 67 & 67X 68 & 68X
Torque in.•lb. (N•m)
25 (2.8) 50 (5.7) 100 (11.3) 150 (17.0) 150 (17.0)
Logo
BC
DA
Straight
Pattern
Assemblies
62, 63 65 67 68
5 (0.57) 10 (1.1) 20 (2.3) 30 (3.4) 30 (3.4)
5 10204040
(0.57) (1.1) (2.3) (4.5) (4.5)
10 (1.1) 20 (2.3) 40 (4.5) 60 (6.8) 60 (6.8)
10 20 40 100 100
(1.1) (2.3) (4.5) (11.3) (11.3)
25 (2.8) 50 (5.7) 100 (11.3) 180 (20.3) 180 (20.3)
25 50 100 300 300
(2.8) (5.7) (11.3) (33.9) (33.9)
35 75 150 300 300
(4.0) (8.5) (17.0) (33.9) (33.9)
35 75 150 400 400
(4.0) (8.5) (17.0) (45.2) (45.2)
40 100 200 500 500
(4.5) (11.3) (22.6) (56.5) (56.5)
40 100 200 600 600
(4.5) (11.3) (22.6) (67.8) (67.8)
VALVE SERIES/
BODY MATERIAL FASTENER TYPE/
MATERIAL 1st 2nd 3rd 4th 5th
62 Series Brass
62 Series Carbon -or- Stainless Steel
62X Series Stainless Steel
63 Series Brass
63 Series Carbon -or- Stainless Steel
63X Series Stainless Steel
65 Series Brass
65 Series Carbon -or- Stainless Steel
65X Series Stainless Steel
67 & 67X Series Stainless Steel
67 Series Carbon -or- Stainless Steel
68 & 68X Series Stainless Steel
68 Series Carbon -or- Stainless Steel
Carbon Steel Bolts
Stainless -or- Carbon Steel Bolts/Studs
Stainless Steel Bolts/Studs
Carbon Steel Bolts
Stainless -or- Carbon Steel Bolts/Studs
Stainless Steel Bolts/Studs
Carbon Steel Bolts
Stainless -or- Carbon Steel Bolts/Studs
Stainless Steel Bolts/Studs
Stainless Steel Bolts/Studs
Carbon Steel Bolts
Stainless Steel Bolts/Studs
Carbon Steel Bolts
www.swagelok.com
