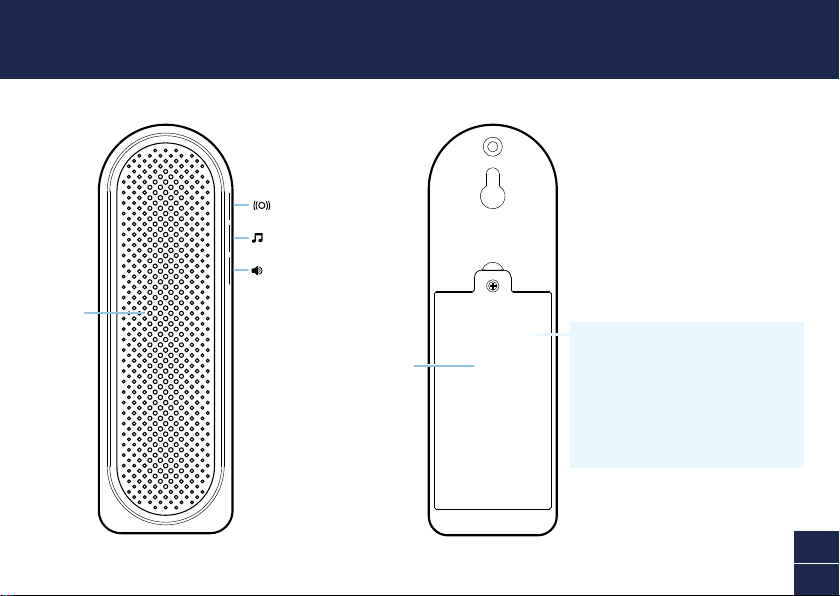
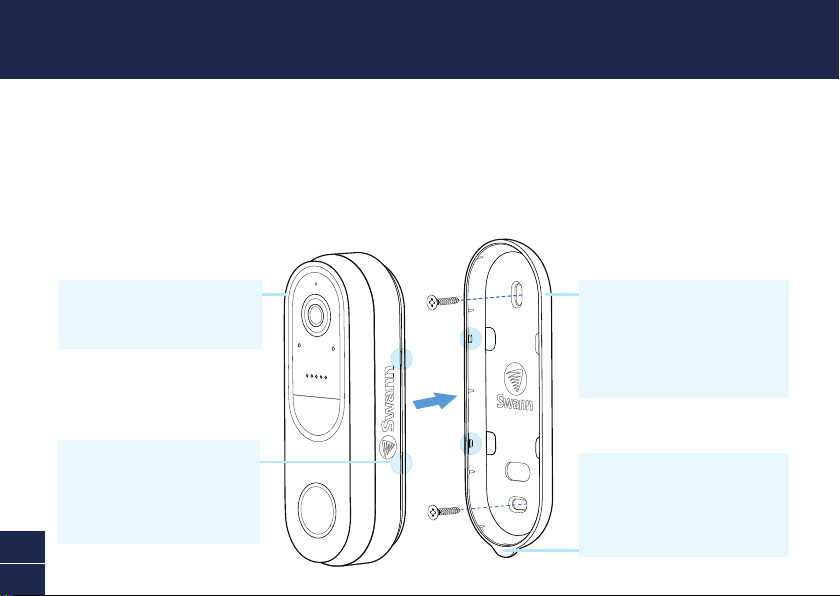
Swann SWIFI-DOORBELL User manual
Other Swann Accessories manuals

Swann
Swann Wireless door chime User manual

Swann
Swann SR16210 User manual

Swann
Swann SWIFI-LEAK User manual

Swann
Swann WARMNITE WN47003N User manual

Swann
Swann SWADS-GARSEN-GL User manual

Swann
Swann HOME Series User manual

Swann
Swann DC810B User manual

Swann
Swann home series User manual

Swann
Swann SWO-WDS2PA User manual

Swann
Swann SR16220 User manual

Swann
Swann PenCam DVR-420 User manual

Swann
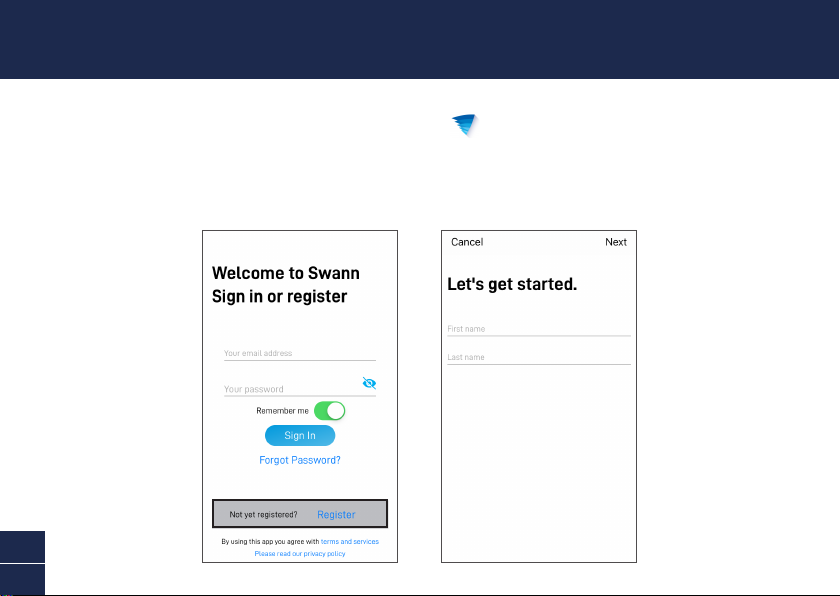
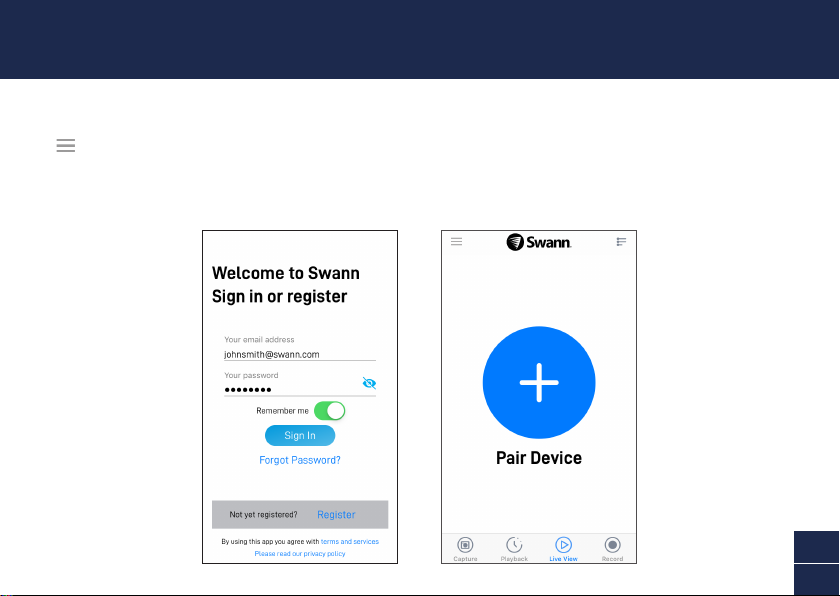
Swann SwannBuddy User manual

Swann
Swann SWADS-WVDP720-UK User manual

Swann
Swann dc835p User manual

Swann
Swann WT83 User manual

Swann
Swann SP10130 Series User manual

Swann
Swann Motion User manual

Swann
Swann HOME Series User manual

Swann
Swann DC835MP3 User manual

Swann
Swann SR12030 User manual