manuals.online logo
Brands
  1. Home
  2. •
  3. Brands
  4. •
  5. Swegon
  6. •
  7. Ventilation Hood
  8. •
  9. Swegon CASA R85 User manual

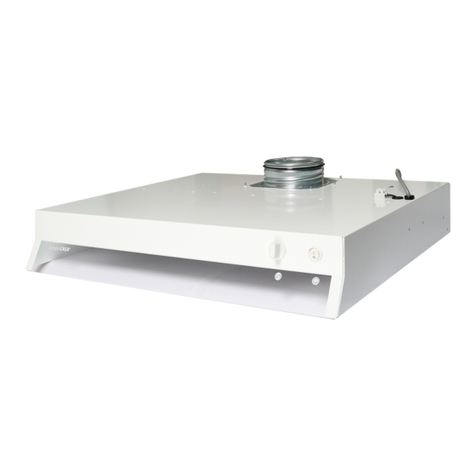
Swegon CASA R85 User manual

Mounting frame for ceiling or wall installation
Swegon CASA®R85
P-RO85-KA-c-m
Swegon reserves the right to alter specifications.2 www.swegon.com/casa
R85.190411
The packaging contains the following
items:
• Mounting frame x 1
• Corner stile x 2
• Screw for corner stiles x 4
• Cover plug x 2
• Blind rivet x 8
• Mounting hook x 4 (in bag)
Tools required for installation:
• Electric drill
• Screwdriver (for slotted screws and socket head cap
screws)
• Air-bubble-type level
• Pair of blind rivet tongs (for 3.2 mm rivets)
1. To mount on a wall
1.1 Back off the screws (4 pcs.) from the mounting
frame.
1.2 Place the corner stiles (2 stiles) in position and se-
cure them with two screws.
1.3 Lift the mounting frame up to its position on the
wall.
N.B.! Use an air-bubble-type level to check that the
mounting frame is vertical. Fasten the mounting
frame to the wall with six (6) screws (two on the
underside, four on the top side).
1.4 a) If the wall outlet is located below the mounting
frame or if the cooker hood is fastened to the lower
section of the ventilation unit: See the instructions
for the R85, Section 1.7 Electrical and control ca-
bles, page 9.
b) If the wall outlet is located above the mounting
frame: Insert the electric cable and possible modular
cable through the appropriate opening provided in
the ceiling mounting frame.
Do not detach the bag with
mounting hooks before you install the
ventilation unit.
Swegon reserves the right to alter specifications. www.swegon.com/casa 3
R85.190411
Applicable to the Swegon CASA R85 A version
units, not B version units.
1.7 If the cooker hood is installed below the ventila-
tion unit, remember to insert and run the modular
cable through the openings on the rear side of the
ventilation unit (see the instructions for the R85,
Section 1.7 Electrical and control cables, page 9.)
If the hooks are facing the wrong
way, the ventilation unit will not en-
gage and fasten onto the frame.
1.5 If the ventilation unit lacks a kitchen bypass on its
top side, remove the duct connection from the
mounting frame.
N.B.! Remember to fit the 100 mm dia. connection
onto the R85 unit before you install the unit at its
final location.
1.6 Secure the mounting hooks in the R85 ventilation
unit. Insert the hooks ( 4 pcs. ) into position and se-
cure them with the rivets in the bag ( 8 pcs. ). Fasten
them with a pair of 3.2 mm blind rivet tongs. The
hooks should point backwards.
Before you secure the ventilation
unit with screws, make sure that the
screw heads are flush with the open-
ings for the holes (back off the screws if
needed).
Swegon reserves the right to alter specifications.4 www.swegon.com/casa
R85.190411
2. Ceiling installation
2.1. Fit the mounting frame to the ceiling with the
smooth surface facing upwards, using 8 mm
threaded rods (4 pcs.). Adjust the length of the
threaded rods so that the ends of the rods are
approx. 15-20 mm below the inner surface of the
mounting frame. Install the mounting frame ap-
prox. 35-55 mm below a suspended ceiling.
The ventilation unit must be lifted
fully into position and be held there
before you thread on and tighten the
nuts.
The unit should be mounted as
near as possible to the wall; this applies
to both wall and ceiling installation. The
space between the ventilation unit and
the wall should be insulated so that the
sound from the unit will not be propa-
gated via the wall.
M8/M10 threaded
rod and washers.
25-55 mm
1.8 If needed, reduce the weight of the ventilation unit
as much as possible before you lift it into place
(by removing the front plate and the rotary heat
exchanger). Hang the ventilation unit in the mount-
ing frame so that the rear of the unit takes hold
in the suspension plate. Lift the ventilation unit
up against the ceiling mounting frame so that the
hooks on both sides go into position. N.B.! The unit
is correctly positioned if the screw heads return to
their original positions. Carefully screw in the lock-
ing screws all the way to the bottom. N.B.! Avoid
pressing the screws too hard since doing so could
release their hold.
1.9 If you have removed the rotor and the front plate
from the unit before lifting it, install them at the
final location. The installation is finished.
Check that the wires do not come
to rest between the ducts when you lift
up the ventilation unit.
Suspension plate

Other manuals for CASA R85

4

Other Swegon Ventilation Hood manuals

Swegon CASA R85 Technical Document

Swegon

Swegon CASA R85 Technical Document

Swegon CASA R85 Operating manual

Swegon

Swegon CASA R85 Operating manual

Swegon CASA Pop User manual

Swegon

Swegon CASA Pop User manual

Swegon COLIBRI Wall b Guide

Swegon

Swegon COLIBRI Wall b Guide

Swegon casa jazz User manual

Swegon

Swegon casa jazz User manual

Swegon CASA Tango 70 User manual

Swegon

Swegon CASA Tango 70 User manual

Swegon casa tango User manual

Swegon

Swegon casa tango User manual

Swegon casa blues User manual

Swegon

Swegon casa blues User manual

Swegon CASA Smart Sensor User manual

Swegon

Swegon CASA Smart Sensor User manual

Swegon CASA Smart Blues User manual

Swegon

Swegon CASA Smart Blues User manual

Swegon casa jazz User manual

Swegon

Swegon casa jazz User manual

Swegon CASA Samba User manual

Swegon

Swegon CASA Samba User manual

Swegon casa salsa User manual

Swegon

Swegon casa salsa User manual

Swegon TBLZ-1-10-09 User manual

Swegon

Swegon TBLZ-1-10-09 User manual

Swegon WISE WS a User manual

Swegon

Swegon WISE WS a User manual

Swegon CASA SV Instruction manual

Swegon

Swegon CASA SV Instruction manual

Swegon WISE Paragon Wall 800 User manual

Swegon

Swegon WISE Paragon Wall 800 User manual

Swegon casa tango User manual

Swegon

Swegon casa tango User manual

Swegon casa blues User manual

Swegon

Swegon casa blues User manual

Swegon CASA Smart Blues User manual

Swegon

Swegon CASA Smart Blues User manual

Swegon ILTO R80 User manual

Swegon

Swegon ILTO R80 User manual

Popular Ventilation Hood manuals by other brands

ROBLIN LIDO DESIGN 900 Dimensions

ROBLIN

ROBLIN LIDO DESIGN 900 Dimensions

Smeg HOBD682D manual

Smeg

Smeg HOBD682D manual

VentAHood SLH6-K installation instructions

VentAHood

VentAHood SLH6-K installation instructions

Monsher Cocos 60 user manual

Monsher

Monsher Cocos 60 user manual

Wolf W302418 Planning information

Wolf

Wolf W302418 Planning information

XtreamAIR PX01-I36 Installation guide & user manual

XtreamAIR

XtreamAIR PX01-I36 Installation guide & user manual

BOMANN DU 652.1 IX instruction manual

BOMANN

BOMANN DU 652.1 IX instruction manual

Fagor 5CFB-36 X brochure

Fagor

Fagor 5CFB-36 X brochure

Applico K90DBSS user manual

Applico

Applico K90DBSS user manual

Pkm BS47-60ABTH instruction manual

Pkm

Pkm BS47-60ABTH instruction manual

Silverline 2240 Assembly instructions

Silverline

Silverline 2240 Assembly instructions

Whirlpool AKR3000/IX instruction manual

Whirlpool

Whirlpool AKR3000/IX instruction manual

Best K15 user manual

Best

Best K15 user manual

Vallox 280 SE manual

Vallox

Vallox 280 SE manual

Westinghouse QR056 owner's manual

Westinghouse

Westinghouse QR056 owner's manual

AEG Perfekt Glide-24 instruction manual

AEG

AEG Perfekt Glide-24 instruction manual

FALMEC LUCE90W3BL Instruction booklet

FALMEC

FALMEC LUCE90W3BL Instruction booklet

Leisure H91PK User instructions

Leisure

Leisure H91PK User instructions

manuals.online logo
manuals.online logoBrands
  • About & Mission
  • Contact us
  • Privacy Policy
  • Terms and Conditions

Copyright 2025 Manuals.Online. All Rights Reserved.