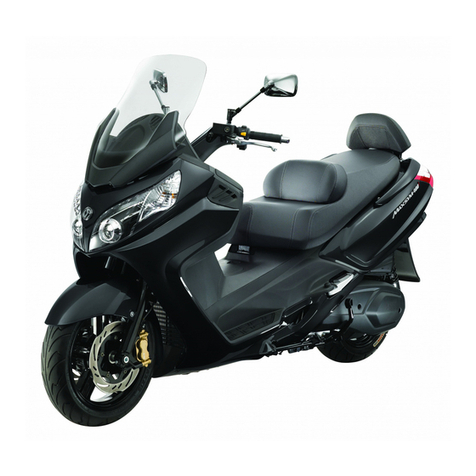
Sym MAXSYM 400 User manual

1
1.Contents
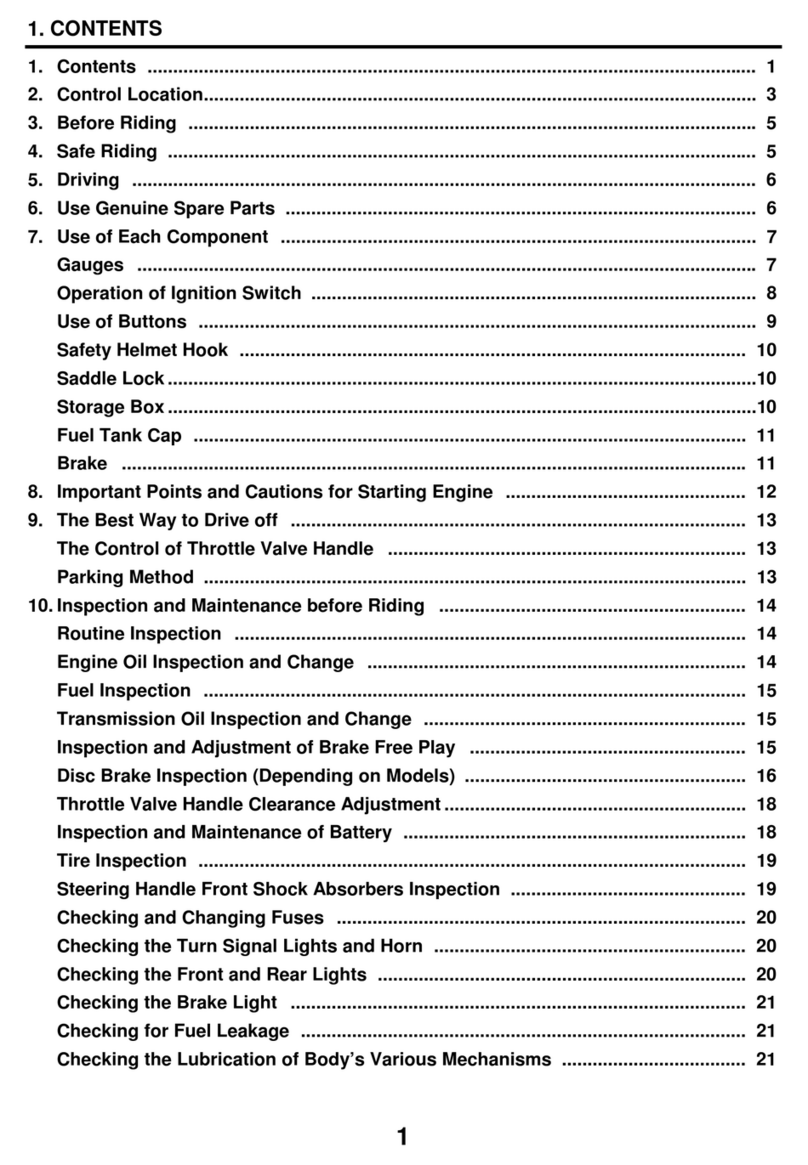
1. Contents ............................................................................................................................. 1
2. Before Riding ..................................................................................................................... 3
3. Serial Number/Labels Location ...................................................................................... 3
4. Safe Riding .......................................................................................................................... 4
5. Driving ................................................................................................................................ 5
6. Use Genuine Spare Parts ................................................................................................. 5
7. Parts Location ................................................................................................................... 6
Combination instrument............................................................................................................ 9
Smart key system................................................................................................................... 15
Right handlebar switches ....................................................................................................... 21
Left handlebar switches .......................................................................................................... 21
Front/rear brake lever ............................................................................................................. 22
Windscreen .......................................................................................................................... 23
Fuel tank cap ....................................................................................................................... 24
Front compartment ............................................................................................................... 25
Luggage box/tool kit ............................................................................................................... 25
Side stand/parking brake ...................................................................................................... 26
Main stand ........................................................................................................................... 26
Rear view mirror ................................................................................................................... 27
Passenger footrest ............................................................................................................... 27
Emission control system ....................................................................................................... 28
8. How to Start the Engine ................................................................................................. 28
To start the engine ................................................................................................................ 28
To stop the engine ................................................................................................................ 29
9. How to Ride the Scooter ................................................................................................ 29
Break-in ............................................................................................................................... 29
Tips of fuel economy ............................................................................................................. 29
Throttle control ..................................................................................................................... 30
Moving off ............................................................................................................................ 30
Braking ................................................................................................................................ 30
Advanced brake light system ................................................................................................. 31
Anti-lock brake system .......................................................................................................... 31
Traction control system ......................................................................................................... 32
Park the scooter ................................................................................................................... 33
10.Maintenance and Adjustment ....................................................................................... 34

2
Importance of maintenance ................................................................................................... 34
Routine checks ..................................................................................................................... 34
Oil level inspection/oil change ............................................................................................... 35
Transmission oil change ......................................................................................................... 37
Fuel inspection....................................................................................................................... 37
Coolant level inspection/filling ................................................................................................ 38
Coolant change .................................................................................................................... 37
Brake system inspection ....................................................................................................... 39
Throttle free play inspection .................................................................................................. 41
Tire/ tire pressure inspection ................................................................................................. 41
Steering/front fork inspection ................................................................................................. 42
Fuse inspection .................................................................................................................... 43
Battery inspection ................................................................................................................. 44
Spark plug inspection ............................................................................................................ 45
Engine air cleaner/V-belt case air cleaner inspection .............................................................. 45
Headlight adjustment ............................................................................................................ 46
Rear shock absorber adjustment ........................................................................................... 47
General lubrication ............................................................................................................... 47
Vehicle data recorder ............................................................................................................ 47
11. Taking Care of Your Scooter ........................................................................................ 48
Washing ................................................................................................................................ 48
Storage.................................................................................................................................. 48
12.Trouble Shooting ............................................................................................................ 49
Diagnosis when engine does not start .................................................................................... 49
Overheating ......................................................................................................................... 49
EFi warning indicator on ........................................................................................................ 50
ABS indicator on ................................................................................................................... 50
TCS indicator on ................................................................................................................... 50
Low oil pressure indicator on ................................................................................................. 50
Luggage box light indicator .................................................................................................... 50
Fuel gauge failure ................................................................................................................. 51
Coolant temperature gauge failure ......................................................................................... 51
Smart key system ................................................................................................................. 51
Exterior lighting burned-out ................................................................................................... 52
13. Periodic Maintenance Schedule ................................................................................... 53
14.Maintenance Record ....................................................................................................... 55
15.Specification .................................................................................................................... 56

3
2.Before Riding
This manual describes the correct usage of this scooter including safety riding, simple inspection methods
and so on.
For a more comfortable and safety riding, please read this manual carefully.
For your benefit, please ask your SYM dealer the operating manual and carefully read the following:
Correct use of the scooter.
Pre-delivery inspection and maintenance.
Thank you very much for your patronage
In order to maximize your scooter’s performance, a periodical inspection and maintenance should be
completely carried out.
We recommend that after riding your new scooter for the first 300 kilometers, you should take your
scooter to the original dealer for an initial inspection, and to have your scooter inspected periodically
every 1000 kilometers thereafter.
In case the scooter’s specifications and construction are modified and different from the photos and
diagrams on the owner’s manual / catalogues, the specifications and construction of the actual scooter
shall prevail.
3.Serial Number/Labels location
The labels on your scooter provide important safety information. Read the labels thoroughly and do not
remove them. Contact your authorized SYM dealer for replacement if any label is missed or damaged.
Engine Number

4
4. Safe Riding
It is very important to be relaxed and clothe properly when driving, observe traffic regulations, do not rush,
always drive carefully and relaxed.
Usually, most people would ride their newly bought scooter very carefully, but after they became familiar
with their scooters, they tended to become reckless which may result in an accident.
To remind you:
Please wear a safety helmet, and properly tighten the chin belt when riding a scooter.
Clothes with open or loose cuffs may be blown by wind and cause the cuffs to get caught on the
steering handle and thus affects riding safety.
So, put on clothes with tight sleeves.
Hold the steering handle by both hands when riding. Never ride with only one hand.
Observe the speed limit.
Wear suitable low-heel shoes.
Perform periodical maintenance and inspection in accordance with the schedule.
WARNING:
To avoid getting burned by exhaust pipe when taking a passenger. Make sure your passenger has
put his/her feet on the pedals.
After running, the exhaust pipe is very hot, be careful not to get burned when conducting an
inspection or maintenance.
After running, the exhaust pipe is very hot, select a suitable location to park your scooter to avoid
others getting burned by the exhaust pipe.
CAUTION:
Modified scooter will affect its structure or performance, and cause poor engine operation or exhaust
noise, which will result in shortening the scooter’s service life.
Besides, modification is illegal and does not conform to the original design and specifications.
A modified scooter will not be covered by warranty, therefore, do not modify your scooter at will.
Tire and rim modifications will make it unsafe to ride and may cause severe injury or death.
Frame Number
Vehicle Identification Number

5
5. Driving
Keep the related parts of your body such as arms, palms, lumbar, and toes relax and ride with the most
comfortable posture in order to be able to react quickly whenever it is necessary.
Rider’s posture will greatly affect riding safety. Always keep your body’s gravity in the center of the
saddle, if your body’s gravity is on the rear part of saddle, the front wheel load will be reduced, and this
will cause the steering handle shaking. It is dangerous to ride a scooter with an unstable handle.
It will be much easier to make a turn if rider inclines his body inward when turning. On the other hand,
the rider will feel unstable if his body and the scooter do not incline.
The scooter is hard to control on a bumpy, unleveled, unpaved road, try to know the road conditions in
advance, slow down and use your shoulder’s force to control the handle.
Suggestion: Do not load objects on the front pedals unnecessarily, to avoid affecting the riding safety
and the operation of steering handle.
CAUTION:
The rider’s feeling on the handle is slightly different with a load or without a load.
Overload may cause the handle to swing and affects the riding safety.
Therefore, do not overload your scooter.
Overloading the scooter will cause the scooter to become unstable and hard to maneuver, it may cause
serious damage to the tires and rims, as well as it may change the center of gravity, which could result in
an accident that could cause injury or death. Do not exceed the maximum authorized load.
CAUTION:
Do not place flammable materials such as rags between the body side cover and engine to avoid
components damaging by fire.
Do not load objects on areas not specified for loading to avoid damage.
SUGGESTION:
To maximize the scooter’s performance and prolong its service life:
The first 1000 km is the break- in period for the engine and components.
Avoid rapid acceleration, and do not exceed the recommended engine revolution limits (page 29).
6. Use Genuine Spare Parts
In order to maintain the scooter’s best performance, each part’s quality, material, and machined precision
must conform with the design requirements. “SYM Genuine Spare Parts” were made from the same high
quality materials used for the original scooter. No parts would be sold to the market until they could meet
the designed specifications through sophisticated engineering and stringent quality control. Therefore, it is
necessary to purchase “SYM Genuine Spare Parts” from “SYM Authorized Dealers or Franchised
Dealers” when replacing spare parts. If you buy cheap, or fake substitute parts from the market, no
guarantee can be provided either for the quality or durability. Also, it may result in unexpected troubles and
lower the scooter’s performance.
Always use “SYM Genuine Spare Parts” to keep your scooters pure blood and to ensure its long
service life.

6
7.Parts Location
1. Windscreen
2. Headlights & position lights
3. Front turn indicators
4. Front brake calipers
5. Front brake discs
6. Coolant level inspection window
7. Coolant reserve tank
8. Side stand
9. Oil filter
10. V-belt case air cleaner
11. Oil drain bolt
12. Transmission oil drain bolt
13. Transmission oil filler bolt
14. Engine air cleaner
15. Rear shock absorbers
16. Seat open lock
17.Tail/brake lights
18. Fuel tank cap
MAXSYM 400 (LZ40W1-EU)
1
3
2
4
6 7
8
9
13
14
16
17
5
10
11
12
15
18

7
1. Rear turn indicators
2. License plate light
3. Passenger footrests
4. Exhaust pipe
5. Rear/parking brake caliper
6. Rear brake disk
7. Oil filler cap/dipstick
8. Oil Filter screen
9. Main stand
10. Front fork
11. Tool kit
12. Luggage box
13. Fuse box
14. Battery
15. Diagnostic tool connector
16. Seat
17. Passenger handlebar
1
2
3
4
7
8
9
10
13
16
5
6
12 11
14
15
17

8
1. Rear brake lever
2. Rear view mirrors
3. Left handlebar switches
4. Rear brake fluid reservoir
5. Combination instrument
6. Front brake fluid reservoir
7. Right handlebar switches
8. Front brake lever
9. Throttle grip
10. USB power outlet
11. Right compartment
12. Ignition switch
13. Left compartment
1
2
3
4
6
7
2
5
8
13
12
10
11
9

9
Combination Instrument
The combination instrument is activated when the ignition switch is turned on. Most indicators are lit up
shortly and then go off; all LCD functions are shown for a few seconds for function test, then the whole
combination instrument turns to operational mode.
NOTE :
Do not wipe plastic components, such as the instrument panel, the headlight, body covers, etc. with
solvents, such as gasoline. Wiping plastic components with solvents can cause damage.
WARNING:
Never operate the instrument buttons while riding the scooter.
○A Turn Signal Indicators
The corresponding turn signal indicator light blinks when the turn signal switch is pushed to the right or
left.
○B EFi Warning Indicator
When turn the ignition switch to “ON” position, the EFi warning indicator remains on initially. It should go
off immediately after the engine is running. It displays the condition of the EFi system is working correctly.
If there is any problem on the EFi system, the warning indicator remains on all the time. Please contact
your SYM authorized dealer if this light goes on all the time.
○C Speedometer
The speedometer shows the current vehicle speed only in km/h. When the ignition switch is turned on, the
speedometer needle sweeps across the whole range then return to zero position for functional test.
○D M Button
Press this button to switch meter mode and set the clock of the multi-function meter (page 11).
MAXSYM 400 (LZ40W1-EU)
○A ○B○C ○D○E
○F○G○H○I ○A
○J ○K
○L
○M
○N

10
○E S Button
Push this button to reset the trip meter, oil mileage meter and set the clock in the multi-function meter
(page 11). Push this button to switch between battery voltage and clock of the multi-function meter.
○F Low Fuel Indicator
The low fuel indicator goes on when the fuel level goes down to 1 steady bar (page 11).
○G Parking Brake Indicator
This scooter is equipped with parking brake. Kick down the side stand to activate this parking brake (page
26). This indicator and the side stand down indicator (page 11) go on when the side stand is kicked down.
The rear wheel will be locked when the parking brake is activated. The engine will be stopped if the side
stand is kicked down while the engine is running. This indicator goes off when the side stand is up.
○H Tachometer
This tachometer shows the engine speed in revolutions per minute (rpm). When the ignition switch is
turned on, the tachometer needle sweeps across the whole range then return to zero position for
functional test.
○ILow Oil Pressure Indicator
This indicator goes on whenever the ignition switch is in “On”position without engine running or the oil
pressure is dangerously low. It should go off immediately after the engine is running. If this indicator goes
on, have the scooter checked by an authorized SYM dealer. Refer to page 50 for more information.
○JTCS Indicator
This indicator blinks when traction control is intervening. If the traction control system is turned off, this
indicator will go on. This indicator goes on whenever the ignition switch is turned off and turned to “On”
position; this indicator will not go off until the engine is started. If the light does not go on after turning the
ignition switch on, or if the indicator remains on when the engine is started, have the scooter checked by
an authorized SYM dealer. Refer to page 32 for more information.
○K High Beam Indicator
This indicator goes on with high beam headlight is turned on.
○L Oil Check Indicator
The oil check indicator shows how long the engine oil is used. The oil check indicator turns on at every
1,000km riding distance according to the oil distance meter (page 14). When this indicator goes on,
please use the oil filler cap/dipstick to check the oil level (page 35). In oil distance meter mode, quickly
press the S button twice to reset the oil check indicator.
○M ABS Indicator
The ABS (Anti-lock Brake System) indicator goes on when the ignition switch is turned on and goes off
shortly after the scooter starts moving. If the ABS is normal, it stays off. If something is wrong with the
ABS, the indicator goes on and stays on. When the indicator is on, the ABS does not function, but if the
ABS fails, the conventional brake system will still work normally.

11
○N Multi-function Meter
○a Side Stand Down Indicator
This indicator and the parking brake indicator (page 10) go on when the side stand (page 26) is kicked
down. The engine cannot be started when the side stand is down. The engine will be stopped if the side
stand is kicked down while the engine is running. This indicator goes off when the side stand is up.
○b Luggage Box Light Indicator
This indicator goes on when the luggage box light is lit up. This indicator goes off when the luggage box
light is off.
○c Fuel Gauge
This digital fuel gauge shows the fuel level. There are 7 bars in the fuel gauge. If the fuel tank is full, all
the 7 bars go on ○a. The low fuel indicator (page 10) goes on when there is only the first bar ○b
remains, go refuel the fuel tank immediately.
a. Side stand down indicator
b. Luggage box light indicator
c. Fuel gauge
d. Coolant temperature gauge
○a○b
○c○d
○e
e. Multi-function display
- Clock
- Battery voltage gauge
- Odometer
- Trip meter
- Oil distance meter
○a
○b

12
○d Coolant Temperature Gauge
This digital coolant temperature gauge displays the temperature of engine coolant. The coolant
temperature varies with changes in the weather and engine load. If the seventh bar ○agoes on, when
the scooter is in operation, stop the engine and move the scooter to a safe place, and check the coolant
level in the reserve tank and the radiator fan (page 12).
○e Multi-function Display
When the ignition switch is turned on, battery voltage will display for approximately 10 seconds. Then the
below display mode can be shifted circularly by pushing the S button.
Push M button to switch the below display mode:
Clock
This clock displays only 24-hour mode.
To set the clock, do the below steps:
Turn the ignition switch on and wait for approximately 10 seconds until the clock displays.
Push the M button for more than 2 seconds, the hour display starts blinking. Push the S button to adjust
the hours.
NOTE :
This scooter is not equipped with a high coolant temperature indicator.
The coolant temperature gauge will not blink when the coolant temperature is too high.
Please take notice of the coolant temperature gauge when the engine is running.
NOTE :
The multi-function display always shows the previous selected mode every time you turn the ignition
switch on.
The multi-function display shows in odometer mode after the battery is reconnected.
○a

13
Push the M button. The hour display stops blinking and the minute display starts blinking. Push the S
button to adjust the tens place in the minute display.
Push the M button. The tens place stops blinking and the units display starts blinking. Push the S button
to adjust the units place in the minute display.
Push M button to finish clock setting.
Battery Voltage Gauge
The battery voltage display shows current battery voltage. It is forced display approximately 10 seconds
when the ignition switch is turned on.
Display range: 9~18 V.
Odometer
This odometer shows the total distance in kilometers the scooter has been ridden. It cannot be reset.
NOTE :
When the battery is disconnected, the clock is reset to 12:00 and starts working again when the battery is
reconnected.
If the clock is idled about 30 seconds while setting, it will exit setting mode automatically and starts
working again.
The clock setting will be finished when the clock is idled about 30 seconds while setting the minute
display.
If the ignition switch is turned off while setting the clock, the clock will exit setting mode when the ignition
switch is turned on again.
The clock works normally by the backup power even the ignition switch is turned off.
NOTE :
The data is maintained in the combination instrument even when the battery is disconnected.
When the figures come to 99999, they will return to 0 and the odometer starts working again.
This odometer only shows in kilometers.

14
Trip meter
This trip meter shows the distance in kilometers since it was last reset to zero.
In trip meter mode, quickly push S button twice to reset trip meter.
Display range: 0~999.9 km.
Oil distance meter
This meter records how long the engine oil is used. The oil check indicator (page 10) goes on at every
1,000km riding distance according to this oil distance meter. When the oil check indicator goes on, please
check the oil level dipstick (page 35).
In oil distance mode, quickly push S button twice to reset the oil distance meter.
Display range: 0~9999.9 km.
NOTE :
When the figures come to 999.9, they will return to 0 and the trip meter starts working again.
This trip meter only shows in kilometers.
NOTE :
If the oil distance meter is not reset, the oil check indicator will go on permanently until it is reset.
If the oil distance meter is not reset, when the oil distance exceed the maximum limit 9999.9 km, the
meter will return to 0 km and continue adding up values. In this condition, the oil check indicator will not
go off until it is reset.
This oil distance meter only shows in kilometers.

15
Smart Key System
The smart key system enables you to operate the ignition switch without inserting a key into a key slot. The
system runs a two-way authentication between the scooter and the smart key to verify it is a registered
smart key. There is an answer back (page 17) function to help you locate the scooter in a parking lot. This
smart key system uses low-intensity radio waves. It may affect medical equipment such as a cardiac
pacemaker or a cardiac defibrillator; keep these medical devices away from the vehicle-mounted antenna
○A. Radio waves transmitted by the antenna may affect the operation of such devices when close by.
NOTE :
The smart key system may not work in the below situations.
-The smart key is placed in a location that exposed to strong radio waves or other electromagnetic
interference.
-Nearby facilities that emits strong radio waves such as TV/radio towers, power plants, electric
transformers, airports etc.
-Carrying or using communication devices such as radios or cell phones.
-The smart key is covered by a metallic object.
In above situations, move the scooter along with the smart key to another location and press the answer
back button to perform the operation.
The seat open button can only be operated in “On”position.
○A
1. Ignition switch
1
1. Smart key
2. Answer back button
1
2

16
Operation Range of the Smart Key System
The operating range of the smart key system is approximately 1 meter from the vehicle mounted antenna.
The smart key system uses low-intensity radio waves; the operating range may become wider or narrower.
If the smart key is not in the operating range when the ignition switch is in “On”position (page 19), the
ignition switch ring will slowly flashes and the beeper on the scooter sounds to alert. If the smart key keeps
out of the operating range for more than 1 minute, the ignition switch ring will keep flashing but the beeper
stop sounding.
Handling of the Smart Keys and Emergency Keys
This scooter is included with 2 smart keys and 2 emergency keys. If the scooter battery or the smart key
battery is discharged, you can use the emergency key to open the seat. The seat lock ○Ais located near
NOTE :
When the smart key’s battery is discharged, the smart key may not work or the operating range may
become very narrow.
Placing the smart key in the front compartment or the luggage box may block the communication between
the smart key and the scooter. If the smart key is locked inside the luggage box, the smart key system
may not work properly. Always carry the smart key with you.
Lock the handlebar and take the smart key with you when leaving the scooter.
CAUTION:
Anyone can unlock the ignition switch and start the engine if your smart key is within operating range
of your scooter even if you are on the other side of a window, specially take care of your
surroundings when closing or leaving the scooter.
If the ignition switch is in “On”position, the scooter can be operated by anyone who does not have a
verified smart key. Lock the handlebar and take the smart key with you when leaving the scooter.
1
2
1. Emergency keys
2. Serial number
1
2
1. Smart keys
2. Identification number

17
the rear left shock absorber. In addition to the smart key, carry 1 emergency key with you.
If one of the smart keys is lost, use the spare smart key to operate the ignition switch. If the smart keys are
lost, contact your authorized SYM dealer for further process.
Smart Key
This smart key system is equipped with answer back function, it helps you to find the position of your
scooter. Push the answer back button to operate this function remotely, the smart key indicator blinks in
green and the beeper on the scooter will sound 3 times; the ignition switch ring also flashes 3 times.
NOTE :
Store the spare smart key securely and do not install a battery before you use it.
Do not store the smart keys in the front compartments or the luggage box, the smart keys may be
damaged by vibration or engine heat.
Do not drop, bend or hit the smart key.
Do not put heavy items or too much stress on the smart key.
Keep the smart keys away from water or other liquids.
Keep the smart keys away from strong magnetic fields.
Keep the smart keys away from medical equipment.
Do not expose the smart keys to sunlight, high temperature or high humidity.
Do not attempt to modify the smart keys.
Do not allow chemicals such as oil or fuel into the smart keys to prevent the smart keys from discolored or
damaged.
CAUTION:
Keep the primary smart key with you securely and always beware of the smart key battery status
(page 18).
○A
1
2
1. Smart key indicator
2. Answer back button
1. Ignition switch ring
1

18
If the smart key indicator goes on in red when pushing the answer back button, it shows the battery is
discharged, follow the below steps to replace the battery:
Wrap a coin or a flat head screwdriver that covered with a protective cloth, and insert into the slit ○A
and carefully remove the upper case ○B.
Remove the inner cover ○Aand replace the old battery with a new one; face the positive terminal side
up.
Battery type
CR2032
Reverse the above steps to install, make sure the ring ○Bis correctly mounted and do not damage the
rubber seal ○C.
Declaration of Conformity
This smart key system complies with the Radio Equipment Directive (2014/53/EU).
NOTE :
Do not touch the chips or the circuit board to avoid problems.
If you lack proper experience or doubt your ability, have the battery changed by your authorized SYM
dealer.
○A
○B
○A
○B
○C

19
Ignition Switch
○A Ignition Switch Knob
Push or turn the knob to operate the ignition switch. This ignition switch knob can be turned when a
verified smart key is in operating range.
○B “On” Position
Engine can be started in this position. Electrical equipment can be used. When the ignition switch knob is
in “Off”position, quickly push the knob once and turn it clockwise to set the ignition switch to “On”
position. The position lights and the ignition switch ring go on in this position. The USB power outlet can
be used in this position. If the smart key is not in the operating range (page 16) when the ignition switch is
in “On”position, the beeper on the scooter will sound to alert.
○C “Off” Position
Engine can be turned off in this position. Electrical circuits will be turned off. The ignition switch ring goes
off in this position. If you push the ignition switch knob without turning it, the ignition switch ring will go on
for 4 seconds then go off with a beep sound.
○D “Fuel Tank Cap” Position
The fuel tank cap can be opened in this position.
Turn the ignition switch knob to “Off ”position.
Push and turn the ignition switch knob anti-clockwise to open the fuel tank cap.
The ignition switch knob will return to “Off”position automatically.
○E “Lock” Position
The handlebar can be locked in this position.
Turn the ignition switch knob to “Off”position.
Turn the handlebar fully to the left.
Push and turn the ignition switch knob anti-clockwise to this position.
To unlock the handlebar, push and turn the ignition switch knob clockwise to “Off”position.
○A
○B
○C
○D
○E
○F
○G

20
○F Seat Open Button
This seat open button is designed to open the seat.
Turn the ignition switch knob to “On”position.
Push this button to open the seat.
○G Ignition Switch Ring
The ignition switch ring only goes on in the below conditions when a verified smart key is in operating
range.
The ignition switch knob is pushed in “Off”position.
The ignition switch is in “On”position.
The ignition switch ring slowly flashes when you are using the answer back function.
When the ignition switch is in “On”position, the ignition switch ring slowly flashes when the smart key is
out of the operating range.
NOTE :
The seat open button can only be operated in “On”position.
CAUTION:
Never operate the ignition switch key when the scooter is running. Turning the ignition switch to “Off ”
position will shut off the electrical system and that may result in a dangerous accident. The ignition
switch can only be turned off after the scooter is completely stopped.
If the ignition switch remains in the “On” position for a prolonged period after the engine is stopped,
the battery voltage will be reduced and this may affect engine’s start capability.
Lock the handlebar before leaving the scooter.
This manual suits for next models
1
Table of contents
Other Sym Scooter manuals

Sym
Sym Symphony cargo AY05W9-EU Series User manual

Sym
Sym Mio FS11W1-EU Series User manual

Sym
Sym Fiddle II 50 SYM Series User manual

Sym
Sym MaxSym 600i ABS User manual

Sym
Sym Mio 100 User manual

Sym
Sym FS05W1-EU Series User manual

Sym
Sym Citycom.300i User manual

Sym
Sym RV 250i User manual

Sym
Sym Scooter User manual

Sym
Sym Fiddle II 125 AW12W User manual