Synapse DIM10-220 User manual

DOC-1000512-A-2
Page 1
DIM10-220 and DIM10-220-F Bolt-on Lighting Controllers
0-10V DIMMER CONTROL, 1 SENSOR INPUT
Failure to follow these instructions could cause damage to the equipment and voids the warranty.
WARNING AND CAUTIONS:
• TO AVOID FIRE, SHOCK, OR DEATH; TURN OFF POWER AT CIRCUIT BREAKER OR FUSE AND TEST THAT POWER IS OFF BEFORE
INSTALLATION!
• Risk of Electric Shock - More than one disconnect switch may be required to de-energize the equipment before servicing.
• To be installed and/or used in accordance with appropriate NEC, local electrical codes, and regulations.
• If you are unsure about any part of these instructions, consult an electrician; all work should be performed by qualified personnel.
WARNING AND CAUTIONS MULTI PHASE POWER:
• On Multi-phase circuits, the DIM10-220 only switches one leg of power. Even though the light is not on, the 2nd phase that lands on
the neutral wire is hot.
• If the LEDs of a luminaire have a slight glow when SimplySNAP instructs the DIM10-220 to turn off the power, the other phase is still
hot. The LED glow is caused by voltage potential created by the LED driver and the LED array. This is not a function of the control
device. This is an isolation issue with the LED circuit.
SPECIFICATIONS:
• Dimensions: 6.1” L x 2.1” W X 1.6” H
• Mounting: ½” Conduit Knock Out, in Luminaire or Pole Hanging Kit
• Input Power: 120 - 277VAC, 50/60 Hz : Phase to Phase power is supported, the controller only switches one phase.
• Load Rating: 5A@ 120 – 277VAC (+/- 10%)
• Surge Rating: 6kV
• Operating Temperature: -40 to +70 C
• IP Rating: IP65
• Dimming Control: 0-10VDC, 30 mA, Class 1/2
• Wiring: 15” wires attached (+/- 1” )
• Radio: 2.4 GHz (IEEE 802.15.4), +20 dBm Transmit Power, -103 Receive Sensitivity
• Sensor Input: 0-24V
• Sensor Power Supply: 24VDC @ 20mA
• Power Monitoring: 2% accuracy, Compiant with ANSI C136.52
• Power Readings: Watts, Voltage
• Certifications: c(UL)us, FCC/IC, RoHS
• Warranty: 5 Years. See www.synapsewireless.com/warranty for warranty terms.
• Default State – Switched “LOAD” 100% energized
Controller Part Numbers:
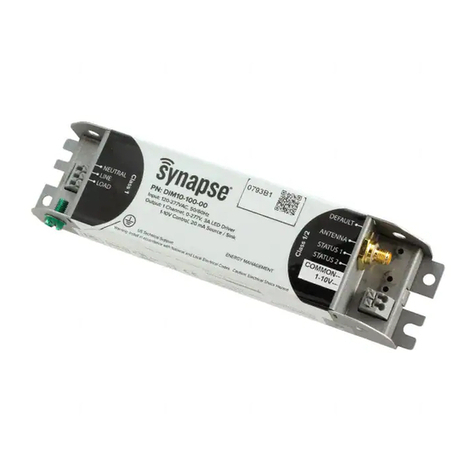
• DIM10-220-F (with internal antenna)
• DIM10-220 (with external antenna cable and Female RPSMA bulkhead connector, antenna not included).
Included Hardware:
• DIM10-220-F (with internal antenna) includes main controller with attached wires and metal locknut for securing unit to a standard
½”knockout
• DIM10-220 (with external antenna) includes main controller with attached wires, antenna cable with bulkhead, dust cap, and
mounting bracket.
Required Materials (Not included):
• If installing the DIM10-220, you will require a 50 OHM Terminator Plug for proper installation. Amphenol P/N 132360RP
• Wiring Connectors: All existing wiring connectors must be replaced with new UL listed wiring connectors. All wiring connectors must
be correctly sized for the application and the number and the size of the electrical conductors.
• If installing a DIM10-220, you will require an external antenna.
• For more details and information about available antenna options, please check www.synapsewireless.com/documentation/
INSTALLATION GUIDE

DOC-1000512-A-2
Page 2
INSTALLATION INSTRUCTIONS
WARNING: TO AVOID FIRE, SHOCK, OR DEATH: TURN OFF POWER AT CIRCUIT BREAKER OR FUSE AND VERIFY THAT POWER IS OFF
BEFORE WIRING!
DIM10-220-F (Hardware with internal antenna) Bolt-on Installation
WARNING- For best RF performance and signal strength, do not mount this device inside a luminaire. Final installed
controller should also be mounted with open space on 2 or more sides.
1. Remove the metal locknut from controller unit.
2. Feed the wires through a standard ½” knockout on a luminaire or junction box.
3. Line up the controller with the ½” knockout and make sure the ½” NPT nipple is inserted completely.
4. Place the metal lock nut over the wires. Thread the lock nut on the ½” NPT nipple of the controller.
5. Complete the wiring according to the wiring instructions and wiring diagram included in this guide on page 3.
DIM10-220 (Hardware with external antenna) Installation Option
There are two installation options for the DIM10-220.
• Option A -Inside a luminaire
• Option B -Inside a Light Pole
Note: Both options will require external antenna installation.
Option A: Installation- Inside a Luminaire
Note: When handling the bulkhead connector, be careful not to touch the center pint to prevent static damage to the
radio.
1. When removing the DIM-220 from the box, attach the 50 OHM Terminator to the RP-SMA female bulkhead connector on
the antenna cable. This component will protect the RF circuitry from static damage.
2. Locate a suitable location inside the luminaire to mount the controller using the included bracket. Be sure to choose an interior
surface and location that will not puncture the outer structure of the luminaire. Also keep in mind where the antenna will need to be
installed.
3. Find a suitable location for the antenna and drill a 1/4” hole for the antenna cable bulkhead.
4. Temporarily remove the 50 Ohm terminator. Remove the star washer and nut from the bulkhead. Insert the antenna cable
bulkhead through the 1/4” hole. Be careful not to touch the center pin to prevent static damage to the radio. Install the star
washer and nut provided. Hand tighten the nut plus an additional ¼turn. Attach the 50 Ohm terminator shown in Figure 1. This
component will protect the RF circuitry from static damage.
5. Complete the wiring according to the wiring instructions and wiring diagram included in the next section of this guide.
6. When it is time to attach the antenna, touch a grounded surface, remove the 50 Ohm terminator and screw on the antenna hand
tight. Tighten a ¼turn with a pair of needle nose pliers. Do not overtighten or the RF pin in the bulkhead will crack, creating poor
RF link quality.
7. Orient antenna direction pointing straight up or straight down for maximum RF connectivity. See Figure 2.
Option B: Installation- Pole Hanging Option
Hanging pole kits are sold separately
• For more details about installing this controller inside a pole, please refer to the Hanging Pole Kit Installation Guide.
• For more information about available hanging pole kit options, please check www.synapsewireless.com/documentation/
Figure 1
50 Ohm RP-SMA Male Terminator
Figure 2

DOC-1000512-A-2
Page 3
Wiring Instructions and Wiring Diagram
WARNING: TO AVOID FIRE, SHOCK, OR DEATH: TURN OFF POWER AT CIRCUIT BREAKER OR FUSE AND VERIFY THAT POWER IS
OFF BEFORE WIRING!
INSTALLATION AC POWER
1. Connect the electrical service black wire (hot) to the black wire (Line) on the DIM10-220.
2. Connect the black wire of the LED driver to the red wire (load)output on the DIM10-220.
3. Connect the electrical service white wire (neutral) to the white wire on the DIM10-220 And the neutral wire of the luminaire.
DIMMING CONTROL
4. Connect the DIM+ wire on the LED driver to the purple wire DIM+ wire on the DIM10-220.
5. Connect the DIM- wire on the LED driver to the gray wire DIM- wire on the DIM10-220.
SENSOR WIRING
6. Connect the DIM10-220 blue wire sensor input to the sensor control/output connection of the sensor.
7. Connect the DIM10-220 white/blue (common) to the Common (ground) connection on the sensor.
8. Connect the DIM10-220 brown wire (sensor power) to the 24VDC power connection on the sensor.
DIMMING RECOMMENDATIONS
Below are some recommendations for successful dimming using the DIM10-220.
• Use appropriate gauge wire for the application.
• Do not ground the DIM- wire. This is a return signal and is critical for dimming.
• When possible, route dimming wires away from AC lines
Wiring Instructions and Wiring Diagram- (Continued)
FUNCTION
WIRE COLOR
CLASS
LINE / L1
BLACK
CLASS 1
NEUTRAL / L2
WHITE
CLASS 1
LOAD / L1
RED
CLASS 1
DIM +
PURPLE
CLASS 1/2
DIM -
GRAY
CLASS 1/2
+24VDC SENSOR CONTROL
BLUE
CLASS 2
+24VDC SENSOR POWER
BROWN
CLASS 2
SENSOR COMMON
WHITE/BLUE
CLASS 2
Note: External Surge is
not provided, but
highly recommended
10KV or higher

DOC-1000512-A-2
Page 4
Note: The luminaire defaults ON. When power is applied to the luminaire the LEDS should turn on to full brightness. The dim signal
should be at 10 VDC and the luminaire power should be full power across the Line to Neutral or Line to Line for 208 and 240VAC.
Phase to Phase power is supported, however the controller only switches one phase.
Refer to the SimplySNAP Resource on the Synapse website for provisioning.
https://help.synapsewireless.com/
REGULATORY INFORMATION AND CERTIFICATIONS
RF Exposure Statement: This equipment complies with FCC radiation exposure limits set forth for an uncontrolled environment. This
equipment should be installed and operated with minimum distance of 20cm between the radiator and your body. This transmitter must
not be co-located or operating in conjunction with any other antenna or transmitter.
Industry Canada (IC) certifications: This digital apparatus does not exceed the Class B limits for radio noise emissions from digital
apparatus set out in the Radio Interference Regulations of the Canadian Department of Communications.
Le present appareil numerique n’emet pas de bruits radioelectriques depassant les limites applicable aux appareils numeriques de la
class B prescrites dans le Reglement sur le brouillage radioelectrique edicte par le ministere des Communications du Canada.
FCC certifications and regulatory information (USA only)
FCC Part 15 Class B: This device complies with part 15 of the FCC rules. Operation is subject to the following two conditions: (1) These
devices may not cause harmful interference, and (2) These devices must accept any interference received, including interference that
may cause harmful operation.
RADIO FREQUENCY INTERFERENCE (RFI) (FCC 15.105): This equipment has been tested and found to comply with the limits for a
Class B digital device, pursuant to Part 15 of the FCC rules. These limits are designed to provide reasonable protection against harmful
interference in a residential installation. This equipment generates, uses, and can radiate radio frequency energy and, if not installed
and used in accordance with the instructions, may cause harmful interference to radio communications. However, there is no guarantee
that interference will not occur in a particular installation. If this equipment does cause harmful interference to radio or television
reception, which can be determined by turning the equipment off and on, the user is encouraged to try to correct the interference by
one or more of the following measures: (1) Re-orient or relocate the receiving antenna; (2) Increase the separation between the
equipment and the receiver; (3) Connect the equipment into an outlet on a circuit different from that to which the receiver is connected;
(4) Consult the dealer or an experienced radio/TV technician for help.
Declaration of Conformity (FCC 96-208 & 95-19): Synapse Wireless, Inc. declares that the product name “DIM10-220” to which
this declaration relates, meet the requirements specified by the Federal Communications Commission as detailed in the following
specifications:
• Part 15, Subpart B, for Class B equipment
• FCC 96-208 as it applies to Class B personal computers and peripherals
• This product has been tested at an External Test Laboratory certified per FCC rules and has been found to meet the FCC, Part 15,
Emission Limits. Documentation is on file and available from Synapse Wireless, Inc.
If the FCC ID for the module inside this product enclosure is not visible when installed inside another device, then the outside of the
device into which this product is installed must also display a label referring to the enclosed module FCC ID. Modifications (FCC 15.21):
Changes or modifications to this equipment not expressly approved by Synapse Wireless, Inc., may void the user’s authority to operate
this equipment.
CERTIFICATIONS
Model: DIM10-220 with any Suffix.
Contains FCC ID: U9O-SM220
Contains IC: 7084A-SM220
UL File No:E513705
Contact Synapse for Support (877) 982-7888
This manual suits for next models
1
Other Synapse Controllers manuals

Synapse
Synapse SimplySNAP User manual

Synapse
Synapse DIM10-087-06 User manual

Synapse
Synapse TL7-HVG User manual

Synapse
Synapse DIM10-087-06-FW User manual

Synapse
Synapse DIM10-087-06-IP User manual

Synapse
Synapse ZhA-S1 User manual

Synapse
Synapse DIM10-087-00 User manual

Synapse
Synapse DIM10-087-06-F3W User manual

Synapse
Synapse DIM10-087-06-FW User manual

Synapse
Synapse SimplySNAP SS420 User manual