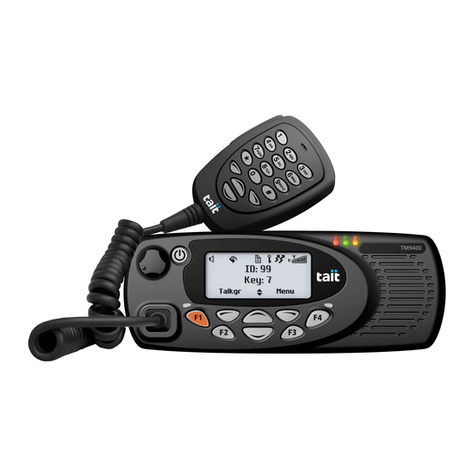
Tait t2020 User manual


1
Contents
Contents ........................................................................................... 1
Safety Warnings .............................................................................. 4
FCC RF Exposure Limits ..................................................................... 4
Additional Safety Warnings ................................................................... 4
Getting Started ................................................................................ 5
Variation in Radio Setup ....................................................................... 5
Radio Controls and Indicators ......................................................... 6
On/Off/Volume Control ...................................................................... 6
Key Functions ....................................................................................... 6
Radio Indicators ................................................................................... 8
LED Indicators ................................................................................ 8
Control Head Display Indicators ...................................................... 9
Basic Operation .............................................................................. 11
Turning the Radio On and Off ........................................................... 11
Adjusting the Volume ......................................................................... 11
Operating Modes ................................................................................ 11
Selecting a Channel ............................................................................. 11
Selecting a Group ................................................................................ 12
Receiving a Call ................................................................................. 12
Making a Call ..................................................................................... 13
Transmit Timer ................................................................................... 14
What You Hear on a Channel ............................................................ 14
CTCSS and DCS mute ................................................................. 14
Selective Call Mute ....................................................................... 15
RF Squelch ................................................................................... 15
Monitor ......................................................................................... 15
Muting an External Device ............................................................ 16
Scanning and Voting Groups ............................................................... 16
Activating Scan Mode .................................................................... 16
Making a Call in Scan Mode .......................................................... 17
Priority Scanning ........................................................................... 17
Voting ........................................................................................... 17
Tait Electronics Ltd has made every effort to ensure the accuracy of the
information in this manual. However, Tait Electronics Ltd reserves the right
to update the radio and/or this manual without notice.

2
5-Tone Signaling ............................................................................ 18
Receiving a 5-Tone Call ..................................................................... 18
Clearing a Call ............................................................................... 18
Receiving a 5-Tone Group Call ..........................................................19
Making a 5-Tone Call ......................................................................... 19
Preset 5-Tone Calls ........................................................................19
Dialing 5-Tone Calls ......................................................................19
Call Acknowledgement ..................................................................21
Making a 5-Tone Group Call .............................................................. 21
Dialing 5-Tone Group Calls .......................................................... 22
5-Tone Emergency Calling ................................................................. 23
Status Messages ....................................................................................23
Status Message Display ................................................................... 24
Assigning a Status Message .............................................................24
Other 5-Tone Features ........................................................................ 25
Call Diversion ................................................................................25
Call Queuing .................................................................................25
Deferred Calling ............................................................................ 26
Immediate Callback ....................................................................... 26
Unanswered Call Alert ...................................................................26
G-STAR ID Encoding ....................................................................... 27
Making a G-STAR Call ......................................................................27
G-STAR Emergency Calling ............................................................... 27
2-Tone Decoding ............................................................................ 28
Receiving a 2-Tone Call ..................................................................... 28
DTMF Calls ...................................................................................... 29
Preset DTMF Calls ..............................................................................29
Dialed DTMF Calls ............................................................................. 29
Dialing Tones A to D .................................................................... 29
Dialing Type .................................................................................. 30
Dialing a DTMF Call ..................................................................... 31
Alphanumeric Entry Mode ............................................................ 32
Selecting an Alpha Symbol ............................................................. 32
User Function Menu ....................................................................... 34
User Function Menu Options ..............................................................34
Altering User Options .........................................................................35
Accessing the User Function Menu ................................................ 35
3
Changing an Option Setting .......................................................... 36
Call Queuing ...................................................................................... 36
Call Queue Not Empty ................................................................. 37
Accessing the Call Queue .............................................................. 37
Exiting Call Queue Entry Mode .................................................... 38
Call Queue Full ............................................................................. 38
Call Diversion ..................................................................................... 38
Activating Call Diversion ............................................................... 39
Exiting Call Diversion Mode ......................................................... 40
Receiving a Call During Call Diversion ......................................... 40
Calling a Radio in Diversion Mode ............................................... 40
Programmable Channel Signaling ........................................................ 40
Changing the Channel Signaling .................................................... 41
Exiting Signal Programming Mode ................................................ 42
Programmable Scanning and Voting Groups ....................................... 42
Starting a Group Programming Session .......................................... 42
Changing a Channel’s Group Membership .................................... 43
Exiting a Group Programming Session ........................................... 43
Other Features ............................................................................... 44
Economy Mode .................................................................................. 44
Emergency Mode ................................................................................ 44
Stealth Emergency ......................................................................... 44
Emergency Cycling ....................................................................... 45
Repeater Talkaround .......................................................................... 45
Maintenance and Troubleshooting .............................................. 46
Basic Maintenance .............................................................................. 46
Troubleshooting ................................................................................. 46

4 Safety Warnings
Safety Warnings
FCC RF
Exposure
Limits
This product generates radio fre-
quency energy during transmissions.
This device must be restricted to
work-related use in an occupational/
controlled exposure environment.
The radio operator must have control of the expo-
sure conditions and duration of all persons exposed
to the antenna of this transmitter to satisfy FCC RF
exposure compliance. This device is not approved
for general population use.
■It must only be used with authorized accessories
and antennas.
■The operator must ensure that the minimum safe
distance of 35 inches (0.9 m) between persons
and the antenna is maintained during transmis-
sions.
■Do not exceed a duty cycle ratio of 50% trans-
mit mode to stand-by or receive modes. The
radio is in transmit mode when the PTT key on
the microphone is pressed and the transmit indi-
cator ( ) shows on the control head display.
Additional
Safety
Warnings
■Switch the radio off at petrol filling
stations or near flammable liquids or
gases.
■Switch the radio off in the vicinity of
explosive devices and blasting zones.
■Using a handheld microphone or a
radio while driving a vehicle may vio-
late the laws and legislation that apply
in your country or state. Please check
the vehicle regulations in your country or state.

Getting Started 5
Getting Started
Variation in
Radio Setup
Your T2020 mobile radio has been programmed to
suit your communication needs. If you are unsure
of which of the features described in this manual are
available on your radio, consult your system man-
ager or the person who programmed your radio.
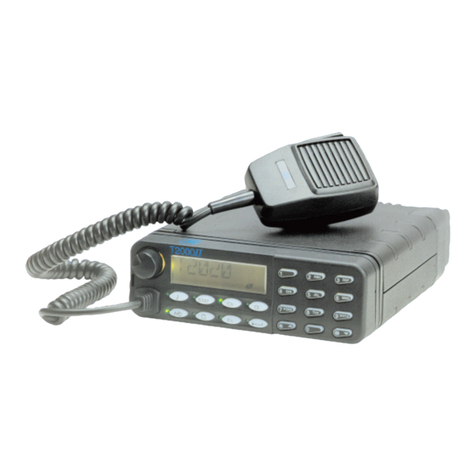
T2020 Control Head

6 Radio Controls and Indicators
Radio Controls and Indicators
Your T2020 radio controls and indicators include
the on/off/volume control, control head keys and
display indicators.
On/Off/
Volume
Control
Rotating the on/off/volume control clockwise
turns on the radio and increases volume. This also
controls the volume level of audible indicators and
confidence tones.
Key Functions
Key functions are outlined in the table below. Func-
tions marked with a * must be programmed in
order to operate.
Symbol Key Name Function
Call * Activates 5-tone dialing mode.
You can make 5-tone calls to other
users.
* Long press: Sends a preset
5-tone call programmed for the
currently selected channel.
Status * Activates status entry mode. You
can select programmed status mes-
sages to indicate your current sta-
tus, such as “EN ROUTE” or “AT
LUNCH” (see “Status Messages”
on page 23).
Channel Activates channel selection/entry
mode so that you can change to
another channel or scan group.
* Long press: Turns repeater
talkaround on and off (see
“Repeater Talkaround” on
page 45).
Alphanumeric * Activates alphanumeric entry
mode (see “Alphanumeric Entry
Mode” on page 32).

Radio Controls and Indicators 7
Monitor * Controls the signaling mute and
RF squelch control of your receiver
(see “Monitor”on page 15).
* Long press: Turns squelch over-
ride on and off.
Auxiliary * Activates emergency mode or
sends a one touch 5-tone or DTMF
call.
* Controls an internal hardware
option (e.g. a scrambler).
Function * Activates user function menu
entry mode, where some radio fea-
tures can be customized (see “User
Function Menu Options”on
page 34).
Enter Completes dialing entries (channel
entries, 5-tone calls, DTMF dialing,
alphanumeric entries and option
selections).
Star/Up Star: For 5-tone and DTMF dialing.
Up: When the scrolling available
indicator ( ) shows on the con-
trol head display, this key is used to
scroll through a list of options.
Pound/Down Pound: For 5-tone and DTMF dial-
ing.
Down: When the scrolling available
indicator ( ) shows on the con-
trol head display, this key is used to
scroll through a list of options.
0to 9Dials numbers when the LED (light
emitting diode) beside the alpha-
numeric key is not illuminated
().
[ABC] to
[WXYZ]
Dials letters when the LED beside
the alphanumeric key is illuminated
().
Symbol Key Name Function

8 Radio Controls and Indicators
Radio
Indicators
In combination, the radio’s LED indicators and
control head display indicators provide you with
visual information on the state of your radio. The
radio indicators are summarized in the following
tables.
LED Indicators
Indicator Name Meaning
Call LED Steady: Your radio has received a
2-tone or 5-tone call.
Flashing: Your radio received a
call which was not answered.
Status LED Your radio is ready for you to
select a status code relating to
your current activity.
Channel LED Steady: Your radio is ready for
you to enter information to
select a new channel.
Flashing: The current channel is
in repeater talkaround mode.
Alphanumeric
LED
You can enter information, such
as an alpha symbol label, from
the keypad.
Monitor LED Steady: The signaling mute (if this
option has been programmed)
has been overridden. This may be
because the microphone is off the
microphone clip, or because you
have pressed the monitor key.
Flashing: Monitor key has been
pressed for long enough to over-
ride RF squelch.
Note that when the radio is oper-
ating normally, this indicator is off.

Radio Controls and Indicators 9
Control Head Display Indicators
Auxiliary LED Indicates the state of the auxiliary
options switch.
The programmed configuration
of the auxiliary options switch
determines whether this indica-
tor is displayed continuously , not
displayed continuously, or is only
displayed when the auxiliary key
is pressed.
Function LED Steady: You can change user pro-
grammable options.
Flashing: There is a queued 5-
tone call.
Enter LED You have pressed the enter key.
Call, Status,
Channel,
Alphanumeric
and Function
LEDs
When none of these LEDs are
illuminated, the radio is operat-
ing in DTMF mode (see “DTMF
Calls”on page 29).
Indicator Name Meaning
BUSY Busy Indicator There is activity on the current
channel. If the selective call mute
is active (see the monitor key
function description on page 15),
you may not hear the traffic until
you lift your microphone off the
microphone clip.
Transmit
Indicator
Your radio is transmitting. This
message is displayed when you
press the PTT key. This message is
also displayed briefly when you
make a 5-tone, G-STAR, DTMF or
alpha symbol call.
Indicator Name Meaning

10 Radio Controls and Indicators
SCAN Scan Indicator Your radio is sampling each of a
group of channels for any activity.
When it detects traffic on a chan-
nel, scanning halts on the active
channel.
WAIT Wait Indicator The channel you are using is busy
and your call has been deferred
to a queue. The radio indicates
the channel is available with a
beep.
Scrolling
Available
Indicator
Scrolling is available and you are
able to use the up and down
scroll keys ( / ) to
move through a list of options. To
select an option, press the enter
key ( ).
Indicator Name Meaning

Basic Operation 11
Basic Operation
This section describes the basic operation of your
radio, including turning the radio on and off,
adjusting volume, selecting channels, transmitting
calls and receiving calls.
Turning the
Radio On and
Off
Rotating the on/off/volume control clockwise
turns on the radio and increases volume. Rotating
the control counterclockwise decreases volume and
turns off the radio.
Adjusting the
Volume
1. Turn the radio on and rotate the on/off/volume
control clockwise to about one third of its
maximum setting. A power-up message may
appear in the control head display.
2. Press and hold the monitor key ( ) until the
monitor LED flashes ( ). The radio then
gives two short beeps.
3. Adjust the on/off/volume control, if necessary,
and depress the monitor key briefly to return the
radio to the quiet state.
4. You may need to finally set the volume level
when you receive your first call.
Operating
Modes
Once the power-up sequence is complete, your
radio may enter the mode last used when the radio
was previously turned on. Alternatively, the radio
may be programmed to enter the same mode each
time it powers up, for example channel selection/
entry mode.
Selecting a
Channel
1. Press the channel key ( ) to enter channel
selection/entry mode. The scrolling available
indicator ( ) appears in the control head

12 Basic Operation
display, along with the current channel name e.g.
REGION2.
2. Press the up and down keys ( / ) to
scroll through the list of available channels, until
the control head display shows desired channel
name or
use the keypad (0to 9) to enter the new channel
number.
3. Press the enter key ( ) to initiate the call.
Note: You cannot change channels while
transmitting.
Selecting a
Group
A group is a collection of channels grouped
together for scanning or voting. Select a group the
same way as a channel.
Receiving a
Call
Your radio remains muted until there is valid traffic
on the channel your radio is currently on.
The BUSY indicator in the control head display
appears when there is traffic on the channel,
although the radio’s squelch and programmed mute
features may prevent you from hearing the traffic.
See “What You Hear on a Channel”on page 14.
Consult your system manager or the person who
programmed your radio about the special signaling
options programmed in your radio.

Basic Operation 13
Making a Call
1. Select the desired channel or group.
If the BUSY indicator appears, the channel is
active with traffic and you must wait until the
channel is available. If you attempt to transmit
while the BUSY indicator is displayed, the WAIT
indicator appears. The radio sounds a warning
beep when the channel is available.
2. Lift the microphone off the microphone clip
once the channel is available.
You may also have to press the monitor key
()briefly, depending on the options fitted
to your radio.
3. Hold the microphone about 2 inches (5 cm)
from your mouth and press the PTT key, located
on the side of the microphone (Step 1).
4. Speak clearly into the microphone.
5. Release the PTT key when you have finished
talking (Step 2).
Step 2Step 1

14 Basic Operation
Transmit
Timer
Your radio is fitted with a transmit timer that limits
the amount of time you can transmit continuously.
If the radio gives three beeps, the transmit timer is
about to expire. You must release the PTT before
you can transmit again. The radio may be pro-
grammed to prevent transmission for a period after
the transmit timer has expired.
What You
Hear on a
Channel
What traffic you hear on a channel depends on how
your radio was programmed. Your radio can be pro-
grammed so that you hear all conversations on a
channel, or your user group may be segregated from
others, using various types of signaling (CTCSS,
DCS, 2-tone or 5-tone).
When special signaling is active, you are not able to
hear other groups talking on the current channel
unless the monitor function is active (see “Monitor”
on page 15). If the channel is busy, the BUSY indica-
tor appears in the control head display.
There are three types of muting control which may
screen your calls:
■CTCSS and DCS mute,
■selective call mute, and
■RF squelch.
Note: RF squelch is always programmed to
operate in your radio, but the CTCSS, DCS
and selective call mutes are dependant on
the way your radio is programmed.
CTCSS and DCS mute
CTCSS (continuous tone controlled subaudible sig-
naling) and DCS (digitally coded squelch) signaling
use subaudible tones to isolate your calls, so that

Basic Operation 15
your radio only unmutes if the call carries the sub-
audible tone or code specific to your fleet or group.
Selective Call Mute
2-tone decoding and 5-tone signaling use audible
tones to isolate your calls, so that your radio only
unmutes if the call carries the tones specific to your
fleet or group.
RF Squelch
The radio’s RF squelch allows reception of a signal
only when it is above a factory-set threshold, so that
only intelligible signals are made audible. Your radio
can be programmed to override RF squelch using
the monitor key ( ), allowing all activity on a
channel to be heard, including noise.
Activating squelch override allows you to hear weak
but intelligible transmissions.
Monitor
The monitor key ( ) can be programmed to
override one or more of the muting controls. In the
most common configuration, monitor operates in
the following way:
1. Press the monitor key briefly (less than one
second) to override CTCSS/DCS or selective
call mute, or both. Press the monitor key again
to reactivate CTCSS/DCS or selective call mute.
Note: If hookswitch monitoring is pro-
grammed, lifting the microphone off the
microphone clip has the same effect.
2. Press and hold the monitor key for longer than
one second to activate RF squelch override.

16 Basic Operation
Press the monitor key again to reactivate RF
squelch.
Muting an External Device
Your radio may be fitted with the ability to mute
another device, such as a car stereo, so that received
or transmitted messages are heard.
Scanning and
Voting
Groups
A series of channels may be grouped together so
that the radio can scan through them looking for
activity. When a busy channel is detected in a group
and the signaling is valid (see “What You Hear on a
Channel”on page 14), the SCAN indicator flashes,
and the radio stops on that channel. The name of
the captured channel is then displayed, rather than
the group name, and you can now hear the trans-
mission. Scanning resumes when the channel is no
longer busy or the signaling is no longer valid.
You may be able to change the channels included in
your group (see “Programmable Scanning and Vot-
ing Groups”on page 42).
Activating Scan Mode
1. Place the microphone on the microphone clip.
Note: Your radio may be programmed
to scan whenever the microphone is off
the microphone clip. Check with the
person who programmed your radio.
2. Select the required group the same way as you
select a channel (see “Selecting a Channel”on
page 11). The group name and SCAN indicator
are shown in the control head display.

Basic Operation 17
3. To cancel scanning, select a non-scanning
channel. The SCAN indicator disappears from the
control head display
Making a Call in Scan Mode
If you wish to make a call when the radio is in scan
mode, lift the microphone off the microphone clip
to suspend scanning. If the radio has halted scanning
to monitor the traffic on a channel, it remains on
that channel when you lift the microphone off the
clip. If scanning has not halted, the radio reverts to
the programmed default transmit (“home”) chan-
nel.
Priority Scanning
One or two priority scan channels may be set.
These channels are scanned more often than other
channels and are scanned periodically when a non-
priority channel is busy.
Voting
Voting works the same way as scanning, except the
group’s member channels carry the same traffic and
the radio searches for and stops on the channel with
the strongest signal.

18 5-Tone Signaling
5-Tone Signaling
5-tone (also known as multi-tone) signaling is selec-
tive calling that segregates a group of users from
others on a channel, using a set of audible tones.
Each radio has a unique identity and you can direct
calls to individuals within your own group and
make different types of calls. An emergency call
may also be programmed.
Receiving a
5-Tone Call
When a call is received that contains your radio’s
identity, the radio gives a ringing tone and the call
LED flashes.
Note: Your radio may be programmed to
display the caller’s identity when a call is
received. This can be either a name or a
number. Contact your system manager or the per-
son who programmed your radio for more informa-
tion.
To accept the call, press the PTT key and begin
speaking.
Clearing a Call
If you do not wish to answer the call, press any of
the control head keys to cancel the ringing tone and
clear the call. The function associated with the key
you press will not be invoked.
Other manuals for t2020
2
Table of contents
Other Tait Radio manuals

Tait
Tait TM9155 User manual

Tait
Tait T2020 Series II User manual

Tait
Tait t2020 User manual

Tait
Tait TM8100 mobiles User manual

Tait
Tait TM9355 User manual

Tait
Tait TM9400 User manual

Tait
Tait TM8100 mobiles Quick start guide

Tait
Tait T2000-300 Quick start guide

Tait
Tait T8000 Quick start guide

Tait
Tait TM8000 Series User manual

Tait
Tait TM8235 User manual

Tait
Tait TM9100 Original instructions

Tait
Tait T2020II User manual

Tait
Tait TM8235 User manual

Tait
Tait TM2210 User manual

Tait
Tait T2000 Series User manual

Tait
Tait TM8200 mobiles User manual

Tait
Tait TM8100 mobiles User manual

Tait
Tait TM9400 User manual

Tait
Tait TM9456 User manual