Tally Xpress T8016 User manual

User Guide
Xpress T8016 Color Laser
Printer
TALLY
May 2004

These materials are the property of Tally and are licensed to you for the sole
purpose of giving necessary instructions in proper operation of the system. All these
materials must be returned to Tally at its request. Any other use or application of
these materials and the information contained herein is unauthorized and not
endorsed by Tally. Printed material is registered by individual customer. There will
be a $50 charge for every such assigned copy that cannot be recovered from the
customer in its entirety originally as issued, and returned to Tally upon request.
All rights reserved, including translation in the United States of America, as well as
in Canada and other countries of the International Copyright Union. All rights
reserved under Pan-American Copyright Conventions and under the Universal
Copyright Convention. No part of these materials may be reproduced, translated, or
appropriated in any form or by any means (including electronic, mechanical, or
other, such as photocopying, recording, or any information storage and retrieval
system) without permission in writing from the publisher. Inquiries should be
addressed to Tally at:
1-800-436-4266

Contents
Contents
1Printer Overview................................................................................................. 1
Printer Parts 2
About the Control Panel 3
Selecting a Message Window Language3
Control Panel Indicators4
Control Panel Keys5
Menu, Select, Previous, and Next Keys6
2Replacing Consumables ...................................................................................7
Introduction 8
Consumable Life Expectancies 8
Consumables Life Expectancies Chart 10
Replacing the Fuser Unit 11
Replacing the Imaging Unit 16
Replacing a Toner Cartridge 20
Replacing the Transfer Unit 25
3Using Media......................................................................................................27
Introduction 28
Media Storage and Handling 29
General Notes about Media32
Media Trays32

Contentsii
Media Sizes and Print Area 33
Page Margins 34
Image Alignment35
Output Tray35
Media 36
Plain Paper 38
Special Note about Custom (and Oversized) Media39
Thick Stock39
Envelopes 41
Glossy Media41
Label Stock41
Postcards42
Transparencies (Uncoated Only) 43
Loading Media 44
Preparing the Media44
Loading and Printing Media44
Using Media Other Than Plain Paper49
Duplexing 54
4Maintaining the Printer.....................................................................................57
Introduction 58
Cleaning 60
Internal Cleaning Cycles60
Cleaning Schedule 60
5Troubleshooting...............................................................................................65
Introduction 66
Printing a Status Page 66
PDF File Printing 67
Adjusting Memory Clients for PDF Printing67
Printing Preformatted Files67
Troubleshooting PDF Direct Printing67
Preventing Media Jams 68
Automatic Jam Recovery 69
Understanding the Media Path 69
Understanding Media Jam Status Messages 70
Clearing Media Jams 71
Media Jam Duplex72
Media Jam Feed73
Media Jam Fuser77
Media Jam Registration79
Mismatch Jam80
Solving Problems 81
Media Jams and Media Transport Problems81
Other Problems 84
Printing Quality 90
Status, Error, and Service Messages 96

Contents iii
Service Messages105
HP-GL Error Codes and PCL Error Codes106
PostScript Errors107
Additional Assistance 107
6Installing Other Accessories......................................................................... 109
Introduction 110
Antistatic Protection 110
Dual In-Line Memory Modules (DIMMs) 111
High-capacity Input Feeder (HCIF) 117
Media Trays120
Tray Cover 121
7Color Printing.................................................................................................123
Introduction 124
Color Registration 124
Color Registration124
8Storage, Deinstallation, Shipping, and Packing..........................................127
Storing the Printer 128
Deinstalling the High-capacity Input Feeder(HCIF) 129
Shipping the Printer 131
Prepare the Printer for Shipment131
Packing the Printer 136
ATechnical Specifications...............................................................................141
Requirements 142
Space Requirements142
Location Requirements142
Power Requirements144
ENERGY STAR Compliance145
Engine and Controller Specifications 146
Print Speed 146
Engine 147
Controller 148
Electrical150
Physical 152
Consumable Life Expectancies 153
Menus 155
Configuration Chart Conventions155
Security Menu 155
Operator Control Menu156
Administration Menu 157
Administration/Communications/Resident NIC/ Menu158
TCP/IP Menu 162
Index .....................................................................................................................163

Contentsiv

1
Printer Overview

Printer Parts2
Printer Parts
The following drawings illustrate the parts of your printer referred to through-
out this guide, so please take some time to become familiar with them.
Front View
Rear View
•
‚
ƒ
„
†
ˆ
…
‡
‰
Š
1—Top cover/face-down output
tray
2—Control panel and message
window
3—Front cover
4—Cover Button B
5—Multipurpose tray (shown
closed)
6—Cover Button A
7—Ventillation grilles
8—Power switch
9—Upper
media tray
10—Media level guide
11—Carrying grips (both sides) 11
1—Topcover
2—Tonercartridges
3—Ventillationgrilles
4—ACpowerconnection
5—Interfacepanel
6—Mediatraycover
‚
ƒ
„
†
…
•

About the Control Panel 3
Top Internal View
About the Control Panel
The control panel, located on the top of the printer, allows you to direct the printer’s
operation. In addition, it displays the current status of the printer, including any
condition that needs your attention.
Status messages are listed in the Maintenance Guide and the User’s Guide.
Selecting a Message Window Language
When you receive your printer, the message window language is set to
English. However, status messages and configuration menus can be
displayed in the message window in Czech, Danish, Dutch, English, French,
German, Italian, Japanese (Katakana), Portuguese, and Spanish. Chinese
(Simplified), Chinese (Traditional), and Korean (Hangul), don’t display in the
control panel message window, but choosing them makes CrownView display
in the correct language.
Button A
1—Transferunit
2—Registrationrollers
3—Imagingunit
4—Imaging unit cover
…
†‡
Button B
5—Duplexer rotator
6—Fuser unit
7—Imaging unit cover
„
•‚ƒ
WINDOW
8 buttons are used in printer configuration
MESSAGE
4 indicators provide printer status
information
A 2-line, 16-characters/
line, message window
displays status messages
and configuration
information.

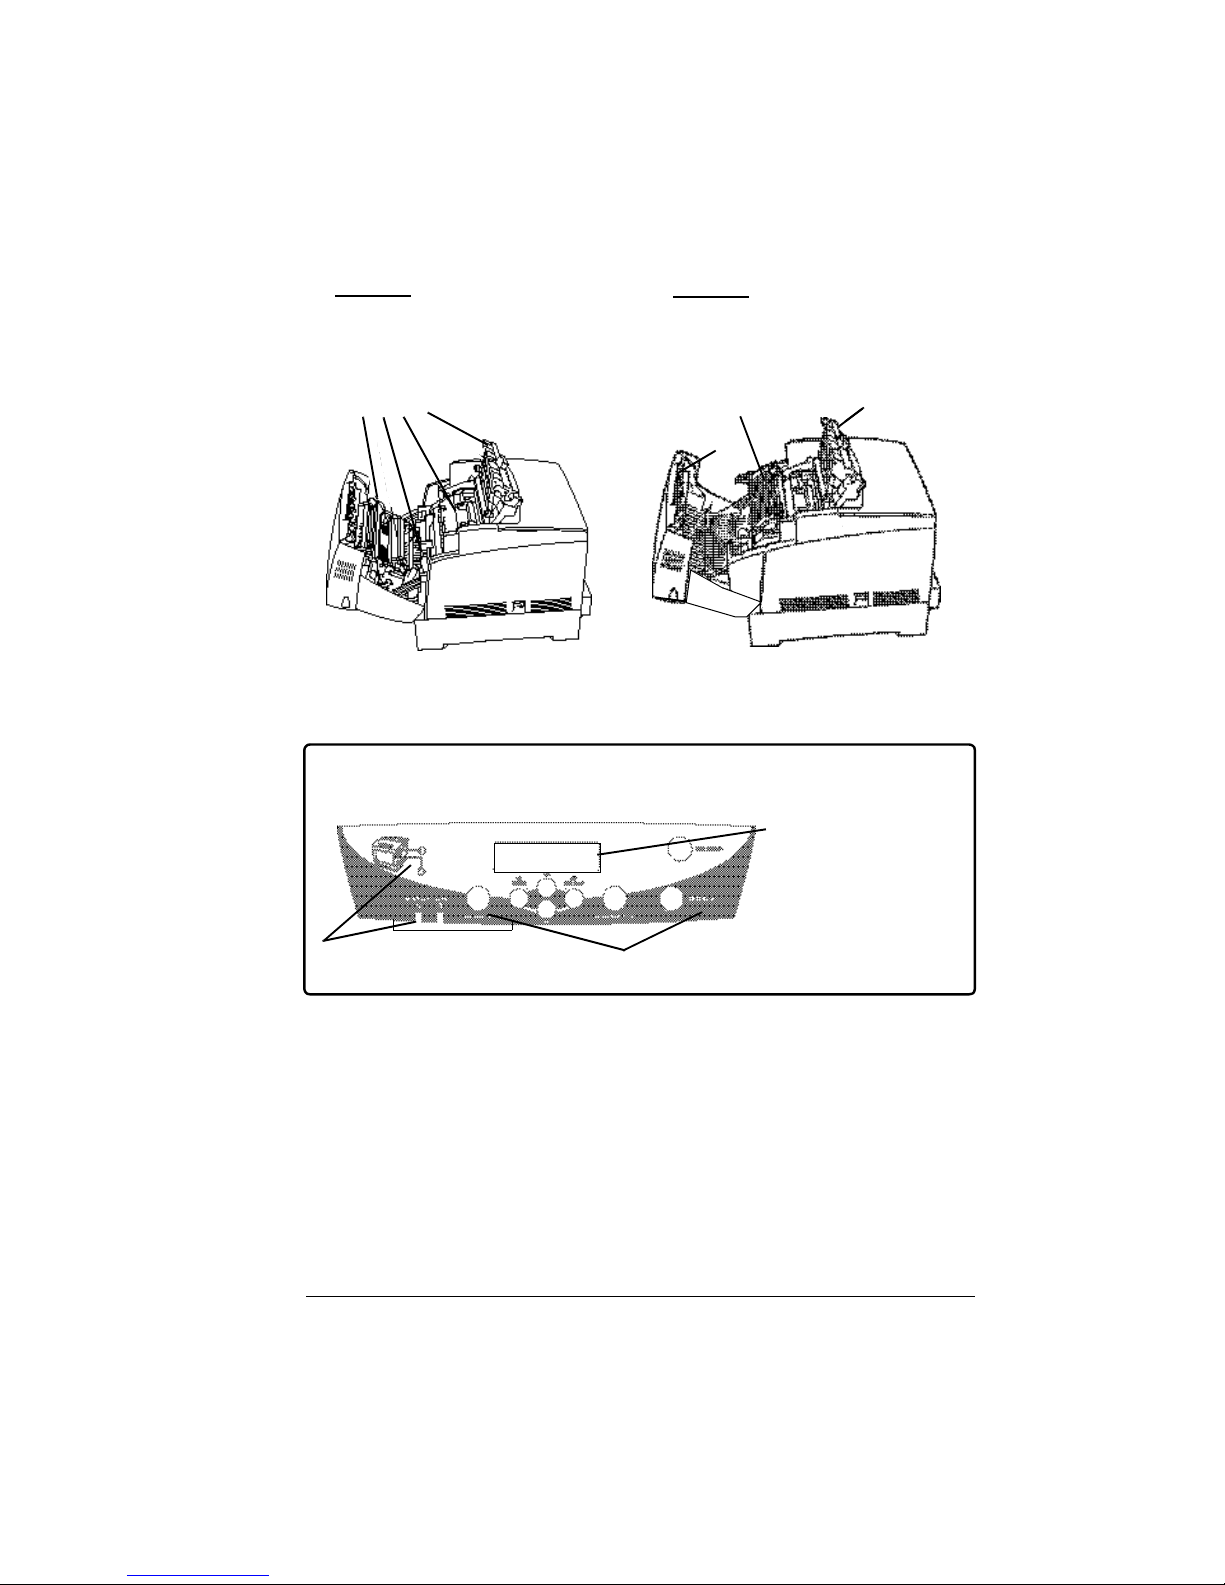
About the Control Panel4
Selecting a language in the control panel also allows media size selections
to be localized.
If you want to change the message window language, use the following
control panel sequence (slightly dependent upon the installed options):
2? The printer must be restarted for changes to the Keypad Language
menu to take effect. You can either let the printer restart automatically
after you save the change and exit from the Configuration menu, or
you can wait for the change to take effect the next time you manually
turn on the printer.
Control Panel Indicators
Press Key (Until) Display Reads
Online IDLE (and online LED is off)
Menu OPERATOR CONTROL
Next () ADMINISTRATION
Select ADMINISTRATION–COMMUNICATIONS
Previous () ADMINISTRATION—MISCELLANEOUS
Select MISCELLANEOUS—SAVE DEFAULTS
Previous () MISCELLANEOUS—KEYPAD LANGUAGE
Select KEYPAD LANGUAGE—*ENGLISH
Next ()/
Previous ()
Press the Next and/or Previous key until the
language required is displayed
Select <LANGUAGE> IS SELECTED
Indicator Off On
No problem These lights indicate the latch that needs to be
pressed to gain access to the jam clearance
area corresponding to the jam message that
appears on the message window.
No problem The printer requires operator attention (see the
status message in the message window).
The printer is
not receiving
data.
The printer is receiving or processing data
through one or more of its interfaces (usually
accompanied by a status message in the
message window).
A
B

About the Control Panel 5
Control Panel Keys
Key Function
The Online key switches the printer between on line and off
line status.
When off line, the printer continues printing until it has finished
all jobs received, but it doesn’t accept any new data. Although
jobs continue to compile and print using the data already
received, a job may be interrupted. If a remote console has
taken the printer off line, pressing the Online key on the control
panel will not take effect until the remote console puts the
printer back on line.
You must take the printer off line before using all keys except
the Cancel, Print Status?, and MP Size keys.
The Cancel key allows you to cancel one or all print jobs. (See
the CrownBooks for complete information.) It also allows you to
end a job.
If the printer is on line, press the Cancel key to cancel the job
currently printing. To cancel the entire print job if the computer
has not completely sent the job, use the printer driver. If you
press the Cancel key by mistake, or if you decide not to cancel
a print job after pressing this key, press the Menu key to
“cancel” the Cancel key’s function.
PRINT
STATUS? Use thePrint Status? key to print status pages. At thePRINT
STATUS YES message on the control panel, press the Select
key.
Use the MP Size key to set the multipurpose tray to the correct
media size. The media size must also be set in the driver.
MP SIZE

About the Control Panel6
Menu, Select, Previous, and Next Keys
Before using any of these printer configuration keys, press the Online key to
take the printer off line.
Key Function
Press Select to access a menu or to choose a displayed menu
option.
The Menu key provides access to the configuration menu.
First press the Online key to take the printer off line, and then
press the Menu key to access the configuration menu. When
you’re changing the printer configuration, press this key to
cancel a change (before pressing the Select key), to return to a
previous menu, or to return to a previous character when
entering character information.
Press the Previous key to return to the previous selection or
option for the current menu. When changing character
information, use this key to return to the previous choice
for the current input character.
Press the Next key to advance to the next selection or option
in the current menu. When changing character information,
use this key to advance to the next choice for the current input
character.

2
Replacing
Consumables

Introduction8
Introduction
Consumable Life Expectancies
What is a consumable?
A consumable is an item that needs to be replaced at regular intervals. For
the T8016, consumables include:
nFuser unit
nImaging unit
nMedia feed roller
nToner cartridges
nTransfer unit
What is a plane?
A plane (also called a face) is a singlepass of media past the imaging unit. A
two-sided (duplex) page (also called a sheet) consists of two passes of the
imaging unit.
The number of sheets printed shown on the startup page may differ from the
sheets printed and faces printed statistics on the consumables statistics page
(Operator Control/Consumables/Print Statistics). The numbers on the startup
page refer to number of sheets/faces printed during the lifetime of the printer.
Item Page
“What is a consumable?” page 8
“What is a plane?” page 8
“What is the life expectancy of consumables?” page 9
“How do I order consumables?” page 10
“Where can I get more information?” page 11
“How do I replace the fuser unit?” page 11
“How do I replace the media feed roller(s)?” page 14
“How do I replace the imaging unit?” page 16
“What are the toner cartridge life expectancies?” page 20
“How should I handle toner cartridges?” page 21
“How do I replace a toner cartridge?” page 21
“How do I replace the transfer unit?” page 21

Consumable Life Expectancies 9
What is the life expectancy of consumables?
Attention
The stated consumable life expectancy is expressed in simplex letter/A4
pages @ normal 5% coverage in continuous printing—for example,
average four-page jobs (optimal consumable life). A duplex page is
equivalent to two simplex pages.
The actual life expectancy will vary (or be reduced) based on printing
under specific operating conditions and other printing variables, such
as intermittent printing—for example, one-page jobs, ambient
temperature, humidity, media type, page size, and content of material
printed—for example, text or graphics.
Attention
Failure to follow instructions as outlined in this manual could result in
printer failure or damage. Use of non-Tally consumables or use of
non-supported print media may cause damage to your printer and void
your warranty. In this case, standard time and material charges might
be applied to service your printer for that particular failure or damage.
The following messages indicate that an item needs to be replaced.
Item This item needs replacing
after... Comment
Imaging unit
(4 OPCs, 4
developers,
imaging unit
transfer roller)
REPLACE IMAGING UNIT
displays in the message
window.
See “How do I replace the
imaging unit?” on page 16.
After replacing the
imaging unit, the imaging
unit automatically resets
its statistics.
Toner
cartridge <COLOR> TONER EMPTY
displays in the message
window.
See “How do I replace a toner
cartridge?” on page 21.
After replacing the toner
cartridge, reset the
statistics on the control
panel. (Operator Control/
Consumables/ Item
Replaced/<Color> Toner)
menu.

Consumable Life Expectancies10
Consumables Life Expectancies Chart
How do I order consumables?
To order supplies, call 1-800-436-4266.
Transfer unit REPLACE TRANSFER UNIT
displays in the message
window.
See “Replacing the Transfer
Unit” on page 25.
After replacing the
transfer unit and media
feed rollers, reset the
statistics on the control
panel (Operator Control/
Consumables/Item
Replaced/Transfer Unit)
menu.
Fuser Unit and
Media Feed
Roller(s)
Approximately 100,000 simplex pages
Imaging Unit Approximately 45,000 simplex pages
Toner
Cartridges Percent Coverage of Simplex Pages (Average Job
Size of Four Continuous Pages)
5% 10% 15% 20% 25% 30% 35% 40%
Black 8,500 4,250 2,833 2,125 1,700 1,417 1,214 1,063
Yellow, Magenta,
Cyan 6,000 3,000 2,000 1,500 1,200 1,000 857 750
Transfer Unit Approximately 25,000 simplex pages @ 5% coverage.
Item This item needs replacing
after... Comment

Replacing the Fuser Unit 11
Replacing the Fuser Unit
WARNING!
The fuser can become extremely hot and cause severe burns.
Make sure the printer is cool before handling it.
How do I replace the fuser unit?
1Turn the printer off •.
2Open the front cover (button A) ‚, ƒ.
3Open the imaging unit cover.
The fuser fuses the toner onto the media.
Replace the fuser unit (fuser and media
feed rollers).
A

Replacing the Fuser Unit12
4Close the front cover.
5Open the front cover (button B) •, ‚.
6Unlock the fuser unit by sliding the two
side locks forward.
7Lift up both levers of the fuser unit.
B
1
2

Replacing the Fuser Unit 13
8Grip the unit’s levers, and gently lift it
out of the printer.
2? Dispose of the used fuser
according to your local
regulations.
9Unpack a new fuser unit, lift up both
levers •, grip the fuser unit by the
levers, align it with the slots in the
printer, and slowly lower it ‚.
10 Completely push down both levers of
the fuser unit.
11 Lock the fuser unit by sliding the two
side locks backwards.
12 Close the covers •, ‚.
13 Continue with the media feed roller(s)
replacement. “How do I replace the
media feed roller(s)?” below.
21
1

Replacing the Fuser Unit14
How do I replace the media feed roller(s)?
1Pull the media tray out of the printer
until it stops.
2Hold the tray with both hands, lifting slightly, and remove it from the
printer.
Push the tabs of the media feed roller cover to open the cover.
The media feed rollers feed media from the
media tray(s) into the printer. When the media
feed rollers deteriorate, media may not feed
correctly from the media tray, resulting in media
jams. Replace the media feed roller in each
500-sheet media tray each time you replace the
fuser unit.
Three media feed rollers are included with the
fuser unit. If you do not have a high-capacity
input feeder (HCIF), two of the rollers do not
need to be installed.
Table of contents
Other Tally Printer manuals

Tally
Tally T2265plus User manual

Tally
Tally T6140 User manual

Tally
Tally XPRESS T9412i Installation instructions

Tally
Tally T2030/24 User manual

Tally
Tally T9006 User manual

Tally
Tally Tally Colour Laser T8006e User manual

Tally
Tally T2033S User manual

Tally
Tally T2030 User manual

Tally
Tally T3016 User manual

Tally
Tally T2240 User manual