manuals.online logo
Brands
  1. Home
  2. •
  3. Brands
  4. •
  5. Tandem
  6. •
  7. Medical Equipment
  8. •
  9. Tandem T:90 Infusion Set User manual

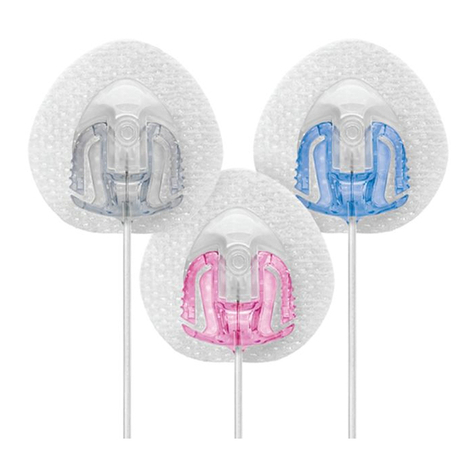
Tandem T:90 Infusion Set User manual

t:90™Infusion Set – Preparation and insertion
Read all instructions carefully before using the t:90™Infusion Set. For information
about pump therapy, possible errors, and potential risks and their causes,
consult your pump manufacturer’s instructions for use before connecting the
infusion set. Follow proper hygiene procedures.
IMPORTANT NOTE!
K. Three raised dots – press here when lifting the lid off (see figure 6)
L. Lined indentations – press here when loading (see figure 10)
M. Round Indentations – press here when releasing (see figure 12)
N. Disconnect cover (see figure B)
INDICATIONS FOR USE
The t:90™Infusion Set is indicated for the subcutaneous
infusion of insulin administered by an external pump.
DESCRIPTION
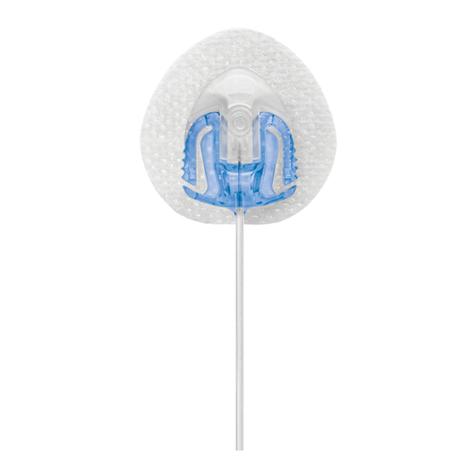
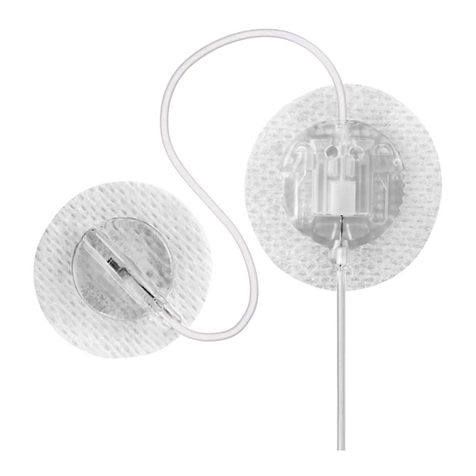
This product is an infusion device which combines an
infusion set (catheter) with an aid for infusion (inserter). As the
infusion set is an integrated part of the inserter, this product is
delivered assembled and ready for use as a single, sterile unit.
CONTRAINDICATIONS
This product is neither intended nor indicated for use in
intravenous infusion of blood or blood products.
WARNINGS
• This product is only sterile and non-pyrogenic if the
insertion device is unopened and undamaged. Do not
use if the insertion device is already open or has been
damaged. Ensure sterility by checking if the sterile
paper and tamper-proof seal are undamaged.
• Carefully examine the instructions for use before inserting
product. Failure to follow instructions may result in pain
or injury.
• When using product for the first time, do so in the pres-
ence of a healthcare provider. Since different individuals
have varying amounts of subcutaneous layer, ensure that
an appropriate cannula length is chosen to fit your needs.
• Do not in any way put disinfectants, perfumes, deodor-
ants, cosmetics or other products containing alcohol or
desinfectants in contact with the connector or the tubing.
These may affect the integrity of the infusion set.
• Product is a single use device and should be disposed of
immediately after use. Do not clean or re-sterilize.
• Product can be disposed of safely after insertion if the lid
has been placed back on. Please consult your local phar-
macy for sharp containers.
• Be sure that the needle guard is removed before insertion
is made.
• Release the tubing with caution as a hard pull of the tub-
ing can result in damage to the infusion set/introducer
needle. Ensure that the infusion set is properly in place
when the tubing is fully released – see picture 8.
• Do not leave air in the infusion set. Make sure to fill tubing
and cannula completely.
• Inaccurate medication delivery, infection and/or site irrita-
tion may result from improper insertion or maintenance of
your infusion site.
• Replace the infusion set every 48-72 hours, or per your
healthcare provider’s instructions.
• If the soft cannula bends during insertion, discard and
apply a new product immediately.
• Replace the infusion set if the adhesive tape becomes
loose or is displaced from its original site. Since the can-
nula is soft, it will not cause any pain if it slips out, and
this may take place without notice. The soft cannula must
always be completely inserted to receive the full amount
of medication.
• If your infusion site becomes inflamed, replace infusion set
and use new site until the first site has healed.
• Do not re-insert the introducer needle into the infusion set.
This could cause a tearing of the soft cannula and unpre-
dictable medication flow.
• Never try to fill or free clogged tubing while the infusion
set is inserted. This may result in unpredictable medica-
tion flow.
• Always clean the insertion site when temporarily discon-
necting the infusion set. Consult your healthcare provider
on how to compensate for missed medication when dis-
connected. Carefully monitor blood glucose levels when
disconnected and after reconnecting.
• Protect the product from direct sunlight and atmospheric
humidity. Store in a dry place at room temperature.
• Never point a loaded insertion device towards any body
part, where insertion is not desired.
• Reuse of the infusion set may cause infection, site irritation,
or damage to the cannula/needle. A damaged cannula/
needle may lead to inaccurate medication delivery.
RECOMMENDATIONS
• Check your blood glucose level 1-2 hours after inserting
product. Measure your blood glucose on a regular basis.
Discuss this with your healthcare provider.
• When using insulin, do not change your infusion set just
prior to bedtime, unless blood glucose can be checked
1-2 hours after insertion.
• When you are infusing insulin and your blood glucose level
becomes unexplainably high or an occlusion alarm occurs,
check for clogs and leaks. If in doubt, change your infu-
sion set since the soft cannula could be dislodged,
crimped or partially clogged. Discuss a plan for rapid
replacement of insulin with your healthcare provider should
any of these problems arise. Test your blood glucose level
to make sure the problem is corrected.
Instructions for Use
CONTENTS
A. Lid
B. Needle guard
C. Soft cannula
D. Adhesive
E. Cannula housing
F. Connector needle
G. Tubing
H. Introducer needle
I. Insertion device
J. Sterile paper
Use by (year/month)
Do not re-use
Sterilized using ethylene oxide
Attention: See accompanying documents
See Instructions for Use
Reference / model number
Lot number
Manufacturer
Distributed by:
11045 Roselle Sreeet
|
San Diego, CA 92121
1-877-801-6901
|
www.tandemdiabetes.com
© 2015 Tandem Diabetes Care, Inc. All rights reserved.
Tandem Diabetes Care is a registered trademark, and t:90
is a trademark of Tandem Diabetes Care, Inc. 005866_B
Unomedical a/s
Aaholmvej 1-3, Osted
|
4320 Lejre, Denmark
Made in Mexico
Legal Manufacturer:

TO DISCONNECT
A. Product allows you to temporarily disconnect your pump without having to
change the infusion set. Hold the adhesive in place by placing a finger just
in front of the cannula housing, and gently squeeze the sides. Pull the
connector needle straight out from the cannula housing.
B. Insert the disconnect cover into the cannula housing until you hear a “click”.
1. Wash your hands before
inserting infusion set.
2. Recommended injection areas.
Do not use an area right next to
your previous place of insertion.
3. Clean the area for insertion with
a disinfectant as directed by your
healthcare team. Be sure the area
is dry before inserting product.
4. Pull the red tape and remove
the seal.
5. Remove the sterile paper.
6. Press the three raised dots on
each side of the lid firmly with
one hand and lift up with the
other hand.
CAUTION: Be careful not to
bend or touch the introducer
needle when preparing the in-
serter and infusion set.
IMPORTANT NOTE! If the infu-
sion set is not securely placed
in the insertion device with the
needle pointing straight ahead
prior to insertion, pain or minor
injury may occur. To avoid this,
please ensure that the follow-
ing steps are taken gently so
the infusion set is not loosened /
removed by accident.
7. Unwinding the tubing: Carefully
twist the beginning of the tubing
out of the slot. Pull up gently.
Now unwind the tubing from
the insertion device by pulling it
carefully upwards.
CAUTION: Do not touch the in-
troducer needle when unwinding
the tubing. Be careful not to pull
too hard when the tubing is fully
released. You could accidentally
remove the infusion set from the
introducer needle.
8. Connect product to a pump
cartridge. Prime infusion set.
Ensure there are no air bubbles
in the tubing or cannula.
CAUTION: When priming the in-
fusion set, hold product with the
needle pointing down to ensure
that medication does not come
in contact with the adhesive
backing paper.
9. Pull up gently to remove the
adhesive backing paper.
10. Prepare the inserter: Place
fingers on lined indentations.
Press lined indentations on each
side. Pull spring up until you hear
a “click”.
11. Carefully remove the needle
guard by gently twisting and then
pulling it.
CAUTION: Before positioning
product over clean insertion site,
place the tubing in the slot to en-
sure that the tubing is not caught
underneath the device during
insertion.
12. Insert infusion set: Position
product over the insertion site.
Simultaneously press the round
indentations on both sides of the
insertion device to insert.
13. Push gently on the center of the
inserter to secure the adhesive
on the skin.
14. Remove the inserter/introducer
needle by grasping the center
and pulling it back gently.
Massage the tape thoroughly
onto the skin. Fill the empty
space in the cannula with the
following amount of insulin:
15. Push the lid back in place until
you hear a “click.”
U-100 insulin:
6 mm : 0.3 units
9 mm : 0.5 units
TO RECONNECT
C. Prime the infusion set until medication dispenses from the needle.
CAUTION: When priming the infusion set, hold the needle pointing down.
D. Place a finger on the adhesive tape just in front of the cannula housing.
E. Push the connector needle straight in until you hear a “click”.

Other Tandem Medical Equipment manuals

Tandem t:slim X2 User manual

Tandem

Tandem t:slim X2 User manual

Tandem t:slim X2 User manual

Tandem

Tandem t:slim X2 User manual

Tandem AutoSoft 30 User manual

Tandem

Tandem AutoSoft 30 User manual

Tandem AutoSoft 90 User manual

Tandem

Tandem AutoSoft 90 User manual

Tandem VariSoft User manual

Tandem

Tandem VariSoft User manual

Tandem AutoSoft 90 User manual

Tandem

Tandem AutoSoft 90 User manual

Tandem t:slim X2 User manual

Tandem

Tandem t:slim X2 User manual

Tandem t:slim X2 User manual

Tandem

Tandem t:slim X2 User manual

Tandem AutoSoft 90 User manual

Tandem

Tandem AutoSoft 90 User manual

Tandem AutoSoft XC User manual

Tandem

Tandem AutoSoft XC User manual

Tandem t:slim X2 User manual

Tandem

Tandem t:slim X2 User manual

Tandem AutoSoft 30 User manual

Tandem

Tandem AutoSoft 30 User manual

Tandem t:slim X2 User manual

Tandem

Tandem t:slim X2 User manual

Tandem AutoSoft 90 User manual

Tandem

Tandem AutoSoft 90 User manual

Tandem TruSteel User manual

Tandem

Tandem TruSteel User manual

Tandem T:Slim User manual

Tandem

Tandem T:Slim User manual

Popular Medical Equipment manuals by other brands

Tomed SomnoGuard AP 2 quick start guide

Tomed

Tomed SomnoGuard AP 2 quick start guide

Pari LC PLUS 022G8100 Instructions for use

Pari

Pari LC PLUS 022G8100 Instructions for use

Omron H-CR24 Instructions for use

Omron

Omron H-CR24 Instructions for use

ulrich medical Obelisc Instructions for use

ulrich medical

ulrich medical Obelisc Instructions for use

Medisana 81502 manual

Medisana

Medisana 81502 manual

Otto Bock 6A20 Instructions for use

Otto Bock

Otto Bock 6A20 Instructions for use

Mindfield eSense Skin Response Faq

Mindfield

Mindfield eSense Skin Response Faq

HTL STREFA WE CARE Droplet manual

HTL STREFA

HTL STREFA WE CARE Droplet manual

Atos Medical PROVOX Micron HME Patient's and Physician's Manual

Atos Medical

Atos Medical PROVOX Micron HME Patient's and Physician's Manual

Ossur Exoform Carpal Tunnel Wrist Instructions for use

Ossur

Ossur Exoform Carpal Tunnel Wrist Instructions for use

HoMedics MYB-S410 instruction manual

HoMedics

HoMedics MYB-S410 instruction manual

Bort SellaTex Classic Quick Instruction

Bort

Bort SellaTex Classic Quick Instruction

Stryker 1288 user guide

Stryker

Stryker 1288 user guide

Dräger Globe-Trotter GT5400 Operator's manual

Dräger

Dräger Globe-Trotter GT5400 Operator's manual

O2matic OMC PC-100 quick guide

O2matic

O2matic OMC PC-100 quick guide

RITZ REDSPOT 2B user manual

RITZ

RITZ REDSPOT 2B user manual

Zimmer Biomet Universal Clamp Surgical Technique Guide

Zimmer Biomet

Zimmer Biomet Universal Clamp Surgical Technique Guide

FagronLab BASIC user manual

FagronLab

FagronLab BASIC user manual

manuals.online logo
manuals.online logoBrands
  • About & Mission
  • Contact us
  • Privacy Policy
  • Terms and Conditions

Copyright 2025 Manuals.Online. All Rights Reserved.