TCL 30 XE 5G User manual


1 2
Note:
This is a user manual for TCL 30 XE 5G (T767G).
There may be certain differences between the user manual description and the
phone’s operation, depending on the software release of your phone or specific
carrier services.
Help
Refer to the following resources to get more FAQ, software, and service information:
Consulting FAQ
Go to https://support.tcl.com/ca
Finding your serial number or IMEI
You can find your serial number or International Mobile Equipment Identity (IMEI)
on the packaging materials. Alternatively, choose Settings >System >About
phone >Status >IMEI information on the phone itself.
Obtaining warranty service
For information on warranty of your device, visit the Canada website at https://www.
tcl.com/ca/en/mobile/warranty
Viewing legal information
On the phone, go to Settings >System >About phone >Legal information.
Table of Contents
1 Basics ............................................................................................................4
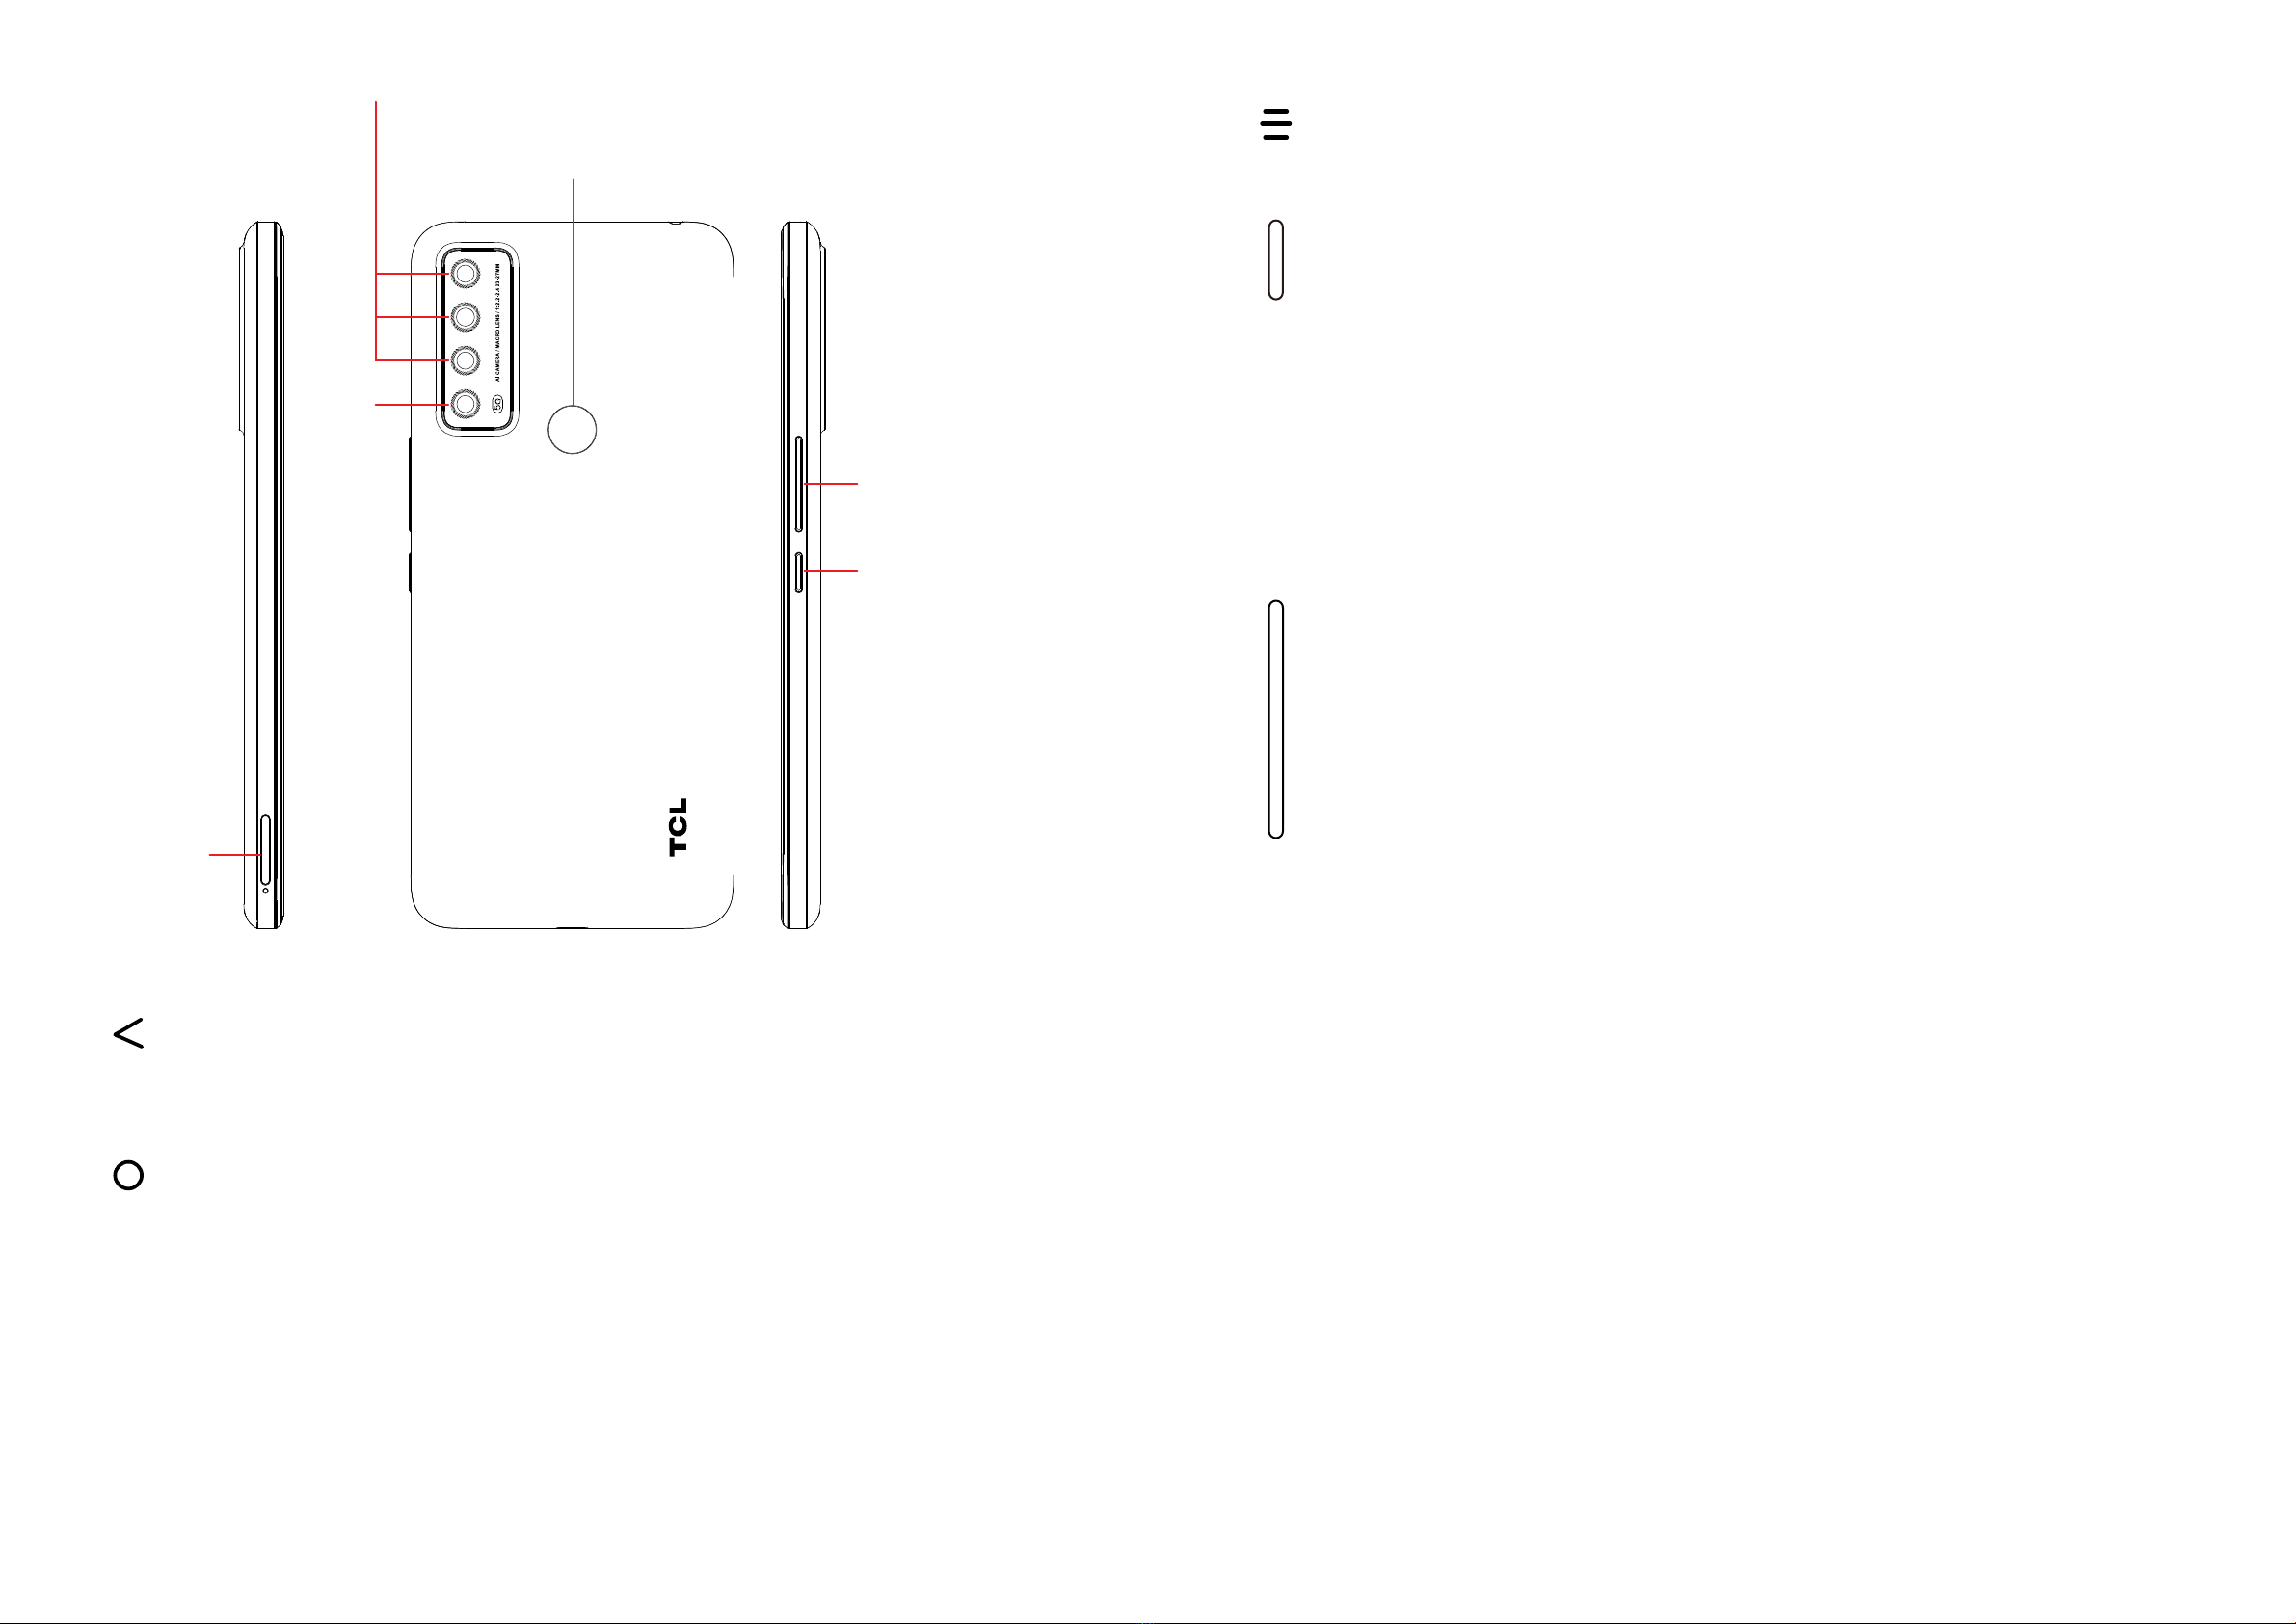
1.1 Device overview ....................................................................................4
1.2 Getting started.......................................................................................7
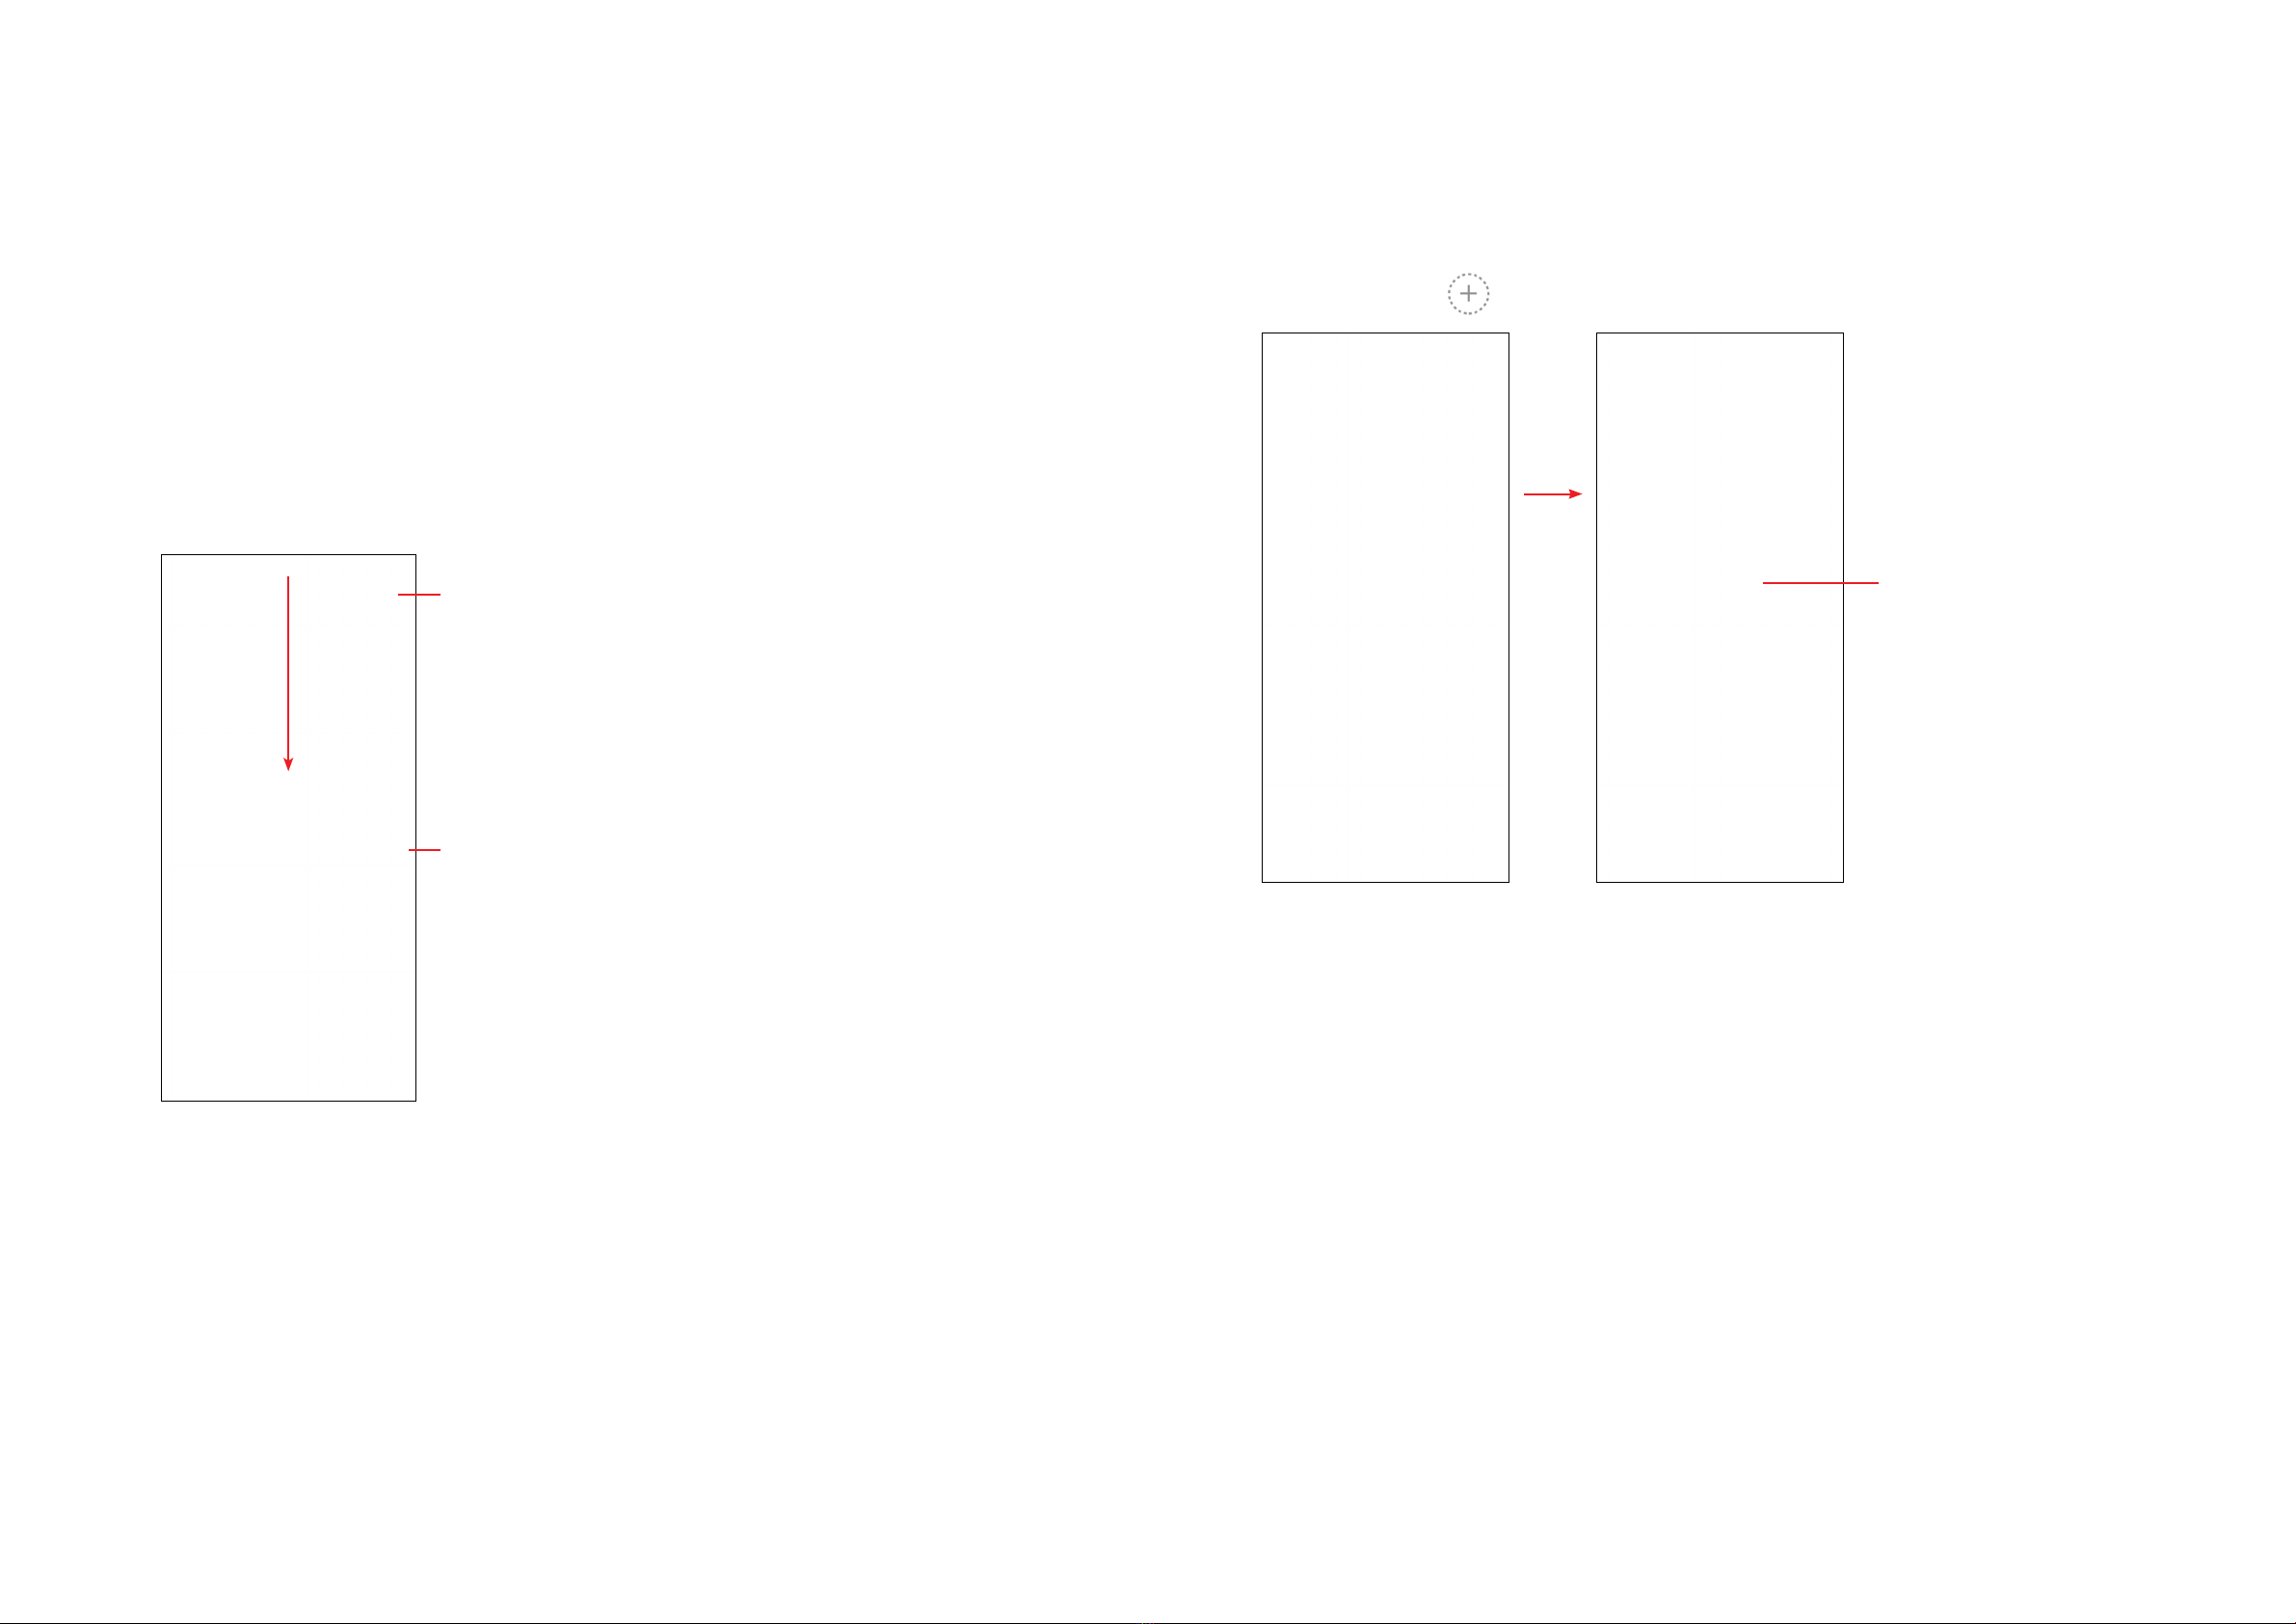
1.3 Home screen.........................................................................................9
1.4 Text input.............................................................................................16
2 Multimedia applications.............................................................................19
2.1 Camera................................................................................................19
2.2 Gallery.................................................................................................23
2.3 Music...................................................................................................26
3 Apps and features ......................................................................................27
3.1 Phone..................................................................................................27
3.2 Contacts ..............................................................................................32
3.3 Messages............................................................................................35
3.4 Calendar..............................................................................................38
3.5 Clock ...................................................................................................39
3.6 Calculator ............................................................................................42
3.7 TCL apps.............................................................................................43
3.8 Other applications ..............................................................................43
3.9 Google applications.............................................................................43
4 Settings........................................................................................................46
4.1 Wi-Fi....................................................................................................46
4.2 Bluetooth .............................................................................................47
4.3 SIM card & mobile network.................................................................48
4.4 Connected devices..............................................................................50

3 4
4.5 Home screen & lock screen................................................................52
4.6 Display.................................................................................................52
4.7 Sound & vibration................................................................................54
4.8 Notifications.........................................................................................55
4.9 Button & gestures ...............................................................................55
4.10 Advanced features ..............................................................................55
4.11 Smart Manager ...................................................................................56
4.12 Digital Wellbeing & parental controls ..................................................57
4.13 Security & biometrics ..........................................................................57
4.14 Location...............................................................................................58
4.15 Privacy.................................................................................................58
4.16 Apps ....................................................................................................58
4.17 Storage................................................................................................58
4.18 Users & accounts................................................................................59
4.19 Google.................................................................................................59
4.20 Accessibility.........................................................................................59
4.21 System ................................................................................................59
5 FOTA upgrade .............................................................................................61
6 Troubleshooting..........................................................................................62
7 Specifications .............................................................................................67
8 Accessories.................................................................................................69
9 Licenses ......................................................................................................70
10 Disclaimer....................................................................................................71
1 Basics
1.1 Device overview
Microphone
Receiver + speaker
USB Type-C connector
Headset connector
Front Camera
Back button
Home button
Touch screen
Recent apps
Speaker
Microphone

5 6
Rear camera
LED
flash
SIM and
microSDTM
tray
Fingerprint sensor
Volume keys
Power/Lock key
Back button
• Tap to return to the previous screen, to close a dialog box, options menu,
the notification panel, etc.
Home button
• From any application or screen, tap to return to the Home screen.
• Touch and hold to open Google Assistant. You can get help such as
getting directions and restaurant information based on the content
detected on the screen.
Recent apps
• Tap to view applications you’ve recently accessed.
Power key
• Press: Lock the screen/Light up the screen.
Note: Additional shortcuts and customizable settings are available at
Settings > Button & gestures > Power key.
• Press and hold: Show the popup menu to select from Power off/Restart/
Airplane mode/Cast.
• Press the Power key and Volume down key at the same time to take a
screenshot.
• Press and hold the Power key for at least 10 seconds to force reboot.
Volume Keys
• In call mode, adjusts the earpiece or headset volume.
• In Music/Video/Streaming mode, adjusts the media volume.
• In general mode, adjusts the media volume.
• Mutes the ringtone of an incoming call.
• In camera preview mode, press the Volume up or Down key to take
a photo or press and hold to take burst shots. To set, tap Camera >
Settings > Volume button function.

7 8
1.2 Getting started
Setting up
Inserting or removing the SIM/microSDTM card
1Use the provided SIM pin to open the SIM tray.
2Pull out the SIM tray.
3Place the SIM card and/or microSDTM card into the tray slot and carefully close
the SIM tray.
You must insert your SIM card to make phone calls. You do not need to power off
your phone before inserting or removing the SIM card as this phone supports hot
swap.
MicroSDTM cards are sold separately. Your phone only supports Nano SIM
cards; attempting to insert other SIM types may cause damage to your
phone.
Charging the battery
Your new phone is partially charged. Charge the battery by using the USB-C cable
and charger provided. You are advised to fully charge the battery ( ). Charging
status is indicated by a percentage displayed on screen while the phone is powered
off. The percentage increases as the phone is charged.
To reduce power consumption and energy waste when the battery is fully
charged, disconnect your charger from the plug; switch off Wi-Fi, GPS,
Bluetooth or background-running applications when not in use; reduce the
backlight time, etc.
Reverse Charging with an OTG Cable
On-The-Go (OTG) is a USB transmitting technology that allows a phone to connect
to an external device with the help of an OTG cable.
You can use your phone to charge other devices using an OTG cable.
1. Connect your phone with the device to be charged using an OTG cable.
2. After connecting, a reminder box will pop up indicating that your phone can charge
the other phone and that the battery will reduce quickly during the charging.
3. Swipe down from the status bar to open the notification panel; tap Charging
connected device via USB, and then check that Supply power is selected by
default.

9 10
Powering on your phone
Hold down the Power key until the phone powers on, unlock your phone (Swipe,
PIN, Password, Pattern, Fingerprint or Face recognition) if necessary and confirm.
The Home screen is displayed.
If you do not know your PIN code or forget it, contact your network carrier. Be sure
to keep your PIN code secure.
Powering off your phone
Press and hold the Power key until options appear, then select Power off.
1.3 Home screen
You can bring all the items (applications, shortcuts, folders and widgets) you love
or use most frequently to your Home screen for quick access. Tap the Home button
to switch to the Home screen.
Status bar
• Status/Notification icons
• Drag down to open the notification panel
Search bar
• Tap to enter text search screen
• Tap to enter voice search screen
Tap an icon to open an application, folder, etc.
Favourite tray applications
• Tap to enter the application.
• Touch and hold to move or remove applications.
The Home screen is provided in an extended format to allow more space for adding
applications, shortcuts etc. Slide the Home screen horizontally left and right to get
a complete view.
Using the touchscreen
Tap
To access an application, tap it with your finger.
Touch and hold
To enter the available options for an item, Touch and hold the item. For example.
Select a contact in Contacts and Touch and hold it. An options list will then appear.
Drag
Place your finger on the screen to drag an object to another location.
Slide/Swipe
Slide the screen to scroll up and down the applications, images, and web pages.
You can slide the screen horizontally too.
Flick
Similar to swiping, but flicking makes it move quicker.
Pinch/Spread
Place two fingers on the screen surface and draw them apart or together to scale
an element on the screen.
Rotate
Automatically change the screen orientation from portrait to landscape by turning
the phone sideways to have a better screen view.

11 12
Status bar
From the status bar, you can view both phone status (on the right side) and
notification information (on the left side).
Drag down the status bar to view notifications and drag again to enter the quick
settings panel.
Tap and drag up to close it. When there are notifications, they can be accessed by
tapping them.
Notification panel
When there are notifications, tap and drag down the Status bar to open the
Notification panel to read more detailed information.
Tap to clear all event–based notifications
(other ongoing notifications will remain).
Tap to access Settings, where you can set
more items.
Quick settings panel
Tap and drag down from the top of the screen twice to open the Quick settings
panel.
You can enable or disable functions or change modes by tapping the icons.
Tap the Edit icon to customize your Quick settings panel.
Tap to customize your
Quick settings panel.
Lock/Unlock your screen
To protect your phone and privacy, you can lock the screen with a pattern, PIN,
password, registered fingerprint or face (1).
To create a screen unlock, tap Settings > Security & biometrics > Screen lock.
To lock the phone screen
• If your phone remains inactive for a period of time, it will automatically lock the
screen and enter sleep mode to save power. Go to Settings > Display > Sleep
and select a screen timeout period.
• You can also manually lock the screen by pressing the Power key once.
(1) Fingerprint and Face unlock may not be as secure as Pattern, PIN, or Password
locks. We may use Fingerprint and Face unlock methods only for the purpose to
unlock the phone. The data collected from you through such methods will be stored
in your device and will not be disclosed to any third-party. You may delete your data
anytime.

13 14
Swipe to unlock the screen
Press the Power key once to light up the screen, swipe up the screen to unlock
the screen. (1)
Swipe right to
enter Phone (1)
Double tap to enter
the detailed screen
Swipe left to
enter Camera (1)
Swipe up to
unlock the screen
Enter a password to unlock the screen
Once the screen is turned on, swipe up the screen to display the password input
panel. Then enter your lock screen password.
Use pattern unlock
Draw the same pattern you have set to unlock the screen.
Use Face unlock
• From the app list, tap Settings >Security & biometrics > Face unlock. Before
using the face unlock, you need to set a pattern/PIN/password.
• Hold your phone 20-50 cm from your face. Position your face in the square
shown on the screen. For best results, we suggest that the face key is enrolled
indoors and away from direct sunlight.
• Enable Face unlock when your screen turns on, otherwise you will have to swipe
up on the screen first of all.
(1) Customized by tapping Settings > Home screen & lock screen > Lock screen
shortcut.
Use Fingerprint unlock
• For the best result, begin with the index finger on your dominant hand.
• Put your finger on the sensor and lift after you feel a vibration. Keep lifting your
finger to add the different parts of your fingerprint.
• Follow theses steps until fingerprints are fully registered.
Personalizing your Home screen
Add
You can touch and hold a folder, an application or a widget and drag the item to
your preferred Home screen.
Reposition
Touch and hold an item and drag it to the desired position and then release. You
can move items both on the Home screen and the Favourite tray. Hold the icon on
the left or right edge of the screen to drag the item to another Home screen.
Remove
Touch and hold the item and drag it up to the top of the remove icon, and
release after it turns red.
Create folders
To improve the organization of shortcuts or applications on the Home screen and
the Favourite tray, you can add them to a folder by stacking one item on top of
another. To rename a folder, open it and tap the folder’s title bar to input the new
name.
Wallpaper customization
Touch and hold an empty area on the Home screen, then tap Wallpapers to
customize wallpaper.

15 16
Widgets and recently used applications
Widgets
Touch and hold the empty area in the Home screen, then tap Widgets to display
all widgets.
Touch and hold the selected widget and slide it to move to your preferred screen.
Recently used applications
To consult recently used applications, tap the Recent apps key.
Tap a thumbnail in the window to open the application.
Tap one thumbnail and slide it up to close the application, slide it right/left to switch
between the applications.
Tap CLEAR ALL at the bottom of the screen to close all the running applications.
Volume adjustment
Press the Volume key to adjust the Media volume.
Tap the icon to adjust Ring, Alarm and Notification volume.
1.4 Text input
Using the Onscreen Keyboard
Onscreen Keyboard settings
Tap Settings > System > Language & input, tap the Virtual keyboard you want to
set up and a series of settings will become available.
Adjust the Onscreen Keyboard orientation
Turn the phone sideways or upright to adjust the onscreen keyboard orientation.
You can adjust it by changing the settings (Tap on/off Settings > Display > Auto-
rotate screen).

17 18
Android keyboard
1
2
3
4
5
6
7
1Enter recipient numbers or select from contacts
2Touch and hold to record audio
3Touch and hold to switch language
4Tap to insert a period
Touch and hold to select symbols
5Tap to switch between "abc/Abc" mode
Touch and hold to switch to "ABC" mode
6Tap to access the symbols and numbers keyboards
7Tap to insert a comma
Touch and hold to access keyboard settings, insert an emoji, or view input
options.
Text editing
You can edit text which you have entered
• Touch and hold or double tap within the text you want to edit.
• Drag the tabs to change the amount of text to edit.
• The following options will appear: Cut, Copy, and Share.
You can also insert new texts if preferred
• Tap where you want to type, or touch and hold a blank area. The cursor will blink
and the tab will appear. Drag the tab to move the cursor.
• If you have cut or copied any text, tap the tab to show the Paste and Select all
option which allows you to complete pasting immediately.

19 20
2 Multimedia applications
2.1 Camera ...........................................................
Launch Camera
There are multiple ways to open the Camera app.
From the Home Screen
From the home screen, tap Camera .
From the Lock Screen
When the screen is locked, press the Power key once to light up the screen, then
swipe left on the camera icon in the lower right corner to open the camera.
1
2
3
4
5
6
7
8
9
10
11
12
1Select filters
2Flash mode: Tap to turn on/off the camera flash
WARNING: Keep a safe distance when using the flash. Do not point the flash
toward people’s or animals’ eyes.
3Take a timed photo
4Take HDR photos
5Zoom in/out
6Switch between front/back camera
7Take a photo
8Touch to access settings
9Picture size
10 Pinch fingers together to zoom out, or spread fingers apart to zoom in
11 View the photos or videos you have taken
12
Google Lens
Google Lens(1)
Google Lens is a free tool that uses Google to:
• Translate/Copy text
• Search for similar products
• Identity places & buildings
• Discover books & media
• Scan barcodes
To take a photo
The screen acts as the viewfinder. First, position the object or landscape in the
viewfinder, tap the screen to focus if necessary. Tap to capture. The photo will
be automatically saved. You can also touch and hold to take burst shots.
(1) Your phone must also be connected to a network.

21 22
To take a video
Tap VIDEO to change the camera mode to video.
Tap to start video recording. Tap to take a picture during video recording.
Tap to pause video recording and tap to continue. Tap to stop
recording. The video will be automatically saved.
Further operations when viewing a photo/video you have taken
• Slide left or right to view the photos or videos you have taken.
• Tap , then Gmail/Bluetooth/MMS/etc. to share the photo or video.
• Tap Back button to return to Camera.
Modes and settings
Modes
Slide left or right to switch between modes.
• AUTO: Auto is the default mode for Camera.
• VIDEO: Tap to access video mode.
• PORTRAIT: Tap to create a depth of field effect. You can compose an image that
highlights your subject while producing a gorgeously blurred background.
• PANO: Tap to turn on the panorama function. Tap the shutter button to start taking
a panoramic photo and move the phone steadily along in the direction indicated
by the onscreen line. Once the slots are filled, the photo will be automatically
saved. If the slots are not fully filled, tap the shutter button again to save the
photo.
• MORE: By tapping , you can access more modes. These modes can be
moved to the main screen by tapping .
PRO: Pro camera mode lets you fine-tune parameters and gives you full control
over ISO, WB exposure time, aperture, shutter speed and so on.
STOP MOTION: Capture a number of photos of a certain scene, then convert
them into a speeded-up video.
SLO-MO: Record special occasions and fast moving scenes, then play them
back at a slow frame rate.
LIGHT TRACE: Capture creative movements of light using a long exposure
photograph.
SUPER MACRO: Capture an image within a 4cm range.
Settings
Tap to set more options:
• Photo size: Select photo size.
• Video quality: Select video quality.
• Video stabilisation (EIS): Enable the Electronic Image Stabilisation (EIS)
feature. It helps reduce blurring associated with the motion of a camera during
exposure.
• AI scene detection: Once enabled the camera will automatically identify the
image content of a scene and categorize it accordingly. Many different scene
categories are supported. This only works when using the main camera.
• Calorie detection(1): Detect the calorie content of a captured object.
• Smart guideline(1):This feature provides AI-powered facial detection and
composition guides for portrait shots. It only works when using the main camera.
• Volume button function: Customize the Volume button to Shutter, Zoom or
Volume when using camera.
• Storage: Choose between phone and microSDTM card storage when an
microSDTM card is inserted. The default is phone storage.
• Save location: Tag photos and videos with your location. This option is available
when the GPS location service is enabled.
• Shutter sound: Turn on/off shutter sound when capturing.
• Watermark: Turn on/off Watermark.
• Reset settings: Reset the camera to its factory default settings.
More options are available when you switch to using the front camera:
• Face Beauty: When activated, tap to adjust skin smoothing and enhance
colouring effects in portraits.
• Mirror camera: Turn on/off.
(1) Only available when the AI scene detection is turned on.

23 24
2.2 Gallery ............................................................
Gallery acts as a media player for you to view photos and play videos. In addition,
a set of further operations to pictures and videos are available for selection.
To view the photos you have taken, tap from the Home screen.
1
2
3
4
1Tap to access more options
2Explore
Explore collects photos into groups making them more easy to find
3Albums
Photos, videos, screenshots, etc. are all automatically grouped in Albums
4Moments
View the photos/videos you have just taken
Working with pictures
You can work with pictures by rotating or cropping them, sharing them with friends,
setting them as a contact photo or wallpaper, etc.
Find the picture you want to work on, and touch the picture in the full-screen picture
view.
• to share the picture.
• to edit the picture.
Select Filters.
Crop, Rotate or Mirror the picture.
Draw the picture.
Adjust the picture colour.
Touch to set Dehaze, Object eraser and Sky.
• to set the picture as your favorite.
• to delete the picture.
• >Set as to set the picture as a Contact photo or Wallpaper.

25 26
Album management
When there are many pictures and videos, you can manage your albums for
convenient viewing.
Create an album
Tap to create and name a new album. Select the pictures or videos you want
to include in it by touching to copy or move them.
Move/copy pictures or videos
Touch and hold the picture(s) or video(s) you want to move/copy. Tap > Copy to
album/Move to album, then select the album that you want to move to/copy to.
Delete or recover pictures or videos
Touch and hold the picture(s) or video(s) you want to delete, tap > DELETE.
Deleted items will be retained in the Trash album for 30 days, after which they will
be permanently deleted. To permanently delete them within this period, find the
picture(s) or video(s) in Trash and touch and hold to delete.
To recover the picture(s) or video(s) within this period, Touch and hold the picture(s)
or video(s) in Trash and tap to recover.
Hide album (1)
Touch and hold the album you want to hide, tap > MOVE. The album contents
will be hidden from Moments.
2.3 Music ..............................................................
You can play music files stored on your phone or microSDTM card.
To play a music file, swipe up on the Home screen, then tap Music .
1
2
3
4
5
1More options
2Search for a song
3Play or pause
4Play the next song
5Music settings
While playing songs with Music, the operation of pause, play or skip is still
available even if the screen is locked.
(1) Default albums such as Camera, Videos, Screenshots, etc. can't be hidden or
moved.

27 28
3 Apps and features
3.1 Phone .............................................................
Making a call
To make a call, tap in the Favourites tray.
Contacts
View the call's detailed information
Call logs
Favourite numbers
Show the dial pad
Touch and hold to
access voicemail
Enter the desired number from the dial pad and tap to place the call or select
a contact from Contacts or Call logs by sliding or tapping tabs, then make the call.
The number you entered can be saved to Contacts by tapping Create new contact
or Add to a contact.
If you make a mistake, you can delete the incorrect digits by tapping .
To hang up a call, tap .
International call
To dial an international call, touch and hold to enter “+”, then enter the international
country prefix followed by the full phone number and tap .
Emergency call
If your phone has network coverage, dial the emergency number and tap to
make an emergency call. Depending on your network and country this could even
work without a SIM card and without typing in the SIM PIN code.

29 30
Answering or rejecting a call
When you receive a call:
• Tap ANSWER, or swipe up the icon to answer;
• Tap DECLINE, or swipe down the icon to reject;
• Tap to reject the call by sending a preset message.
Calling your voicemail
To access your voicemail, touch and hold .
If you receive a voicemail, appears on the Status bar. Open the Notification
panel and touch New voicemail.
During a call
To adjust the volume during a call, press the Volume up/down key.
End the current call.
Tap to mute the current call. Tap this icon again to unmute the call.
Display the dial pad.
Tap to activate the speaker during the current call. Tap this icon again to
deactivate the speaker.
Make another call.
Make a video call.
Put a call on hold.
Merge calls to start a conference call.
Manage conference calls.
Swap the calls.

31 32
To avoid accidental operation of the touchscreen during a call, the screen
will be locked automatically when you put the cellphone close to your ear;
and it will be unlocked when the cellphone is taken away from your ear.
Managing multiple calls
With this phone you can handle multiple calls at the same time.
Swap calls
When you accept two calls, tap the icon to switch between two lines. The
current call will be put on hold and you are able to join the other call.
Conference calls(1)
You can set up a conference call as follows.
• Place a call to the first participant of the conference call.
• Tap to add another call.
• Enter the phone number of the person you want to add to the conference and
touch . You can also add participants from Call logs or Contacts.
• Tap to start the conference.
• Tap to end the conference call and disconnect all callers.
Call settings
Tap from the Phone screen, then tap Settings to set phone and contact settings.
Call log
You can access your call logs by tapping from the Phone screen to view
missed calls, outgoing calls and incoming calls.
Tap one call to view information or further operations. You can launch a new call,
send a message to the contact or number, or view detailed information of the call.
To delete the call history of a selected contact or number, touch and hold the
contact and choose Delete.
(1) Depending on your network carrier.
3.2 Contacts.........................................................
Contacts enables quick and easy access to the contact you want to reach.
You can view and create contacts on your phone and synchronize these with your
Gmail contacts or other applications on the web or on your phone.
Consult your Contacts
To see your contacts, tap from the App drawer.
Add new contact
• Tap to open the Quick contact panel
• Touch and hold to share or delete the selected contact
Deleted contacts will also be removed from other applications on the phone
or web the next time you synchronize your phone.

33 34
Adding a contact
Tap in the contact list to create a new contact.
You are required to enter the contact's name and other contact information. By
scrolling up and down the screen, you can move from one field to another.
Select a picture or take a photo for the Phone contact
Tap to save
Tap to open available labels
Add to/remove from Favourites (1)
To add a contact to favourites, you can tap a contact to view details then tap
to add the contact to favourites.
To remove a contact from favourites, tap on the contact details screen.
Editing your contacts
To edit contact information, tap in the contact details screen.
When finished, tap Save.
(1) Phone and Gmail contacts can be added to favourites.
Using the Quick contact panel
Tap a contact to open the Quick contact panel.
• Tap or the number to make a call.
• Tap to send a message.
• Tap to make a video call.
The icons available on the Quick contact panel depend on the information you have
for the contact and the applications and accounts on your phone.
Sharing contacts
You can share a single contact or contacts with others by sending the contact's
vCard to them via Bluetooth, Gmail, etc.
• From the Contacts screen, touch and hold a contact and tap .
• Select the application to perform this action.

35 36
Accounts
Contacts, data or other information can be synchronised from multiple accounts,
depending on the applications installed on your phone.
To add an account, touch from the contacts list and tap Settings > Accounts >
Add account, or from the home screen, touch Settings > Users & accounts >
Add account.
You are required to select the kind of account you are adding, like Google, etc.
As with any other account setup, you need to enter detailed information, like
username, password, etc.
You can remove an account and all associated information from the phone. Tap the
account you want to delete, tap Remove account, then confirm.
Auto-sync
On the Accounts screen, turn on Automatically sync data . When activated,
all changes to information on the phone or online will be automatically synchronized
with each other.
3.3 Messages ........................................................
Writing a new message
You can create, edit, send and receive SMS and MMS with this phone.
To access Messages, tap from the App drawer.
On the message list screen, tap to write text/multimedia messages.
Sending a text message
• To add recipients, enter a mobile phone number or select a contact in the To bar.
• Tap the Text message bar to enter the text of the message.
• When finished, tap to send the text message.
Specific letters (accented) will also increase the size of the SMS. This may
cause multiple SMS to be sent to your recipient.
Sending a multimedia message
MMS enables you to send video clips, images, photos, animations, and sounds to
other compatible mobiles and e-mail addresses.
An SMS will be converted to MMS automatically when media files (image, video,
audio, slides, etc.) are attached or subject or email addresses are added.
• To send a multimedia message, enter the recipient's phone number in the To bar.
• Write the text of the message in the Text message bar.
• Tap to give access to your location, share a contact or attach files.
• Tap to take a photo/video or attach a photo/video you have taken.
• When finished, tap to send the multimedia message.

37 38
Manage messages
When receiving a message, will appear on the Status bar as a notification.
Drag down the Status bar to open the Notification panel. Tap the new message
to open and read it. You can also access the Messages application and tap the
message to open it.
Messages are displayed as a conversation.
Tap a message to enter the message composing screen:
1
2
3
4
1More options
2Search within a conversation
3Call the number
4Save the number to Contacts or view the contact details if the number has
been saved
To adjust message settings, tap and select Settings on the message list screen.
3.4 Calendar.........................................................
Use Calendar to keep track of important meetings, appointments, etc.
To view the calendar and create events, open the Google apps folder from the
Home screen, then tap Calendar.
Multimode view
You can display the Calendar by Schedule, Day, 3 days, Week, or Month, touch
to select.
To create new events
You can add new events from any Calendar view.
• Tap .
• Fill in all required information for this new event. If it is a whole-day event, you
can turn on All-day .
• Invite guests to the event. Enter the email addresses of the guests you want to
invite. The guests will receive an invitation from Calendar and Email.
• When finished, tap Save at the top of the screen.
To quickly create an event from the Day, 3 days and Week view screens, tap an
empty spot to select a target area, then touch again to create a new event.
To delete or edit an event
To delete or edit an event, tap the event to enter its details screen. Tap to edit
the event, or tap >Delete to delete.
Event reminder
If a reminder is set for an event, the upcoming event icon will appear on the
Status bar as a notification when the reminder time arrives.
Tap and drag down the Status bar to open the notification panel, tap an event name
to view the Calendar notification list. Tap the Back button to keep the reminders
pending in the Status bar and the notification panel.
Other manuals for 30 XE 5G
2
This manual suits for next models
1
Table of contents
Other TCL Cell Phone manuals

TCL
TCL 20A 5G User manual

TCL
TCL Alcatel Neon Technical manual

TCL
TCL Alcatel Pixi4-4.5 TF User manual

TCL
TCL Alcatel Neon Technical manual

TCL
TCL 30Z User manual

TCL
TCL 20S User manual

TCL
TCL 403 32GO BLEU User manual

TCL
TCL 10 Pro User manual

TCL
TCL 20 SE User manual

TCL
TCL Alcatel Pixi4-4.5 TF User manual