PHONO
12
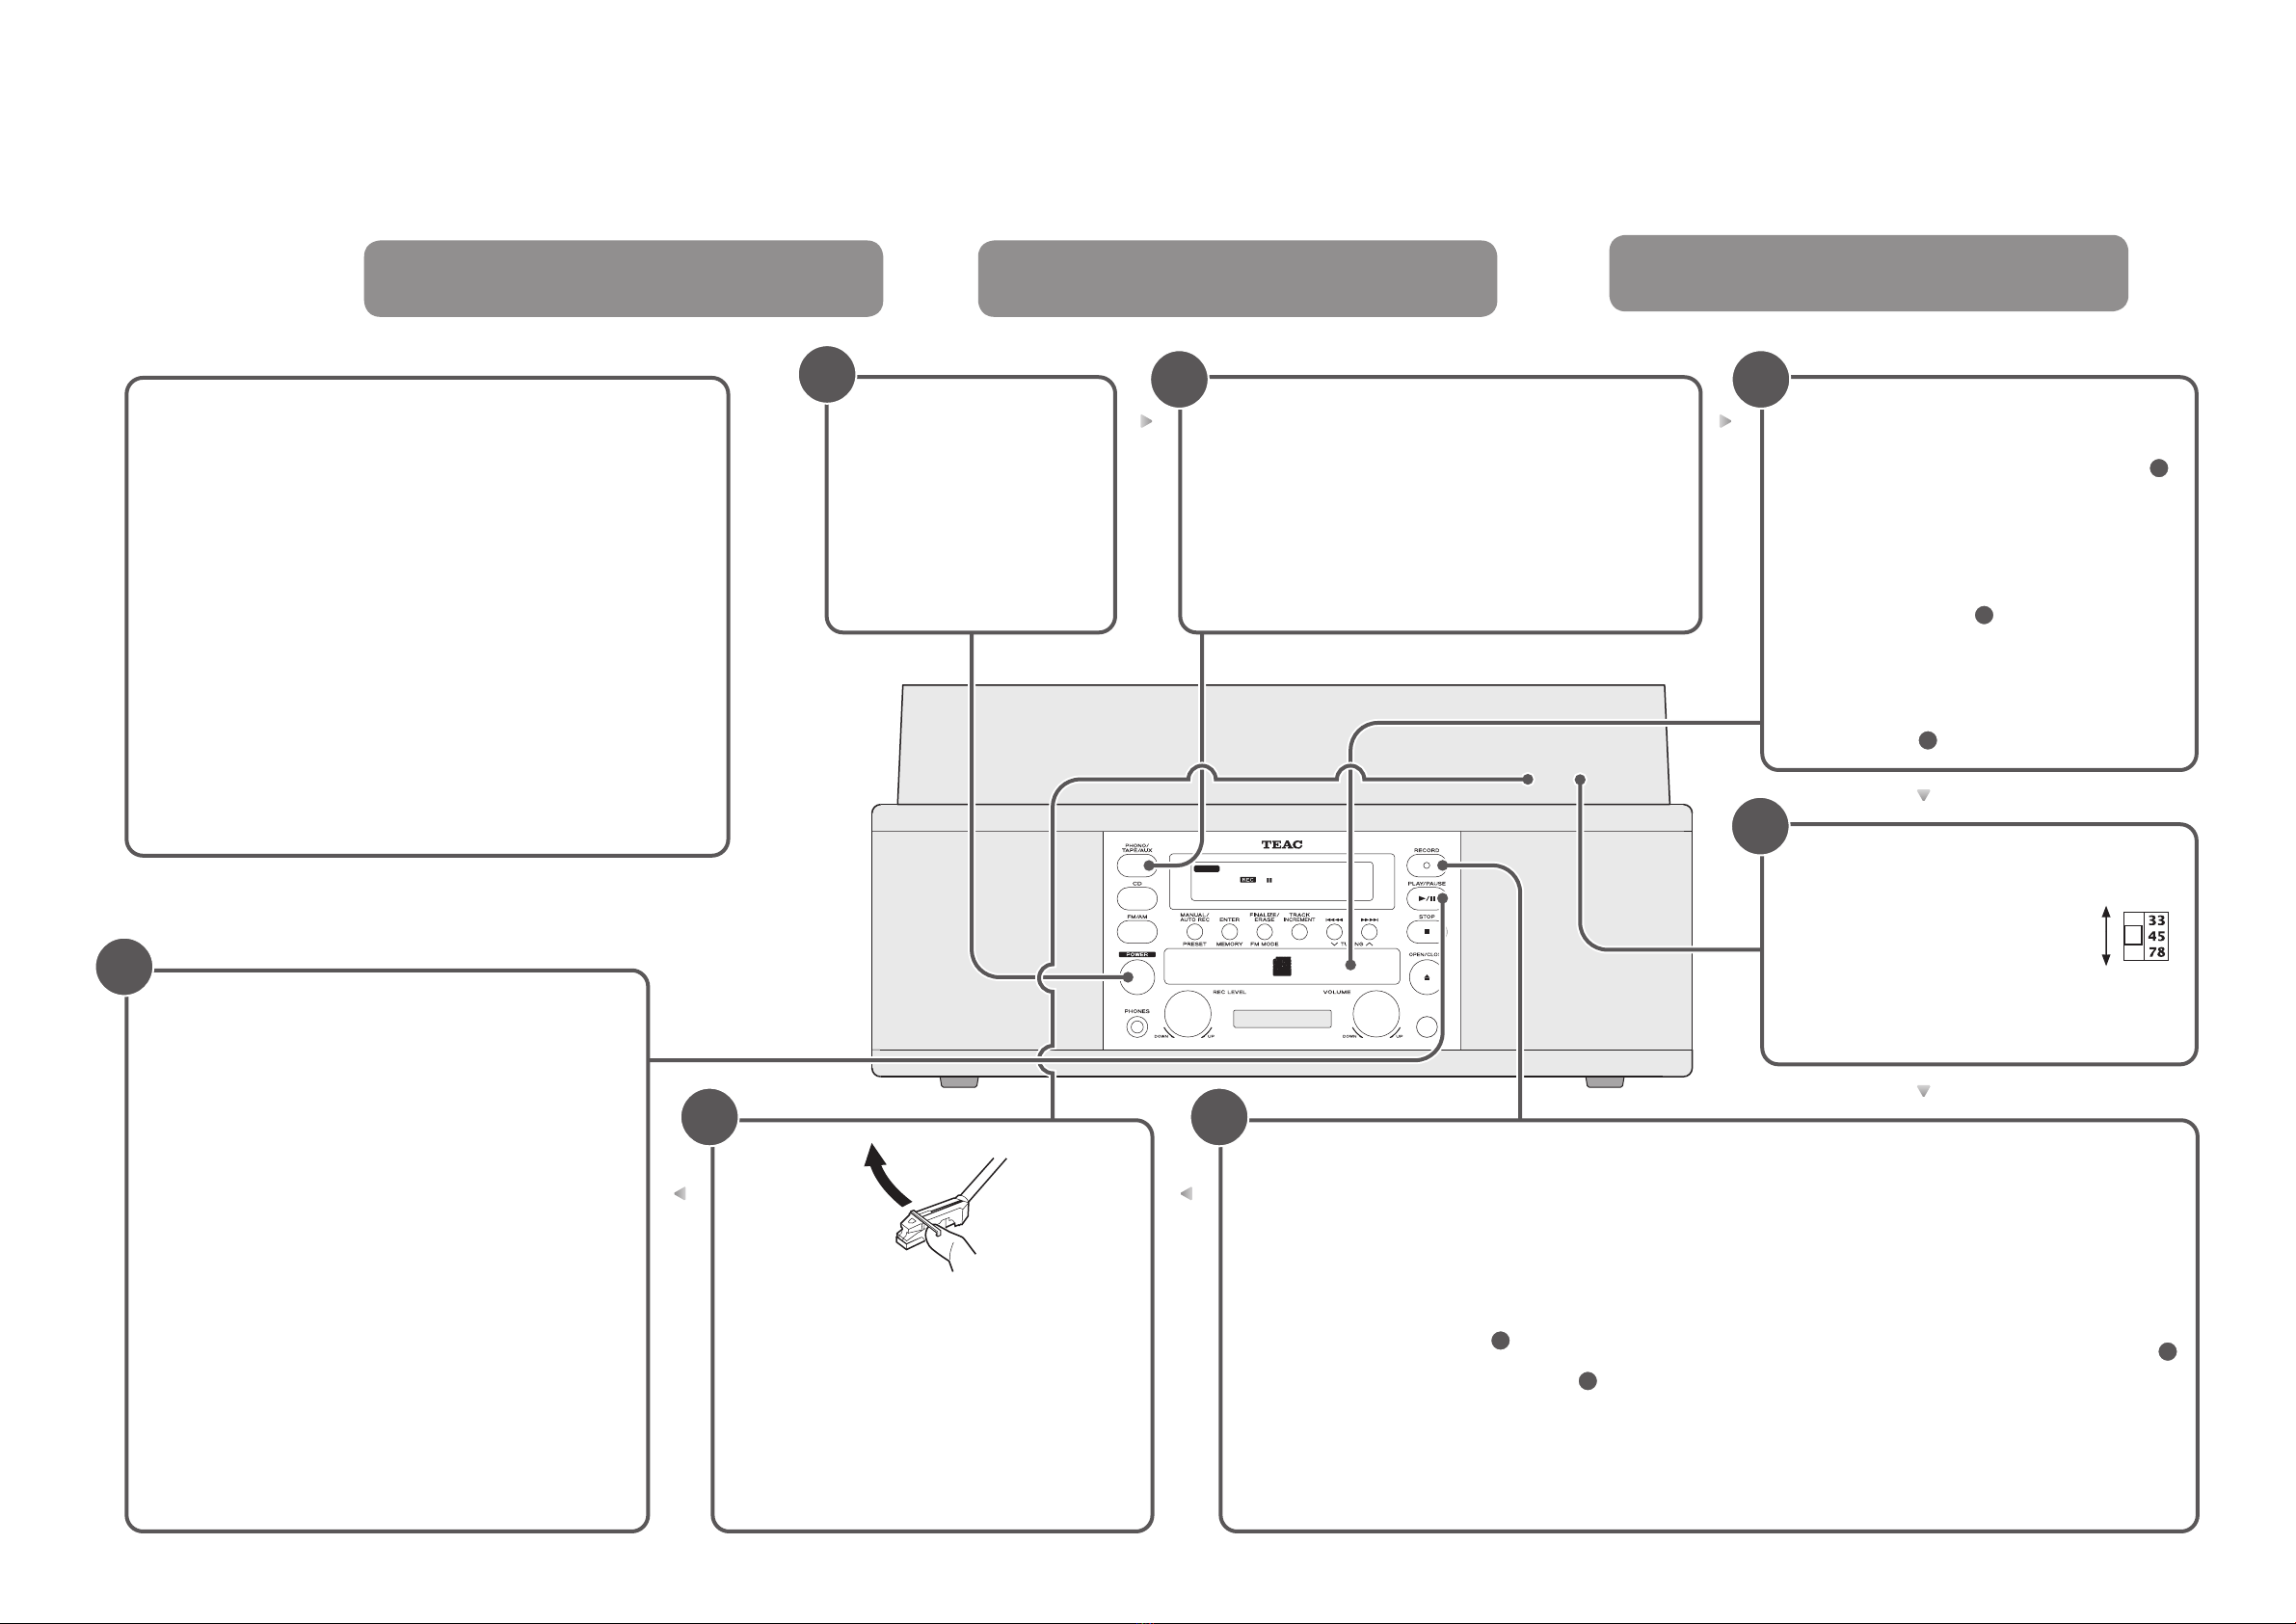
Press the POWER button
to turn the unit on.
Appuyez sur la touche
POWER pour allumer
l’appareil.
Presione el interruptor
POWER para activar la
unidad.
If the PHONO indicator does not appear in the display, press
the PHONO/TAPE/AUX button repeatedly to select PHONO.
Si le témoin PHONO n’apparaît pas dans l’écran, appuyez
répétitivement sur la touche PHONO/TAPE/AUX jusqu’à ce
que PHONO soit sélectionné.
Si el indicador PHONO no aparece en la pantalla, presione
el botón PHONO/TAPE/AUX varias veces para seleccionar
PHONO.
3
Load a recordable CD-R or CD-RW disc into the
unit.
Make sure “NO TOC” and “CD-R” (or “CD-RW”) indicators
lights on the display, or the RECORD button in step
will not work.
Mettez un CD-R ou CD-RW enregistrable en place
dans l’appareil.
Vériez que les témoins “NO TOC” et “CD-R” (ou “CD-RW”)
sont allumés dans l’écran ou la touche RECORD ne
fonctionnera pas à l’étape .
Cargue un disco CD-R o CD-RW grabable en la
unidad.
Asegúrese de que los indicadores “NO TOC” y “CD-R” (o
“CD-RW”) se enciendan en la pantalla o el botón
RECORD del paso no funcione.
7
Press the PLAY/PAUSE button (G/J) to start recording.
When the rotation of the turntable stops, the recording will stop
automatically.
To prevent unwanted noise from the tone arm being recorded, stop
the recording manually by using the STOP button (H).
Appuyez sur la touche PLAY/PAUSE (G/J) pour démarrer
l’enregistrement.
Quand la rotation de la platine tourne-disque s’arrête, l’enregistrement
s’arrête automatiquement.
Toutefois, pour éviter que le bruit de déplacement du bras ne soit
enregistré, arrêtez l’enregistrement manuellement à l’aide de la
touche STOP (H).
Presione el botón PLAY/PAUSE (G/J) para iniciar la graba-
ción.
Cuando se interrumpe la rotación del plato giradiscos, la grabación
se detendrá automáticamente.
Para evitar que se graben los ruidos indeseados del brazo lector, pare
la grabación manualmente utilizando el botón STOP (H).
5
4
Place the record on the turntable and
select the speed.
Placez le disque sur la platine et
sélectionnez la vitesse.
Coloque el disco en lel plato giradios-
cos y seleccione la velocidad.
Before using the turntable
• Completely loosen the transportation screw by turning them clockwise with a
coin.
• Before use, detach the stylus guard (white plastic cover) by pulling it straight
o the front of the cartridge.
• Gently push the clamper to the right to release the tone arm.
Avant d'utiliser la platine
• Desserrez totalement la vis de transport en la tournant dans le sens horaire
avec une pièce de monnaie.
• Avant utilisation, retirez le protège-pointe (capuchon de plastique blanc) en le
tirant de façon droite vers l’avant de la cellule.
• Poussez délicatement l’attache vers la droite pour libérer le bras.
Antes de utilizar el plato giradiscos
• Aoje completamente el tornillo de transporte girándolos hacia la derecha con
una moneda.
• Antes de utilizar, retire la protección de aguja (cubierta plástica blanca) al
deslizarla de la parte delantera del cartucho.
• Empuje suavemente el jador de nivel hacia la derecha para liberar el brazo
lector.
6
Gently lower the tone arm onto the edge of the
record (or the track to be recorded).
The turntable will begin to turn.
Déplacez doucement le bras vers le bord du
disque (ou le point de départ d’une plage).
La platine commencera à tourner.
Baje suavemente el brazo lector en la orilla del
disco (o la pista que se grabará).
El plato giradiscos comenzará a girar.
Press the RECORD button.
The unit enters record pause mode.
The red indicator on the RECORD button
blinks. On the display, the “REC” indicator
blinks and the J indicator lights.
The recording does not start yet and
you now need to press the PLAY/
PAUSE button (G/J) in step to
start recording.
• To adjust the recording level, turn
the REC LEVEL knob. See page 26 of
Owner’s manual for detail.
Appuyez sur la touche RECORD.
L’appareil est armé pour l’enregistrement
et passe en pause.
Le témoin rouge de la touche RECORD
clignote. Dans l’écran, le témoin “REC”
clignote et le témoin J s’allume.
L’enregistrement ne démarre pas
encore, vous devez appuyer sur la
touche PLAY/PAUSE (G/J) à l’étape
(o)pour le lancer.
• Pour régler le niveau d'enregistrement,
tournez la commande REC LEVEL. Voir
page 60 du mode d'emploi pour des
détails.
Presione el botón RECORD.
La unidad entra en modo de pausa de
grabación.
El indicador rojo del botón RECORD par-
padea. En la pantalla, el indicador “REC”
parpadea y el indicador J se enciende.
La grabación no empieza todavía
y es necesario que pulse el botón
PLAY/PAUSE (G/J) en el paso (o)
para comenzar a grabar.
• Para ajustar el nivel de grabación,
gire el mando REC LEVEL. Consulte la
página 94 del Manual del usuario para
obtener más información.
5
5
5
7
7
7
Z
TEAC CORPORATION 0417.MA-2392A77-21LR66000000
LP-R660USB Quick-Start Recording Guide
This Guide provides you with the simplest way to use this equipment for
recording.
Of course, we strongly suggest that you consult the Owner's Manual for
complete details and important safety information.
LP-R660
USB
Guide de prise en main
rapide pour l’enregistrement
Ce guide vous explique les opérations simples qui vous permettront
d'utiliser l’appareil pour l’enregistrement.
Nous vous conseillons bien entendu de consulter le mode d’emploi pour
tout ce qui concerne les détails et les questions de sécurité.
LP-R660
USB
Guía de Inicio Rápido de
Grabación
Esta Guía le brinda la manera más simple de utilizar este equipo para grabar.
Por supuesto, es estrictamente recomendado que usted consulte el Manual
del Usuario para los detalles completos e importantes informaciones de
seguridad.
From Record Depuis un disque De un disco


