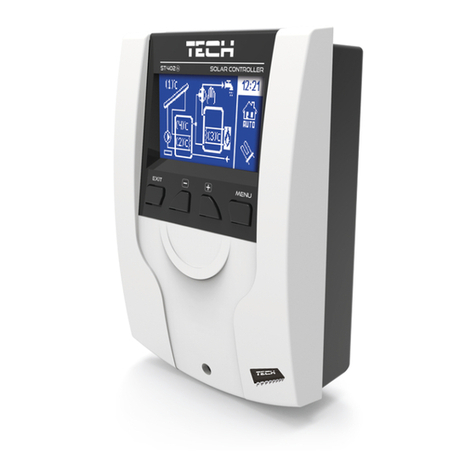
TECH ST-401N PWM User manual

Tech
- 1 -
User’s manual
ST-401N PWM

ST-401N User's Manual v 1.0.3
- 2 -
I. Safety
Before using the device for the first time the user should read the following regulations carefully. Not
obeying the rules included in this manual may lead to personal injuries and device damage. The user's
manual should be stored in a safe place for further reference.
In order to avoid accidents and errors it should be ensured that every person using has familiarized
themselves with the principle of operation and security functions of the device. If the device is to be
sold or put in a different place, make sure that the user's manual is kept with the device so that any
potential user has access to essential information about the device. The manufacturer does not accept
responsibility for any injuries or damage resulting from negligence; therefore, users are obliged to take
the necessary safety measures listed in this manual to protect their lives and property.
WARNING
High voltage. Make sure the regulator is disconnected from the mains before perform-
ing any activities involving the power supply (plugging cables, installing the device
etc.).
The device should be installed by a qualified electrician.
Before starting the controller, the user should measure the earthing resistance of the
electric motors as well as the insulation resistance of the cables.
The regulator should not be operated by children.
NOTE
The controller may be damaged if struck by lightning. Make sure the plug is discon-
nected from the power supply during storms.
Any use other than that specified by the manufacturer is forbidden.
Before and during the heating season, the controller should be checked for the condition
of its cables. The user should also check if the controller is properly mounted and clean
it if dusty or dirty.
After the editing of this manual was completed on June 29, 2015, changes in products specified in the
manual may have taken place. The manufacturer reserves the right to change the information in
regards to products. The illustrations may contain additional equipment. The printing technology may
affect differences in shown colours.

Tech
- 3 -
II. Application
The ST-401N type temperature regulator is intended for the operation of solar collectors for various
system configurations. This device controls the operation of collector pumps (or a pump and a valve)
on the basis of the measurement of the solar panel temperatures and the accumulation tank (two
tanks) temperature. There is an option to connect an additional device: circulation pump, electric heater
or feeding the signal to the CH boiler in order to fire it up.
It is possible to control the circulation pump and feed the firing-up signal to the CH boiler directly
from the controller, while an additional signal relay is necessary to control the heater.
III. Principle Of operation
Description of the Control Panel of a Sample System
Opis panelu sterującego przykładowego układu
The regulator is controlled through the use of buttons. The user may enter the menu and confirm the
settings by pressing the Menu button. Using the Plus and Minus buttons, the user moves through the
menu's functions. In order to accept the selected menu item, the user should press the Menu button.
In order to proceed to the main screen (or the menu of a higher level), the user should use the Exit
button. Any setting may be changed in a similar manner.
Switching Valve
Switching Valve
Timer
Collector
Temperature
Operation Mode
Additional Device
Started
MENU
PLUS Button
MINUS Button
EXIT
Heat Container's
Temperature
Collector Cump
Collector
Temperature

ST-401N User's Manual v 1.0.3
- 4 -
IV. User Menu
IV.a) Home Page
During the regulator's standard operation, the Graphic Display shows the Homepage which displays
the diagram of the selected system and:
- Operation mode (or alarm type),
- Current hour,
- Collector's temperature,
- Current heat container temperature,
- The temperatures of all additional sensors, depending on the configuration.
The following graphic elements are displayed on the right hand side:
The Symbol of Active Operation Mode:
The Symbol of Active Additional
Device (Peripherals):
Automatic Operation Mode
Circulation Pump
Collector Defrosting Mode
Firing-up the Pellet Boiler
(voltage-free signal)
Holiday Mode
Heater
Collector Overheat (alarm mode)
Anti-Legionella
Sensor Damage (alarm mode)
If one of the sensors is damaged, an additional icon will flash as an indicator in the place of
the displayed temperature of the damaged sensor, informing the user about the sensor that is
disconnected or is damaged.
Additionally, the installation system diagram shows a pump symbol (it rotates when in operation) and/or
a valve symbol (indicating the current circulation path)

Tech
- 5 -
IV.b) Main Menu – Flowchart
Due to its multifunctional nature, the controller's menu is divided into the Main Menu and the Service
Menu.
The Main Menu is used to adjust the controller's basic options such as changing the operation modes,
timer settings, date settings, changing the language etc. The layout of parameters in the Main Menu is
shown by the flowchart below.
*Parameter visible if an additional device (i.e. a heater) is connected.
IV.c) Operation Mode
Using this function, the user selects the operation mode.
IV.c.1) Automatic Operation
The pump operates during the Automatic Operation mode if the minimum difference of temperatures
between the collector and the tank is reached (the difference between these temperatures when the
pump is activated is determined by the function "Solar Pump Activation Delta" in: SERVICE MENU >
Pumps > Solar Pump Activation Delta).
The pump will operate until the set temperature is reached (the set temperature is adjusted in:
SERVICE MENU > Accumulation Tank > Set Temperature) or until the difference of temperatures
between the collector and the tank reaches the deactivation delta threshold: SERVICE MENU > Pumps
> Solar Pump Deactivation Delta (in this case, the pump will be activated again when the temperature
on the collector increases above the tank's temperature by the Solar Pump Activation Delta). When the
pump is deactivated after reaching the set temperature, it will be activated again if the temperature
drops below the set value by the amount specified by the Tank's Hysteresis (the hysteresis value is
adjusted in: SERVICE MENU > Accumulation Tank > Tank Hysteresis).
IV.c.2) Collector Defrosting
Using this mode, the user may manually activate the collector's pump in order to melt the snow on the
solar panels. After activation, this mode is active throughout a period of time defined by the user and
then the controller returns to its automatic operation (the defrosting time is set in: SERVICE MENU>
Solar Collector > Defrosting Time). This function may be switched off manually after a shorter operation
time by selecting a different operation mode.
Main Menu
Operation Mode
Automatic Operation
Collector Defrosting
Holiday Mode
Anti-Legionella*
Manual Operation
Timer
Date
Ethernet Module
Activate
IP Address
Reset Module Password
Advanced Settings
Information
GSM Activate
Information
Statistics
Gain
Collector Overheat
Power Supply Failures
Backlight
Display Contrast
Language
Information
Factory Settings
Service Menu

ST-401N User's Manual v 1.0.3
- 6 -
IV.c.3) Holiday Mode
After the user activates Holiday Mode, the pump operates when one of the following conditions is met:
The collector's temperature increases to the overheat temperature value (SERVICE MENU> Solar
Collector > Overheat Temperature) reduced by the value of the parameter Delta Holiday (SERVICE
MENU> Solar Collector > Delta Holiday). When this condition is met, the pump is activated to cool down
the collector. The pump is deactivated after the temperature is reduced by 5°C.
If the collector's temperature is lower than the tank's temperature – the pump is activated to cool
down the tank and will operate until the collector's and the tank's temperatures are level.
IV.c.4) Anti-Legionella
This function is only active when an additional device is connected (found under the function Peripherals
in the Service Menu and then activated). Thermal disinfection involves increasing the temperature to
the required disinfection temperature in the tank – this reading is taken from the upper sensor in the
tank (in the case of using an optional sensor, the user should make sure that this sensor measures the
temperature in the upper part of the tank because this is the priority sensor for this function). This is
to eliminate the Legionella pneumophila bacteria that reduce the body's cell immunity. These bacteria
often multiply in tanks with stagnant hot water (at an optimum temperature of 35°C). After the user
activates this function, the tank heats up to the defined temperature (SERVICE MENU > Peripherals >
Heater > Anti-Legionella > Anti-Legionella Temperature) and maintains such a temperature for the
time of disinfection (SERVICE MENU > Peripherals > Heater > Anti-Legionella > Anti-Legionella Time)
and then returns to the regular operation mode.
From the moment of activating the disinfection, the temperature of disinfection needs to be reached in
no longer than the time defined by the user (SERVICE MENU > Peripherals > Heater > Anti-Legionella
> Maximum Anti-Legionella Time), otherwise this function is deactivated automatically.
IV.c.5) Manual Operation
Using this function, the user may manually (by pressing the ‘Menu’ button) activate and deactivate the
following to control the installation's equipment:
- Solar Pump,
- Second Solar Pump or Switching Valve,
- Peripherals - Additional Device (voltage-free contact e.g. for firing up the pellet boiler).
IV.d) Timer
Using this function, the user adjusts the current hour for regulator operation.
IV.e) Date
Using this function, the user adjusts the current date. The correct adjustment of date and hour is
necessary to calculate energy in a proper manner.
IV.f) Ethernet Module
NOTE
Control of this type is possible after purchasing and connecting an additional ST-500 control module
(which is not added to the controller as a standard).
The Ethernet Module is a device for enabling remote control over the collector's operation via
the Internet or a local network. On the home computer screen, the user controls the status of all the
solar installation devices and the operation of each device is presented in the form of an animation.
After activating the Internet module and selecting the DHCP option, the controller automatically
downloads the following parameters from the local network: IP Address, IP Mask, Gateway Address and
DNS Address. In the case of any problems with downloading the network parameters, it is possible to
adjust these parameters manually. The method of obtaining the local network's parameters is described
in the manual for the Internet Module.
The function Reset Module Password may be used when the user changed the factory user's
password to his own password on the login page. When the new password is lost, it is possible to return
to the factory password after resetting the module password.

Tech
- 7 -
IV.g) GSM Module
NOTE
Control of this type is possible after purchasing and connecting an additional ST-65 control module
(which is not added to the controller as a standard).
The GSM module is an optional device designed to work in tandem with the collector's controller,
enabling remote control over the collector operation with the use of a mobile phone. The user is notified
with a text message about each alarm of the solar installation's controller and they receive a return
message with information on the current temperature of all sensors by sending an appropriate text
message at any time.
The ST-65 module may also operate independently of the collector. It has two inputs with
temperature sensors, one contact input to be used in any configuration (detecting closing/opening of
contacts) and one controlled output (e.g. possibility to connect an additional contactor to control any
electrical circuit).
When any temperature sensor reaches the set maximum or minimum temperature, the module
automatically sends a text message with such information. It is similar in the case of a closing or
opening of the contact input which may be used e.g. for the simple protection of property.
IV.h) Statistics
The parameters in this submenu allow the user to monitor the current conditions of the controller's
operation:
IV.h.1) Gain
This parameter allows the user to monitor the current values of gained energy in certain sections of
time: daily, weekly, monthly, annual and temporary.
CAUTION
Statistical data displayed in the controller is approximate – it is used only to determine the approximate
values of gained energy.
IV.h.2) Collector Overheat
After the user enters this submenu, the controller's display will show the list of the collector's overheats
(too high temperature of the collector's sensor). The user may see:
The date when the overheating occurred.
The hour.
The duration.
The reading from the collector's sensor.
IV.h.3) Power Supply Failures
After the user enters this submenu, the controller's display will show the list of power supply failures
registered by the controller. The user may see:
Date of occurrence.
Hour of occurrence.
Duration of occurrence.
IV.i) Backlight
This parameter regulates the display's brightness. This change takes place after a dozen or so seconds
of idleness.
IV.j) Display Contrast
This parameter regulates the display's contrast.
IV.k) Language
The user may select the controller's language version.
IV.l) Information
When the user selects this option, a screen with the controller's manufacturer logo and the current

ST-401N User's Manual v 1.0.3
- 8 -
program version appears.
IV.m) Factory Settings
This function allows the user to load factory settings previously recorded in the service menu.
V. Service Menu
In order to enter the service settings, the user should select the SERVICE MENU option and then select
code 0112 using the Plus and Minus buttons and confirm it by pressing the Menu button. In order to
return to the display's main view (exit the service menu), the user should use the Exit button by
pressing it several times or waiting for approx. 30 seconds (the device will then automatically leave the
service mode).
The flowchart of the Service Menu is given below.
The ST-401N controller is adapted to operate various heating installations. When the
installation's scheme is changed this may lead to the appearance of additional functions in the
controller's service menu – marked with an asterisk (*) in the following flowchart.

Tech
- 9 -
Service Menu
Accumulation Tank
Set Temperature
Maximum Temperature of Tank 1
Tank Hysteresis
Minimum Temperature of Tank 1
Cooling Down to Set Value
Holiday Delta
Valve Hysteresis*
Set Temperature of Tank 2*
Maximum Temperature of Tank 2*
Hysteresis of Tank 2*
Operation Algorithm*
Tank Reheating Priority*
Solar Collector
Overheat Temperature
Minimum Reheating Temperature
Alarm Hysteresis
Defrosting Time
Anti-Freeze Temperature
Collector Delta*
Pumps
Regulated Revolutions
Collector Maximum Temperature
Solar Pump Deactivation Delta
Solar Pump Activation Delta
Gear Coefficient
Solar Pump Operating Minimum
Solar Pump Operating Maximum
Circulation Sampling
Peripherals
None
Circulation Pump
Pellet Boiler Pump
Heater
Contact Not Consistent with Pump
Contact Consistent with Pump
Calculation of Energy
Flow
Type of Agent
Glycol Solution
Calibration
Installation's Options*
Alarm Sound
Factory Settings

ST-401N User's Manual v 1.0.3
- 10 -
V.b) Accumulation Tank
This menu allows the user to adjust all parameters related to the tank (heat container).
V.b.1) Set Temperature
This function is used to adjust the set temperature in the container which leads to the deactivation of
the Collector Pump.
V.b.2) Maximum Temperature of Tank 1
Using this option, the user may declare the maximum acceptable safe temperature value to which the
tank is allowed to heat in the case of Collector Overheat.
If the collector reaches its alarm temperature (Overheat), the pump is activated automatically
in order to cool down the heated collector, regardless of the set temperature. The pump operates until
reaching the Tank's Maximum Temperature or until the collector's temperature drops by the value of
the Alarm Hysteresis (see: SERVICE MENU > Solar Collector> Alarm Hysteresis)
V.b.3) Minimum Temperature of Tank 1
Using this parameter, the user may declare the minimum acceptable temperature value to which the
tank is allowed to cool. Below this temperature, the pump does not activate in the Collector Defrosting
mode.
V.b.4) Tank Hysteresis
Using this function, the user declares the tank hysteresis value. If the tank reaches the set temperature
and the pump is deactivated, it will be activated again after the tank's temperature drops below the set
value by the value of this hysteresis.
V.b.5) Cooling Down to Set Value
When the collector reaches the overheat temperature, the pump is activated in emergency mode to
cool it down. In this case, the tank receives heating until exceeding the set temperature (up to the
maximum temperature). To prevent the accumulation of water which is too hot in the container, the
Cooling Down to Set Value function should be started. After activating this option, when the collector's
temperature drops below that of the container, the pump is activated in order to cool down the tank
until it reaches the set temperature.
V.b.6) Delta Holiday
This function is active only in the Holiday Operating mode. This parameter determines how many °C
before reaching the collector overheat temperature the pump is activated in order to cool it down. The
pump is deactivated after the collector's temperature is reduced by at least 5°C.
IV.b) Solar Collector
This menu allows the user to adjust all parameters related to the Solar Collector.
V.c.1) Overheat Temperature
This is the Solar Collector's acceptable alarm temperature at which the pump is forced to activate in
order to cool down the solar panels. The discharge of warm water will take place regardless of the
tank's set temperature. The pump will operate until its temperature drops below the alarm temperature
by the Alarm Hysteresis Value (Service Settings > Solar Collector > Alarm Hysteresis) or until the tank
reaches the maximum acceptable temperature (Service Settings > Accumulation Tank > Maximum
Temperature)
V.c.2) Minimum Reheating Temperature
This is the collector's threshold temperature. If the temperature within the collector is higher and is
dropping after reaching the minimum reheating temperature, the pump is deactivated. On the other
hand, when the temperature on the collector is below this limit and is increasing - the pump is activated
after reaching the minimum reheating temperature plus hysteresis - 3°C. The threshold reheating
temperature is not active in the emergency mode, manual operation or collector defrosting.
V.c.3) Anti-Freeze Temperature
Due to the different freezing temperatures of the liquid in the solar installation, the Anti-Freeze

Tech
- 11 -
Temperature was introduced. This parameter determines the minimum safe temperature when the
glycol liquid does not freeze (temperature measured on the collector). In the case of a significant drop
in the collector's temperature (to the value of this parameter), the pump is activated and operates
continuously until the collector is heated to a safe temperature. The settings range of this coefficient is
within -50: +10°C.
V.c.4) Alarm Hysteresis
Using this function, the user declares the value of the collector's alarm hysteresis. If the tank reaches
the alarm temperature (Overheat Temperature) and the pump is activated, it will deactivate again when
the collector's temperature drops below the maximum temperature by the value of this hysteresis.
V.c.5) Defrosting Time
Using this function, the user determines for how long the pump is activated after the activation of the
function Collector Defrosting.
V.c.6) Collector Delta
Option active only in the case of setting the installation scheme number: 4.
Only one heating circulation is always active in this system. The switching valve is to switch the
circulation to the collector that currently has temperature higher at least by the value of collector delta
(this is the difference in temperatures of both Collectors).
V.e) Pumps
V.e.1) Pump's Revolutions, Adjusted or Constant
Using this function, the user defines the mode of the pump's operation. The use may select constant
revolutions when the pump operates at all times with full power (always when its operation is active)
or adjusted revolutions. In the case of adjusted revolutions, the user should adjust several additional
parameters (see below).
V.e.2) Collector's Maximum Temperature
Using this setting, the user declares the value of the collector's maximum alarm temperature when the
pump may be damaged. This temperature should be adjusted according to the collector's technical
data. Due to phenomenon of glycol "gelation" at high temperatures and the risk of damaging the Solar
Pump, the pump will be deactivated after reaching the maximum alarm temperature (the regulator
proceeds to the Collector Overheat mode).
V.e.3) Solar Pump Deactivation Delta
This function determines the difference between the collector temperature and the tank temperature
when the pump is deactivated (so as to avoid cooling down the tank).
V.e.4) Solar Pump Activation Delta
This function determines the difference between the Collector Temperature and the Tank Temperature
when the pump begins to operate (this is the pump activation threshold value).
V.e.5) Gear Coefficient
This parameter is active only if the pump's revolutions are set as adjusted. When the conditions for the
pump's activation are met, it is initially activated at minimum speed (Solar Pump's Operating Minimum).
Then, the pump increases its revolutions according to the setting of this coefficient, which determines
at how many °C of difference between the collector temperature and the tank temperature the pump
increases its operation revolutions by 10%. The gear coefficient applies only to the pump's operating
revolutions, namely the value of revolutions within the limits of the Solar Pump's operating minimum
(0% for the gear coefficient) as well as the solar pump operating maximum (100% for the gear
coefficient). The greater the difference in temperatures between the collector and the tank, the greater
the number of revolutions conducted by the pump.
Example:
If the gear coefficient value is 3, a change in the difference in temperatures between the collector and
the tank by each 3 degrees will lead to a change in the value of the pump's revolutions by 10%.

ST-401N User's Manual v 1.0.3
- 12 -
The table below contains examples of the coefficient's values depicting the operation of the gear
coefficient.
Gear Coeff. 3
Gear Coeff. 4
Gear Coeff. 5
Gear Coeff. 6
Pump's Operation
Revolutions
Value of Δ
(Collector's
Temperature –
Tank's
Temperature)
Δ3
Δ4
Δ5
Δ6
10%
Δ6
Δ8
Δ10
Δ12
20%
Δ9
Δ12
Δ15
Δ18
30%
Δ12
Δ16
Δ20
Δ24
40%
Δ15
Δ20
Δ25
Δ30
50%
V.e.6) Solar Pump Operating Minimum
This parameter is active only if the pump's revolutions are set as adjusted. Using this setting, the user
should define the pump's minimum initial revolutions.
V.e.7) Solar Pump Operating Maximum
This parameter is active only if the pump's revolutions are set as adjusted. Using this setting, the user
should define the pump's maximum percentage operation revolutions.
V.e.6) Circulation Sampling
This function allows the user to activate or deactivate circulation sampling aimed at updating the
temperature reading consisting in a short activation of the collector's pump (when normal conditions
for the pump's activation are not met). Sampling requires a short activation of the pump after growth
in the collector's temperature by at least 3°C.
V.f)
Peripherals
The user may connect and configure the settings of an additional device. If there is no additional device,
the user should select the position NO (deactivate). Additional available devices and examples of
connections supporting all available installation schemes are presented below.
In the case of using schemes 12 or 14, it is not possible to connect an additional device – the function
is inactive.
V.f.1) Circulation Pump
After selecting this device, the user should adjust the pump's periodical Operation Time and Stoppage
Time during its activity. Then, the user should define in which hours the pump will be active, with the
use of the "From" and "To" functions. Entering the same times ("From – To") will result in the device
being active throughout the whole day.

Tech
- 13 -
V.f.2) Firing up the PLT Boiler (pellet)
This option is used to adjust the voltage-free signal to fire up the pellet boiler. The user sets the
Activation Delta, namely the difference between the tank's set temperature and the tank's current
temperature which leads to the controller sending a signal to fire up the boiler. Then, the user selects
the time interval in which this function will be active (using the function "From" and "To")
V.f.3) Heater
The heater is used to electrically heat the tank. The principle of operation is similar to that in the
previous case but the heater should be connected by means of an additional contactor. The user sets
the activation delta (the difference between the tank's set temperature and the tank's current
temperature), below which the controller will activate the heater. Then, the user selects the time interval
in which the electric heating function will be active (by means of the "From" and "To" functions).
V.f.4) Contact (not) Consistent with Pump
This setting determines the operation of the voltage-free contact. If the icon "Contact Consistent with
Pump" is marked, then the voltage-free contact will close always when the pump operates (the
additional device will activate). Otherwise (when the icon is unmarked), the contact will open at each
activation of the solar pump.
V.g) Calculation of Energy
Entering the following values correctly will make it possible for measure the gained energy in a more
precise manner.
V.g.1) Flow
At this point, the user should specify the quantity of glycol that flows through the pump in one minute.
V.g.2) Type of Agent
This function allows the user to identify the agent used: ethylene glycol, propylene glycol or water.
V.g.3) Glycol Solution
At this point, the user should specify the percentage concentration of glycol in water.

ST-401N User's Manual v 1.0.3
- 14 -
V.g.4) Calibration
This function allows the user to calibrate the difference in temperatures between the sensors. The
temperature measurement takes place in the temperature sensor's installation place. There is a
possibility of deviations in the flow and temperature measurement at the return from the container.
The manufacturer does not recommend changing this setting.
V.h) Alarm Sound
This function allows the user to activate or deactivate the acoustic signal after an alarm.
V.i) Factory Settings
The regulator is pre-configured for operation. However, it should be adjusted for own needs. Return to
the factory settings is possible at any moment. Activating the factory settings option cancels all the
user's settings of the Solar Installation Controller (saved in the user's menu) and replaces them with
the settings saved by the boiler's manufacturer. From that moment, the user may once again adjust
their own parameters. Restoring factory settings will result in setting the default installation scheme as
current.
V. Protections
In order to ensure safe and failure-free operation, the regulator has been equipped with a range
of safeguards.
1. Installation Sensor Protection.
If one of the sensors is damaged, an acoustic signal is activated and the following symbol will appear
on the right hand side of the display: An additional icon informing the user about the sensor
that is disconnected or is damaged will flash in the place of the displayed temperature of the damaged
sensor. In order to deactivate the alarm signal in the sensor's error mode, the user should press the
Exit button.
2. Protection against Collector Overheat.
If the maximum temperature (alarm) is reached, the regulator proceeds to the so-called collector
overheat mode and the display will show the following symbol: . The pump begins to
operate in order to cool down the collector until the Tank's Maximum Temperature is reached or until
the collector's temperature drops by the value of the Alarm Hysteresis (see: SERVICE MENU > Solar
Collector> Alarm Hysteresis) In the case of two tanks, both of them are used to cool down the
overheated collector (at the same time or successively, depending on the operation algorithm setting).
3. Heat Container Protection.
In the case of collector overheat, each tank may be heated to no more than the set value of the
maximum safe temperature. After reaching this temperature, the pump of a given tank is stopped (in
the system with two tanks with a valve, the circulation is switched to the second tank).
4. Fuse.
The regulator is equipped with a WT 3,15A tube fuse-link protecting the network,
CAUTION
Higher amperage should not be used. Higher amperage fuse should not be used as it may damage the
controller.

Tech
- 15 -
V. Updating Software
NOTE
New software may be uploaded to the controller only by a qualified fitter. After the software is changed,
it is not possible to restore the previous settings.
In order to upload new software, the controller should be disconnected from the power supply. A USB
flash drive with new software should be inserted to the USB port. Then, the controller should be
connected to the power supply while holding the MENU button all the time. The MENU button should
be held until a single sound signal is heard – this means that the new software is being uploaded.
VI. Maintenance
Before and during the heating season, the ST-401N controller should be checked for the condition of
its cables. The user should also check if the controller is properly mounted and clean it if dusty or dirty.
Technical Data of ST-401N Controller
Power Supply Voltage
230V/50Hz +/-10%
Temperature Adjustment Range
8°C: 90°C
Power Consumption
max. 4W
Temperature Strength of PT 1000 Sensors
-30°C: 200°C
Measurement Accuracy
1°C
Ambient Temperature
5°C: 50°C
Load at Each Outlet
1A
Fuse Insert
3,15A
VII. Assembly
NOTE:
The device should be installed by a qualified electrician. Make sure that the plug is disconnected from
the power supply at that time.
CAUTION
The cable to the temperature sensor should be led in a shield and should be protected against weather
factors. The cable for connection to the solar controller should be permanent, made under a roof and
well insulated. Metal elements of the sensor and the collector installation should be earthed.
Schematic Diagram of the Collector Installation

ST-401N User's Manual v 1.0.3
- 16 -
*Schematic Diagram – the scheme does not replace the design of the CH installation It is aimed at
demonstrating the possibility for expanding the controller. The presented scheme of the heating
installation does not contain cut-off and protecting elements for the execution of its specialist
installation.

Tech
- 17 -
Table of contents
I. Safety.............................................................................................................................. 2
II. Application .................................................................................................................... 3
III. Principle Of operation ..................................................................................................... 3
IV. User Menu......................................................................................................................... 4
IV.a) Home Page .................................................................................................................. 4
IV.b) Main Menu – Flowchart.................................................................................................. 5
IV.c) Operation Mode ............................................................................................................ 5
IV.c.1) Automatic Operation................................................................................................ 5
IV.c.2) Collector Defrosting ................................................................................................. 5
IV.c.3) Holiday Mode .......................................................................................................... 6
IV.c.4) Anti-Legionella........................................................................................................ 6
IV.c.5) Manual Operation .................................................................................................... 6
IV.d) Timer.......................................................................................................................... 6
IV.e) Date ........................................................................................................................... 6
IV.f) Ethernet Module............................................................................................................ 6
IV.g) GSM Module................................................................................................................. 7
IV.h) Statistics ..................................................................................................................... 7
IV.h.1) Gain ...................................................................................................................... 7
IV.h.2) Collector Overheat .................................................................................................. 7
IV.h.3) Power Supply Failures.............................................................................................. 7
IV.i) Backlight ...................................................................................................................... 7
IV.j) Display Contrast............................................................................................................ 7
IV.k) Language .................................................................................................................... 7
IV.l) Information .................................................................................................................. 7
IV.m) Factory Settings .......................................................................................................... 8
V. Service Menu ................................................................................................................ 8
V.b) Accumulation Tank ....................................................................................................... 10
V.b.1) Set Temperature .................................................................................................... 10
V.b.2) Maximum Temperature of Tank 1 ............................................................................. 10
V.b.3) Minimum Temperature of Tank 1 .............................................................................. 10
V.b.4) Tank Hysteresis...................................................................................................... 10
V.b.5) Cooling Down to Set Value ...................................................................................... 10
V.b.6) Delta Holiday ......................................................................................................... 10
IV.b) Solar Collector....................................................................................................... 10
V.c.1) Overheat Temperature ............................................................................................ 10
V.c.2) Minimum Reheating Temperature ............................................................................. 10
V.c.3) Anti-Freeze Temperature ......................................................................................... 10
V.c.4) Alarm Hysteresis .................................................................................................... 11

ST-401N User's Manual v 1.0.3
- 18 -
V.c.5) Defrosting Time ..................................................................................................... 11
V.c.6) Collector Delta ....................................................................................................... 11
V.e) Pumps..................................................................................................................... 11
V.e.1) Pump's Revolutions, Adjusted or Constant ............................................................. 11
V.e.2) Collector's Maximum Temperature ........................................................................ 11
V.e.3) Solar Pump Deactivation Delta ............................................................................. 11
V.e.4) Solar Pump Activation Delta ................................................................................. 11
V.e.5) Gear Coefficient.................................................................................................. 11
V.e.6) Solar Pump Operating Minimum ........................................................................... 12
V.e.7) Solar Pump Operating Maximum........................................................................... 12
V.e.6) Circulation Sampling ........................................................................................... 12
V.f) Peripherals............................................................................................................... 12
V.f.1) Circulation Pump ................................................................................................ 12
V.f.2) Firing up the PLT Boiler (pellet) ............................................................................ 13
V.f.3) Heater............................................................................................................... 13
V.f.4) Contact (not) Consistent with Pump ...................................................................... 13
V.g) Calculation of Energy ................................................................................................ 13
V.g.1) Flow.................................................................................................................. 13
V.g.2) Type of Agent..................................................................................................... 13
V.g.3) Glycol Solution ................................................................................................... 13
V.g.4) Calibration ......................................................................................................... 14
V.h) Alarm Sound ............................................................................................................ 14
V.i) Factory Settings ....................................................................................................... 14
V. Protections ....................................................................................................................... 14
V. Updating Software ............................................................................................................. 15
VI. Maintenance.................................................................................................................... 15
VII. Assembly ....................................................................................................................... 15
Care for the natural environment is our priority. Being aware of the fact that we manufacture
electronic devices obligates us dispose of used elements and electronic equipment in a manner
which is safe for nature. As a result, the company has received a registry number assigned by the
Main Inspector of Environmental Protection. The symbol of a crossed out rubbish bin on a product
means that the product must not be thrown out to ordinary waste bins. By segregating waste
intended for recycling, we help protect the natural environment. It is the user's responsibility to
transfer waste electrical and electronic equipment to the selected collection point for recycling of
waste generated from electronic and electrical equipment.

Tech
- 19 -
Declaration of conformity no 62/2012
The company TECH, based in Wieprz 1047A, 34-122 Wieprz,
declares with complete liability that our temperature regulator
ST-401N 230V, 50Hz meets the requirements of the Regulation
of the Minister of Economy, Labor and Social Policy (Journal of
Laws No 155, item 1,089) dated August 21st, 2007 implementing
the provisions of the Low Voltage Directive (LVD)
2006/95/EC,, the Act dated April 13th, 2007 on
electromagnetic compatibility (Journal of Laws 07.82.556)
implementing the provisions of Directive (EMC) 2004/108/EC,
as well as the Regulation of the Minister of Economy dated May
8th, 2013 "on basic requirements on the restriction of the use of
certain hazardous substances in electrical and electronic
equipment" implementing the provisions of Directive ROHS
2011/65/EC.
Harmonized standards were used to assess the conformity
PN-EN 60730-2-9:2011, PN-EN 60730-1:2012.
The product was marked with CE :12-05-2014
Wieprz, April 14th, 2015

ST-401N User's Manual v 1.0.3
- 20 -
Table of contents
Other TECH Controllers manuals
