Tele Radio T60RX-01APL User manual

2 - 32 English
33 - 63 Dutch (Netherlands)
64 - 94 Swedish (Svenska)
95 - 125 German
3
Printed in Sweden Mar-03 MW
Contents
2 Contents
3 Important information
4 Codes / Erase
5 Placement of the Antenna and Receiver
6 - 7 Transmitter
8 - 16 Program the receiver
17 - 22 Co-programming the transmitter and receiver
23 Trouble shooting chart
24 Service and Support
25 - 31 Coding tables
32 Voltage connections
GBNLSWED
GBNLSWED

3
Important information
To read before installation of the radio equipment
In order for the radio control system to function reliably for a long period of time
the installation of the receiver with antenna is extremely important. Equipment
installed correctly can give both an improved range and a longer life. It is worth
taking the time to read through these instructions.
General information
The system works at the frequency 433.92 MHz and uses frequency modulation,
this is generally called FM.
The main benefit of using FM instead of the more common AM (amplitude
modulation), is because FM is significantly less sensitive to the electrical
interference generated in computers, electric motors, etc.
Objects positioned between the transmitter and receiver antenna, especially large
metal objects (think about the reinforcement rods in concrete walls), can affect the
range in a very unpredictable manner, depending on how the distribution of radio
signals takes place. The effect of other radio transmitters on the same frequency in
the vicinity also affects the range.
Due to these circumstances it is difficult to give any general advice about anything
other than if there is free visibility between the transmitter and the receiver the
range with an optimal signal should be the best.
The typical range for the transmitter in an interference-free environment is about
50-100 m.
GBNLSWED
GBNLSWED

FCC Statement
This device complies with part 15 of the FCC rules. Operation is subject to the condition
that this device does not cause harmful interface.
Any changes or modifications not expressly approved by the party responsible for
compliance could void the user’s authority to operate the equipment.

4
5
T60RX-01APL
T60RX-03ADL
Normally all controls are supplied with the same standard code, which means
all transmitters can operate all receivers.
It is important that the transmitter and receiver to be used are coded
together with an unique code. Coding is done using respective code switches
on the transmitter.
NOTE!
The receiver does not have code switches (system T60). It automatically
programs the transmitter’s unique code.
See ”program the receiver”
The code switches consist of 10 three way switches (”+”, ”0”, ”-”).
When using the 460 system the code switches 1-8 are used and it is possible
to choose between 6,561 codes.
On the T60 system, the code switches 1-10 are used and it is possible to
choose between 59,049 codes.
The T60 system has 16,777,216 individual codes. Each transmitter is supplied
with a unique code (Private ID code)
Erase the programmed codes.
- Press the self-teach button (more than 6 sec) until the red LED goes out.
Codes/Erase
GBNLSWED
GBNLSWED

ON
ON
1
4123
123
5678
5678
91
9 1
0
+
0
-
(A)
(B) +
DIP-433K3 1/4-433Kx 5/8-433Kx
4
5
General transmitter
Switch
To gain access to set the system switch (A) and code switches (B)
the transmitter must be unscrewed. The switches are located as
shown on the diagram.
Battery replacement
The transmitter must be taken apart to access the battery.
Note on transmitters that use a button battery the plus symbol (+) should
be turned to face the plus symbol marked on the battery holder
The receiver should be placed:
-As far as possible, protected from the wind and weather.
-With cable glands facing down.
Placement of the receiver’s antenna.
-Place the antenna high above the ground.
-The antenna should not be in the vicinity of metal objects such as electrical
cables and other antennae.
Placement of the Antenna and Receiver
X= 3, 5, or 10 m antenna cable
GBNLSWED
GBNLSWED

(A)
(B)
123
456
123
+
6
7
Transmitter MINI
Transmitter components
Size: 84x40x16 mm
Transmitter MIDI
T60TX-01SHL
with 1 button function
T60TX-03SHL
with 3 button functions
T60TX-06SHL
with 6 button functions
Battery 3V
T60TX-06SOL
with 1-6 button functions
Size: 98x62x22 mm
Battery 9V
GBNLSWED
GBNLSWED

(B)
(A)
6
7
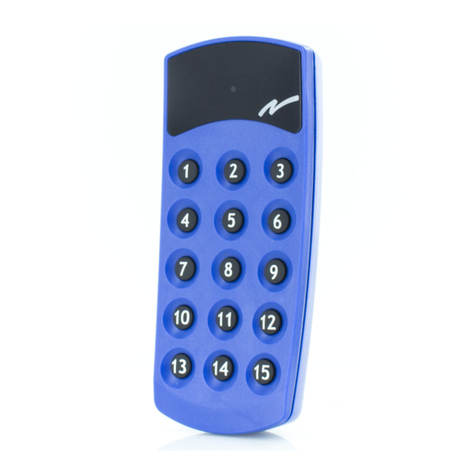
Transmitter MAXI
Transmitter components
Transmitter T60TX-15SML
with 15 button functions
Transmitter T60TX-15DML
with the function buttons
Up Stop and Down.
Can control 0-999 doors
Size: 143x62x38 mm
Function buttons
Battery 9V
Door no. buttons
Shortcut for one function (T60TX-15DML)
The buttons * and # are used to program a shortcut (1 selection per button)
for a specific operation.
To program a shortcut set the door you wish to save, press * or # for more than 3
sec. (the display flashes).
The door has now been saved as a shortcut.
GBNLSWED
GBNLSWED

4
123
5
6
7
8
9
10
TX2
TX2
*
123456789101112
8
9
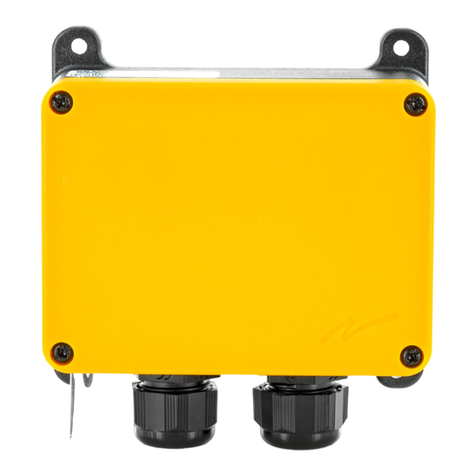
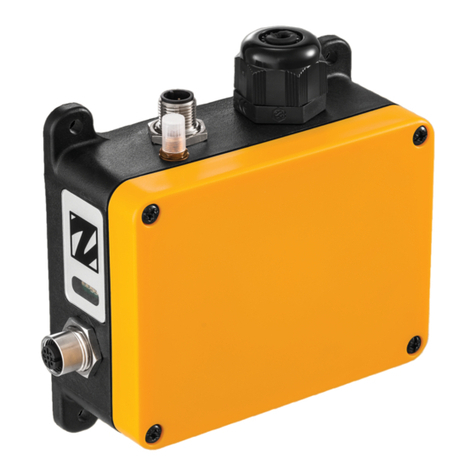
Receiver T60RX-04xSL
Receiver components
T60RX-04xSL
Frequency: 433.92 MHz
Operating voltage: 12-30 VAC/DC or *48/115/230V AC
Size: 120x33x45 mm
Enclosure: IP 65
The receiver’s LEDs indicate:
1.Yellow LED. Lights when the receiver has the correct supply voltage.
2.Green LED. Lights when the receiver receives a radio signal.
3. Function button.
4. Select button.
5.Red LED. Each relay is fitted with a LED that lights when the relay
switches.
6. Red LED.
6.1.Comes on - The receiver can be programmed.
6.2.Flashes - The code has been programmed (1-10)
6.3.Flashes twice - One or more private ID codes have been programmed.
7.Yellow LED Flashes when one of the relays has a toggle function.
8.Green LED Flashes when one of the relays is interlocked.
9. Connection terminal for the voltage.
10. BNC connector
NOTE! Connection for
the receiver see page 32
GBNLSWED
GBNLSWED

8
9
Program the receiver T60RX-04xSL
STANDARD code on all or individual relays
Program as follows.
1.Press the function button for at least 0.3 sec, longest 4 sec
-Red LED no. 6 comes on (programming the code)
Pressing the function key repeatedly allows you to select between the code
(Red LED), toggling (Yellow LED) or interlocking (green LED).
2.Now press the select button
-Four red LEDs come on above the relays.
3.Now press the function key and select which of
the relays is to be coded.
NOTE-Pressing the function key repeatedly allows you to choose which one
of the four relays you wish to code. You can choose between all relays or only
1, 2, 3, or 4. A red LED comes on above the relay to be coded.
If all of the relays are chosen the first relay will work with function key 1 on
the transmitter, function key 2 on the transmitter with relay 2, etc.
4.Press the select button again.
-Release the select button.
5.Now press the function key on the transmitter that is to control
the relay until LED no. 6 flashes 3 times.
6.The standard code is now stored.
-The red LED no. 6 flashes and indicates that the transmitter is programmed.
GBNLSWED
GBNLSWED
10 1
1
Program the receiver T60RX-04xSL
Erase all relays or individual relays
Program as follows.
1.Press the function button for at least 0.3 sec, longest 4 sec.
-Red LED no. 6 comes on.
2.Now press the select button
-Four red LEDs come on above the relays.
3.Release the select button.
4.Now press the function key and then select the relay
to be erased.
NOTE! -Pressing the function key repeatedly allows you to choose which
one of the four relays you wish to erase. You can choose between all relays
or only 1, 2, 3, or 4. A red LED comes on behind the relay that can be erased.
5.Press the select button again for at least 6 sec.
-The red LEDs above the relays go out.
GBNLSWED
GBNLSWED

1
0 11
Program the receiver T60RX-04xSL
Register the Standard code and Private code on all
or individual relays.
Only for the T60 system
Program as follows.
1.Press the function button for at least 0.3 sec, longest 4 sec.
-Red LED no. 6 comes on (programming the code).
Pressing the function key repeatedly allows you to select between the code
(Red LED), toggling (Yellow LED) or
interlocking (green LED).
2.Now press the select button.
-Four red LEDs come on above the relays.
3.Now press the function key and select which of
the relays is to be coded.
NOTE-Pressing the function key repeatedly allows you to choose which one
of the four relays you wish to code. You can choose between all relays or
only 1, 2, 3, or 4. A red LED comes on above the relay to be coded.
If all of the relays are chosen the first relay will work with function key 1 on
the transmitter, function key 2 on the transmitter with relay 2, etc.
4.Press the select button between 0.3 sec and 0.4 sec.
5.Release the select button wait max 1 sec.
6.Press the select button again for more than 1 sec.
7.Now press the function key on the transmitter that is to control
the relay until the red LED no. 6 flashes three times.
8.The standard code and private code are now stored.
-Red LED no. 6 double flashes to indicate that private code has been stored.
GBNLSWED
GBNLSWED

12 1
3
Program the receiver T60RX-04xSL
Programming the toggling/instantaneous function
Program as follows.
1.Press the function key twice so that the yellow LED no 7 comes on
(program a toggling relay).
2.Now press the select button.
-The red LED above the first relay comes on.
3.Press the select button and select whether the first relay should be toggling
or not. If the yellow LED is on the relay is toggling, if it is out the relay is
not toggling.
NOTE! You can use the function key to step to the relay 2, 3 or 4 that should
have the toggling function.
After the fourth relay the program is stored.
4.Continue to press the function key until all four relay LEDs
have gone out.
-Yellow LED no. 7 flashes once (the function is now stored).
5. The toggling function has now been programmed.
-Yellow LED no. 7 flashes and indicates that one of the relays has a
toggling function.
GBNLSWED
GBNLSWED

1
2 13
Program the receiver T60RX-04xSL
Program/Erase the interlock function
Program as follows.
1.Press the function key three times so that the green LED no 8 comes on
(Programming the interlock).
2.Now press the select button.
-The red LEDs above relays 1 and 2 come on.
3.Press the select button and select whether the first relay should be toggling
or not. If the yellow LED is on the relay is toggling, if it is out the relay is
not toggling.
NOTE! Press the function key once to program interlocking over
relays 3 and 4.
4.Continue to press the function key until all four relay
LEDs have gone out.
-Green LED no. 8 flashes once (the function is now stored).
Interlocking is now programmed.
-The Green LED no. 8 flashes and indicates that
interlocking is programmed.
GBNLSWED
GBNLSWED
12/24V AC/ DC
12/24V AC/ DC
C NO NC C NO NC C NO NC
14 1
5
Receiver T60RX-03ADL
Receiver components
T60RX-03ADL
Frequency: 433.92 MHz
Operating voltage: 12-24 V AC/DC
Size: 86x30x58 mm
Enclosure: IP 20, for internal installation
Green LED
indicates
signal reception Button for
self-teach
Red LED shows
the programming status
Yellow LED indicates
the supply voltage
Voltage
connection
GBNLSWED
GBNLSWED

1
4 15
Program receiver T60RX-03ADL
Standard code/ Private ID code
T60RX-01APL
T60RX-03ADL
Register the Standard Code
1.Press the self-teach button for
-at least 0.3 sec, longest 4 sec.
2.Release the button.
Programming mode, red LED comes on.
3.Press the required function key.
The red LED flashes three times quickly.
4.The standard code is now stored.
The red LED flashes, once every other sec.
Register the Private ID code
1. Press the self-teach button for
at least 0.3 sec, longest 4 sec.
2.Release the button (less than 1 sec).
3.Press the button again (longer than 1 sec).
Private program mode, the red LED goes out and comes on again.
4.Press the required function key.
The red LED flashes three times quickly.
5.The Private code is now stored.
The red LED double flashes every other sec.
GBNLSWED
GBNLSWED

5
6
11
10
16 1
7
Receiver T60RX-01APL
Receiver components
T60RX-01APL
Frequency: 433.92 MHz
Operating voltage: 12-24 VAC/DC
Size: 70x58x40 mm
Enclosure: IP 23, for internal installation
Green LED indicates
signal reception Button for
self-teach
Red LED shows
the programming status
Yellow LED indicates
the supply voltage
BNC connector
Side 1
Side 2
Voltage connection
11-way terminal
5. 12-24 V AC/DC
6. 12-24 V AC/DC
11. C
10. NO
GBNLSWED
GBNLSWED

(A) (B)
(C)
ON
ON
1
4123
123
5678
5 6 7 8
91
9 1
0
+
0
-
1
6 17
Co-programming the transmitter and receiver
T60TX-15SML and T60RX-03ADL
Program as follows.
1. Check that the transmitter’s system switch (A) is in the ON position.
2. Set an own code on the transmitter’s code switch (B) 1-10.
3. If you press the buttons 1-3 the relays in the receiver will
work as buttons 1-3. If buttons 4-6 are pressed the relays will
work as buttons 4-6, etc.
- The red LED comes on (programming mode 6 sec).
4. Press the required function key (1-15) on the transmitter.
- The red LED flashes three times.
5. Check that the relay switches when the same function button
is pressed again.
T60TX-15DML
Program as follows.
1. Check that the transmitter’s system switch (A)
is in the ON position.
2. Set an own code on the transmitter code switch (B) 1-10.
3. Press the self-teach button (C) on the receiver.
- The red LED comes on (programming mode 6 sec).
4. Press the required door number button (0-999) and an optional function
button (up- stop- down) on the transmitter.
- The red LED flashes three times
5. Check that the relay switches when one of the transmitter’s buttons is
pressed again.
GBNLSWED
GBNLSWED

4123 567891
0
(A) (B)
123
456
3
ON
ON
1
(C)
4123
123
5678
5 6 7 8
91
9 1
0
+
0
-
12
18 1
9
Co-programming the transmitter and receiver
T60TX-01SHL
T60TX-03SHL
T60TX-06SHL
T60TX-0xSOL
Program as follows
1. Check that the transmitter system switch
(A) is in the ON position.
2. Set an own code on the transmitter code switch (B) 1-10.
3. Press the self-teach button (C) on the receiver.
-The red LED comes on (programming mode 6 sec).
NOTE!
Only receiver T60RX-03ADL
4.1. If you press the buttons 1-3 the relays in the receiver will
work as button 1-3. If buttons 4-6 are pressed the relays will
work as buttons 4-6, etc.
- The red LED comes on (programming mode 6 sec).
4. Press the required function key (1-6) on the transmitter.
-The red LED flashes three times.
5. Check that the relay switches when the same
function button is pressed again.
GBNLSWED
GBNLSWED

(A) (B)
4123
1 2 3
5678
5678
91
9 1
0
+
0
-
ON
ON
1
1
8 19
Co-programming the transmitter and receiver
Supplement for the 460 system
Type 401RVL9 and 403RVL9 transmitter with knob 1-10
T60TX-15DML
Program as follows.
1. Check that the transmitter’s system switch (A) is in position 1 (OFF).
2. Check that the code switch (B) 9 is in the 0 (zero) position.
3. Set code switch 10 to either the minus or plus position depending on whether
you are using A or B coding on the old transmitter. (robust transmitter)
4. Set an identical code on the transmitter’s 4 first switches (code switches 1-4)
as set on the receiver (code switches 5-8 are not used).
5. Check that the relay switches when one of the transmitter’s buttons is pressed in.
See the code table 1-10 page 24
GBNLSWED
GBNLSWED

20 2
1
Co-programming the transmitter and receiver
Supplement for the 460 system
Type 401RVL9 and 403RVL9 with knob 0-15
T60TX-15DML
Program as follows.
1. Check that the transmitter’s system switch (A) is in position 1 (OFF).
2. Check that the code switch (B) 9 is in the - (minus) position.
3. Set code switch 10 to either the minus or plus position depending on whether
you are using A or B coding on the old transmitter. (robust transmitter)
4. Set an identical code on the transmitter’s 4 first switches (code switches 1-4)
as set on the receiver (code switches 5-8 are not used).
5. Check that the relay switches when one of the transmitter’s buttons is pressed in.
See the code table 1-15 page 25
GBNLSWED
GBNLSWED
This manual suits for next models
1
Table of contents
Languages:
Other Tele Radio Receiver manuals

Tele Radio
Tele Radio T60 User manual

Tele Radio
Tele Radio R2-01 User manual

Tele Radio
Tele Radio R9 User manual

Tele Radio
Tele Radio R20-01 User manual

Tele Radio
Tele Radio Panther PN-R18-1 User manual

Tele Radio
Tele Radio R21-RS02 User manual

Tele Radio
Tele Radio T20RX-02AKL User manual

Tele Radio
Tele Radio T50 User manual

Tele Radio
Tele Radio R23-01 User manual

Tele Radio
Tele Radio PN-R15-1 User manual