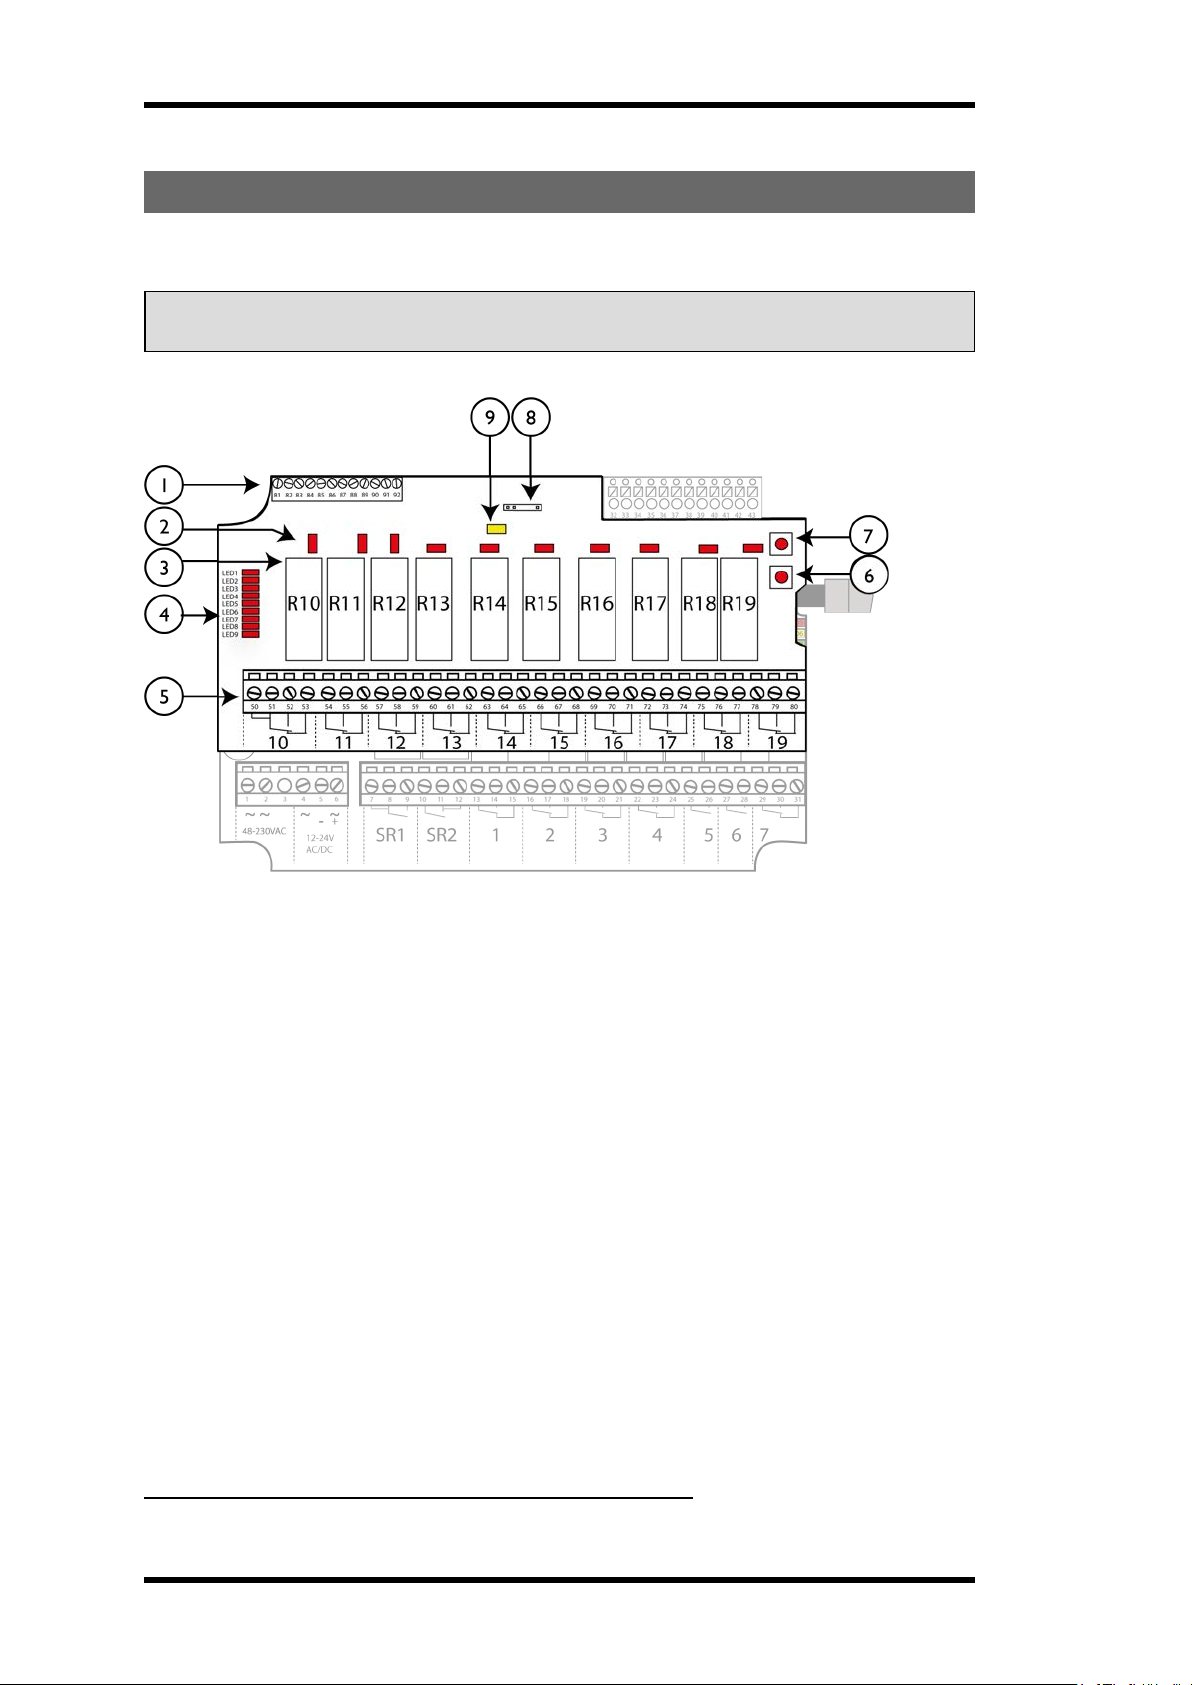
CHAPTER 1: CUSTOMER INFORMATION
THANK YOU FOR PURCHASING A TELE RADIO AB PRODUCT
Read all instructions and warnings carefully before mounting, installing and
configuring the products.
These instructions have been published by Tele Radio AB and are not subject to any guarantee. The
instructions may be withdrawn or revised by Tele Radio AB at any time and without further notice.
Corrections and additions will be added to the latest version of the instructions. Always download the
installation instructions from our website, www.tele-radio.com, for the latest available version. Keep the
safety instructions for future reference.
IMPORTANT! These instructions are intended for end users. They can be printed and
handed to end users. The installation instructions containing information about the installation and
configuration of the radio remote control unit on the machine are not intended to be passed on to the
end user. Only such information that is needed to operate the machine correctly by radio remote
control may be passed on to the end user.
Tele Radio AB remote controls are often built into wider applications. Always refer to the applicable
local regulations for installation and safety requirements relating to cranes, hoists or other material
handling and/or lifting equipments using Tele Radio AB products, e.g.:
napplicable local and industrial standards and requirements,
napplicable occupational health and safety regulations,
napplicable safety rules and procedures for the factory where the equipment is being used,
nuser and safety manuals or instructions of the manufacturer of the equipment where Tele Radio
AB remote control systems are installed.
Tele Radio AB instructions do not include or address the specific instructions and safety warnings of the
end product manufacturer.
Tele Radio AB products are covered by a guarantee/warranty against material, construction or
manufacturing faults, see §"GUARANTEE, SERVICE, REPAIRS AND MAINTENANCE" on page 16
©Tele Radio AB
Datavägen 21
SE-436 32 ASKIM
SWEDEN
Tel: +46-31-748 54 60
www.tele-radio.com
-3-