manuals.online logo
Brands
  1. Home
  2. •
  3. Brands
  4. •
  5. Teledyne
  6. •
  7. Laboratory Equipment
  8. •
  9. Teledyne ACCQPrep AI 5 User manual

Teledyne ACCQPrep AI 5 User manual

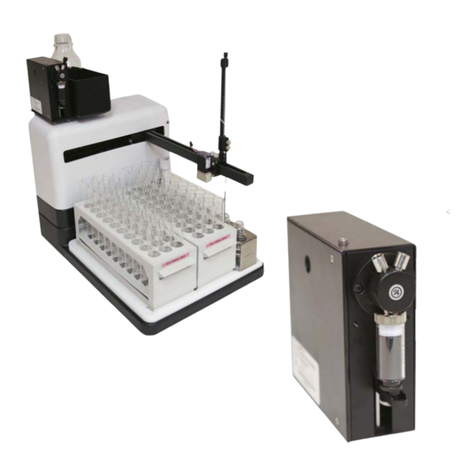
Installing the ACCQPrep AI 5
AutoInjector
Overview
This instruction sheet will guide you through the
installation of the ACCQPrep AI 5 AutoInjector into the
ACCQPrep HP125 system.
Tools Required:
●1/4” wrench
●#2 Phillips screwdriver
●#1 Phillips screwdriver
●Side cutters
Parts List:
Installation
1. Turn OFF power to the ACCQPrep HP125 system.
2. Disconnect the power cord from the back of the
unit.
3. Remove the cover panel on the right side of the
instrument (Figure 1, L).
4. Carefully cut the plastic tie securing the AutoIn-
jector power supply cable to the back of the
panel (Figure 1, R).
Figure 1: Cover panel (L) and cable tie (R)
5. Connect the AutoInjector power cable to the
port on the back of the syringe drive and secure
with the provided panhead screws and internal
lock washers (Figure 2).
Note
If the power supply cable isn’t long enough, you may
need to access the back of the AutoInjector through
the back panel of ACCQPrep HP125 system.
Figure 2: Location of screw placement on the
syringe drive
6. Once the power supply cable is secured, you
may now slide the AutoInjector Module into
the ACCQPrep system. (Figure 3).
Figure 3: AutoInjector partially installed
7. Using the screws (removed in Step 3) attach the
AutoInjector assembly into place.
8. The back panel may be reinstalled on the system
if it was necessary to remove it.
Part Part Number
AutoInjector 60-5237-098
Panhead Screws 231514303
Lock Washers 233210400
72” Black Tubing 023050309
15” Teflon Tubing 023050204
Cable tie 489010100
Instruction Sheet #69-5233-836
March 2018
March 2018
Teledyne Isco
P.O. Box 82531, Lincoln, Nebraska, 68501 USA
Toll-free: (800) 775-2965 • Phone: (402) 464-0231 • Fax: (402) 465-3001
E-mail: [email protected]
Teledyne Isco is continually improving its products and reserves the right to change product
specifications, replacement parts, schematics, and instructions without notice.
9. Thread the nut of the clear 15” Teflon tubing into
the top left port of the AutoInjector. Thread the
nut side of the black 72” tubing into the top right
port of the AutoInjector (Figure 4).
Figure 4: Tubing location on the AutoInjector
Module
10. Route the clear 15” Teflon tubing behind the sam-
ple loop, then connect it to port #3 of the Injec-
tion valve and tighten the metal fitting with a ¼”
wrench (Figure 5).
Figure 5: Tubing location
11. Take the open end of the black tubing connected
in Step 10 and route to a waste container or tee
into the existing waste lines.
12. The AutoInjector sample probe should be
connected to Port #2 of the injection valve if the
AutoInjector is being used without an
AutoSampler. If an AutoSampler is being used,
then the AutoSampler probe should be
connected to Port #2 instead.
13. Reconnect the power cord in the back of the unit
and power the ACCQPrep ON.
14. To verify that the system recognizes the pres-
ence of the AutoInjector, press the play button
and the MULTIPLE INJECTION RUN screen will
appear (Figure 6).
Figure 6: Multiple Injection Run screen
Revised March 2018
Left port
tubing is
connected to #3
position on the
injector.
Right port
tubing is
connected to
waste container.
#3 position
Route
tubing
behind
loop

Other Teledyne Laboratory Equipment manuals

Teledyne AutoInjector Module Operating instructions

Teledyne

Teledyne AutoInjector Module Operating instructions

Teledyne Installation Guide User manual

Teledyne

Teledyne Installation Guide User manual

Teledyne XTRX500 User manual

Teledyne

Teledyne XTRX500 User manual

Teledyne ACCQPrep HP125 Operating instructions

Teledyne

Teledyne ACCQPrep HP125 Operating instructions

Teledyne Hanson Research FLODEX User manual

Teledyne

Teledyne Hanson Research FLODEX User manual

Teledyne CombiFlash Companion XL User manual

Teledyne

Teledyne CombiFlash Companion XL User manual

Teledyne Platinum User manual

Teledyne

Teledyne Platinum User manual

Teledyne CETAC ASX-112FR User manual

Teledyne

Teledyne CETAC ASX-112FR User manual

Teledyne Foxy R1 User manual

Teledyne

Teledyne Foxy R1 User manual

Teledyne ASX-560 User manual

Teledyne

Teledyne ASX-560 User manual

Teledyne ADX-500 User manual

Teledyne

Teledyne ADX-500 User manual

Teledyne 934 NiCad User manual

Teledyne

Teledyne 934 NiCad User manual

Teledyne Everywhereyoulook IsoPlane 320A User manual

Teledyne

Teledyne Everywhereyoulook IsoPlane 320A User manual

Teledyne 10 Operating instructions

Teledyne

Teledyne 10 Operating instructions

Teledyne Princeton Instruments IsoPlane 81 User manual

Teledyne

Teledyne Princeton Instruments IsoPlane 81 User manual

Teledyne 3700 Operating instructions

Teledyne

Teledyne 3700 Operating instructions

Teledyne ASX-560 User manual

Teledyne

Teledyne ASX-560 User manual

Teledyne 4700 User manual

Teledyne

Teledyne 4700 User manual

Teledyne T640 Manual

Teledyne

Teledyne T640 Manual

Teledyne 4700 Instruction manual

Teledyne

Teledyne 4700 Instruction manual

Teledyne FALCON GC User manual

Teledyne

Teledyne FALCON GC User manual

Teledyne CombiFlash Torrent User manual

Teledyne

Teledyne CombiFlash Torrent User manual

Teledyne Tekmar 7000 User manual

Teledyne

Teledyne Tekmar 7000 User manual

Teledyne CombiFlash NextGen Operating instructions

Teledyne

Teledyne CombiFlash NextGen Operating instructions

Popular Laboratory Equipment manuals by other brands

diversey SKY 7Xi manual

diversey

diversey SKY 7Xi manual

Four E's Scientific MultiEX 032 operating instructions

Four E's Scientific

Four E's Scientific MultiEX 032 operating instructions

Integra Evolve 3011 operating instructions

Integra

Integra Evolve 3011 operating instructions

Skytron SS2201-J2 owner's manual

Skytron

Skytron SS2201-J2 owner's manual

CAPP PA-100 Operation manual

CAPP

CAPP PA-100 Operation manual

Helmer Pro Series user guide

Helmer

Helmer Pro Series user guide

V&P Scientific SpinVessel VP 418SV2-2-50-CC operating instructions

V&P Scientific

V&P Scientific SpinVessel VP 418SV2-2-50-CC operating instructions

MELAG Euroklav 29 VS+ user manual

MELAG

MELAG Euroklav 29 VS+ user manual

Beckman Coulter Avanti J-HC Instructions for use

Beckman Coulter

Beckman Coulter Avanti J-HC Instructions for use

Bruker Ascend 600'89 user manual

Bruker

Bruker Ascend 600'89 user manual

Getinge 9120 Technical manual

Getinge

Getinge 9120 Technical manual

Pacific Image Electronics Glite 965GW user manual

Pacific Image Electronics

Pacific Image Electronics Glite 965GW user manual

Rainfresh R519 user manual

Rainfresh

Rainfresh R519 user manual

Knauer Azura Assistant ASM 2.1L user manual

Knauer

Knauer Azura Assistant ASM 2.1L user manual

Renfert MT plus instruction manual

Renfert

Renfert MT plus instruction manual

VEE GEE C10 Operation manual

VEE GEE

VEE GEE C10 Operation manual

Pall Allegro 200 L Instructions for use

Pall

Pall Allegro 200 L Instructions for use

Binder APT.line MK E2.1 Series operating manual

Binder

Binder APT.line MK E2.1 Series operating manual

manuals.online logo
manuals.online logoBrands
  • About & Mission
  • Contact us
  • Privacy Policy
  • Terms and Conditions

Copyright 2025 Manuals.Online. All Rights Reserved.