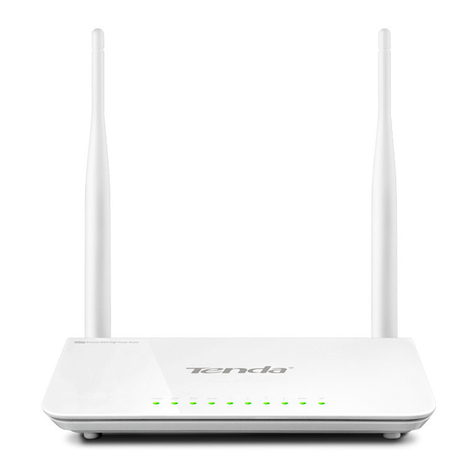
Tenda DH301 User manual

Wireless N300 ADSL2+ High Power Modem Router
i

Wireless N300 ADSL2+ High Power Modem Router
ii
Copyright Statement
is the registered trademark of Shenzhen Tenda Technology Co., Ltd. All the products and product names
mentioned herein are the trademarks or registered trademarks of their respective holders. Copyright of the whole product
as integration, including its accessories and software, belongs to Shenzhen Tenda Technology Co., Ltd. No part of this
publication can be reproduced, transmitted, transcribed, stored in a retrieval system, or translated into any language in
any form or by any means without the prior written permission of Shenzhen Tenda Technology Co., Ltd. If you would
like to know more about our product information, please visit our website at http://www.tendacn.com.
Disclaimer
Pictures, images and product specifications herein are for references only. To improve internal design, operational
function, and/or reliability, Tenda reserves the right to make changes to the products without obligation to notify any
person or organization of such revisions or changes. Tenda does not assume any liability that may occur due to the use or
application of the product described herein. Every effort has been made in the preparation of this document to ensure
accuracy of the contents, but all statements, information and recommendations in this document do not constitute the
warranty of any kind, express or implied.
Technical Support
Website: http://www.tendacn.com
Telephone: (86 755) 2765 7180
Email: suppor[email protected]

Wireless N300 ADSL2+ High Power Modem Router
iii
Contents
Chapter 1 Get to Know Your Router ..................................................................................................................................... 1
1.1 What it does ............................................................................................................................................................ 1
1.2 Product Features ...................................................................................................................................................... 1
1.3 Package Contents .................................................................................................................................................... 2
Chapter 2 Hardware Install ................................................................................................................................................... 3
2.1 LED Indicators, Buttons and Interfaces .................................................................................................................. 3
2.2 Install the Device .................................................................................................................................................... 5
Chapter 3 Quick Internet Setup ............................................................................................................................................. 6
3.1 Log in to Web Manager ........................................................................................................................................... 6
3.2 Internet Setup .......................................................................................................................................................... 6
3.2.1 ADSL Mode ................................................................................................................................................. 6
3.2.2 Ethernet Mode .............................................................................................................................................. 8
3.2.3 Test Internet Connectivity ............................................................................................................................ 9
Chapter 4 Advanced Settings .............................................................................................................................................. 10
4.1 Device Info ............................................................................................................................................................ 11
4.1.1 Summary .................................................................................................................................................... 11
4.1.2 WAN........................................................................................................................................................... 12
4.1.3 Statistics ..................................................................................................................................................... 12
4.1.4 Route .......................................................................................................................................................... 14
4.1.5 ARP ............................................................................................................................................................ 14
4.1.6 DHCP ......................................................................................................................................................... 15
4.2 Advanced Setup..................................................................................................................................................... 15
4.2.1 Layer2 Interface ......................................................................................................................................... 15
4.2.2 WAN Service .............................................................................................................................................. 18
4.2.3 LAN ........................................................................................................................................................... 85
4.2.4 NAT ............................................................................................................................................................ 89
4.2.5 Security ...................................................................................................................................................... 95
4.2.6 Parental Control ......................................................................................................................................... 98
4.2.7 Bandwidth Control ................................................................................................................................... 100
4.2.8 Routing ..................................................................................................................................................... 101
4.2.9 DNS .......................................................................................................................................................... 104
4.2.10 DSL ........................................................................................................................................................ 109
4.2.11 UPnP ...................................................................................................................................................... 110
4.2.12 Print Server ............................................................................................................................................ 111
4.2.13 Storage Service....................................................................................................................................... 117
4.2.14 Interface Grouping ................................................................................................................................. 120
4.2.15 IP Tunnel ................................................................................................................................................ 123
4.2.16 Certificate ............................................................................................................................................... 125
4.2.17 Multicast................................................................................................................................................. 129
4.2.18 IPTV ....................................................................................................................................................... 130
4.3 Wireless ............................................................................................................................................................... 131
4.3.1 Basic ......................................................................................................................................................... 131
4.3.2 Security .................................................................................................................................................... 132
4.3.3 MAC Filter ............................................................................................................................................... 134
Wireless N300 ADSL2+ High Power Modem Router
iv
4.3.4 Wireless Bridge ........................................................................................................................................ 136
4.3.5 Station Info ............................................................................................................................................... 137
4.4 Diagnostics .......................................................................................................................................................... 138
4.4.1 Diagnostics ............................................................................................................................................... 138
4.4.2 Ping test .................................................................................................................................................... 138
4.5 Management ........................................................................................................................................................ 139
4.5.1 Settings ..................................................................................................................................................... 139
4.5.2 System Log .............................................................................................................................................. 141
4.5.3 SNMP Agent ............................................................................................................................................ 142
4.5.4 TR-069 Client........................................................................................................................................... 143
4.5.5 Internet Time ............................................................................................................................................ 144
4.5.6 Access Control ......................................................................................................................................... 145
4.5.7 Update Firmware ...................................................................................................................................... 147
4.5.8 Reboot ...................................................................................................................................................... 147
Appendix 1 Configure Your PC ........................................................................................................................................ 149
Windows 8 ................................................................................................................................................................ 149
Windows 7 ................................................................................................................................................................ 151
Windows XP ............................................................................................................................................................. 153
MAC ......................................................................................................................................................................... 154
Appendix 2 Join Your Wireless Network .......................................................................................................................... 156
Windows 8 ................................................................................................................................................................ 156
Windows 7 ................................................................................................................................................................ 157
Windows XP ............................................................................................................................................................. 158
MAC ......................................................................................................................................................................... 160
iPhone/iPad ............................................................................................................................................................... 162
Appendix 3 FAQs.............................................................................................................................................................. 164
Appendix 4 VPI/VCI List ................................................................................................................................................. 166
Appendix 5 Regulatory Compliance Information ............................................................................................................. 174

Wireless N300 ADSL2+ High Power Modem Router
1
Chapter 1 Get to Know Your Router
1.1 What it does
The Wireless N300 ADSL2+ High Power Modem Router provides you with an easy and secure way to set up a wireless
home network with fast access to the Internet over a high-speed digital subscriber line (DSL). Complete with a built-in
ADSL modem, it is compatible with all major ADSL Internet service providers. It offers wireless speeds of up to
300Mbps needed for demanding applications, such as large file transfers, streaming HD video, and multiplayer gaming.
The unit comes with a wide range of premium features and applications such as IPv6, SNMP, Multicast, IP tunnel, ready
share USB, IPTV service and parental controls, etc. Plus, with the router, you can access the Internet via the ATM
interface or Ethernet interface.
1.2 Product Features
Wireless N speeds up to 300 Mbps for streaming HD videos and online gaming in addition to basic Internet applications
All-in-one device combines a built-in ADSL2+ modem, wired router, wireless router and switch
Sharable USB lets you access and share files on an attached USB hard drive
Sharable Printer lets you print from your Windows computer to a connected USB printer
Advanced QoS helps prioritize media streaming and gaming applications for best entertainment experience
Parental Control keeps your kids Internet experience safe using flexible and customizable filter settings
One-touch WPS ensures a quick and secure network connection
WEP and WPA/WPA2 are supported for advanced encryptions
Compatibility: Works with all major ADSL Internet service providers (ISPs); backward compatible with 802.11b/g WiFi
devices
Interchangeable LAN/WAN ports to schedule the Ethernet port to function either as a LAN or a WAN port
Interchangeable LAN/IPTV to schedule the Ethernet port to function either as a LAN or an IPTV port
Optional Ethernet and ADSL Uplinks: Access the Internet via ADSL2+ Broadband Internet Service or an
interchangeable LAN/WAN RJ45 port
Multiple Internet Connection Types: Bridging, PPPoE, IPoE, PPPoA, IPoA, dynamic IP and static IP
IPTV Service lets your surf the Internet while watching online TV
6000V lightning-proof design fits into lightning-intensive environment
Strong driving capability up to 6.5Km transmission distance

Wireless N300 ADSL2+ High Power Modem Router
2
High ADSL speed up to 24Mbps downstream 1Mbps upstream
Built-in firewall prevents hacker attacks
Channel auto-select for optimum performance
FDM technology enables telephoning, faxing and surfing activities to proceed simultaneously without mutual
interference
OtherAdvanced Features: IPv6, DDNS, virtual server, DMZ, port triggering, IP filter, MAC filter and UPnP, etc.
Tenda Setup Wizard for easy and fast installation and configuration
Tenda Green: Use hardware Power On/Off and software WiFi On/Off buttons to turn on and off power and WiFi to save
energy when not in use
1.3 Package Contents
Your box should contain the following items:
Wireless N300 ADSL2+ High Power Modem Router
Telephone Line
Ethernet Cable
ADSL Splitter
Install Guide
Power Adapter
Resource CD
If any of the parts are incorrect, missing, or damaged, keep the carton, including the original packing materials and
contact the dealer for immediate replacement.

Wireless N300 ADSL2+ High Power Modem Router
3
Chapter 2 Hardware Install
If you have not set up your new router using the Install Guide that comes in the box, this chapter walks you through the
hardware install. To set up your Internet connection, see Chapter 3 Quick Internet Setup.
2.1 LED Indicators, Buttons and Interfaces
Front Panel
LED
Status
Description
PWR
Solid
Power is supplied to the device.
Off
Power is not supplied to the device.
SYS
Blinking
System is functioning correctly.
Solid/Off
System is functioning incorrectly.
WLAN
Blinking
Transmitting data via wireless
Off
Wireless is disabled.
Solid
Wireless is enabled.
DSL
Slow Blinking
Physical connection failure.
Fast Blinking
Synchronizing...
Solid
ADSL connection is established.

Wireless N300 ADSL2+ High Power Modem Router
4
Back Panel
Button & Interface
Description
DSL
For connecting the router to the Internet via a phone cable provided by your ISP.
1/WAN
LAN port or WAN port. When you access the Internet via the DSL, this port works as a LAN
port which can be used to connect to a PC, switch, or a router; when you access the Internet
via an Ethernet cable from your ISP directly, this port works as a WAN port.
Note: It works as a LAN port by default.
2/3
LAN port, used to cable the device to the local network devices such as computers.
4/iTV
LAN port or IPTV port. When IPTV feature is disabled, it works as a LAN port which can be
used to connect to a PC, switch or a router; when IPTV feature is enabled, it works as an IPTV
port, and it can only be connected to a set-top box.
Note: IPTV feature is disabled by default.
USB
Used to connect a USB device, such as a 3G USB modem, USB print server or storage
service.
RST/WPS
Press it for 1-3 seconds to enable WPS-PBC feature;
Press it for about 10 seconds to restore all configurations to factory defaults.
4/iTV
3/2
1/WAN
Off
No connection established
Blinking
Transmitting data
Solid
Connection is established.
WPS
Solid
Client connected successfully.
Blinking
WPS LED starts blinking if you press the WPS button on the device or interface.
Off
No wireless clients are connected. WPS LED turns off after blinking for 2 minutes.
USB
Solid
Connection is successfully established on the USB port.
Off
Connection is not established on the USB port.
INTERNET
Solid
Current client is connecting to the Internet; no data is transmitted via the Internet.
Blinking
Current client is connecting to the Internet; data is transmitted via the Internet.
Off
Current Internet client is not connecting to the Internet.

Wireless N300 ADSL2+ High Power Modem Router
5
DC
Used to connect to the power adapter, which is included in the package.
ON/OFF
Power switch to turn the router on or off.
2.2 Install the Device
①Connect the included power adapter to your router and turn on the router.
②Connect your computer to your router.
③Connect your router to the Internet. Choose ADSL Mode or ETH Mode according to your actual Internet service
type.
ADSLMode
(Phone cable access)
With a telephone
Simply connect the DSL line to the DSL port of your router.
Without a telephone
Use the splitter as a medium:
1) Connect the DSL line from the Internet side to the LINE port of
the splitter;
2) Connect the telephone with a phone cable to the PHONE port of
the splitter;
3) Connect the MODEM port of the splitter and DSL port of your
router via another phone cable.
ETH Mode
(Ethernet cable access)
Do not go to Step 3 (connect the Ethernet cable to the LAN/WAN port) until you finish the
Primary Setup of Internet connection type on the Web Management Homepage, i.e., finish
settings in Ethernet Mode in Chapter 3 Quick Internet Setup >3.2 Internet Setup.

Wireless N300 ADSL2+ High Power Modem Router
6
Chapter 3 Quick Internet Setup
This chapter instructs you to quickly set up your Internet connection.
3.1 Log in to Web Manager
1. Set your PC to Obtain an IP address automatically. For more information, see Appendix 1 Configure Your PC.
2. Launch a web browser and enter 192.168.1.1 to display the login window.
3. Enter admin in both the Login Username and Password fields if you access the router for the first time and then click
Login to enter the home page.
Tip
If you change the login username and password and forget them, press the RST/WPS button on the device for about 10
seconds to reset the router, and then enter the home page with the default username and password “admin”.
3.2 Internet Setup
3.2.1 ADSL Mode
1. Link Type: Select ADSL.
2. Select your country.
3. Select your ISP.
4. VPI/VCI fields will be populated automatically if you select a correct country and ISP.
5. Select your Connection Type, and fill the relevant Internet information.
6. Secure your wireless network. (Strongly Recommended)
7. Click OK to apply your configurations.

Wireless N300 ADSL2+ High Power Modem Router
7
Depending on the type of connection, you are prompted to enter your ISPsettings, as shown in the following table:
Connection Type
Description
PPPoE/PPPoA
Enter the ISP user name and password. If you cannot locate this information, ask
your ISP to provide it.
IPoE
Dynamic IP
No entries are needed.
Static IP
Enter the assigned IP address, subnet mask, and the IP address of your ISP’s primary
DNS server. This information should have been provided to you by your ISP. If a
secondary DNS server address is available, enter it also.
IPoA
Static IP
Enter the assigned IP address, subnet mask, and the IP address of your ISP’s primary
DNS server. This information should have been provided to you by your ISP. If a
secondary DNS server address is available, enter it also.

Wireless N300 ADSL2+ High Power Modem Router
8
Bridge
When Bridge mode is enabled, this device works as a modem. If you wish to initiate
a dialup directly from your PC for Internet access or enjoy the entire Internet
connection by yourself (instead of sharing it with others), you can select Bridge.
Note
If your country and/or your ISP are not covered on the home page, select Other country and ISP, and set VCI and VPI
value manually. If you cannot locate this information, refer to Appendix 4 VPI/VCI List or ask your ISP to provide it.
For more information, see To Set up the ATM interface and To Set up WAN Service for ATM Interface.
3.2.2 Ethernet Mode
1. Link Type: Select ETH.
2. Select your Connection Type according to your accessing method.
3. Secure your wireless network. (Strongly Recommended)
4. Click OK to apply your configurations.
Note
After saving the Ethernet mode settings, you will see the following prompt:
And then you need to connect the Ethernet cable from the Internet side provided by your ISP to the LAN/WAN port, i.e.
to finish Step 3 of Ethernet Mode in Chapter 2 Hardware Install-> 2.2 Install the Device.

Wireless N300 ADSL2+ High Power Modem Router
9
Depending on the type of connection, you are prompted to enter your ISPsettings, as shown in the following table:
Connection Type
ISP Information
PPPoE
No entries are needed.
IPoE
Static IP
Enter the assigned IP address, subnet mask, and the IP address of your ISP’s primary
DNS server provided by your ISP. If a secondary DNS server address is available,
enter it also.
Dynamic IP
Enter the user name and password provided by your ISP.
3.2.3 Test Internet Connectivity
If Connection Status shows Connected shown as below, you access the Internet now.
Try to launch a web browser and enter www.tendacn.com. If the webpage displays properly, you are connected to the
Internet.

Wireless N300 ADSL2+ High Power Modem Router
10
Chapter 4 Advanced Settings
If you prefer configuring your router for unique situations, consult this chapter to know advanced features.
Click Advanced on the home page to enter the screen below.

Wireless N300 ADSL2+ High Power Modem Router
11
4.1 Device Info
4.1.1 Summary
Here you can view system information and current status of your WAN connection as seen in the screenshot.

Wireless N300 ADSL2+ High Power Modem Router
12
4.1.2 WAN
Here you can view the WAN Information including Interface, Description, Type, IGMP, NAT, Firewall, Status, IPv4
Address, etc.
4.1.3 Statistics
Here you can view the packets received and transmitted on LAN and WAN ports.
Statistics--LAN: Displays the packets received and transmitted on the LAN ports as seen in the screenshot below.
Statistics--WAN: Displays the packets received and transmitted on the WAN port as seen in the screenshot below.

Wireless N300 ADSL2+ High Power Modem Router
13
Statistics-xDSL: Display the packets received and transmitted on the DSL port.

Wireless N300 ADSL2+ High Power Modem Router
14
4.1.4 Route
Here you can view the route table as seen in the screenshot:
4.1.5 ARP
Here you can view the IP and MAC addresses of the PCs that attach to the device either via a wired or wireless
connection as seen in the screenshot:

Wireless N300 ADSL2+ High Power Modem Router
15
4.1.6 DHCP
Here you can view the DHCP leases, including IP and MAC addresses of the PCs, hostnames and remaining lease time
as seen in the screenshot:
4.2 Advanced Setup
4.2.1 Layer2 Interface
Click Advanced Setup > Layer2 Interface to enter the Layer2 Interface screen.
This router provides two Layer2 Interfaces:
-ATM Interface for ADSL broadband Internet service. (By default, system applies the ATM Interface [ADSL uplink].)
- ETH Interface for connecting to the Internet via an Ethernet cable.
If you directly connect to the ADSL line via a phone cable, first refer to To Set up the ATM interface and then skip
to To Set up WAN Service for ATM Interface.
If you connect to the Internet via a fiber/cable modem using an Ethernet cable, first refer to To Set up the ETH
interface and then skip to To Set up WAN Service for ETH Interface.

Wireless N300 ADSL2+ High Power Modem Router
16
To set up the ATM interface
Step 1: Select ATM Interface and click Add to configure it.
Step 2: Enter the VPI and VCI values. Select a DSLLink Type (Internet connection type): EoA, PPPoA or IPoA. Leave
other options unchanged from factory defaults. Click Apply/Save.
Table of contents
Other Tenda Network Router manuals
Popular Network Router manuals by other brands

ZyXEL Communications
ZyXEL Communications GS1920 Series User handbook

D-Link
D-Link EXO DIR-1960 Quick installation guide

iDirect
iDirect evolution x5 installation manual

Fortinet
Fortinet FortiExtender 201F quick start guide

ZyXEL Communications
ZyXEL Communications P-2602H-D1A quick start guide

MEN Mikro Elektronik
MEN Mikro Elektronik RS3 user manual