DO
Entering Barometric Pressure
Dissolved oxygen readings are dependent on barometric pressure. This needs to be entered
manually as mm Hg. 1 mm Hg = 0.03937 inch Hg = 1.3332 hPA (mBar) = 0.01934 PSI.
1. In DO measurement mode, press setup.
2. Press three times so that the top line reads “PRES”.
3. Press or to enter the barometric pressure in mm Hg.
Note: Holding the button down will make the value change faster.
4. Press to save configuration and to return measurement mode.
Entering Salinity Correction Value
Since the presence of dissolved salts limits the amount of oxygen that can dissolve in
water, the correction value can be manually entered. The meter default has a salinity
correction factor of 0. If this value needs to be changed, enter the salinity of the sample in
parts per thousand (ppt)
1. In DO measurement mode, press setup.
2. Press four times so that the top line reads “SALT”.
3. Press or to enter the salinity in ppt.
Note: Holding the button down will make the value change faster.
4. Press to save configuration and to return measurement mode.
DO Calibration using Air
1. Press to display the unit “% Sat” or “mg/L” in DO mode.
2. Make sure the DO probe is connected to the meter and fully polarized.
3. Prepare the calibration sleeve or BOD bottle. Insert the DO probe and wait five minutes
for equilibrium. Press .
4. “CAL” will appear in the upper right of the display. Wait for “READY” to appear and %
Sat to stop blinking. The meter will display 102.3 % saturation and will proceed to the
measurement mode.
DO Measurement
1. Check the barometric pressure and if needed, change the value for barometric pressure
correction in setup menu 1.0.
2. Press to display DO readings in % saturation or mg/L (units of measurement).
3. Rinse the DO probe with distilled water and blot dry. Place into the sample and stir gently.
4. If the meter is in AUTO-READ mode (meter default), press .
If the meter is in continuous read mode, the meter will immediately start taking
readings.
Record the DO result and temperature of the sample when “READY” is displayed and the
unit of measurements stops blinking.
Note: If in AUTO-READ mode and memory storage is enabled, the reading will
automatically be stored when the “AR” appears.
If in continuous read mode and memory storage is enabled, press to store into the
meter’s memory.
5. Remove the DO probe from the sample, rinse with distilled water and blot dry.
To continue taking measurements, place the probe into the next sample, stir gently
and repeat step 4.
6. When finished measuring all samples, store probe according to the probe instructions.
DO Calibration Selection
This meter can be calibrated using water-saturated air
or the Winkler titration method for a manual calibration.
Air calibration is the default setting on the meter. For
calibration using Winkler titration, refer to the user
reference guide on the included CD.
1. In DO measurement mode, press setup.
2. Press five times so that the top line reads
“CALT”.
3. Press to select the calibration type as AIR for
water-saturated air calibration or MAN for a manual
calibration (Winkler titration).
4. Press to save configuration and to
return measurement mode.
Read Type Selection
1. In measurement mode, press setup.
2. Press in setup until “4.0” is shown on the top
line and “READ” is shown on the lower line.
Press .
3. Press or to select the measurement mode:
CONT = Continuous
AUTO = AUTO-READ™
4. Press to save selection. Press the key to
return to measurement mode.
Orion Star A113 Benchtop and Orion Star A123 Portable DO Meters
Memory Feature
This meter stores up to 50 readings.
To enable memory storage:
1. In measurement mode, press the “Setup” key.
2. Press to show “5.0” on the top line and “LOG”
on the lower line. Press .
3. Press to show “ON” on the second line. Press
to save selection.
4. Press to return to measurement mode.
In Auto-Read mode, readings are automatically stored
into memory after each stable reading (when “AR”
stops blinking and “READY” appears).
In continuous read mode, when the reading is stable
and “READY” appears, press to store into the
meter’s memory.
Viewing Stored Readings
1. In measurement mode, press .
2. Press or to scroll through the memory points.
3. Press to review the reading stored at that
point.
4. Press key to return to measurement mode or
to view additional stored readings.
English
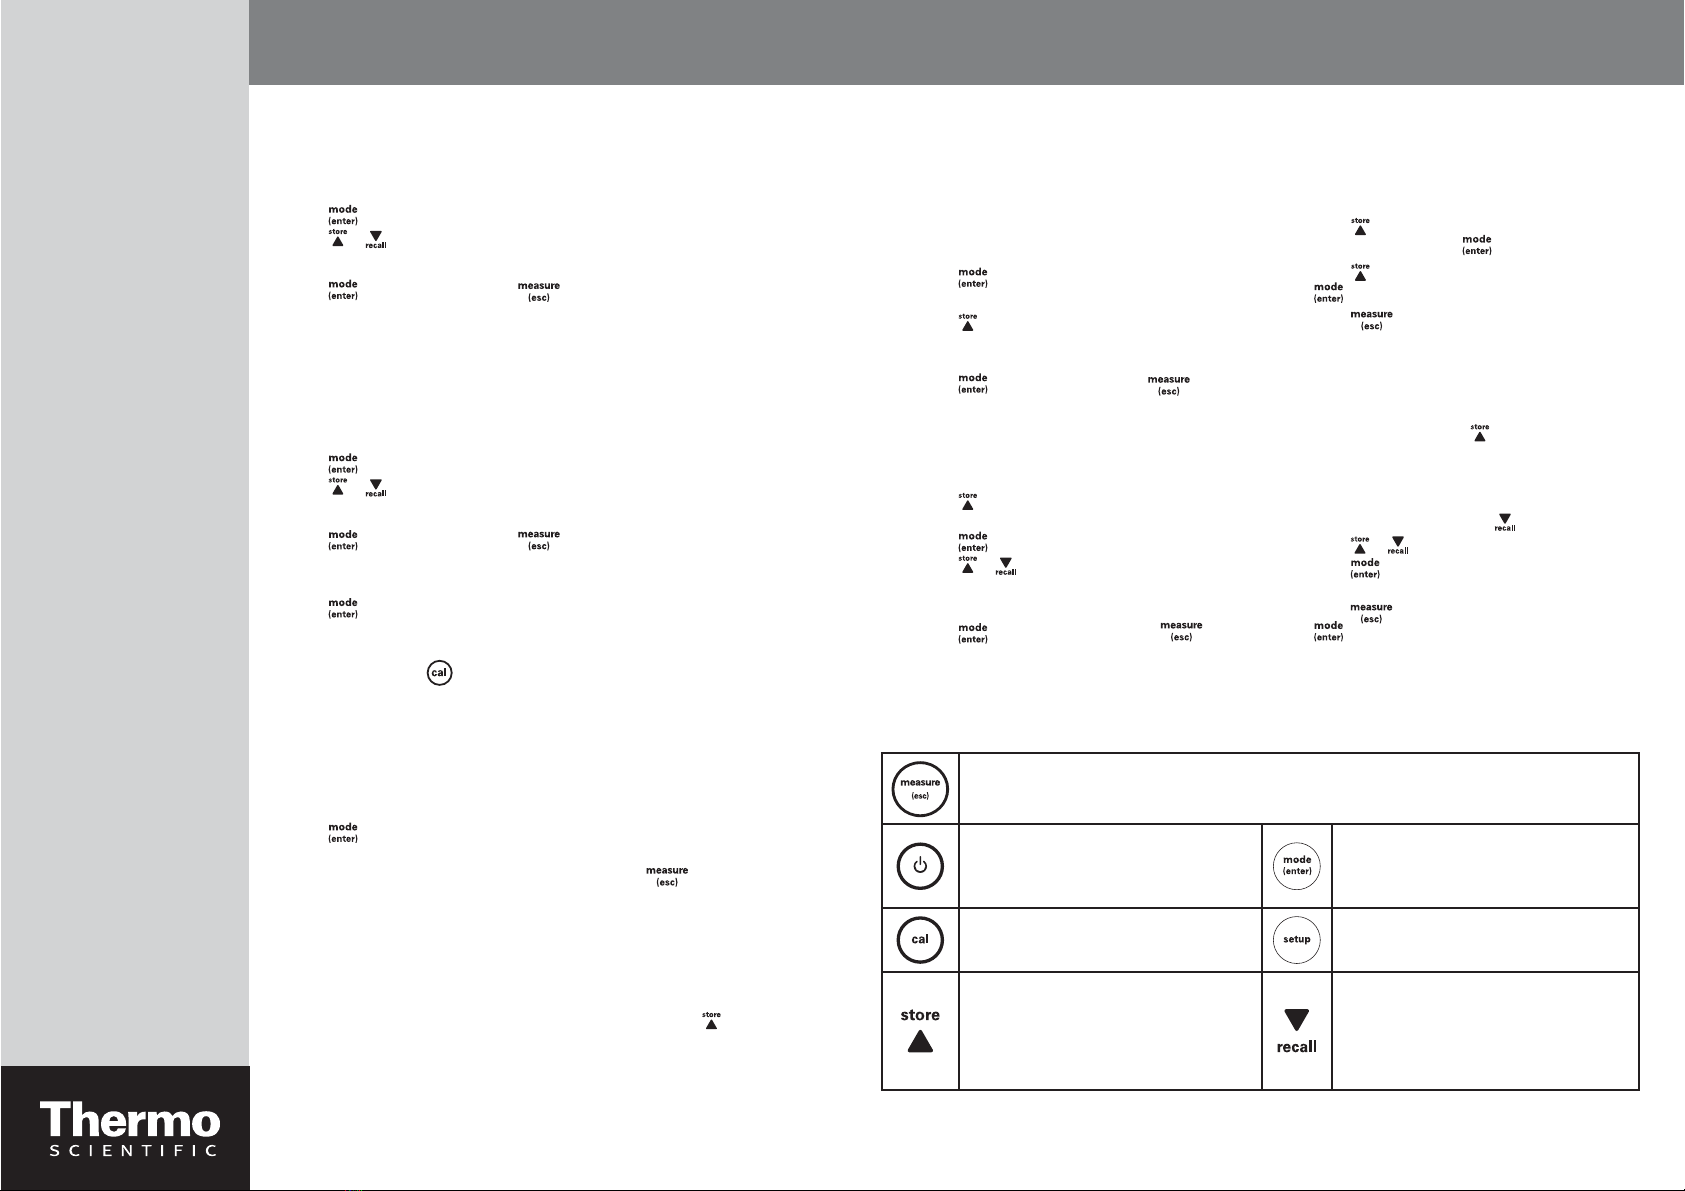
Keypad Information
In the measurement screen: Press to take a measurement.
In the setup screen: Press to escape the setup menu.
In the calibration screen: Press to abort calibration.
Press to turn the meter on or off.
In the measurement screen:
Press to switch between modes.
In the setup screen:
Press to confirm the selection.
Press to enter the calibration mode. Press to enter the setup mode.
In the measurement screen:
Press to store the data on the screen in
continuous read mode and with data logging
on.
In the setup screen:
Press to scroll up in the list of options.
In the measurement screen:
Press to see the stored data.
In the setup screen:
Press to scroll down in the list of options.
For additional setup menu information, refer to the reference guide. The reference guide is on the included CD
and available at www.thermoscientific.com/water.


