Timex iConnect Premium Active User manual

1
iConnect Premium Active
User Manual
Important Safety Instructions And Warnings
1. To prevent risk of fire, chemical burn, electrolyte leak, and/or injury from the unit’s
internal Lithium-polymer battery:
a. Do not attempt to remove the case back or exterior shell of the unit, or to remove
its non-user-replaceable battery.
b. Do not leave the unit exposed to a heat source or in a high-temperature location
(such as in the sun or in an unattended vehicle). To prevent damage, store the unit
out of direct sunlight.

2
c. Do not puncture or incinerate the unit.
d. When storing the unit for an extended time, keep it in the 32°F to 77°F (0°C to 25°C)
temperature range.
e. Charge the unit only within the 50°F to 113°F (10°C to 45°C) temperature range.
f. Do not operate the unit outside the -14 to 104°F (-10°C to 40°C) temperature range.
g. Contact your local waste disposal department to properly recycle or dispose of the
unit or its battery.
2. Use only the charging cable supplied with this product.
3. This unit is not a medical device and is not recommended for use by persons with
serious heart conditions. Always consult your physician before beginning or modifying
an exercise program.
4. Do not attempt to read the unit’s display while moving: this is unsafe and distracting,
and could result in an accident or collision. Read the display only when you can safely do
so. See instructions for details.
1. Product Specifications
➢Model: M05L
➢CPU RTL8762C ARM Cortex-M0 53MHz
➢Memory: RAM 256KB+ ROM 128Mb
➢Capacitive touch screen 1.3” 240*240 TFT full touch
➢Bluetooth version 5.0
➢Functions: Notifications, Heart Rate Monitor, Sleep, Activity, Weather, Relax, Sport
➢Battery Lithium-ion 3.7V/170mAh
2. Product Details
(1) Power on: When the watch is off, press and hold the touch screen for 5 seconds to turn it
on, and the main Time of Day (TOD) page of the watch will be displayed.
(2) Touch screen operation: Swipe to the left to the menu page, or to the right to the
function list, then tap the function icon to enter the corresponding feature.

3
(3) Turn on screen: When the watch is on, touch anywhere on the display area to light up
screen. If the “Turn wrist to wake” feature is enabled in the app, the watch screen can be
activated by turning the wrist.
(4) Shutdown: Enter “Setting” of menu page and tap on “Shutdown”. Tap “OK” to shut down
the watch. Or tap on “Shut down” icon in function list and tap “OK” to shutdown the watch.
3. Features and Functions
3.1 Basic Functions
Touch Screen Display:
(1) Press and hold the time of day screen to enter dial switching mode. Dial options can be
viewed by sliding left and right. Tap on desired dial option to confirm switching to that dial.
(2) Drag the screen right to display function list -> Daily activity, Heart rate, Messages,
Workouts, Sleep, Weather, Relax, Music, Timer, Brightness, Change dial, System and
Shutdown. Tap on the item to enter the corresponding function (the list can be dragged up
and down)
(3) Drag the screen down to enter the Shortcut mode where brightness adjustment, Do not
disturb mode, shutdown and system information are available.
(4) Drag the screen up to show stored messages.
(5) Drag the screen to left to enter the icon main menu page and navigate by dragging the
screen left and right. Tap on each functional icon to enter the corresponding function. Drag
the screen right in sub-menu to return to the previous level.
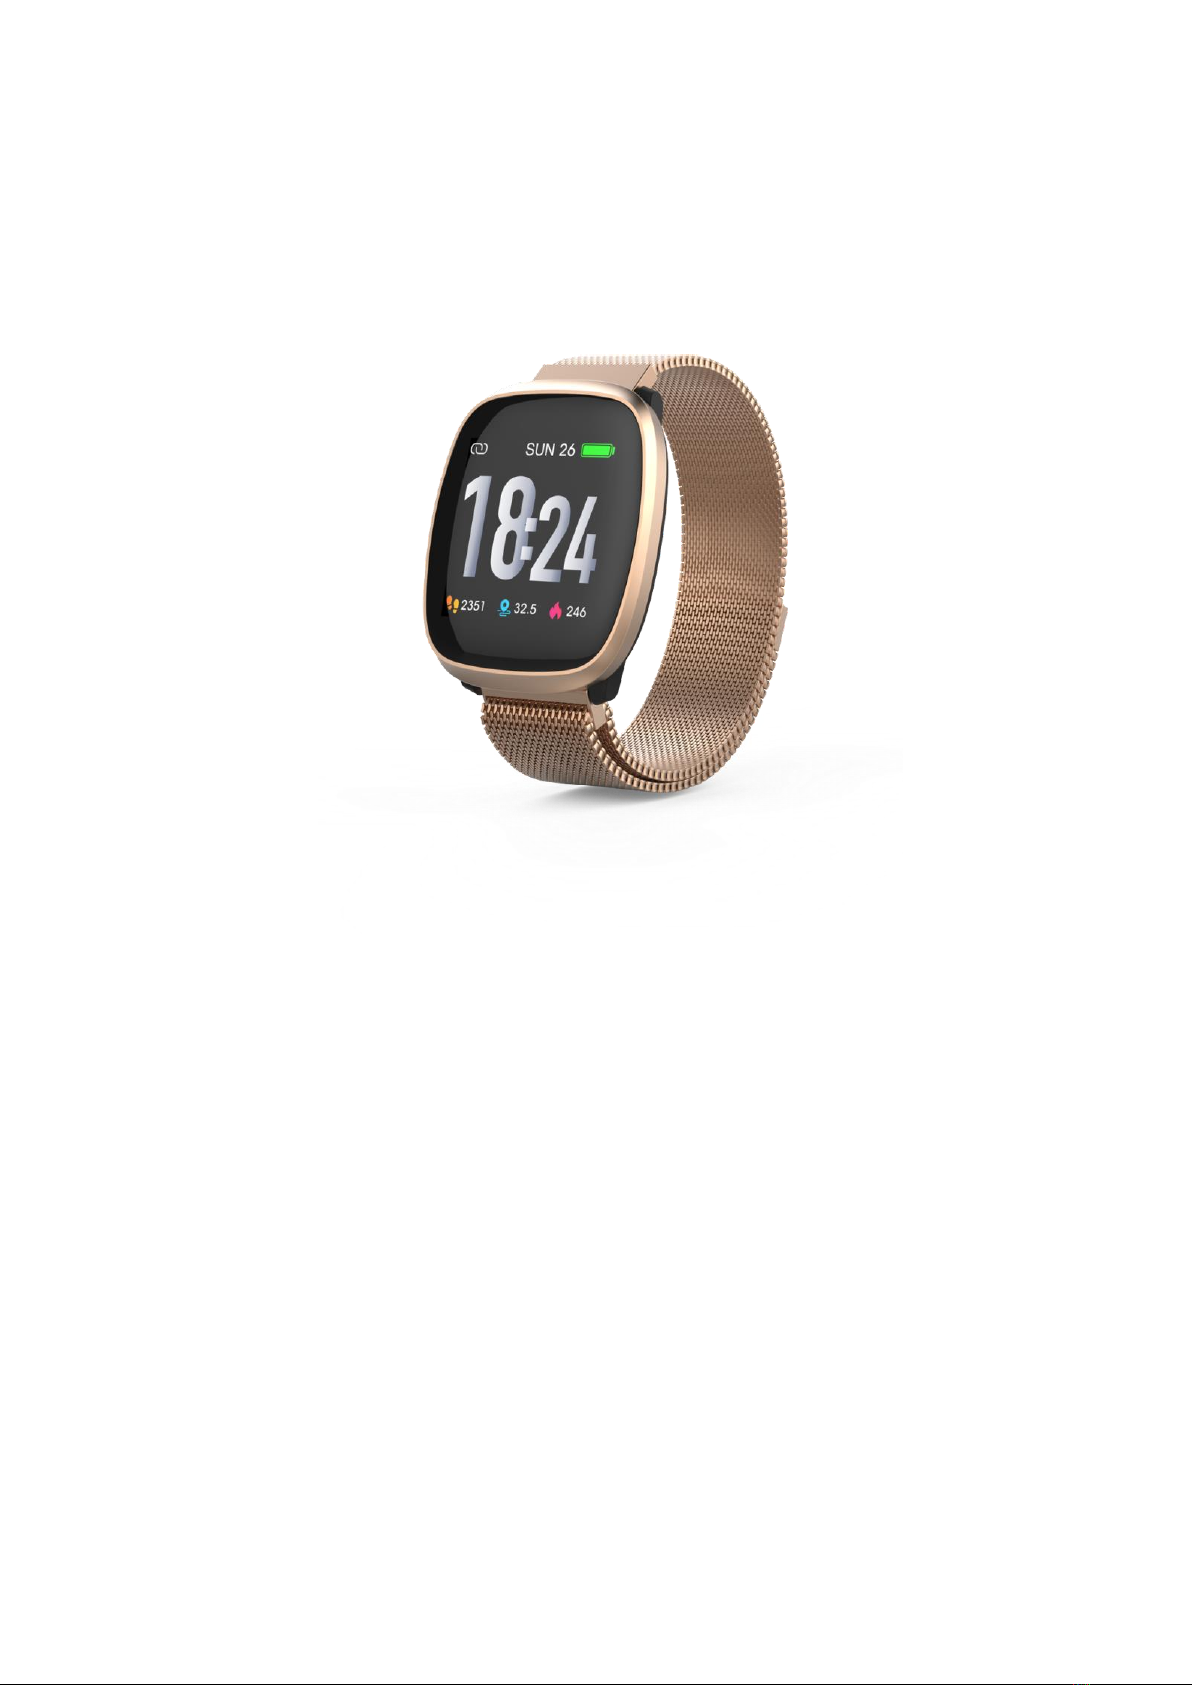
3.2 Custom Watch Faces
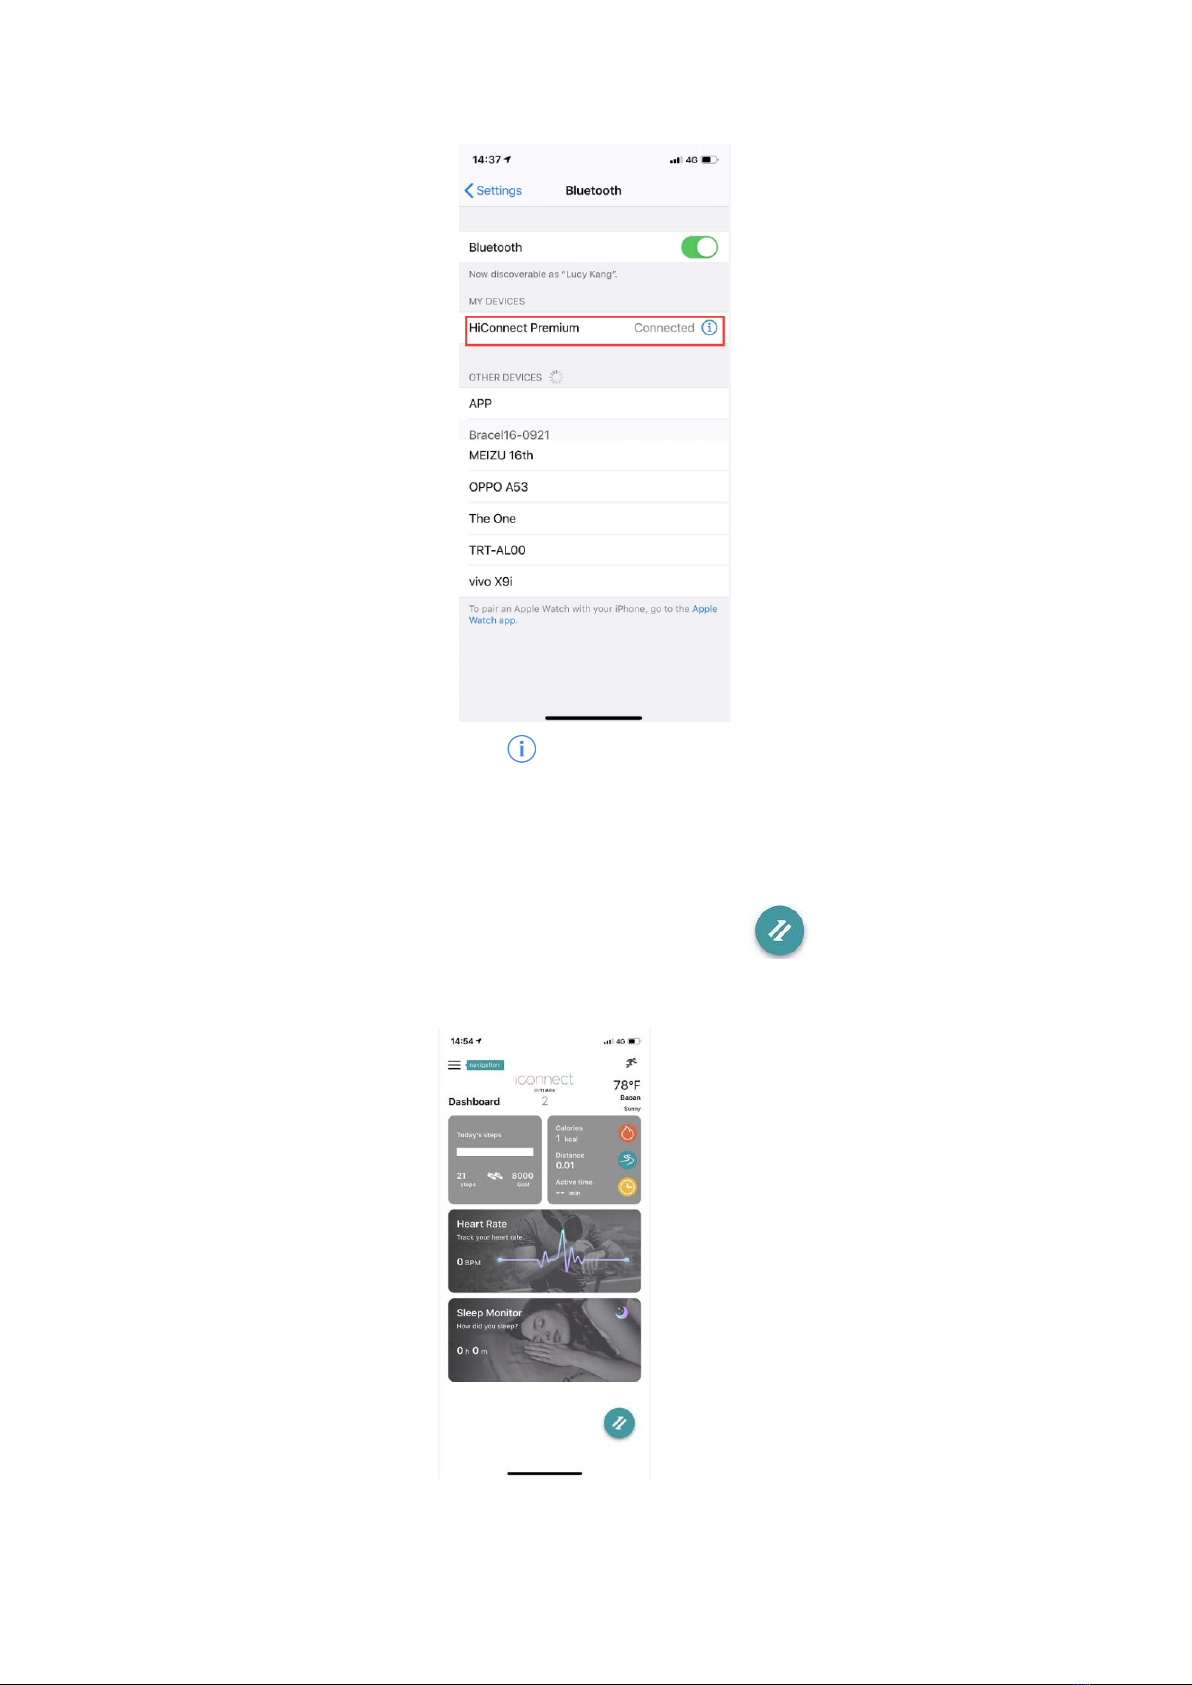
4. Getting Connected
4.1 The iConnect By Timex 2 App
Download and install the " iConnect By Timex 2" App from Apple APP Store or Google
Play Store; iPhone with IOS 10.0 or higher and Android phone with Android 6.0 or higher is
recommended.

4
4.2 Connection and Synchronize Data
4.2.1 For Android:
Open iConnect By Timex 2 - left slide menu bar –Pair my watch - select the corresponding
device icon - search for the corresponding Bluetooth address pairing.
Click OK and Click Pair to pair watch as below.
4.2.1.2 For IOS:
Connect step 1: Open “iConnect By Timex 2”- left slide menu bar –Pair my watch - select
the corresponding device icon - search for the corresponding Bluetooth pairing
Connect step 2: Now the Bluetooth menu interface displays iConnect Premium Active
connected successfully as pictured below:

5
There will be “Connected” and icon shown on the right of the Bluetooth name of the
watch after connected successfully.
4.2.2 Synchronizing Data
Pair your watch with " iConnect By Timex 2" App. Press " " to sync data. Your
data will be shown on App accordingly.

6
Notice:
Turning off the Bluetooth function on your phone will interrupt synchronization features
between your phone and watch. Please keep Bluetooth turned on.
It is recommended to allow the “Location Services”on your phone to the iConnect by Timex
2 App. This will enable the Weather feature as well other functions.
4.2.3 Step History
In the App tap on the tile “Today’s Steps” or “Activity data” to enter the “Step History”
page. You can adjust your daily step goal by tapping on the “set up” located at the top
right corner. The step count recorded per day and the accumulated step count will be
shown under Step History.

7
4.2.4 Adding Friends
Add friends to compete in daily activity with each other.
Enter the “My Friend” in the Navigation menu. Tap on the “add friend” icon at the
top right corner to enter the “Add friend” page. Type the email address of desired
friend and search. The users with the name you searched will be listed. Tap on the
“Add friend” button to add the friend.
5
5.2.4 Leaderboard
Shows the ranking among added friends by daily activity.
4.3 Main Features
4.3.1 Daily Activity
(1) The watch will display the user's total number of steps, walked distance, calories burned
on the current day, and the data will be cleared at midnight every day.
(2) Tap on the “Daily Activity” icon in the main menu to check your activity info. The screen
will be turned off automatically after the watch is idle for more than 10 seconds.

8
4.3.2 Heart rate
(1) Heart rate measurement: The watch will measure the user's heart rate under the heart
rate measurement interface. After the test is completed, the vibration will display the result.
(2) Heart rate measurement: slide to the left on the main interface and click the heart rate
static icon to switch to the heart rate measurement interface. Once the interface is entered,
the measurement will start. "- -" is shown on screen when the watch starts the measurement.
The measurement can take up to 40 seconds. If no value is displayed, please return to menu
and re-enter the heart rate measurement interface and try again.
.
4.3.3 Sleep
(1) The watch will display the user's sleep time of the previous night. The default sleep
measuring period is from 21:30 of current day to 12:00 of next day.
(2) Drag the TOD (time of day) screen to the right side. Tap on the Sleep icon to enter the
sleep interface. “Monitoring……” on the screen indicating the watch is still measuring the
sleeping time. Once the watch detects valid activity after sleep, the sleeping time counting
will stop and the measured sleep time of the previous night will be displayed on the screen.
4.3.4 Message
After pairing the watch to the phone, notifications from your phone will be sent to your
watch. It is necessary to switch on the message sending feature in the App in advance in the
“Notification Settings” page.
4.3.5 Workouts
In workouts mode: Tap on the icon to enter Workouts sub-menu which includes Walking,
Running, Climbing, Riding, Basketball, Elliptical, Yoga.
After entering the Workouts, choose a desired workout mode. The workout tracking will start
automatically once tapping on the desired workout mode. You can always pause the tracking

9
by tapping on the “pause” icon at the bottom right corner of the screen. After pausing, you
can resume the tracking by tapping on the “play” icon at the bottom right corner or stop the
tracking by tapping on the “stop” icon at the bottom left corner.
Please note that the watch supports 4 hours of workout tracking.
4.3.6 Timer
Tap on the Timer icon to enter the stopwatch interface.
For counting-up timer, ensure the correct icon on top side has been tapped. Start the time
counting by tapping the “play” icon at the bottom right corner of the screen. Tap on the
“pause” icon at the bottom right corner of the screen during counting to pause the Timer.
Then, tap the “play” button at the bottom right corner to resume counting or tap the “reset”
icon at the bottom left corner to reset the Timer. The watch supports time counting up to
99hrs 59mins 59sec.
For counting-down timer, ensure the correct icon on top side has been tapped. Drag the hour,
minute and second section of the screen up and down to adjust the starting time. Tap on the
“play” icon at the bottom right corner to start the time counting down. Pause, resume and
reset the counting-down timer by similar operation as described in counting-up timer.

10
4.3.7 Weather
After connected to the iConnect By Timex 2, the watch will show local weather. The High and
Low value of temperature will be displayed.
4.3.8 Relax
Relax with iConnect Premium. Set the Relax mode to 1 or 2 minutes and the follow the
instructions on the screen for guided breathing.
4.3.9 Music control
Use this feature to Play, Pause or Skip music on your Phone from your watch. You must
already have your music application open and running on your phone.
4.3.10 Find phone
With your phone connected, phone vibrates and rings when you click the Find Phone icon.
4.3.11 Settings
⚫Change dial: You can select different kinds of watch faces.
⚫Brightness: The brightness of the watch can be set manually.
⚫Do Not Disturb: Turning off the notification and vibration of the watch.
⚫System: You can view the Bluetooth name, version and other information.
⚫Language: 4 UI language options English, French, Spanish and Polish.
⚫Units: Switch Imperial or Metric.
⚫Shut down: Tap “OK” to turn off the watch.
⚫Restart: The watch data will be reset once the watch is restarted.

11
5. Features in the iConnect By Timex 2 App
5.1 Sleep Monitor.
Wearing the watch at night will allow you to monitor your sleep schedule and analyze
the quality of your sleep according to your nocturnal movements.
5.2 Heart Rate Monitoring.
The watch will automatically monitor your heart rate in 5 minute intervals and the measured
HR value will be synced to the App automatically. The measured value will be shown on the
Heart Rate block in the Dashboard of the App
In the App, you can initiate real-time measurement of heart rate. Tap on “Start” to start
heart rate monitoring and the measured heart rate will be shown in graphical manner. Tap
Close to end monitoring.

12
5.3 My Friends
Add friends to compete on daily activity with each other.
Enter the “My Friend” in the Navigation menu. Tap on the “add friend” icon at the
top right corner to enter “Add friend” page. Type the email address of desired friend
and search. The users with the name searched will be listed. Tap on the “Add friend”
button to add the friend.
5.4 Leaderboard
Show the ranking among added friends by daily activity.
5.5 Motion Record
Tap on the Motion Record icon at the top right corner on the dashboard page. Then, tap on
the “Start” button to enter the workout page. There are several workout choices, Walking,
Running, Biking, Hiking, Run Indoor, Trial Run, available in Motion Record. Choose a desired
workout mode.
User is allowed to set target workout distance, time and calories. Tap on the target setting
icon located at the left side of the “Start” icon.
Once setting is completed, tap on “Start” to start the workout. Tap on the map icon at the

13
top right corner to check the real-time location tracking.
Press the “Pause” icon to pause the workout. Then press and hold the “Stop” button for
several seconds to end the workout.
There will be a record of the workout stored on the Motion Record page. You can always
check the workout details by taping on the record.

14
The Motion Record support sharing the workout record to Strava, Google fit, Apple
Health and also third-party apps.
=
5.6 Pair My Watch
Pair the watch by following the steps shown on the App.
After the watch is successfully paired the below features are available:
Notification Settings
After connecting the watch to the phone, enter “Pair my watch” -> “Notification
Settings” to enable the watch to receive messages, caller ID and other notifications.

15
Sedentary alert
After connecting the watch to the phone, enter “Pair my watch” -> “Sedentary alert”.
Set the start time and end time of sedentary reminder. Push the Sedentary alert button
to right to activate the feature. If user is not active for 1 hour, device will vibrate to
remind you to get up and move.
Drinking water reminder
After connecting the watch to the phone, enter “Pair my watch” -> “Drink water
reminder”. Set the start time and end time of the drink water reminder. Push the Drink
water reminder button to right to activate the feature.

16
The watch will show a drink icon and vibrate to remind the user to drink every 30
minutes.
Alarm Setting
After connecting to the phone, enter the “Pair my watch” -> “Alarm setting”, add
the new alarm; The watch will vibrate when the preset alarm time is reached. The
alarm clock can be set daily or the day of a week, and you can create up to 5 alarm
clocks.
Remote Camera control
After connecting to the phone, enter Pair my watch -> “Camera control” . The phone
will enter camera UI automatically. Rotate wrist to trigger photo taking by the watch.

17
Left hand or right hand
Choose which hand you will wear the watch.
Turn wrist to wake
Turn on this option to allow waking up the screen on by turning wrist.
Daily heart rate monitoring
Turn on this feature to enable the automatic heart rate monitoring in the
“Routine” page of the Heart Rate Monitoring feature.
Time display
Set the time of data format to 12-hour or 24-hour.
Reset
Reset the watch in factory default. Please note all data on watch will be cleared.
Unpair
Unpair the watch from the phone. Just simply choose “OK” to confirm unpairing
when pop-up appears.
For iPhone user, after unpairing the watch in the App, it is recommended to find
out the Bluetooth name of the watch in the Bluetooth Settings of the iPhone and
“Forget the device” to ensure the watch is completely disconnected from iPhone.
5.6 Personalize dial
Once the watch is paired with the phone, this feature is available for pushing dial
face options available in the App to the watch. Tap on the “Personalize dial” in the
Navigation menu, the optional dials available will be shown on the “Personalize dial”
page. Tap on the desired dial and the dial pushing should begin automatically.

18
5.9 Unit
Set the unit of parameters shown on the watch and App to be Imperial or Metric.
5.9 Temperature
Set the temperature shown on the watch and App to be Celsius or Fahrenheit.
5.9 Find Watch
When the watch is connected successfully to the App, tap on the “Find Watch” in the App,
the icon below will be shown on the watch as the indication of the connected watch.
5.10 STRAVA
Authorize the App to upload Motion Record to STRAVA. Choose “Authorize” on the App and
then follow the instruction of STRAVA site to complete the authorization.
5.11 Firmware upgrade
Perform firmware upgrade on the watch through the App if there is new version of
watch firmware available. Please ensure the App staying on the front during firmware
upgrade. DO NOT attempt to close the App once the firmware upgrade is started or the
watch will no longer be workable anymore.
It is NOT recommended to upgrade watch firmware if the watch function is normal.
5.12 FAQ
Tap on FAQ of the Navigation menu of the App to check the FAQ for the watch function
and operation. Please check FAQ for solution first in case of finding any problem during
normal usage.
5.13 Privacy Policy
Please note that it is required to agree the Privacy Policy or the registered account
information will be cleared and it is not allowed to use the App.
5.13 Version
Tap on the Version to show the version number of the iConnect by iConnect 2 App.
There is also a “Feedback” link provided for user to provide the detailed comment. Please
also provide your email address before submitting the comment.

19
IP68 Water Resistance
The watch is rated IP68 for dust and water resistance. The watch is resistant to submersion
in fresh water up to a maximum depth of 1.5 meters for up to 30 minutes. Care should be
taken to avoid over exposure to moisture and excessive submersion in water.
Other Safety and Precaution Notices
Bluetooth®Wireless Technology
Bluetooth devices communicate without wires, using built-in radio transceivers that operate
on a globally available radio frequency to ensure worldwide compatibility. The device can
communicate with other Bluetooth devices
(e.g. BT headsets) within a range of approximately 10 meters (33 feet).
Recycle
Always return your used electronic products, batteries, and packaging materials to dedicated
collection points.
Battery and Charger Info
Your device has an internal, non-removable, rechargeable battery. Do not attempt to open
the back cover or remove the battery, as you may damage the device. To replace the battery,
take the device to the nearest authorized service facility.
Aircraft, Hospitals
CAUTION: The device’s Bluetooth radio must be switched to OFF in airplanes, hospitals or
other public locations where handheld wireless and other electronic devices are prohibited.
Driving Precautions
Responsible, safe driving is your responsibility when operating a vehicle. Using a mobile
device or accessory for messaging while driving may cause distraction and could result in
death or injury to you or others. Using a mobile device or accessory may be prohibited or
restricted in certain areas; always obey the laws and regulations on the use of these
products.
While driving, NEVER:
•Read messages
•Review on-screen data
•Perform any other functions that divert your attention from driving
This manual suits for next models
1
Table of contents
Other Timex Watch manuals

Timex
Timex 555-095000 User manual

Timex
Timex W223 NA User manual

Timex
Timex RETRO DIGITAL User manual

Timex
Timex IRONMAN R300 User manual

Timex
Timex Performance Watch User manual

Timex
Timex W-107-US User manual

Timex
Timex w-215 User manual

Timex
Timex W-232 User manual

Timex
Timex M097 User manual

Timex
Timex W266 User manual

Timex
Timex W-307 User manual

Timex
Timex W-10 User manual

Timex
Timex W231 User manual

Timex
Timex W217 NA User manual

Timex
Timex W-89 User manual

Timex
Timex Marathon User manual

Timex
Timex iConnect Kids Active User manual

Timex
Timex W-34-US User manual

Timex
Timex 30-LAP User manual

Timex
Timex W-285 User manual