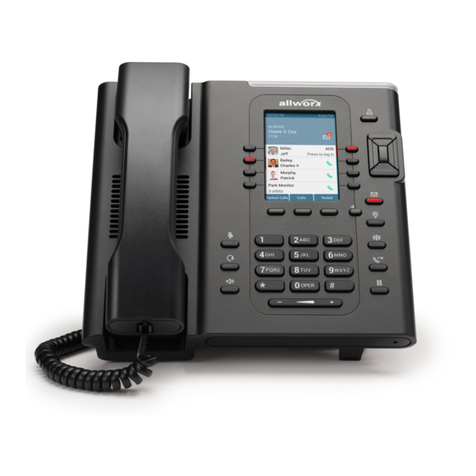
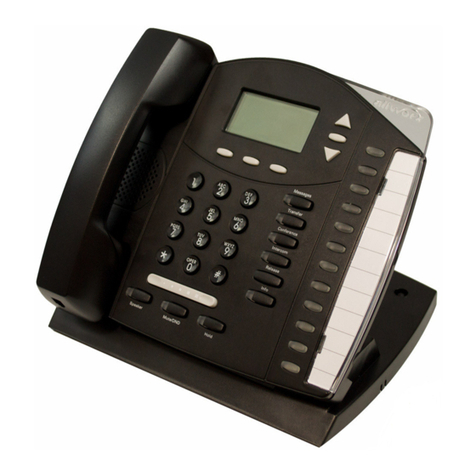
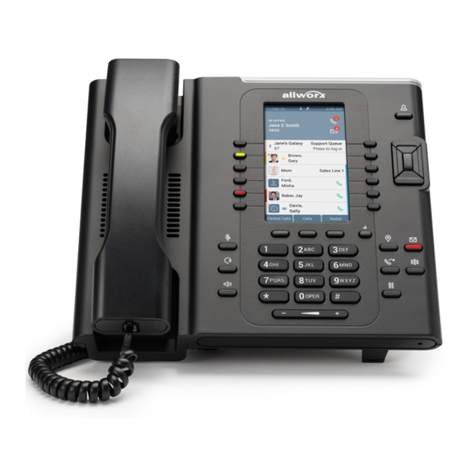
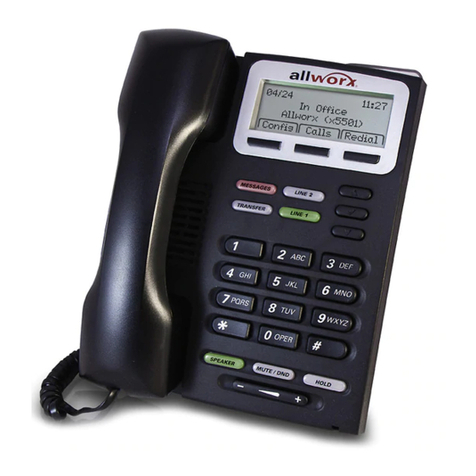
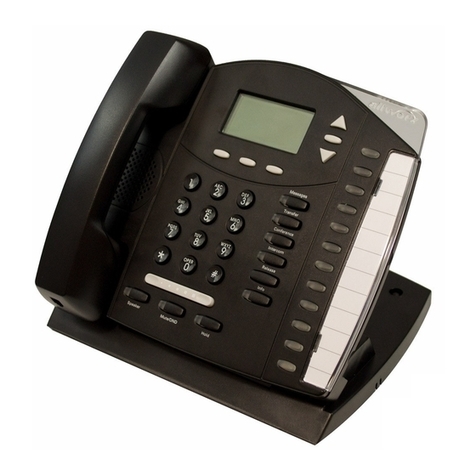
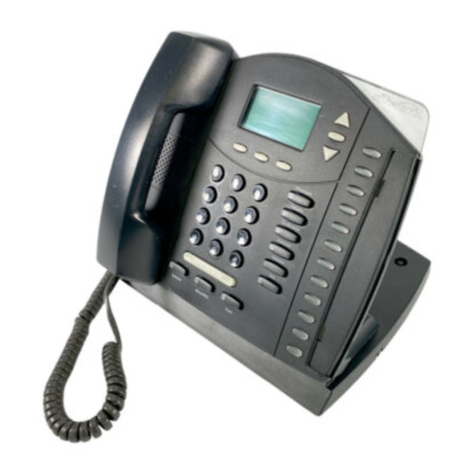
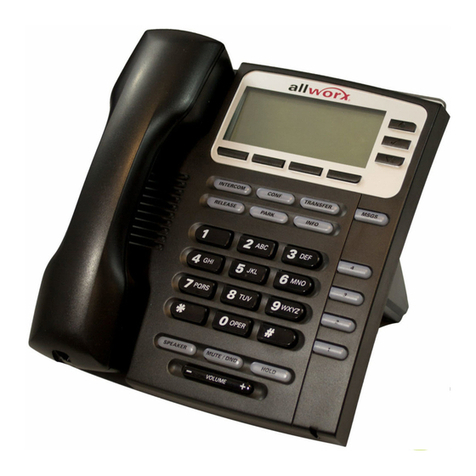
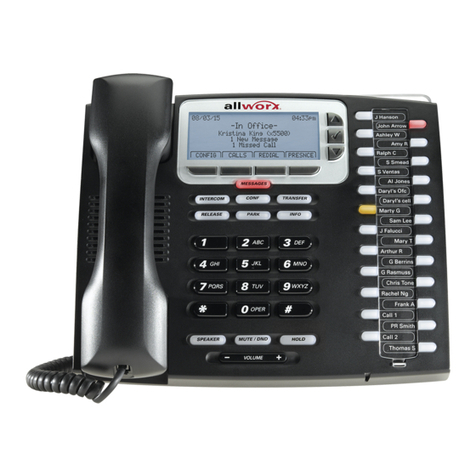
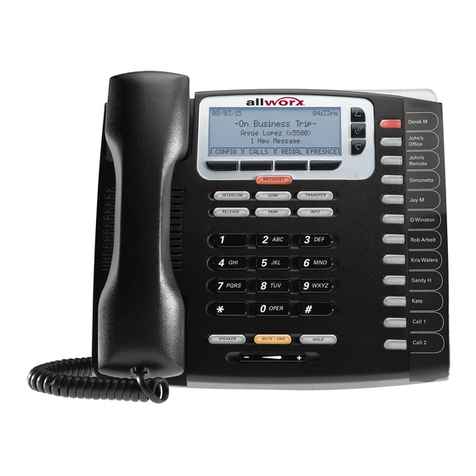
Allworx 9204G User manual

Allworx®
Phone Guide
9204/9204G
Updated April 16, 2013

Phone Guide – 9204/9204G
Toll Free 1-866-ALLWORX • 585-421-3850 • www.allworx.com
Revised: April 16, 2013
Page ii
© 2013 Allworx Corp, a Windstream company. All rights reserved. No
part of this publication may be reproduced, stored in a retrieval system,
or transmitted, in any form or by any means, electronic, mechanical,
photocopy, recording, or otherwise without the prior written permission of
Allworx Corp.
Software in this product is Copyright 2013 Allworx Corp, a Windstream
company, or its vendors. All rights are reserved. The software is
protected by United States of America copyright laws and international
treaty provisions applicable worldwide. Under such laws, the licensee is
entitled to use the copy of the software incorporated with the instrument
as intended in the operation of the product in which it is embedded. The
software may not be copied, decompiled, reverse-engineered,
disassembled, or otherwise reduced to human-perceivable form. This is
not the sale of the software or any copy of the software; all right, title,
ownership of the software remains with Allworx or its vendors.
A caution statement in this manual identifies a condition or practice,
which if not corrected or discontinued immediately, could lead to
equipment failure, equipment damage, or data loss.

Phone Guide – 9204/9204G
Toll Free 1-866-ALLWORX • 585-421-3850 • www.allworx.com
Revised: April 16, 2013
Page iii
Table of Contents
1Getting Started..................................................................................1
1.1 Contents Checklist....................................................................1
1.2 Connect the Phone ...................................................................1
2Adjusting the Phone..........................................................................3
2.1 Base Assembly and Adjusting the Angle of the Phone.............3
2.2 Volume Adjustment...................................................................3
2.3 Wall Mounting (Optional)...........................................................4
3Allworx Phone Overview...................................................................5
3.1 Buttons......................................................................................6
3.2 Feature Keys.............................................................................6
3.3 My Allworx Manager................................................................13
4Phone Operation.............................................................................14
4.1 Place a Call.............................................................................14
4.2 Receive a Call.........................................................................14
4.3 End a Call................................................................................14
4.4 Headset...................................................................................14
4.5 Directory Dialing......................................................................15
4.6 Redial a Number .....................................................................15
4.7 Missed Calls............................................................................15
4.8 Presence Soft Key ..................................................................15
4.9 Ignore and Silence Soft Keys..................................................16
4.10 Programmable Function Keys.................................................16
5Phone Features...............................................................................17
5.1 Operator..................................................................................17
5.2 User / Resource Extensions ...................................................17
5.3 Leave a User a Voicemail.......................................................17
5.4 Business Speed Dial...............................................................17
5.5 Auto Attendant ........................................................................17
5.6 Overhead Pages.....................................................................17
Phone Guide – 9204/9204G
Toll Free 1-866-ALLWORX • 585-421-3850 • www.allworx.com
Revised: April 16, 2013
Page iv
5.7 Activate Door Relay ................................................................18
5.8 Call Queues ............................................................................18
5.9 Shared Call Appearance.........................................................18
5.10 Automatic Call Distribution (ACD) Queuing............................22
5.11 Call Forwarding.......................................................................23
5.12 Paging Zones..........................................................................23
5.13 Conference Center..................................................................24
5.14 Allworx Message Center.........................................................24
5.15 Answer a Ringing Phone Using another Handset ..................24
5.16 Park.........................................................................................25
5.17 Call Monitors ...........................................................................26
5.18 Busy Lamp Field (BLF) ...........................................................26
6Advanced Options...........................................................................27
6.1 Phone Configuration Menu .....................................................27
6.2 Personal Speed Dial ...............................................................27
6.3Preferences.............................................................................28
6.4 Reboot the Phone ...................................................................31
6.5 Hot Desk Login........................................................................32
6.6 Clear Call History....................................................................32
6.7 Refresh Directory....................................................................33
7Regulatory Notices..........................................................................34
8Abbreviations ..................................................................................35

Phone Guide – 9204/9204G
Toll Free 1-866-ALLWORX • 585-421-3850 • www.allworx.com
Revised: April 16, 2013
Page 1
1 Getting Started
1.1 Contents Checklist
Unpack the Allworx phone and applicable accessories, identify each item
with the following checklist and inspect for missing items.
•Allworx phone and base: Attach the base to the back of the phone.
See 2.1 Base Assembly and Adjusting the Angle of the Phone for
more information.
•Handset with cord: Attach the cord to the jack on the back of the
Allworx phone.
•Phone Functions Reference Card: Attach this quick operating
guide to the between the base and back of phone.
•Phone Guide: Read this document. Save for reference.
The Allworx phone requires, but does not include:
•Ethernet Cable: Connects the phone to the network, or
•Power Supply: Provides power to the Allworx phone - rated 24VDC,
400 mA.
1.2 Connect the Phone
To connect the phone:
1. Insert the handset connector to the Handset
jack on the back of the phone using the coiled
handset cord into the handset ( ) plug.
2. Plug one end of the Ethernet cable into the Network jack on the back of
the phone. Plug the other end into the Ethernet jack () on the wall.
CAUTION: Do not connect the phone to an analog phone line.
Users can connect a computer to the network through the phone’s
Computer jack ( ).
3. Connect the power supply. The phone initializes.

Phone Guide – 9204/9204G
Toll Free 1-866-ALLWORX • 585-421-3850 • www.allworx.com
Revised: April 16, 2013
Page 2
If using Power over Ethernet (PoE), this is the power to the phone after
connecting the Ethernet cable. Skip to step 4.
If not using PoE, obtain a power supply, connect the power cable to the
back of the phone in the DC jack ( ), and then plug into an outlet.
Allworx recommends using a surge protector.
4. View the initialization progress on the phone’s screen. A normal
sequence includes :
•Allworx Logo
•Configuring Network
•Starting network
•Loading configuration files
•Station Init complete •
If the phone does not follow this sequence or displays an error, contact
the Allworx Server Administrator
After successful startup, the phone displays the date, time, user
presence, user name, and extension.
5. Thread cables through the strain relief guide. 0.

Phone Guide – 9204/9204G
Toll Free 1-866-ALLWORX • 585-421-3850 • www.allworx.com
Revised: April 16, 2013
Page 3
2 Adjusting the Phone
2.1 Base Assembly and Adjusting the Angle of the Phone
Users can adjust the Allworx phone base angle so that the Allworx Phone is
easy to use and read the screen while sitting on a desk.
To adjust the phone:
1. Remove the handset from the hook and lay the phone face down on a
soft surface with the top pointed away.
2. Hold the base with the fixed tabs facing the bottom of the phone.
3. Select one of the three available positions to connect the base to the
back of the phone. The nearest set of holes provides the steepest angle.
4. Place the fixed tabs in the preferred holes on the back of the phone.
5. Rotate the phone base towards the top until the flexible tabs click. 0.
To remove the base:
1. Remove the handset from the hook and lay the phone face down on a
soft surface with the top pointed away.
2. Press down on the flexible tabs and rotate the base towards the bottom
until the fixed tabs easily lift of the holes. 0.
2.2 Volume Adjustment
The volume of the incoming ring, handset, speakerphone, and the headset is
adjustable.
To adjust the incoming call volume:
1. Locate the volume bar at the bottom of the phone. Do not lift the handset
or turn on speakerphone.
2. Press the volume bar on the left (decrease) or right (increase) to adjust
the incoming ring. The phone plays the audio tone. 0.
To adjust all other volumes:

Phone Guide – 9204/9204G
Toll Free 1-866-ALLWORX • 585-421-3850 • www.allworx.com
Revised: April 16, 2013
Page 4
1. Pick up the handset or turn on the speakerphone. Locate the volume bar
at the bottom of the phone.
2. Press the – (decrease) or + (increase) on the volume bar to adjust the
incoming ring. 0.
2.3 Wall Mounting (Optional)
Mounting the Allworx phone requires a wall mounting plate. Use mounting
plates that meet standard TIA-570-B, Section 5. These are available from the
local telephone company or local retailer.
Caution: If using a standard telephone wall mount plate, DO NOT connect
to the RJ 11 jack. This connection is for analog phones and may cause
damage to the Allworx phone, which voids the warranty.
The mounting plate has mounting studs to receive the telephone base and
positioned to secure the Allworx phone flush to the wall surface.
Remove the Allworx phone base and mount the phone over the mounting
plate studs. All power and RJ 45 cable connections should exit between the
phone body and the phone base and then routed to the network connection
and/or a power connection.
Leviton 4108W-0SP

Phone Guide – 9204/9204G
Toll Free 1-866-ALLWORX • 585-421-3850 • www.allworx.com
Revised: April 16, 2013
Page 5
3 Allworx Phone Overview
The Allworx Server Administrator pre-configures the phone for either PBX
(Private Branch Exchange) or Key System mode of operation. This affects
the functionality of each programmable button on the phone.
For Allworx Server Software Release 7.5 and later, the phone LCD screen
backlight turns off after 2 minutes of inactivity. To turn on the backlight, lift the
handset off the hook or press a button.

Phone Guide – 9204/9204G
Toll Free 1-866-ALLWORX • 585-421-3850 • www.allworx.com
Revised: April 16, 2013
Page 6
3.1 Buttons
•Keypad:Use the numeric keypad to dial phone numbers or to enter
PIN numbers/ passwords.
•Navigation: Use the up or down navigation arrows to move through
the phone screen options. Use the center button to Select or Save
settings.
•Soft Key Selection: Use the Softkey buttons located below the
phone screen to select an option.
3.2 Feature Keys
3.2.1 Messages
There is a new message in the voicemail box, if the MESSAGES button is
red. The number of new messages displays on the LCD screen.
To retrieve messages in Software Release 7.2 or lower:
1. Press the MESSAGES button to call to the Audio Message Center.
2. Login using the phone keypad, and listen to the messages. 0.
To retrieve messages in Software Release 7.3 or higher:
1. Press the MESSAGES button.
•Once opens the Visual Message Center.
•Twice opens the Audio Message Center.
2. Login using the phone keypad. 0.
Visual Message Center: A list of messages displays on the screen.
Use the UP / DOWN scroll and SELECT soft keys to play and manage
the voicemail messages.
Audio Message Center: A welcome message plays and indicates the
number of new voicemail messages. Follow the prompts to manage the
voicemail messages.

Phone Guide – 9204/9204G
Toll Free 1-866-ALLWORX • 585-421-3850 • www.allworx.com
Revised: April 16, 2013
Page 7
Note: The Allworx System Administrator can change the function of the
Messages button so that pressing it immediately calls the Audio
Message Center. If this occurs, the Visual Message Center operation is
not available.
3.2.2 Intercom
The Intercom button enables using the phone as an intercommunication
system between two handsets. The discussion between the two handsets
broadcasts over the speakerphone and is not private. The button is solid
green while in use.
To use the Intercom:
1. Press the INTERCOM button and dial the user extension. The call
connects when the LCD screen displays Active Call.
2. Start talking. The conversation transmits through the speaker.
3. Press the INTERCOM or SPEAKER button to end the call.
4. Hang up the handset when finished. 0.
To deny an incoming Intercom request, press the IGNORE soft key.
3.2.3 Conference
The Allworx 9204/9204G phones provide the ability to set up conferences
between three parties (3-way conferences) or four parties (4-way
conferences). To connect a 4-way conference, the system requires at least
three Call Appearance PFKs. The PFK flashes green while making
connections, is solid red or green when Call Assistant – Call Recording is in
progress, or flashes red and green when recording a call.
To connect a conference call:
1. Connect to the first person for the conference call.
2. Press the CONF button.
3. Select another Call Appearance PFK and dial the number of the second
person for the conference call.

Phone Guide – 9204/9204G
Toll Free 1-866-ALLWORX • 585-421-3850 • www.allworx.com
Revised: April 16, 2013
Page 8
4. Press the CONF button. All three callers join in the conference. The
CONF button illuminates solid green. 0.
To add another person to the conference, repeat steps 1 through 4. All
four callers are now able to conference. The CONF button illuminates
solid red.
One party may hang up to exit the conference; the remaining two parties
continue to be connected.
To have a private conversation with one of the parties, split the
conference:
a. Use the phone UP / DOWN scroll soft keys, and select the Call
Appearance PFK of the person to put on hold.
b. Press the HOLD button. The display indicates the two parties
involved in the conference The Call Appearance PFK for the person
on hold flashes. .
Talk privately to the remaining party.
To have the person re-join the conference, press CONF, then
select the flashing Call Appearance PFK. The three-way
conference becomes re-established.
3.2.4 Transfer
The TRANSFER button enables the user to send the active call to another
number. The Transfer button is solid red,which indicates the user is
transferring a call to another extension using a Blind or an Attended
Transfer. The transfer option works differently, depending on the Allworx
server software version. Users have two transfer options:
•Unannounced (Blind) Transfer: user does not talk to the transfer
recipient prior to transferring a call to that extension.
•Announced (Attended) Transfer: user talks to the transfer
recipient prior to transferring a call to that extension.

Phone Guide – 9204/9204G
Toll Free 1-866-ALLWORX • 585-421-3850 • www.allworx.com
Revised: April 16, 2013
Page 9
Allworx Server Software 7.3 or Lower
To do an Unannounced (Blind) transfer:
Note: The Allworx Server Administrator may configure this method for server
7.4 and greater based on the phone configuration.
1. Press the TRANSFER button. This places the current call on hold.
Key System Mode: To transfer a call to an external party, press a free
Line Appearance PFK, and then dial the phone number.
PBX Mode: Continue to step 2.
2. Wait for the dial tone, and then dial the number to transfer the call.
3. Hang up, press the TRANSFER button, or press the XFER softkey to
complete the transfer. 0.
To do an Announced (Attended) transfer:
1. Press the TRANSFER button. This places the current call on hold
2. Select an unused Call or Line Appearance PFK.
3. Dial the number of the recipient of the transfer.
4. Talk to the recipient.
5. Press the TRANSFER button again, and then press the PFK of the
original call. This connects the two parties.
6. Hang up the handset when finished. 0.
To cancel the transfer, press the RELEASE button. To return to the
original caller, press the PFK indicating the held call.
Allworx Server Software 7.4 or Higher
Note: Verify the INTERCOM button or an appearance PFK is free.
To do a one-step transfer:
On an active call, the user must have a BLF or Speed Dial PFK for the
recipient of the transfer (Note: The Allworx Server Administrator enables the
one-step transfer).

Phone Guide – 9204/9204G
Toll Free 1-866-ALLWORX • 585-421-3850 • www.allworx.com
Revised: April 16, 2013
Page 10
1. Press the BLF or Speed Dial PFK for the recipient of the transfer.
Unattended (Blind) Transfer: skip to step 2.
Attended (Announced) Transfer: Talk to the recipient.
2. Hang up, press the TRANSFER button, or press the XFER softkey to
complete the transfer. 0.
Note: The phone configuration may not enable users to stay on the line to
announce the transfer. Use the procedure in Section 4.4.1, Allworx
Server Software 7.3 or Lower for Announced transfers.
To do a two-step transfer:
If a key is unable for the intended recipient, press the TRANSFER button and
dial the number:
1. Press the TRANSFER button.
To transfer a call to an external party while in Key System mode, press a
free Line Appearance PFK and then dial the phone number
If the system is not in Key System mode, continue to step 2.
2. Wait for the dial tone, and then dial the extension to transfer the call.
Unattended (Blind) Transfer: skip to step 3.
Attended (Announced) Transfer only: Talk to the recipient.
3. Hang up, press the TRANSFER button, or press the XFER softkey to
complete the transfer. 0.
Note: The phone configuration may not enable users to stay on the line to
announce the transfer. Use the procedure in Section 4.4.1, Allworx
Server Software 7.3 or Lower for Announced transfers.
To transfer to voicemail:
Pre-requisite: User is on an active call.
1. Press the TRANSFER button, and then press the VMAIL soft key.

Phone Guide – 9204/9204G
Toll Free 1-866-ALLWORX • 585-421-3850 • www.allworx.com
Revised: April 16, 2013
Page 11
2. Dial the extension, press a BLF key, or press the Speed Dial key.
3. Hang up, press the TRANSFER button, or press the XFER softkey to
complete the transfer. 0.
3.2.5 Release
Use the RELEASE button to end an active call or to abort a new call setup,
such as the middle of a transfer operation.
3.2.6 Park
PBX Behavior on a call appearance: To park an active call, press the PARK
button. The phone briefly displays the parking orbit1extension of the call.
Key System Behavior on an outside line: To place an active call in a “system-
wide hold”, press the PARK button. Any phone with a PFK for this outside
line can retrieve the call.
Pressing the PARK button on a handset displays a list of all parked calls, if
there are no active calls on the handset (including the Caller ID and number
of the parked caller, the parked call orbit number, duration of the parked call,
and the extension number that parked the call). Users may also select calls
from the list to retrieve a parked call.
3.2.7 Info
To see a quick description of the phone buttons, use the INFO button. The
button is solid green while in use. For example, use the INFO button to
determine the programmed numbers for each speed-dial button.
To use this feature:
1. Press the INFO button.
2. Press any of the other buttons on the phone. The screen displays a brief
description of the selected button.
†Digits may vary per system. Please check phone functions tab of the My Allworx Manager
page or consult with the Allworx Server Administrator.

Phone Guide – 9204/9204G
Toll Free 1-866-ALLWORX • 585-421-3850 • www.allworx.com
Revised: April 16, 2013
Page 12
3. Press the INFO button a second time or let the LCD screen time out to
exit the description screen. 0.
3.2.8 Speaker
Press the SPEAKER button for hands-free use of the phone.
When using the handset, press the SPEAKER button and the button is solid
green while in use. Then place the handset on hook. Take the handset off
the hook to continue using it. When finished with the call, press the
SPEAKER button to hang up.
Note: While using a headset, use the SPEAKER button to activate it. The
speakerphone does not work while using a headset. See Section 5.4,
Headset, for more information on using headsets.
3.2.9 Mute/DND
Mute a Call
During a call, press the MUTE/DND button to turn off the microphone in the
handset, speakerphone, or headset. The MUTE/DND button is solid red
while in use.
Do Not Disturb (DND)
When activating the DND, the phone does not ring. All incoming calls follow
the next step in the active call route. Users can send calls. The MUTE/DND
is solid amber while in use.
When not on a call, press the MUTE/DND button. Press the MUTE/DND
button to de-activate the Do Not Disturb feature.
3.2.10 Hold
To place a call on hold:
1. Press the HOLD button. The HOLD button becomes solid red.
2. Place the handset on the hook. The Call Appearance PFK for the held
call blinks green until the user picks up the call again.

Phone Guide – 9204/9204G
Toll Free 1-866-ALLWORX • 585-421-3850 • www.allworx.com
Revised: April 16, 2013
Page 13
3. Pick up the handset to take the call off hold. If more than one call is on
hold, the most recent call connects. The caller ID of the call picked up
displays.
Pick up a different call on hold: press the flashing PFK for that call or use
the UP / DOWN scroll soft keys to display the call on the screen, and
then pick up the handset.
While on a call on hold and a new call comes in, lift the handset to
answer the new call.
4. Hang up the handset when finished. 0.
If the Allworx Server Administrator has enabled the Music on Hold feature for
the call appearance, callers on hold will hear music.
For Line Appearance, by default the HOLD button will first start flashing red
indicating a parked call. Continue pressing the HOLD button until it becomes
solid red to place the call on hold.
See section 5.9 Shared Call Appearance for the hold options.
3.3 My Allworx Manager
To access the business directory, conference scheduling page, company
phone list, distribution lists, phone features chart, and shared folders, enter
the My Allworx Manager address into a web browser (e.g. Internet Explorer).
The Allworx Server Administrator provides the address:
http://ServersLANSideAddress , where ServersLANSideAddress is the IP
address or domain name of the Allworx server.

Phone Guide – 9204/9204G
Toll Free 1-866-ALLWORX • 585-421-3850 • www.allworx.com
Revised: April 16, 2013
Page 14
4 Phone Operation
4.1 Place a Call
•Call Appearance PFK: place extension-to-extension calls or to obtain
an outside line (must dial 9†first).
•Line Appearance PFK: seizes the outside line without dialing 9†first.
•Speed Dial PFK: automatically dials the programmed number.
4.2 Receive a Call
For incoming calls, the audible indicator rings and a Call Appearance or Line
Appearance PFK flashes, unless configured otherwise. Press the PFK.
•Call Appearance: receive either an extension-to-extension call or an
outside line directed to an extension assigned to the phone.
•Line Appearance: receive inbound calls from an outside line.
•Call Monitor
•Call Queue
•ACD Appearance
4.3 End a Call
To release a call, do one of the following:
•Place the receiver back on the hook. If using the speakerphone or
headset, press the SPEAKER button.
•Press another PFK. If a second incoming call is on another PFK,
pressing that PFK ends the current call and answers the incoming
call (unless the phone configuration enables auto on hold).
•Press the RELEASE button to end a call and start a new call. •
4.4 Headset
1. Plug the cable for the headset into the headset jack on the phone.
2. Press the SPEAKER button to activate the headset.

Phone Guide – 9204/9204G
Toll Free 1-866-ALLWORX • 585-421-3850 • www.allworx.com
Revised: April 16, 2013
Page 15
3. Press the SPEAKER button to disconnect the call when finished. 0.
Note: The Allworx Server Administrator can create a PFK to activate the
headset instead of using the SPEAKER button.
4.5 Directory Dialing
1. Press the UP / DOWN scroll soft keys to view a list of all User
Extensions, System Extensions, and Speed Dial numbers by Name or
Description. While the handset is off the hook, the rightmost soft key
changes to the directory listing option: PHONEBK. Press to initiate.
2. Use the UP / DOWN scroll soft keys to highlight the name (or
description) and extension or press the keypad to jump to desired
specific alphabetic section of the directory.
3. Press the SELECT button to dial the number. 0.
4.6 Redial a Number
•Press the REDIAL soft key on the phone’s display screen.
•Press the CALLS softkey. Use the UP / DOWN scroll softkeys to
highlight the call in the display. Press the SELECT button .
4.7 Missed Calls
After a missed call, a message displays on the phone’s screen.
To see details of the missed calls:
1. Press the CALLS soft key, and then press the UP / DOWN scroll soft
keys to view any missed calls.
2. Press the DETAIL soft key to view the date and time of the missed calls.
Press the SELECT button to call the number, if it is available.0.
4.8 Presence Soft Key
The Presence setting identifies which call route the incoming call uses based
on the extension availability. The Presence setting options include In Office,
At a Meeting, On Vacation, On Business Trip, At Home, Away, and Busy.

Phone Guide – 9204/9204G
Toll Free 1-866-ALLWORX • 585-421-3850 • www.allworx.com
Revised: April 16, 2013
Page 16
1. Press the PRESNCE (presence) soft key.
2. Press the UP / DOWN scroll soft keys to view the presence states.
3. Press the SELECT button to change the presence. The Presence
setting changes, the default LCD screen displays, and all inbound calls
follows the call route for this presence state. The MUTE/DND button
flashes amber to indicate a presence setting other than “In Office”. 0.
4.9 Ignore and Silence Soft Keys
While a call is ringing, the SILENCE and IGNORE soft key options display on
the phone screen.
•IGNORE soft key: stops the audible ringing and the PFK continues
to flash until the user answers the call or the caller hangs up.
•SILENCE soft key: stops the audible ringing, the phone screen
displays the incoming call information, and the PFK continues to
flash until the user answers the call or the caller hangs up.
4.10 Programmable Function Keys
The Allworx Server Administrator can program the following options into the
available PFKs on the Allworx phone:
•ACD Appearance
•Headset
•Push to Talk
•Busy Lamp Field (BLF)
•Hot Desk
•Queue Alarm
•Call Appearance
•Line Appearance
•Queue Appearance
•Call Monitor
•Messages
•Redial
•Call Supervision
•Park
•Schedule
•Centrex Flash •Parking Orbit •Shared Appearance
(version 7.5 and
later)
•Emergency Alert •Park Set Monitor
(version 7.5 and
later)
•Speed Dial
•Personal Speed
Dial
This manual suits for next models
1
Table of contents
Other Allworx IP Phone manuals

Allworx
Allworx 9212 User manual

Allworx
Allworx 9224 User manual

Allworx
Allworx Verge Series User manual

Allworx
Allworx Verge Series Parts list manual

Allworx
Allworx 9112 User manual

Allworx
Allworx 9224 User manual

Allworx
Allworx 9102 User manual

Allworx
Allworx Verge 9304 User manual

Allworx
Allworx 9102 User manual

Allworx
Allworx Verge 9318Ex User manual

Allworx
Allworx 9204 User manual

Allworx
Allworx 9292E User manual

Allworx
Allworx 9212 User manual

Allworx
Allworx 9102 User manual

Allworx
Allworx 9202 User manual

Allworx
Allworx 9224 User manual

Allworx
Allworx 9202 User manual

Allworx
Allworx Allworx Phone User manual

Allworx
Allworx 9212 User manual

Allworx
Allworx 9212 User manual