manuals.online logo
Brands
  1. Home
  2. •
  3. Brands
  4. •
  5. 101VOICE
  6. •
  7. IP Phone
  8. •
  9. 101VOICE IP1060G Instruction manual

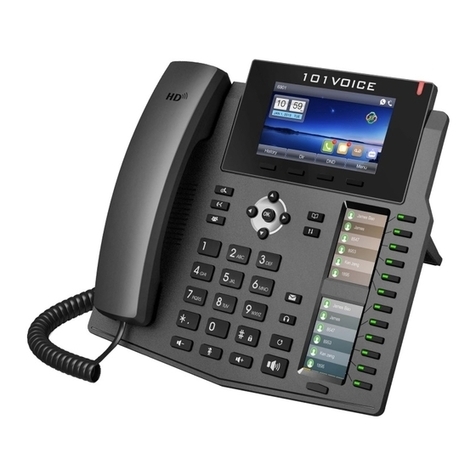
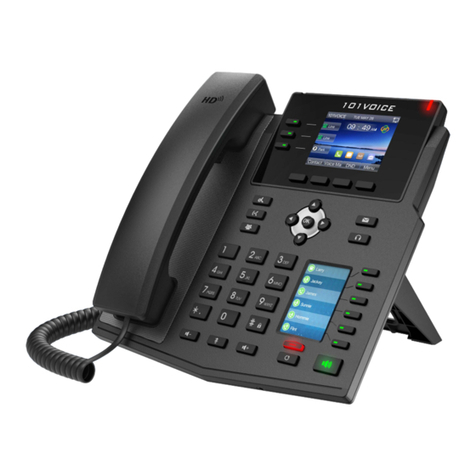
101VOICE IP1060G Instruction manual

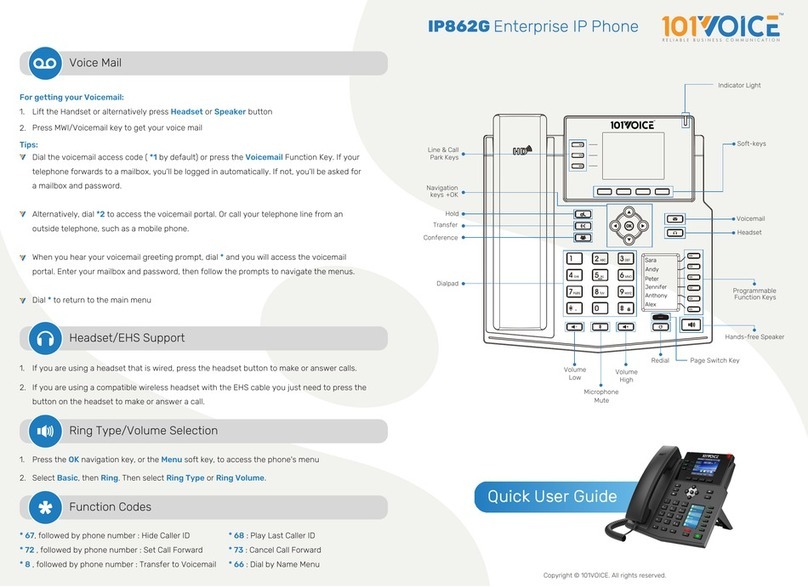
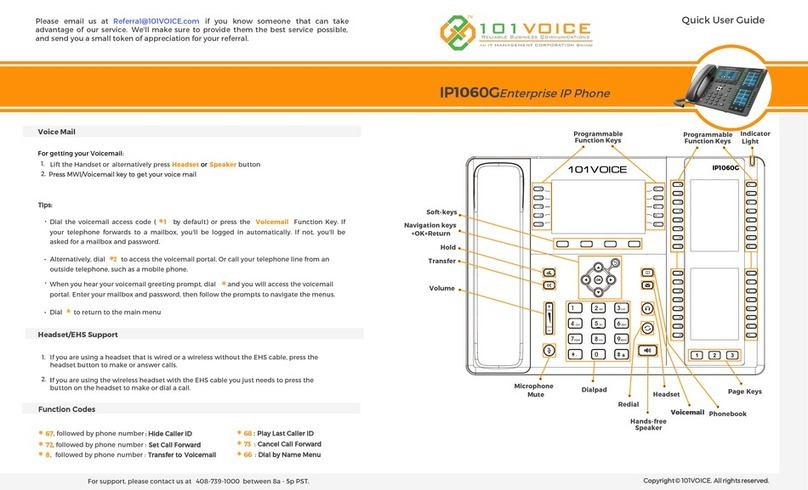
IP1060G Enterprise IP Phone
If you are using a headset that is wired or a wireless without the EHS cable, press the
headset button to make or answer calls.
If you are using the wireless headset with the EHS cable you just needs to press the
button on the headset to make or dial a call.
1.
2.
*67, followed by phone number : Hide Caller ID
*72 , followed by phone number : Set Call Forward
*8 , followed by phone number : Transfer to Voicemail
For getting your Voicemail
1. Lift the Handset or alternatively press Headset or Speaker button
2. Press MWI/Voicemail key to get your voice mail
Tips:
Dial the voicemail access code ( * 1 by default) or press the Voicemail
Function Key. If your telephone forwards to a mailbox, you'll be logged in
automatically. If not, you'll be asked for a mailbox and password.
Alternatively, dial *2 to access the voicemail portal. Or call your telephone
line from an outside telephone, such as a mobile phone
When you hear your voicemail greeting prompt, dial *and you will access the
voicemail portal. Enter your mailbox and password, then follow the prompts
to navigate the menus.
Dial *to return to the main menu
*68 : Play Last Caller ID
*73 : Cancel Call Forward
*66 : Dial by Name Menu
For support, please contact us at 408-739-1000 between 8a - 5p PST. Copyright © 101VOICE. All rights reserved.
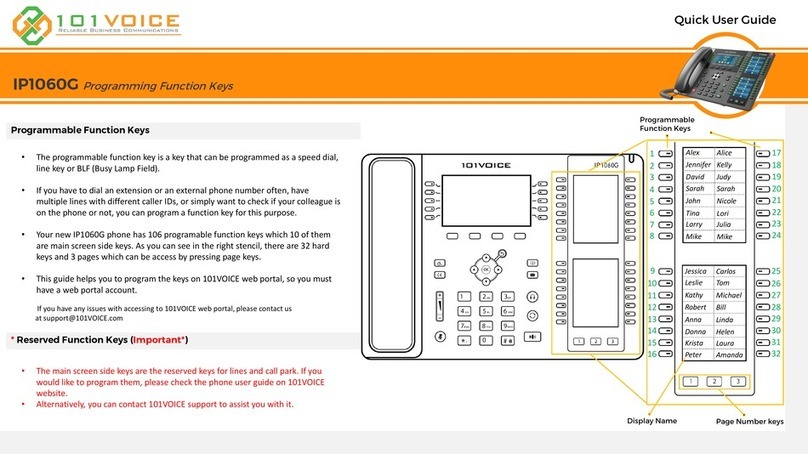
Programmable
Function Keys
Soft-keys
Programmable
Function Keys Indicator Light
Page Keys
Navigation keys
+OK+Return
Hold
Transfer
Volume
Phonebook
Voicemail
Headset
Hands-free
Speaker
Redial
Dialpad
Microphone
Mute
Quick User Guide
Headset/EHS Support
Function Codes
Voicemail
IP1060G IP Phone User Guide - Powered by 101VOICE Copyright © 101VOICE. All rights reserved.
If a phone is ringing, users of other phones in the same pickup group may press pick up
function key to intercept the call and bring it to their phone.
1.
While the 1st party is on the phone, press the Conf soft key at the bottom of the LCD display
or Conference button.
1.
Dial the 2nd party phone number (internal or external phone number), then press the Dial
soft key.
2.
Press the Conf soft key again - to join the conference, use Navigation Keys (up or down) to
select the caller on-hold and press OK.
3.
You may press the End soft key to end the conference, or Split to split the callers.4.
While the 1st party is on the phone, press the Transfer button or XFER soft key, dial the
number to transfer to (internal or external), then press XFER again to complete the transfer.
1.
(This function allows users to transfer directly to an extension's voicemail without ringing the
phone).
Press the Transfer button or XFER soft key, dial *8 followed by the destination mailbox
number,then press XFER again.
1.
2.
Press the Menu soft key to access the phone's menu.1.
Select Basic, then Bluetooth.
Use right and left keys to enable . Select paired device or if no paired is displayed
press Scan to search, long press your bluetooth pairing button until you hear pairing,
then select the scanned device to connect.
3.
While the 1st party is on the phone, press the Transfer button or XFER soft key, dial the
number to transfer (internal or external), then press the Dial soft key.
1.
Announce/notify the receiving party about the transfer.2.
Press the XFER soft key to complete the transfer, or press End, then Resume to return to
the 1st party.
3.
Press the OK navigation key, or the Menu soft key, to access the phone's menu.1.
Select Basic, then Ring. Then select Ring Type or Ring Volume.2.
Enter the phone number on telephone dialpad.
Either pickup the handset, press the Headset button (if a headset's connected), press the
Speaker button, or press the Dial softkey on the bottom of the LCD display.
1.
2.
To end the call, either hang up the handset, press End soft key, or press the Speaker button.3.
Tips:
No need to dial 9to make external system calls (outside line).
No need to dial the Area Code if the destination number has the same Area
Code as your phone's caller ID.
No need to dial 1before any phone numbers.
No need to place an existing call on hold to take another call. You can simply
switch calls by pressing the phone line Function Keys.
Either pick up the handset, press the Headset button (if a headset's connected),
press the Speaker button, or press the Answer soft key on the LCD display.
1.
(This function allows users to place an incoming call on system-wide hold, so the call can be
retrieved from any phone within the location).
With the caller on the line, press the Call Park Function Key.1.
Wait for about (2) seconds to hear the "Call Park extension number" (i.e. 701 or 702).2.
Then press the End soft key or hang up the handset (you must do this for the call to
be in Park mode).
3.
The Parked call can be retrieved via any phone by dialing the "Call Park extension
number" within (2.5) minutes.
4.
Tips:
You should announce "You've got a call on 701" or "There's a call waiting for
you on 702", etc
OK
Telephone Lines
Key
Color LCD Screen
Key Pad
Function
Making Calls
Pick up
Conference Calls — 3-Party Audio Conferencing
Transferring Calls — Announced/Attended Transfer
Transferring Calls — Unannounced/Blind Transfer
Ring Type/Volume Selection
Pair Bluetooth Headset
Accepting Calls
Call Park/Orbit (System-Wide Hold)
Transferring Calls — Direct Voicemail Transfer
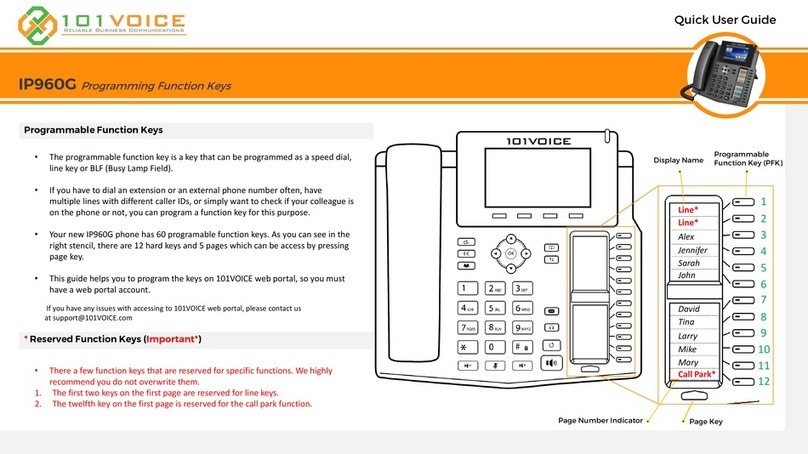
Long press the Dss key, on the Main display, you will see the Dss key number, Type and Dss
theme.
1.
Use down arrow button and select type. Then, select Memory Key type, then, select
Speed dial as subtype, then enter the name and number and press Ok.
2.
After saving, you should be able to see the name next to Dss key.3.
Press the down arrow button on your phone and check the IPv4 address (e.g. 192.168.19.15)1.
Open your web browser and enter the IP address. You should be able to see your phone web
interface
2.
Username is user and password is voip101. On the left navigation bar, select Function Key3
Select Dss Key page, then select Dss key you want to program, then choose Memory Key
type, then, select Speed dial as subtype, and click on apply. The name will be shown next
to the Dss key.
4.
Please note that
Names with more than 12 characters won't be shown completely.
You can change the color of handset icon next to the name by selecting color in Icon
Color.
The Speed dial LED will be o.
You have the option to configure the main display side keys. By default, they are configured
to be line keys. If you would like to program them, select Function Key on the left naviga-
tion bar, then, select Side key from the top navigation bar and repeat step 4 (Except
selecting Dss key page) and click on apply
5.
Speed Dial Configuration on Phone
Speed Dial Configuration on the Web Interface
IP1060G IP Phone User Guide - Powered by 101VOICE Copyright © 101VOICE. All rights reserved.

Other 101VOICE IP Phone manuals

101VOICE IP1060G Instruction manual

101VOICE

101VOICE IP1060G Instruction manual

101VOICE IP960G User manual

101VOICE

101VOICE IP960G User manual

101VOICE IP860G Instruction manual

101VOICE

101VOICE IP860G Instruction manual

101VOICE IP840G Instruction manual

101VOICE

101VOICE IP840G Instruction manual

101VOICE IP862G Instruction manual

101VOICE

101VOICE IP862G Instruction manual

101VOICE IP862G Instruction manual

101VOICE

101VOICE IP862G Instruction manual

101VOICE IP1060G Instruction manual

101VOICE

101VOICE IP1060G Instruction manual

101VOICE IP960G Instruction manual

101VOICE

101VOICE IP960G Instruction manual

101VOICE IP862G Instruction manual

101VOICE

101VOICE IP862G Instruction manual

Popular IP Phone manuals by other brands

Avaya 1616 manual

Avaya

Avaya 1616 manual

E-MetroTel UC306W user guide

E-MetroTel

E-MetroTel UC306W user guide

Digium Digium user guide

Digium

Digium Digium user guide

Avaya 4600 Series installation guide

Avaya

Avaya 4600 Series installation guide

Avaya 4600 Series manual

Avaya

Avaya 4600 Series manual

Gigaset SL800 H PRO instruction manual

Gigaset

Gigaset SL800 H PRO instruction manual

Polycom VVX 400 quick start guide

Polycom

Polycom VVX 400 quick start guide

Xblue Networks X2020 installation manual

Xblue Networks

Xblue Networks X2020 installation manual

Aastra 6753I user guide

Aastra

Aastra 6753I user guide

Yealink W56P Telesystem quick start guide

Yealink

Yealink W56P Telesystem quick start guide

Mitel networks 5240 quick start guide

Mitel

Mitel networks 5240 quick start guide

Fanvil V Series instruction manual

Fanvil

Fanvil V Series instruction manual

Yealink Yealink SIP-T48G user guide

Yealink

Yealink Yealink SIP-T48G user guide

Yealink SIP-T42U Configuration guide

Yealink

Yealink SIP-T42U Configuration guide

Yealink T2 series quick start guide

Yealink

Yealink T2 series quick start guide

AudioCodes C470HD quick guide

AudioCodes

AudioCodes C470HD quick guide

Mitel 5324 IP Quick reference guide

Mitel

Mitel 5324 IP Quick reference guide

Avaya IP Office 1416 User reference

Avaya

Avaya IP Office 1416 User reference

manuals.online logo
manuals.online logoBrands
  • About & Mission
  • Contact us
  • Privacy Policy
  • Terms and Conditions

Copyright 2025 Manuals.Online. All Rights Reserved.