manuals.online logo
Brands
  1. Home
  2. •
  3. Brands
  4. •
  5. Toro
  6. •
  7. Lawn Mower Accessories
  8. •
  9. Toro TransPro 80 series User manual

Toro TransPro 80 series User manual

1
All Rights Reserved
Printed in the USA
2003 by The Toro Company
8111 Lyndale Avenue South
Bloomington, MN 55420-1196
TransPro Frame
Rail Ramp
Flat Ramp
TransPro 80
Model No. 04238—Serial No. 220000001 and Up
Model No. 04244
Model No. 04245
Form No. 3329–551
Installation Instructions
Mount Tongue Assembly
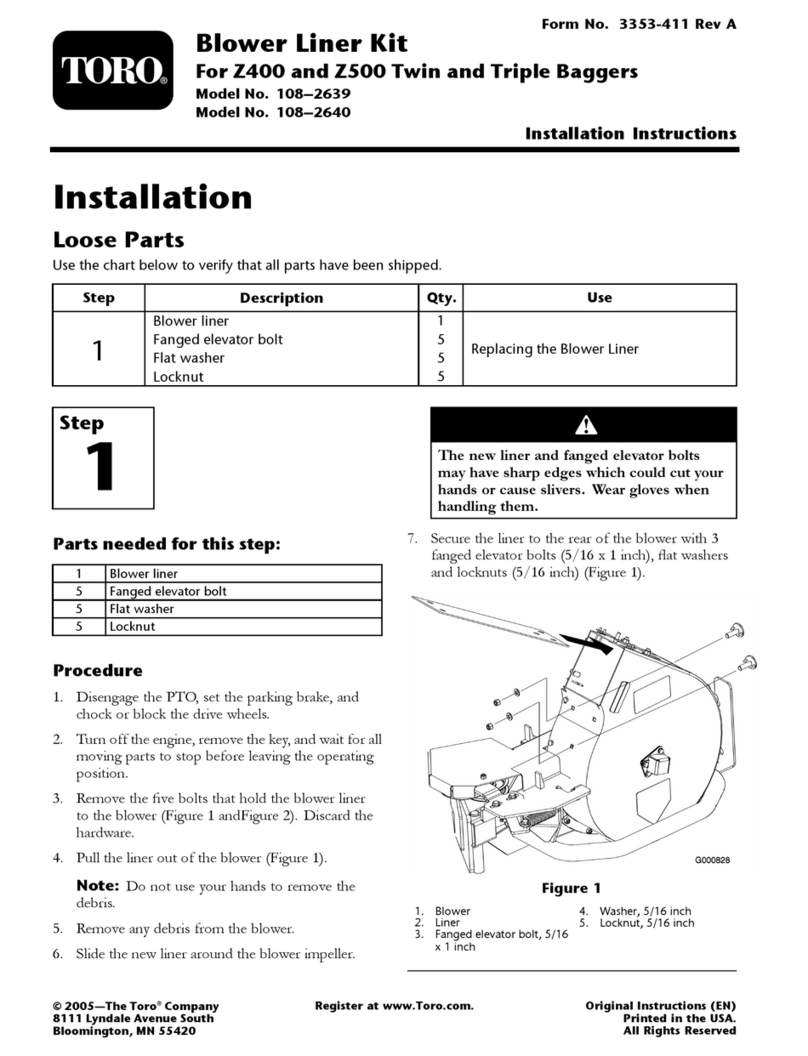
1. Insert tongue assembly into frame assembly while
aligning rear mounting holes (Fig. 1).
2. Secure tongue assembly into frame assembly with a
clevis pin, (2) washers and (2) cotter pins (Fig. 1).
11
2
Figure 1
1. Tongue assembly 2. Frame assembly
Mount Axle and Ramp (Model 04245) or
Rail (Model 04244) Assemblies
1. Refer to figure 2 to determine which mounting holes
should be used to fit the width of your greensmower.
1
3
2
Figure 2
1. GR 1600 or GR 1000
w/Groomer 2. GR 800
3. GR 1000 & Flex 21
2. Mount axle assembly and a ramp assembly (Fig. 3) or
rail assembly (Fig. ) to each end of frame with (2)
3/8–16 x 3–1/2” lg. bolts, (4) washers and (2) nuts.
1
2
Figure 3
1. Axle assembly 2. Ramp assembly (R.H.)
2
1
2
Figure 4
1. Axle assembly 2. Rail assembly (R.H.)
Mount Wheel Assemblies
1. Mount a wheel assembly to each axle hub with (4) lug
nuts (Fig. 5). Tighten nut to 80 ft/lb.
2. Inflate tires to 5 psi.
1
2
Figure 5
1. Axle 2. Wheel assembly
Important Higher tire pressure may cause damage
to greensmower.
Mount/Adjust Hitch Straps
Hitch straps are shipped mounted in the standard position
(Fig. 6).
Important Trailer tongue to be parallel to ground when
aligned with tow vehicle hitch.
Figure 6
1. Standard position
1. Using one of the configurations in figure 7 or 8, adjust
and secure hitch straps to trailer tongue.
Figure 7
1. Low hitch position 2.
Figure 8
1. High hitch position
3
Mount Greensmower Wheel Assemblies
(Model 04244 only)
Note: On Greensmaster 1000 equipped with a groomer,
Model 04052, the wheel shaft, on the groomer end, must be
removed and a new wheel shaft, part no. 106–5385 must be
purchased and installed. Also, the rail assembly, on the
groomer end, must be mounted in the outside (GR 1600)
hole locations (Fig. 2).
1. Remove existing standard transport wheels from wheel
shafts on greensmower (if so equipped).
1
2
3
Figure 9
1. Wheel shaft (L.H. shown)
2. Wheel 3. Wheel clip
2. Insert a wheel onto each shaft and secure with a wheel
clip (Fig. 9).
Loading Trailer
1. Press down on latch assembly and lift handle (Fig. 10).
Lower trailer bed to ground.
1
2
Figure 10
1. Latch assembly 2. Handle
2. Pivot wheel rods upward (Fig. 11).
3. Remove baskets from greens mower, disengage reel
drive and move throttle to slowest position. SLOWLY
drive greens mower onto trailer until wheel stops are
contacted.
4. Stop engine and engage parking brake.
5. Engage wheel rods as follows:
•On flat ramps, rotate wheel rods downward over greens
mower transport wheels (Fig. 11).
•On rail ramps, lift wheel rod and rotate behind greens
mower transport wheels (Fig. 12).
1
Figure 11
1. Wheel rod
1
Figure 12
1. Wheel rod
6. Push down on handle until trailer assembly locks into
latch assembly.
7. Store basket in tow vehicle.
4
Operation
1. The TRANSPRO 80 is intended for use with
Greensmaster 800, 1000, 1600 and Flex 21 Walk
Greens Mowers. The towing of other products may
result in damage to axles and transmissions that
continue to rotate when towed.
2. USE ONLY A VEHICLE WITH THE PROPER
TOW RATING. The TRANSPRO 80 and one greens
mower weigh approximately 400 lbs. Ensure that the
tow vehicle has adequate braking and handling capacity
by checking the recommendations of the vehicle
manufacturer.
3. Ensure that the trailer is properly connected to the tow
vehicle before loading or unloading the greens mower
to prevent sudden unintended tongue movement or flip
up. Use a retention device on hitch pin to secure
connection.
Important Trailer tongue to be parallel to ground when
aligned with tow vehicle hitch.
4. Strap Greensmower to trailer when driving on rough or
hilly terrain.
5. The TRANSPRO 80 adds extra towing weight to the
vehicle. Drive the vehicle safely.
•Do not drive on highway or public roads.
•Always SLOW the tow vehicle when approaching
and while making a turn.
•Always SLOW the tow vehicle when driving in
unfamiliar areas or over rough terrain.
•Always SLOW the tow vehicle when changing
direction of travel or preparing to stop.
•When turning or driving on slopes, always SLOW
the tow vehicle, then turn to prevent loss of control
and possible upset.
•DO NOT make sudden or sharp turns. DO NOT
suddenly change direction of travel on an incline,
ramp, grade, slope or similar surface.
•Maximum towing speed is 15 mph (24 kmh).
Always adjust the tow vehicle speed to allow for
existing ground conditions such as wet slick
surfaces, loose sand or gravel and/or low visibility
conditions such as dim or bright lighting, fog, mist
or rain.
•Be especially careful when driving a heavily loaded
vehicle down an incline or slope. Drive the vehicle
UP and DOWN the face of the slopes, inclines or
grades whenever possible. DO NOT DRIVE across
the face if at all possible. There is a risk of upsetting
the vehicle, which can result in serious injury or
death.
6. Before backing up, look to the rear and assure no one is
behind. Back up slowly and watch the trailer movement
closely.
7. Use extreme caution and slow speed when backing up
the trailer and tow vehicle.
8. Watch out for traffic when near or crossing roads.
Always yield the right of way to pedestrians and other
vehicles.
9. If the trailer begins to vibrate abnormally, stop
immediately. Shut off the tow vehicle engine. Repair all
damage before commencing towing.
10.Before servicing or making any adjustments to the
trailer:
•Stop the tow vehicle and set the parking brake.
•Shut off the tow vehicle’s engine and remove key
from ignition.
11. Keep all nuts, bolts and other fasteners tightened
securely. Replace any parts removed during servicing or
adjustments.
12.To assure optimum performance and continued safety of
this product, always use genuine TORO replacement
parts. Replacement parts and accessories made by other
manufacturers may affect the product’s operation,
performance or durability. Such use could also void the
warranty of The Toro Company.
Other Toro Lawn Mower Accessories manuals

Toro 31212 User manual

Toro

Toro 31212 User manual

Toro 79485 User manual

Toro

Toro 79485 User manual

Toro Groundsmaster 5900 User manual

Toro

Toro Groundsmaster 5900 User manual

Toro 78493 User manual

Toro

Toro 78493 User manual

Toro 3200 User manual

Toro

Toro 3200 User manual

Toro 03484 User manual

Toro

Toro 03484 User manual

Toro 79216 User manual

Toro

Toro 79216 User manual

Toro 136-9125 User manual

Toro

Toro 136-9125 User manual

Toro 137-5001 User manual

Toro

Toro 137-5001 User manual

Toro 108-2639 User manual

Toro

Toro 108-2639 User manual

Toro Z Master 116-0231 User manual

Toro

Toro Z Master 116-0231 User manual

Toro Grandstand 139-1529 User manual

Toro

Toro Grandstand 139-1529 User manual

Toro 31329 User manual

Toro

Toro 31329 User manual

Toro 108-1381 User manual

Toro

Toro 108-1381 User manual

Toro 140-1559 User manual

Toro

Toro 140-1559 User manual

Toro 4045 User manual

Toro

Toro 4045 User manual

Toro 120-6950 User manual

Toro

Toro 120-6950 User manual

Toro 03661 User manual

Toro

Toro 03661 User manual

Toro 136-8550 User manual

Toro

Toro 136-8550 User manual

Toro 138-6246 User manual

Toro

Toro 138-6246 User manual

Toro Wheel Horse 78305 User manual

Toro

Toro Wheel Horse 78305 User manual

Toro 79390 User manual

Toro

Toro 79390 User manual

Toro 31353 User manual

Toro

Toro 31353 User manual

Toro 110-6506 User manual

Toro

Toro 110-6506 User manual

Popular Lawn Mower Accessories manuals by other brands

Ariens 891008 Operator's manual

Ariens

Ariens 891008 Operator's manual

Rover 108 - 109 owner's manual

Rover

Rover 108 - 109 owner's manual

Snapper 1690047 Operator's manual

Snapper

Snapper 1690047 Operator's manual

RHINO 800 Operator's manual

RHINO

RHINO 800 Operator's manual

Exmark Quest 126-7506 Operator's manual

Exmark

Exmark Quest 126-7506 Operator's manual

Snapper 1685167 installation instructions

Snapper

Snapper 1685167 installation instructions

Cub Cadet 19B70029100 installation manual

Cub Cadet

Cub Cadet 19B70029100 installation manual

Stihl AMK 043.1 instruction manual

Stihl

Stihl AMK 043.1 instruction manual

MTD 753-0873 Service kit manual

MTD

MTD 753-0873 Service kit manual

Bush Hog RG60 Operator's manual

Bush Hog

Bush Hog RG60 Operator's manual

Scag Power Equipment GC-F4 Operator's manual

Scag Power Equipment

Scag Power Equipment GC-F4 Operator's manual

Land Pride RCF2760 Operator's manual

Land Pride

Land Pride RCF2760 Operator's manual

Peco SPARTAN RZ Series Operator's manual

Peco

Peco SPARTAN RZ Series Operator's manual

Peco 28621206 Operator's manual

Peco

Peco 28621206 Operator's manual

Simplicity 367 Operator's manual

Simplicity

Simplicity 367 Operator's manual

Simplicity 211 Operator's manual

Simplicity

Simplicity 211 Operator's manual

Iseki SSM72 Operators & service manual

Iseki

Iseki SSM72 Operators & service manual

Simplicity 1690043 Operator's manual

Simplicity

Simplicity 1690043 Operator's manual

manuals.online logo
manuals.online logoBrands
  • About & Mission
  • Contact us
  • Privacy Policy
  • Terms and Conditions

Copyright 2025 Manuals.Online. All Rights Reserved.