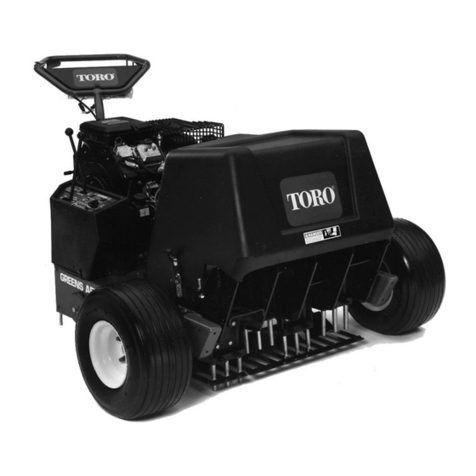
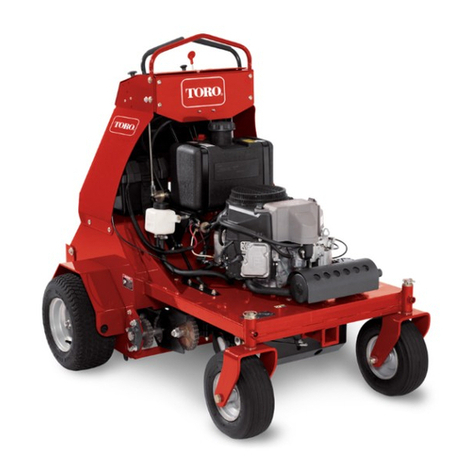
Toro 23518 User manual

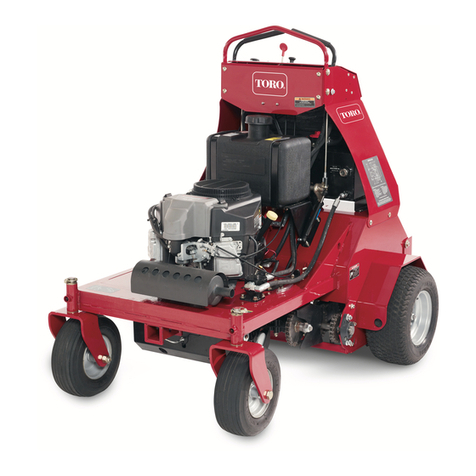
30 inch
Stand-On Aerator
Service Manual
Residential and
LCE Products


ABOUT THIS MANUAL
This service manual was written expressly for Toro and Lawn-Boy service technicians. The Toro Company has made
every effort to make the information in this manual complete and correct.
Basic shop safety knowledge and mechanical/electrical skills are assumed. The Table of Contents lists the systems
and the related topics covered in this manual.
For additional information on the electrical system, please refer to the Toro Electrical Demystication Guide (492-
4761) and subsequent. For service information on drive systems, please refer to the Hydro-Gear BDP service manual
(492-4779). For information specic to the engine used on this unit, refer to the appropriate engine manufacturer’s
service and repair instructions.
The Toro 30” Aerator, model year 2013, is covered in this manual. The manual may also be specied for use on later
model products.
Due to the compact design, parts were removed for photographic purposes when necessary.
The hydraulic components are sophisticated pieces of machinery. Maintain strict cleanliness control during all stages
of service and repair. Cover or cap all hose ends and ttings whenever they are exposed. Even a small amount of dirt
or other contamination can severely damage the system.
We are hopeful that you will nd this manual a valuable addition to your service shop. If you have any questions or
comments regarding this manual, please contact us at the following address:
The Toro Company
Residential and Landscape Contractor Service Training Department
8111 Lyndale Avenue South
Bloomington, MN 55420
The Toro Company reserves the right to change product specications or this manual without notice.
Copyright© All Rights Reserved
©2013 The Toro Company

ABOUT THIS MANUAL
THIS PAGE INTENTIONALLY LEFT BLANK.

TABLE OF CONTENTS
TOC-1Toro 30” Aerator Service Manual
1 - Safety Information
General Information ..................................................................................................................................... 1-1
Think Safety First......................................................................................................................................... 1-1
2 - Specications & Maintenance
Torque Specications .................................................................................................................................. 2-1
Standard Torque for Dry, Zinc Plated & Steel Fasteners (Inch Series) ....................................................... 2-2
Standard Torque for Dry, Zinc & Steel Fasteners (Metric Fasteners) .......................................................... 2-3
30” Aerator Specications............................................................................................................................ 2-4
Recommended Maintenance Schedule....................................................................................................... 2-5
Premaintenance Procedures ....................................................................................................................... 2-6
Lubrication ................................................................................................................................................... 2-6
Lubricate Chains ................................................................................................................................... 2-6
Lubricate Grease Fittings ...................................................................................................................... 2-7
Lubricate Caster Wheel Hubs ............................................................................................................... 2-8
Engine Maintenance .................................................................................................................................... 2-9
Service Air Cleaner ............................................................................................................................... 2-9
Change Engine Oil ................................................................................................................................ 2-9
Check Spark Plugs ............................................................................................................................... 2-9
Check Spark Arrester (if equipped) ....................................................................................................... 2-9
Fuel System Maintenance ......................................................................................................................... 2-10
Change Fuel Filter .............................................................................................................................. 2-10
Electrical System Maintenance ................................................................................................................. 2-10
Check Battery Charge ......................................................................................................................... 2-10
Drive System Maintenance.........................................................................................................................2-11
Check Tire Pressures ...........................................................................................................................2-11
Check Wheel Hub Nuts Torque Specication ......................................................................................2-11
Check Wheel Lug Nuts Torque Specication .......................................................................................2-11
Check Condition Of Chains ..................................................................................................................2-11
Check Condition Of Sprockets .............................................................................................................2-11
Check Transmission Output Shaft Nut Torque Specication ...............................................................2-11
Jackshaft Drive Chain Tension Adjustment ......................................................................................... 2-12
Drive Wheel Chain Tension Adjustment .............................................................................................. 2-13
Caster Pivot Bearings Pre-Load Adjustment ....................................................................................... 2-13
Brake Maintenance.................................................................................................................................... 2-13
Adjusting the Parking Brake ................................................................................................................ 2-13
Adjusting the Brake Switch ................................................................................................................. 2-14
Belt Maintenance ....................................................................................................................................... 2-14
Check Condition & Tension Of Belts ................................................................................................... 2-14
Transmission Drive Belt Tension ......................................................................................................... 2-14
Auxiliary Pump Drive Belt Adjustment ................................................................................................. 2-14
Controls System Maintenance................................................................................................................... 2-15
Motion Control Linkage Adjustment .................................................................................................... 2-15
Hydraulic System Maintenance ................................................................................................................. 2-16
Check Auxiliary Hydraulic Oil Level .................................................................................................... 2-16
Check Hydraulic Transmission Oil Level ............................................................................................. 2-16
Change Auxiliary Hydraulic Reservoir Fluid and Filter ........................................................................ 2-16
Change Hydraulic Transmission Filters and Fluid ............................................................................... 2-17
Tine Maintenance ...................................................................................................................................... 2-18
Check Tines ........................................................................................................................................ 2-18
Tine Drive Chain Adjustment ............................................................................................................... 2-18

TABLE OF CONTENTS
TOC-2 Toro 30” Aerator Service Manual
3 - Chassis
Chassis ............................................................................................................................................................3-1
Exploded View - Mainframe ......................................................................................................................3-1
Lubricate Caster Wheel Hubs..........................................................................................................................3-2
Caster Wheel Assembly Replacement ............................................................................................................3-3
Caster Wheel Assembly Removal .............................................................................................................3-3
Caster Wheel Assembly Installation ..........................................................................................................3-6
Exploded View – Tower .................................................................................................................................3-12
Adjusting the Parking Brake ..........................................................................................................................3-13
Adjusting the Brake Switch ............................................................................................................................3-13
Fuel System...................................................................................................................................................3-14
Engine Fuel Line Routing ..............................................................................................................................3-14
Motion Control System ..................................................................................................................................3-15
Motion Control Linkage Adjustment ...............................................................................................................3-16
Axle Bearing Assembly Replacement............................................................................................................3-17
Axle Bearing Assembly Removal ............................................................................................................3-17
Axle Bearing Assembly Installation .........................................................................................................3-18
4 - Hydraulics & Engine Mounting
Hydraulics ........................................................................................................................................................4-1
Hydraulic Subsystem ................................................................................................................................4-1
Valve Manifold ...........................................................................................................................................4-2
Auxiliary Hydraulic Subsystem ..................................................................................................................4-3
Checking the Transmission Expansion Tank Hydraulic Oil ..............................................................................4-4
Servicing the Auxiliary Hydraulic Oil ................................................................................................................4-4
Changing Auxiliary Hydraulic Reservoir Fluid and Filter..................................................................................4-6
Changing Hydraulic Transmission Filters and Fluid ........................................................................................4-7
Hydraulic Transmission Filter Removal .....................................................................................................4-7
Hydraulic Transmission Filter Installation ..................................................................................................4-7
Transmission Belt Replacement .....................................................................................................................4-8
Transmission Belt Removal ......................................................................................................................4-8
Transmission Belt Installation ................................................................................................................. 4-11
Transmission Replacement ...........................................................................................................................4-13
Transmission Removal ............................................................................................................................4-13
Transmission Installation .........................................................................................................................4-17
Transaxle Chain Tensioning ....................................................................................................................4-20
Hydraulic Pump Belt Removal & Installation .................................................................................................4-21
Idler Arm Removal & Installation ...................................................................................................................4-22
Return to Neutral Setting ........................................................................................................................4-23
Hydraulic Pump Rebuild ................................................................................................................................4-24
Hydraulic Pump Assembly .............................................................................................................................4-28
Hydraulic Cylinder Rebuild ............................................................................................................................4-29
Engine ...........................................................................................................................................................4-34
Engine Mounting .....................................................................................................................................4-34
Engine Pulley ..........................................................................................................................................4-35
Engine Replacement .....................................................................................................................................4-36
Engine Removal ......................................................................................................................................4-36
Engine Installation ...................................................................................................................................4-38

TABLE OF CONTENTS
TOC-3Toro 30” Aerator Service Manual
5 - Ground Drive & Tine Systems
Ground Drive ...................................................................................................................................................5-1
Subsystem Ground Drive ..........................................................................................................................5-1
Chains .......................................................................................................................................................5-2
Aerator Assembly ............................................................................................................................................5-3
Tinebar Chain Assembly ..................................................................................................................................5-4
Tine Shaft Replacement ..................................................................................................................................5-4
Tine Shaft Removal ...................................................................................................................................5-4
Tine Wheel Assembly ................................................................................................................................5-6
Coring Tine Removal & Replacement .......................................................................................................5-7
Tine Shaft Installation ................................................................................................................................5-7
Jackshaft Replacement ...................................................................................................................................5-9
Jackshaft Removal ....................................................................................................................................5-9
Jackshaft Installation ...............................................................................................................................5-12
6 - Electrical
Ignition Switch .................................................................................................................................................6-1
Purpose .....................................................................................................................................................6-1
Location ....................................................................................................................................................6-1
How It Works .............................................................................................................................................6-1
Testing .......................................................................................................................................................6-1
Foot Switch ......................................................................................................................................................6-2
Purpose .....................................................................................................................................................6-2
Location ....................................................................................................................................................6-2
How It Works .............................................................................................................................................6-2
Testing .......................................................................................................................................................6-2
Starter Solenoid ...............................................................................................................................................6-3
Purpose .....................................................................................................................................................6-3
Location ....................................................................................................................................................6-3
How It Works .............................................................................................................................................6-3
Testing .......................................................................................................................................................6-3
Parking Brake Switch ......................................................................................................................................6-4
Purpose .....................................................................................................................................................6-4
Location ....................................................................................................................................................6-4
How It Works .............................................................................................................................................6-4
Testing .......................................................................................................................................................6-4
Fuse Block & Fuses.........................................................................................................................................6-5
Purpose .....................................................................................................................................................6-5
Location ....................................................................................................................................................6-5
How It Works .............................................................................................................................................6-5
Testing .......................................................................................................................................................6-5
Hour Meter.......................................................................................................................................................6-6
Purpose .....................................................................................................................................................6-6
Location ....................................................................................................................................................6-6
How It Works .............................................................................................................................................6-6
Testing .......................................................................................................................................................6-6

TABLE OF CONTENTS
TOC-4 Toro 30” Aerator Service Manual
6 - Electrical cont.
Relay ...............................................................................................................................................................6-6
Purpose .....................................................................................................................................................6-6
Location ....................................................................................................................................................6-6
How It Works .............................................................................................................................................6-7
Testing .......................................................................................................................................................6-7
Subsystem Electrical Diagram.........................................................................................................................6-9
Wiring Harness Diagram ...............................................................................................................................6-10
Electrical Diagram ......................................................................................................................................... 6-11
Electrical Schematic ......................................................................................................................................6-12

SAFETY INFORMATION
1-1
Toro 30” Aerator Service Manual
1
General Information
This symbol means WARNING or
PERSONAL SAFETY INSTRUCTION -
read the instruction because it has to do
with your safety. Failure to comply with the
instruction may result in personal injury or
even death.
This manual is intended as a service and repair manual
only. The safety instructions provided herein are for
troubleshooting, service, and repair of the Toro 30”
Aerator. The 30” Aerator operator’s manual contains
safety information and operating tips for safe operating
practices. Operator’s manuals are available through your
Toro parts source or:
The Toro Company
Publications Department
8111 Lyndale Avenue South
Bloomington, MN 55420
Think Safety First
Avoid injury from batteries...
Battery acid is poisonous and can cause burns. Avoid
contact with skin, eyes, and clothing. Battery gases can
explode. Keep cigarettes, sparks, and ames away from
the battery.
Avoid injury due to inferior parts...
Use only original equipment parts to ensure that
important safety criteria are met.
Avoid injury to bystanders...
Always clear the area of bystanders before starting or
testing powered equipment.
Avoid injury due to projectiles...
Always clear the area of sticks, rocks, or any other
debris that could be picked up and thrown by the
powered equipment.
Avoid modications...
Never alter or modify any part unless it is a factory
approved procedure.
Avoid unsafe operation...
Always test the safety interlock system after making
adjustments or repairs on the machine. Refer to the
Electrical section in this manual for more information.
Avoid unexpected starting of engine...
Always turn off the engine and disconnect the spark plug
wire(s) before cleaning, adjusting, or repair.
Avoid lacerations and amputations...
Stay clear of all moving parts whenever the engine is
running. Treat all normally moving parts as if they were
moving whenever the engine is running or has the
potential to start.
Avoid burns...
Do not touch the engine, mufer, or other components
which may increase in temperature during operation,
while the unit is running or shortly after it has been
running.
Avoid res and explosions...
Avoid spilling fuel and never smoke while working with
any type of fuel or lubricant. Wipe up any spilled fuel
or oil immediately. Never remove the fuel cap or add
fuel when the engine is running. Always use approved,
labeled containers for storing or transporting fuel and
lubricants.
Avoid asphyxiation...
Never operate an engine in a conned area without
proper ventilation.
!

SPECIFICATIONS & MAINTENANCE
2-1
Toro 30” Aerator Service Manual
2
Torque Specications
Inch Series bolts and Screws
(A) Grade 1 & 2
(B) Grade 5
(C) Grade 8
Recommended fastener torque values are listed in the
following tables. For critical applications, as determined
by Toro, either the recommended torque or a torque
that is unique to the application is clearly identied and
specied in the service manual.
These torque specications for the installation and
tightening of fasteners shall apply to all fasteners
which do not have a specic requirement identied
in the service manual. The following factors shall be
consid ered when applying torque: cleanliness of the
fastener, use of a thread sealant (e.g. Loctite®), degree
of lubrication on the fastener, presence of a prevailing
torque feature, hardness of the surface underneath of
the fastener’s head, or similar condition which affects the
installation.
As noted in the following tables, torque values should
be reduced by 25% for lubricated fasteners to achieve
the similar stress as a dry fastener. Torque values may
also have to be reduced when the fastener is threaded
into aluminum or brass. The specic torque value should
be determined based on the aluminum or brass material
strength, fastener size, length of thread engagement,
etc.
The standard method of verifying torque shall be per-
formed by marking a line on the fastener (head or nut)
and mating part, then back off fastener 1/4 of a turn.
Measure the torque required to tighten the fastener until
the lines match up.
Fastener Identication
Metric Bolts and Screws
(A) Class 8.8 (B) Class 10.9

SPECIFICATIONS & MAINTENANCE
2-2 Toro 30” Aerator Service Manual
2
Standard Torque for Dry, Zinc Plated & Steel Fasteners (Inch Series)
Standard Torque for Dry, Zinc Plated, and Steel Fasteners (Inch Series)
Note: Reduce torque values listed in the table above
by 25% for lubricated fasteners. Lubricated fasteners
are defined as threads coated with a lubricant such as
oil, graphite, or thread sealant such as Loctite.
Note: Torque values may have to be reduced when
installing fasteners into threaded aluminum or brass.
The specific torque value should be determined based
on the fastener size, the aluminum or base material
strength, length of thread engagement, etc.
Note: The nominal torque values listed above for
Grade 5 and 8 fasteners are based on 75% of the
minimum proof load specified in SAE J429. The
tolerance is approximately ± 10% of the nominal torque
value. Thin height nuts include jam nuts.
Thread Size
Grade 1, 5, &
8 with Thin
Height Nuts
SAE Grade 1 Bolts, Screws,
Studs, & Sems with Regular
Height Nuts (SAE J995
Grade 2 or Stronger Nuts)
SAE Grade 5 Bolts, Screws,
Studs, & Sems with Regular
Height Nuts (SAE J995
Grade 2 or Stronger Nuts)
SAE Grade 8 Bolts, Screws,
Studs, & Sems with Regular
Height Nuts (SAE J995
Grade 2 or Stronger Nuts)
In-lb In-lb N-cm In-lb N-cm In-lb N-cm
# 6 - 32 UNC 10 ± 2 13 ± 2 147 ± 23 15 ± 2 169 ± 23 23 ± 2 260 ± 34
# 6 - 40 UNF 17 ± 2 190 ± 20 25 ± 2 280 ± 20
# 8 - 32 UNC 13 ± 2 25 ± 5 282 ± 30 29 ± 3 330 ± 30 41 ± 4 460 ± 45
# 8 - 36 UNF 31 ± 3 350 ± 30 43 ± 4 31 ± 3
# 10 - 24 UNC 18 ± 2 30 ± 5 339 ± 56 42 ± 4 475 ± 45 60 ± 6 674 ± 70
#10 - 32 UNF 48 ± 4 540 ± 45 68 ± 6 765 ± 70
1/4 - 20 UNC 48 ± 7 53 ± 7 599 ± 79 100 ± 10 1125 ± 100 140 ± 15 1580 ± 170
1/4 - 28 UNF 53 ± 7 65 ± 10 734 ± 113 115 ± 10 1300 ± 100 160 ± 15 1800 ± 170
5/16 - 18 UNC 115 ± 15 105 ± 15 1186 ± 169 200 ± 25 2250 ± 280 300 ± 30 3390 ± 340
5/16 - 24 UNF 138 ± 17 128 ± 17 1446 ± 192 225 ± 25 2540 ± 280 325 ± 30 3670 ± 340
ft-lb ft-lb N-m ft-lb N-m ft-lb N-m
3/8 - 16 UNC 16 ± 2 16 ± 2 22 ± 3 30 ± 3 41 ± 4 43 ± 4 58 ± 5
3/8 - 24 UNF 17 ± 2 18 ± 2 24 ± 3 35 ± 3 47 ± 4 50 ± 4 68 ± 5
7/16 - 14 UNC 27 ± 3 27 ± 3 37 ± 4 50 ± 5 68 ± 7 70 ± 7 68 ± 9
7/16 - 20 UNF 29 ± 3 29 ± 3 39 ± 4 55 ± 5 75 ± 7 77 ± 7 104 ± 9
1/2 - 13 UNC 30 ± 3 48 ± 7 65 ± 9 75 ± 8 102 ± 11 105 ± 10 142 ± 14
1/2 - 20 UNF 32 ± 3 53 ± 7 72 ± 9 85 ± 8 115 ± 11 120 ± 10 163 ± 14
5/8 - 11 UNC 65 ± 10 88 ± 12 119 ± 16 150 ± 15 203 ± 20 210 ± 20 285 ± 27
5/8 - 18 UNF 75 ± 10 95 ± 15 129 ± 20 170 ± 15 230 ± 20 240 ± 20 325 ± 27
3/4 - 10 UNC 93 ± 12 140 ± 20 190 ± 27 265 ± 25 359 ± 34 374 ± 35 508 ± 47
3/4 - 16 UNF 115 ± 15 165 ± 25 224 ± 34 300 ± 25 407 ± 34 420 ± 35 569 ± 47
7/8 - 9 UNC 140 ± 20 225 ± 25 305 ± 34 430 ± 45 583 ± 61 600 ± 60 813 ± 81
7/8 - 14 UNF 155 ± 25 260 ± 30 353 ± 41 475 ± 45 644 ± 61 660 ± 60 895 ± 81

SPECIFICATIONS & MAINTENANCE
2-3
Toro 30” Aerator Service Manual
2
Standard Torque for Dry, Zinc & Steel Fasteners (Metric Fasteners)
Standard Torque for Dry, Zinc, and Steel Fasteners (Metric Fasteners)
Note: Reduce torque values listed in the table above
by 25% for lubricated fasteners. Lubricated fasteners
are defined as threads coated with a lubricant such as
oil, graphite, or thread sealant such as Loctite.
Note: Torque values may have to be reduced when
installing fasteners into threaded aluminum or brass.
The specific torque value should be determined based
on the fastener size, the aluminum or base material
strength, length of thread engagement, etc.
Note: The nominal torque values listed above are
based on 75% of the minimum proof load specified in
SAE J1199. The tolerance is approximately ± 10% of
the nominal torque value. Thin height nuts include jam
nuts.
Thread Size
Class 8.8 Bolts, Screws, and Studs with
Regular Height Nuts
(Class 8 or Strong Nuts)
Class 10.9 Bolts, Screws, and Studs with
Regular Height Nuts (
Class 10 or Strong Nuts)
M5 X 0.8 57 ± 5 in-lb 644 ± 68 N-cm 78 ± 8 in-lb 881 ± 90 N-cm
M6 X 1.0 96 ± 10 in-lb 1085 ± 113 N-cm 133 ± 14 in-lb 1503 ± 158 N-cm
M8 X 1.25 19 ± 2 ft-lb 26 ± 3 N-m 28 ± 3 ft-lb 38 ± 4 N-m
M10 X 1.5 38 ± 4 ft-lb 52 ± 5 N-m 54 ± 6 ft-lb 73 ± 8 N-m
M12 X 1.75 66 ± 7 ft-lb 90 ± 10 N-m 93 ± 10 ft-lb 126 ± 14 N-m
M16 X 2.0 166 ± 15 ft-lb 225 ± 23 N-m 229 ± 23 ft-lb 310 ± 31 N-m
M20 X 2.5 325 ± 33 ft-lb 440 ± 45 N-m 450 ± 36 ft-lb 610 ± 62 N-m

SPECIFICATIONS & MAINTENANCE
2-4 Toro 30” Aerator Service Manual
2
30” Aerator Specications
30” Stand-On Aerator
Models: 23518 / 33518
Engines: 36.8 cu-in. (603cm³)
Make Kawasaki
Model FS481 V-Twin
Hi-Idle 3600 RPM
Low-Idle 1250-1550 RPM
Spark Plug BPR4ES (NKG)
Spark Plug Gap .030"/.76mm
Oil SAE 10W-30
Oil Capacity 1.8 Qt. (1.7 liters)
Starter Electric Only
Fuel Tank Volume 5.0 US gal (18.9 L)
Power System:
Transmission Hydro-Gear ZT3400
Hydraulic Fluid Toro Hydro Oil
Hydraulic Fluid
Capacity 70.3 oz.(2.0 L) w/lter
Ground Speed
(fwd/rev) 7.5 mph/NA
Drive Tires
(pneumatic) 16 x 6.50 - 8
Tire Pressure 12-14 psi (83-97 kPa)
Dimensional:
Width (in/cm) 47.75/121.3
Length Operating
(in/cm) 64.0/162.6
Length Handle
Stored (in/cm) N/A
Height Operating
(in/cm) 52.0/132.1
Height Handle
Stored (in/cm) N/A
Weight (lb/kg) 1015.0/460.0
Max Operating
Depth (in/cm) 4.0/10.2
Plugs per Sq-ft./
Sq-meter 4.6/49.5

SPECIFICATIONS & MAINTENANCE
2-5
Toro 30” Aerator Service Manual
2
Recommended Maintenance Schedule
Maintenance Service Interval Maintenance Procedure
After the rst 5 hours • Change the engine oil.
After the rst 100 hours • Change the auxiliary hydraulic reservoir lter and uid.
• Change the hydraulic transmission lter and uid.
Before each use or daily
• Check the engine oil level.
• Check the safety interlock system.
• Check for loose hardware.
• Lubricate the chains.
• Check the condition and tension of the chains.
• Check the condition of the sprockets.
• Check the tines.
• Clean the engine and exhaust system area.
• Clean the grass and debris build-up from the machine.
Every 25 hours
• Grease the jackshaft bearings.
• Grease the wheel bearings.
• Grease the tine shaft bearings.
• Grease the tine assembly idlers.
Every 50 hours
• Grease the control pivots.
• Check spark arrester (if equipped).
• Check the tire pressures.
• Check the condition and tension of the belts.
• Check the auxiliary hydraulic oil level.
• Check the hydraulic transmission oil level.
Every 80 hours • Remove engine shrouds and clean cooling ns.
Every 100 hours • Change the engine oil. (May need more often under severe conditions.)
Every 160 hours • Check the spark plugs.
Every 250 hours
• Replace the primary air cleaner element - check secondary air cleaner element;
replace if dirty. (May need more often under severe conditions. See the Engine
manual for additional information.)
• Change the auxiliary hydraulic reservoir lter and uid.
• Change the hydraulic transmission lter and uid.
Every 500 hours • Replace the secondary air cleaner element. (May need more often under severe
conditions. See the Engine manual for additional information.)
Monthly • Check the battery charge.
Yearly
• Grease the front caster pivots.
• Grease the belt idler pivot.
• Lubricate the caster wheel hubs.
• Check the torque of the wheel hub nuts.
• Check the torque on the wheel lug nuts.
• Check the transmission output shaft nut torque specication.
Yearly or before storage • Touch up chipped paint

SPECIFICATIONS & MAINTENANCE
2-6 Toro 30” Aerator Service Manual
2
Premaintenance Procedures
Note: Shut off engine, wait for all moving parts to
stop, engage parking brake, and remove key
before servicing, cleaning, or making any
adjustments to the unit.
Caution
Raising the unit for service or maintenance
relying solely on mechanical or hydraulic
jacks could be dangerous. The mechanical or
hydraulic jacks may not be enough support or
may malfunction allowing the unit to fall, which
could cause injury.
Do not rely solely on mechanical or hydraulic
jacks for support. Use adequate jack stands or
equivalent support.
Lubrication
Lubricate Chains
Service Interval: Before each use or daily
Important: Do not lubricate chains with penetrating
oil or solvents. Use oil or chain lubricant.
1. Stop engine, wait for all moving parts to stop, and
remove key. Engage parking brake.
2. Lift the rear of the unit and support using jack stands
or equivalent support.
Caution
Raising the unit for service or maintenance
relying solely on mechanical or hydraulic
jacks could be dangerous. The mechanical or
hydraulic jacks may not be enough support or
may malfunction allowing the unit to fall, which
could cause injury.
Do not rely solely on mechanical or hydraulic
jacks for support. Use adequate jack stands or
equivalent support.
3. Start engine and move throttle control ahead to 1/2
throttle position. Disengage parking brake.
Warning
Engine must be running and drive wheels must
be turning so adjustments can be performed.
Contact with moving parts or hot surfaces may
cause personal injury.
Keep ngers, hands, and clothing clear of
rotating components and hot surfaces.
4. With the engine running, slowly move the motion
control levers forward and lubricate all six chains.
5. Check the condition and tension of the chains.
!!

SPECIFICATIONS & MAINTENANCE
2-7
Toro 30” Aerator Service Manual
2
Lubricate Grease Fittings
Note: See chart for service intervals.
1. Stop engine, wait for all moving parts to stop, and
remove key. Engage parking brake.
2. Lubricate ttings with NGLI grade #2 multi-purpose
gun grease.
Refer to the following chart for tting locations and
lubrication schedule.
Lubrication Chart
Fitting
Locations
Initial
Pumps
Number
of Places
Service
Interval
A. Front Caster
Pivots *0 2 Yearly
B. Jackshaft
Bearings 1 8 25 hours
C. Wheel
Bearings 1 2 25 hours
D. Tine Shaft
Bearings 1 4 25 hours
E. Tine
Assembly Idlers 1 2 25 hours
F. Control
Pivots 1 4 50 hours
G. Belt Idler
Pivot 1 1 Yearly
H. Front Caster
Hubs *0 2 Yearly
Fig. 001 g. 13a G020222
3. Lubricate front caster pivots once a year. Remove
hex plug and cap. Thread grease tting in hole
and pump with grease until it oozes out around top
bearing. Remove grease tting and thread plug back
in. Place cap back on.
* Seestep3forspeciallubricationinstructionsonthefront
casterpivots.
A B
G
H
C
F
D
E

SPECIFICATIONS & MAINTENANCE
2-8 Toro 30” Aerator Service Manual
2
Lubricate Caster Wheel Hubs
Service Interval: Yearly
1. Stop engine, wait for all moving parts to stop, and
remove key. Engage parking brake.
2. Remove caster wheel from caster forks.
3. Remove seal guards from the wheel hub (Fig. 002).
4. Remove one of the spacer nuts from the axle
assembly in the caster wheel (Fig. 002). Note that
thread locking adhesive has been applied to lock the
spacer nuts to the axle. Remove the axle (with the
other spacer nut still assembled to it) from the wheel
assembly.
5. Pry out seals, and inspect bearings for wear or
damage and replace if necessary.
6. Pack the bearings with a NGLI grade #1 multi-
purpose grease.
7. Insert one bearing, one new seal into the wheel.
Note: Replace the seals.
8. If the axle assembly has had both spacer nuts
removed (or broken loose), apply a thread locking
adhesive to one spacer nut and thread onto the
axle with the wrench ats facing outward. Do not
thread spacer nut all of the way onto the end of
the axle. Leave approximately 3mm (1/8”) from the
outer surface of the spacer nut to the end of the axle
inside the nut.
9. Insert the assembled nut and axle into the wheel on
the side of the wheel with the new seal and bearing.
10. With the open end of the wheel facing up, ll the
area inside the wheel around the axle full of NGLI
grade #1 multi-purpose grease.
11. Insert the second bearing and new seal into the
wheel.
12. Apply a thread locking adhesive to the 2nd spacer
nut and thread onto the axle with the wrench ats
facing outward.
13. Torque the nut to 75-80 in-lbs. (8-9 Nm), loosen,
then re-torque to 20-25 in-lbs. (2-3 Nm). Make sure
axle does not extend beyond either nut.
14. Reinstall the seal guards over the wheel hub and
insert wheel into caster fork. Reinstall caster bolt and
tighten nut fully.
Important: To prevent seal and bearing damage,
check the bearing adjustment often. Spin the
caster tire. The tire should not spin freely
(more than 1 or 2 revolutions) or have any side
play. If the wheel spins freely, adjust torque on
spacer nut until there is a slight amount of drag.
Reapply thread locking adhesive.
Fig. 002 g. 14 G006115
A. Seal guard B. Spacer nut w/wrench ats
A
B

SPECIFICATIONS & MAINTENANCE
2-9
Toro 30” Aerator Service Manual
2
Engine Maintenance
Service Air Cleaner
Service Interval: Every 250 hours - Replace the primary
air cleaner element - check secondary air cleaner
element; replace if dirty. (May need more often
under severe conditions. See the Engine Owner’s
Manual for additional information.)
Every 500 hours - Replace the secondary air cleaner
element. (May need more often under severe condi-
tions. See the Engine Owner’s Manual for additional
information.)
1. Stop engine, wait for all moving parts to stop, and
remove key. Engage parking brake.
2. See the Engine Owner’s Manual for maintenance
instructions.
Change Engine Oil
Service Interval: After the rst 5 hours
Every 100 hours (May need more often under
severe conditions.)
1. Stop engine, wait for all moving parts to stop, and
remove key. Engage parking brake.
2. Drain oil while engine is warm from operation.
3. The oil drain hose assembly is located on the left
side of the engine.
Place pan under machine to catch oil. Remove oil
drain plug. Allow oil to drain and replace oil drain
plug. Torque plug to 20-24 ft-lbs. (27-33 Nm).
4. Replace the oil lter per the Engine Owner’s Manual.
Clean around the oil lter and carefully remove the
lter by unscrewing it. Make sure no oil drains onto
the belt drives through the holes in the engine deck.
Before the new lter is installed, apply a thin coating
of Toro 4–Cycle Premium Engine Oil on the surface
of the rubber seal. Turn lter clockwise until rubber
seal contacts the lter adapter, then tighten lter an
additional 2/3 to 3/4 turn.
5. Clean around oil ll cap and remove cap. Fill to
specied capacity and replace cap.
6. Add 1.8 qt. (1.7 L) of Toro Premium Oil. Do not
overll. Start the engine and check for leaks. Stop
engine and recheck oil level.
7. Wipe up any spilled oil from engine deck mounting
surfaces.
Check Spark Plugs
Service Interval: Every 160 hours
Remove spark plugs, check condition and reset gaps,
or replace with new plugs. See the Engine Owner’s
Manual.
Check Spark Arrester (if equipped)
Service Interval: Every 50 hours
Warning
Hot exhaust system components may ignite
gasoline vapors even after the engine is
stopped. Hot particles exhausted during engine
operation may ignite ammable materials.
Fire may result in personal injury or property
damage.
Do not refuel or run engine unless spark arrester
is installed.
1. Stop engine, wait for all moving parts to stop, and
remove key. Engage parking brake.
2. Wait for mufer to cool.
3. If any breaks in the screen or welds are observed,
replace arrester.
4. If plugging of the screen is observed, remove
arrester and shake loose particles out of the arrester
and clean screen with a wire brush (soak in solvent if
necessary). Reinstall arrester on exhaust outlet.
! !

SPECIFICATIONS & MAINTENANCE
2-10 Toro 30” Aerator Service Manual
2
Fuel System Maintenance
Change Fuel Filter
A fuel lter is installed in the fuel line between the fuel
tank and the engine. Replace when necessary.
Note: It is important to reinstall the fuel line
hoses and secure in place, the same way as
originally installed at the factory, to keep the
fuel line away from components.
Electrical System Maintenance
Check Battery Charge
Service Interval: Monthly
Warning
CALIFORNIA
Proposition 65 Warning
Battery posts, terminals, and related
accessories contain lead and lead compounds,
chemicals known to the State of California to
cause cancer and reproductive harm.
Wash hands after handling.
Allowing batteries to stand for an extended period of
time without recharging them will result in reduced
performance and service life. To preserve optimum
battery performance and life, recharge batteries in
storage when the open circuit voltage drops to 12.4
volts.
Note: To prevent damage due to freezing, battery
should be fully charged before putting away
for winter storage.
Check the voltage of the battery with a digital voltmeter.
Locate the voltage reading of the battery in the table and
charge the battery for the recommended time interval
to bring the charge up to a full charge of 12.6 volts or
greater.
Important: Make sure the negative battery cable
is disconnected and the battery charger used
for charging the battery has an output of 16
volts and 7 amps or less to avoid damaging the
battery.
!!
Other manuals for 23518
2
This manual suits for next models
1
Table of contents
Other Toro Tiller manuals
Popular Tiller manuals by other brands
Craftsman
Craftsman 917.295450 owner's manual
Craftsman
Craftsman 917.293301 owner's manual
Ardisam
Ardisam R3355H Operating instructions & parts explosions

Electrolux
Electrolux Petrol Tiller instruction manual

DR
DR ROTO-HOG POWER TILLER Safety & Operating Instructions

DR
DR ROTO-HOG Premier Power Tiller Safety & Operating Instructions

