Toro 07385H Workman HDX-D User manual

FormNo.3392-850RevA
Workman®HDX-DUtilityVehicle
withBed
ModelNo.07385—SerialNo.315000001andUp
ModelNo.07385H—SerialNo.315000001andUp
ModelNo.07385TC—SerialNo.315000001andUp
ModelNo.07387—SerialNo.315000001andUp
ModelNo.07387H—SerialNo.315000001andUp
ModelNo.07387TC—SerialNo.315000001andUp
Registeratwww.Toro.com.
OriginalInstructions(EN)*3392-850*A

WARNING
CALIFORNIA
Proposition65Warning
Thisproductcontainsachemicalorchemicals
knowntotheStateofCaliforniatocausecancer,
birthdefects,orreproductiveharm.
Dieselengineexhaustandsomeofits
constituentsareknowntotheStateof
Californiatocausecancer,birthdefects,
andotherreproductiveharm.
Thismachineisautilityvehicleintendedtobeusedby
professional,hiredoperatorsincommercialapplications.It
isprimarilydesignedforthetransportofimplementsusedin
suchapplications.Thisvehicleallowsforthesafetransport
ofanoperatorandonepassengerintheidentiedseats.The
bedofthisvehicleisnotsuitableforanyriders.
ThisproductcomplieswithallrelevantEuropeandirectives;
fordetails,pleaseseetheseparateproductspecicDeclaration
ofConformity(DOC)sheet.
Important:Theengineinthisproductisnotequipped
withasparkarrestedmufer.Itisaviolationof
CaliforniaPublicResourcecodeSection4442touse
oroperatethisengineonanyforest-covered,brush
covered,orgrass-coveredlandasdenedinCPRC4126.
Otherstatesorfederalareasmayhavesimilarlaws.
Introduction
Readthisinformationcarefullytolearnhowtooperateand
maintainyourproductproperlyandtoavoidinjuryand
productdamage.Youareresponsibleforoperatingthe
productproperlyandsafely.
YoumaycontactTorodirectlyatwww .Toro.comforproduct
safetyandoperationtrainingmaterials,accessoryinformation,
helpndingadealer,ortoregisteryourproduct.
Wheneveryouneedservice,genuineToroparts,oradditional
information,contactanAuthorizedServiceDealerorToro
CustomerServiceandhavethemodelandserialnumbersof
yourproductready.Figure1identiesthelocationofthe
modelandserialnumbersontheproduct.Writethenumbers
inthespaceprovided.
Figure1
1.Modelandserialnumberlocation
ModelNo.
SerialNo.
Thismanualidentiespotentialhazardsandhassafety
messagesidentiedbythesafetyalertsymbol(Figure2),
whichsignalsahazardthatmaycauseseriousinjuryordeath
ifyoudonotfollowtherecommendedprecautions.
Figure2
1.Safetyalertsymbol
Thismanualuses2wordstohighlightinformation.
Importantcallsattentiontospecialmechanicalinformation
andNoteemphasizesgeneralinformationworthyofspecial
attention.
©2015—TheToro®Company
8111LyndaleAvenueSouth
Bloomington,MN554202
Contactusatwww.Toro.com.
PrintedintheUSA
AllRightsReserved

Contents
Safety...........................................................................4
Operation...............................................................4
SoundPressure.......................................................6
Vibration................................................................6
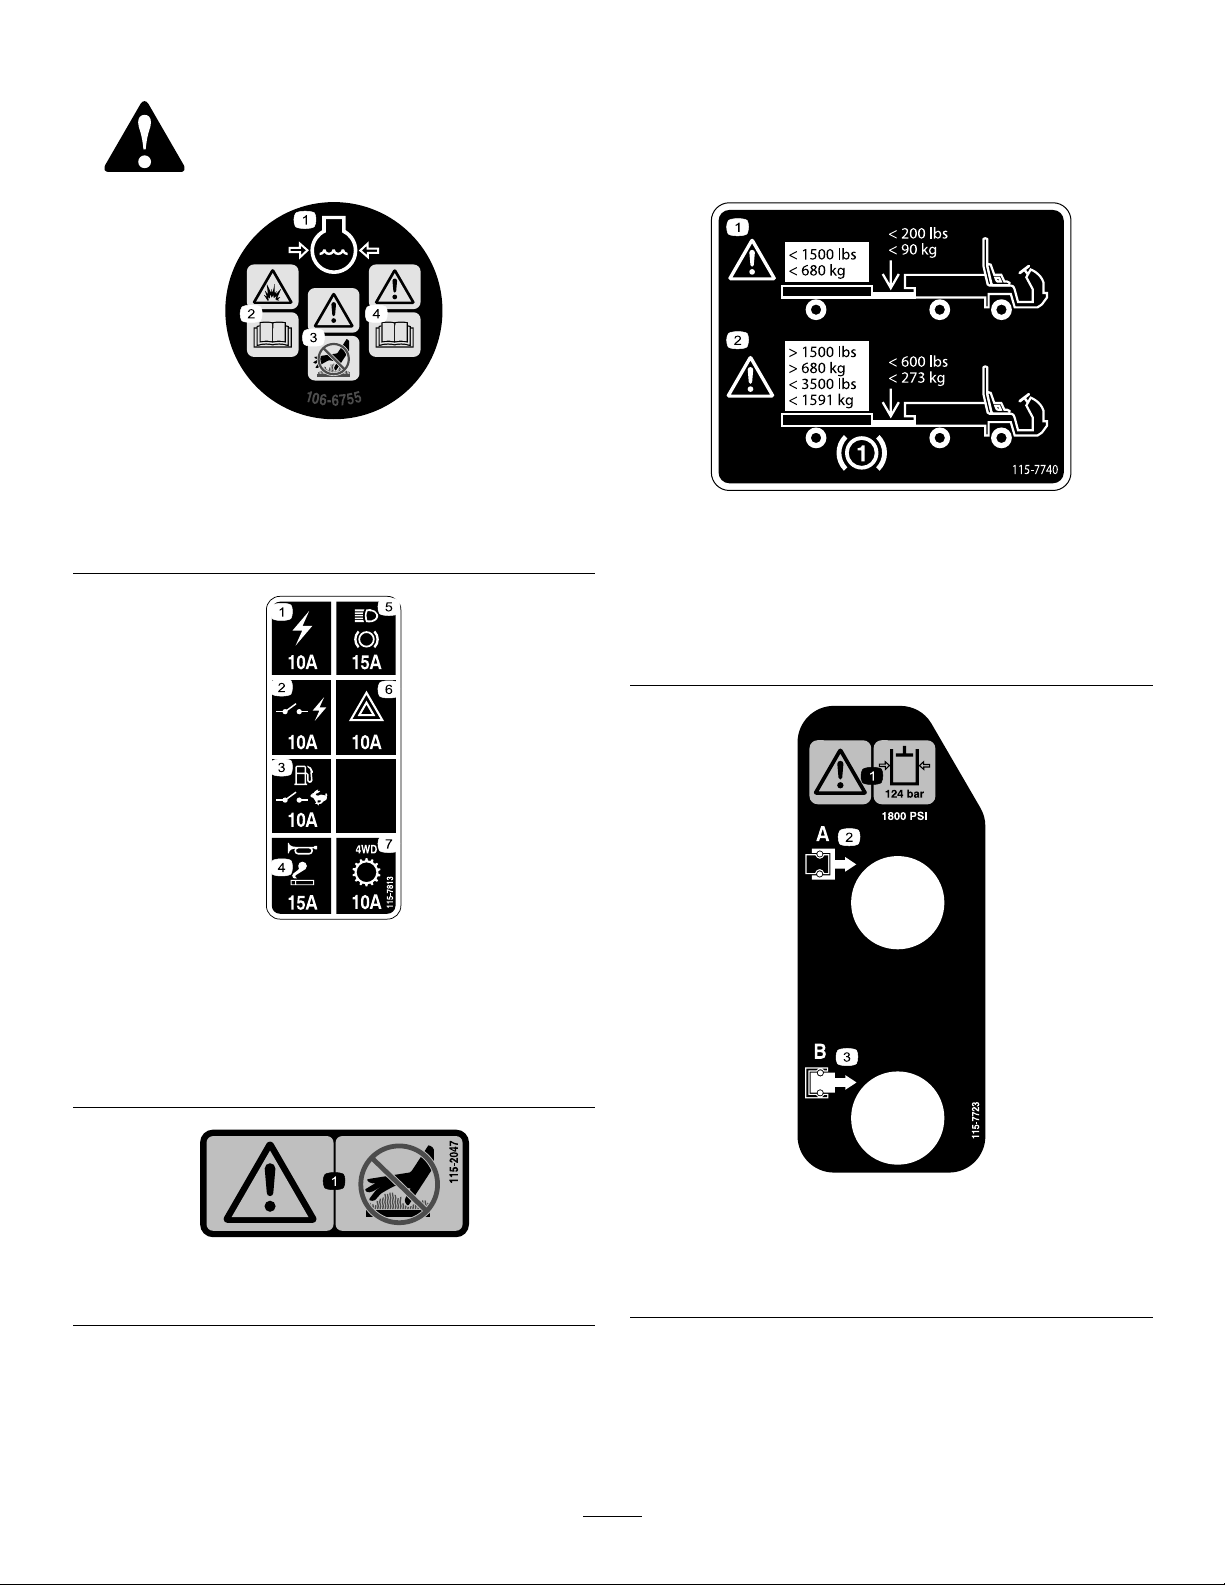
SafetyandInstructionalDecals.................................7
Setup...........................................................................12
1InstallingtheSteeringWheel(TCmodels
only).................................................................12
2InstallingtheRolloverProtectionSystem
(ROPS).............................................................12
3CheckingtheFluidLevels.....................................13
ProductOverview.........................................................14
Controls...............................................................14
Specications........................................................17
Attachments/Accessories........................................17
Operation....................................................................18
OperatingtheCargoBox.........................................18
CheckingtheEngine-oilLevel..................................19
AddingFuel...........................................................20
CheckingtheCoolantLevel.....................................21
CheckingtheTransaxle/Hydraulic-uid
Level.................................................................21
CheckingtheHighFlowHydraulic-uidLevel(TC
modelsonly)......................................................22
CheckingtheFront-differential-oilLevel(4-wheel
drivemodelsonly)...............................................22
CheckingtheTorqueoftheWheelNuts.....................23
CheckingtheTirePressure......................................23
CheckingtheBrake-uidLevel.................................23
StartingtheEngine.................................................24
DrivingtheVehicle.................................................24
StoppingtheMachine.............................................25
StoppingtheEngine...............................................25
BreakinginaNewMachine......................................25
CheckingtheSafety-interlockSystem........................25
EnsuringPassengerSafety.......................................26
EnsuringProperSpeed...........................................26
EnsuringProperTurning.........................................26
EnsuringProperBraking.........................................26
PreventingTipOvers..............................................27
OperatingonHills..................................................27
LoadingandDumping............................................27
UsingtheDifferentialLock......................................28
Using4-wheelDrive(4-wheeldrivemodels
only).................................................................28
TransportingtheMachine........................................28
TowingtheMachine...............................................29
TowingaTrailerwiththeMachine.............................29
UsingtheHydraulicControl....................................29
Maintenance.................................................................32
RecommendedMaintenanceSchedule(s)......................32
OperatinginAdverseConditions..............................33
PremaintenanceProcedures........................................34
UsingtheBedSupport............................................34
RemovingtheFullBed............................................35
InstallingtheFullBed.............................................35
RaisingtheMachine................................................36
RemovingtheHood...............................................37
InstallingtheHood.................................................37
Lubrication...............................................................38
GreasingtheBearingsandBushings..........................38
EngineMaintenance..................................................40
ServicingtheAirCleaner.........................................40
ChangingtheEngineOilandFilter...........................40
FuelSystemMaintenance...........................................41
CheckingtheFuelLinesandConnections..................41
ServicingtheFuelFilter/WaterSeparator...................41
ElectricalSystemMaintenance....................................42
ServicingtheFuses.................................................42
JumpStartingtheMachine.......................................43
ServicingtheBattery...............................................44
DriveSystemMaintenance.........................................44
ChangingtheFront-differentialOil(4-wheeldrive
modelsonly)......................................................44
InspectingtheConstant-velocityBoot(4-wheel
drivemodelsonly)...............................................44
AdjustingtheShiftCables........................................45
AdjustingtheHigh-to-LowCable.............................45
AdjustingDifferential-lockCable..............................45
InspectingtheTires................................................45
CheckingtheFrontWheelAlignment........................46
CoolingSystemMaintenance......................................47
RemovingDebrisfromtheCoolingSystem................47
ChangingtheEngineCoolant...................................47
BrakeMaintenance....................................................48
AdjustingtheParkingBrake.....................................48
AdjustingtheBrakePedal........................................49
BeltMaintenance......................................................50
AdjustingtheAlternatorBelt...................................50
ControlsSystemMaintenance.....................................50
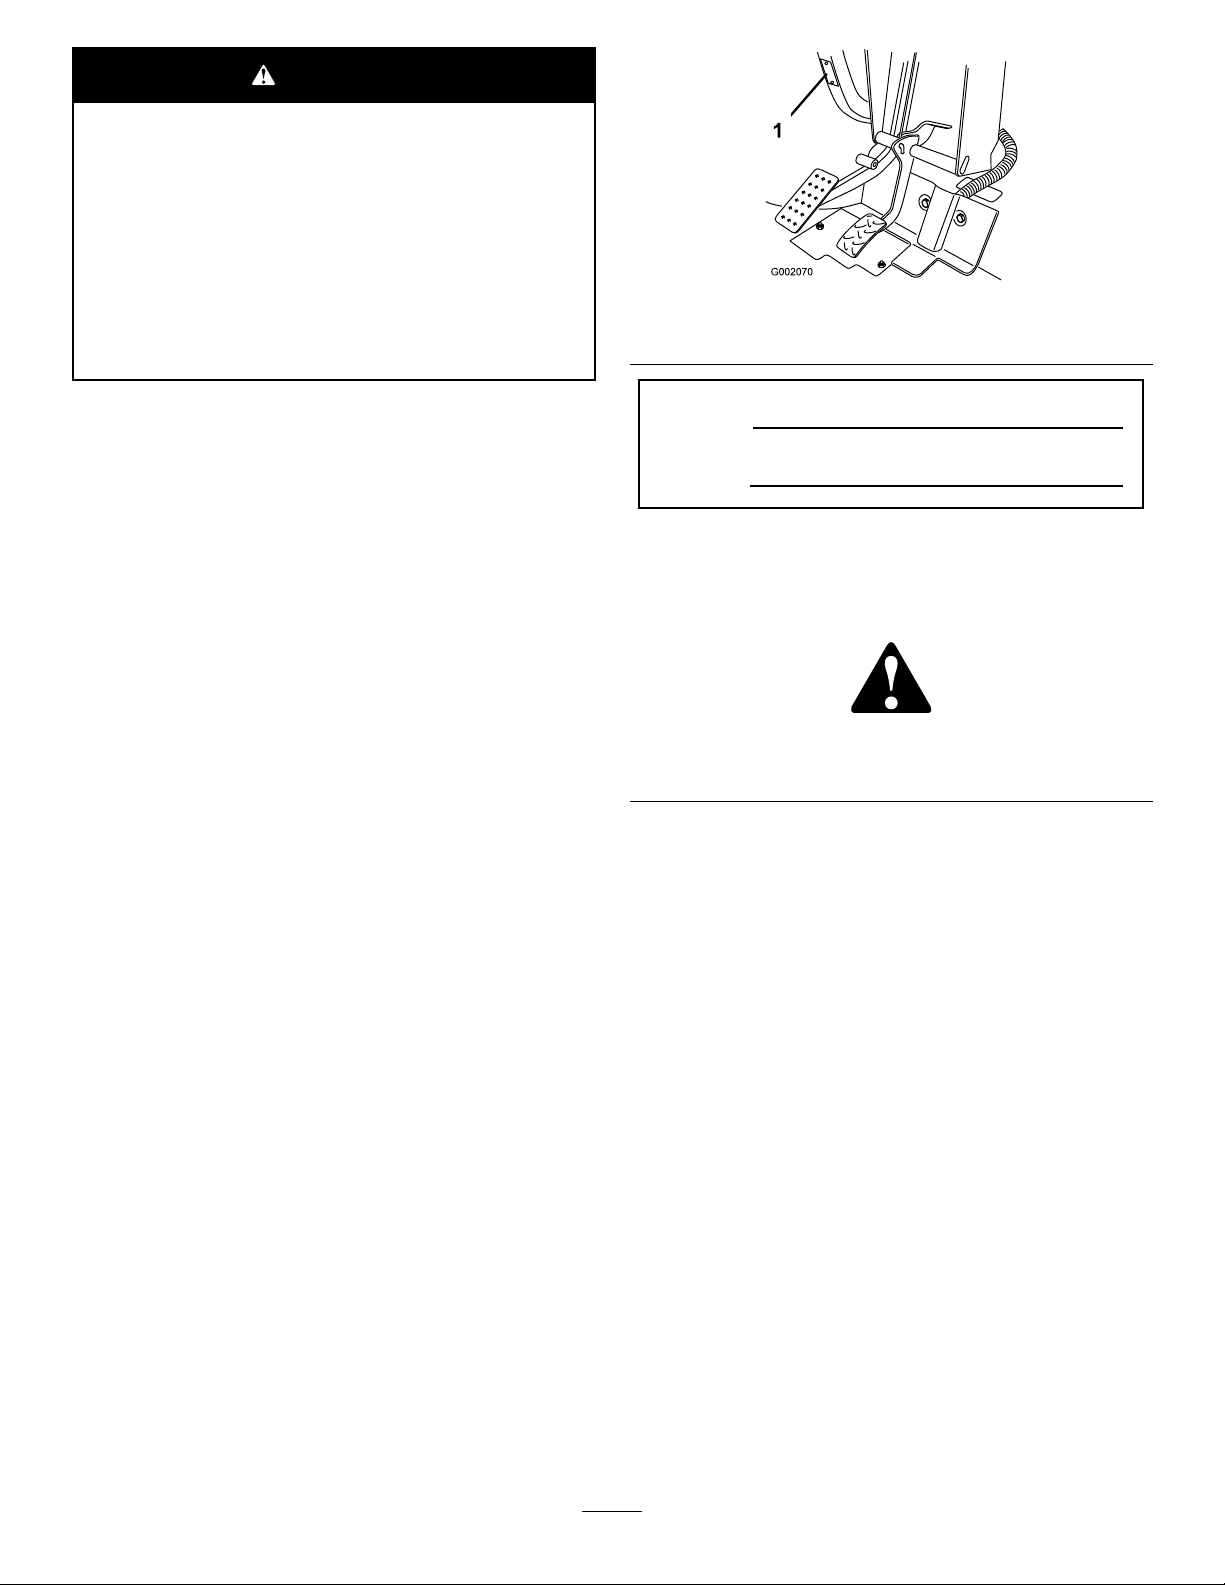
AdjustingtheAcceleratorPedal................................50
AdjustingtheClutchPedal.......................................51
ConvertingtheSpeedometer....................................51
HydraulicSystemMaintenance....................................52
ChangingtheHydraulicuidandCleaningthe
Strainer..............................................................52
ReplacingtheHydraulicFilter..................................52
ChangingtheHigh-owHydraulicuidandFilter
(TCmodelsonly)................................................53
RaisingtheCargoBoxinanEmergency.....................53
Cleaning...................................................................55
WashingtheMachine..............................................55
Storage........................................................................55
3

Safety
Improperuseormaintenancebytheoperatororownercan
resultininjury.Toreducethepotentialforinjury,comply
withthesesafetyinstructionsandalwayspayattentionto
thesafetyalertsymbol,whichmeansCaution,Warning,or
Danger—“personalsafetyinstruction.”Failuretocomply
withtheinstructionmayresultinpersonalinjuryordeath.
Operation
•Theoperatorandpassengermustuseseatbeltsand
remainseatedwheneverthemachineisinmotion.The
operatorshouldkeepbothhandsonthesteeringwheel,
wheneverpossible,andthepassengershouldusethehand
holdsprovided.Keeparmsandlegswithinthevehicle
bodyatalltimes.Nevercarrypassengersintheboxor
onattachments.Rememberyourpassengermaynotbe
expectingyoutobrakeorturnandmaynotbeready.
•Neveroverloadyourmachine.Thenameplate(located
underthemiddleofthedash)showstheloadlimitsfor
themachine.Neveroverllattachmentsorexceedthe
machinemaximumgrossvehicleweight(GVW).
•Whenstartingtheengine:
–Sitontheoperator’sseatandensurethattheparking
brakeisengaged.
–DisengagePTO(ifsoequipped)andreturnthehand
throttlelevertotheOffposition(ifsoequipped).
–Makesurethehydraulic-liftleverisinthecenter
position.
–MoveshiftlevertoNeutralandpresstheclutchpedal.
–Keepyourfootoffoftheacceleratorpedal.
–TurnstarterswitchtotheOnposition.Whenthe
glowplugindicatorgoesoff,theengineisreadyto
start.
–TurnthestarterkeytotheStartposition.
Note:Theglow-plugindicatorwillturnon,foran
additional15seconds,whentheswitchreturnstothe
Startposition.
•Usingthemachinedemandsattention.Failuretooperate
machinesafelymayresultinanaccident,tipoverofthe
machine,andseriousinjuryordeath.Drivecarefully.
Topreventtippingorlossofcontrol,takethefollowing
precautions:
–Useextremecaution,reducespeed,andmaintain
asafedistancearoundsandtraps,ditches,creeks,
ramps,anyunfamiliarareas,orotherhazards.
–Watchforholesorotherhiddenhazards.
–Usecautionwhenoperatingthemachineonasteep
slope.Normally,travelstraightupanddownslopes.
Reducespeedwhenmakingsharpturnsorwhen
turningonhillsides.Avoidturningonhillsides
wheneverpossible.
–Useextracautionwhenoperatingthevehicleon
wetsurfaces,athigherspeeds,orwithafullload.
Stoppingtimewillincreasewithafullload.Shiftinto
alowergearbeforestartingupordownahill.
–Whenloadingthebed,distributetheloadevenly.
Useextracautioniftheloadexceedsthedimensions
ofthemachine/bed.Operatethevehiclewithextra
cautionwhenhandlingoff-centerloadsthatcannot
becentered.Keeploadsbalancedandsecureto
preventthemfromshifting.
–Avoidsuddenstopsandstarts.Donotgofrom
reversetoforwardorforwardtoreversewithoutrst
comingtoacompletestop.
–Donotattemptsharpturnsorabruptmaneuversor
otherunsafedrivingactionsthatmaycausealossof
machinecontrol.
–Donotpassanothermachinetravelinginthesame
directionatintersections,blindspots,oratother
dangerouslocations.
–Whendumping,donotletanyonestandbehindthe
machine,anddonotdumptheloadonanyone’sfeet.
Releasethetailgatelatchesfromthesideofbox,not
frombehind.
–Keepallbystandersaway.Beforebackingup,lookto
therearandensurethatnooneisbehindthemachine.
Backupslowly.
–Watchoutfortrafcwhennearorcrossingroads.
Alwaysyieldtherightofwaytopedestriansandother
machines.Thismachineisnotdesignedforuseon
streetsorhighways.Alwayssignalyourturnsorstop
earlyenoughsootherpersonsknowwhatyouplanto
do.Obeyalltrafcrulesandregulations.
–Neveroperatethemachineinornearanareawhere
thereisdustorfumesintheairwhichareexplosive.
Theelectricalandexhaustsystemsofthemachinecan
producesparkscapableofignitingexplosivematerials.
–Alwayswatchoutforandavoidlowoverhangssuch
astreelimbs,doorjambs,overheadwalkways,etc.
Makesurethereisenoughroomoverheadtoeasily
clearthemachineandyourhead.
–Ifeverunsureaboutsafeoperation,stopwork,and
askyoursupervisor.
•Donottouchtheengine,transaxle,radiator,mufer,or
mufermanifoldwhileengineisrunningorsoonafter
ithasstoppedbecausetheseareasmaybehotenough
tocauseburns.
•Ifthemachineevervibratesabnormally,stopimmediately,
turnengineoff,waitforallmotiontostopandinspectfor
damage.Repairalldamagebeforeresumingoperation.
•Beforegettingoffoftheseat:
1.Stopthemovementofthemachine.
2.Settheparkingbrake.
3.TurnthestarterkeytotheOffposition.
4

4.Removethestarterkey.
Note:Ifthemachineisonanincline,blockthe
wheelsaftergettingoffofthemachine.
•Lightningcancausesevereinjuryordeath.Iflightning
isseenorthunderisheardinthearea,donotoperate
themachine;seekshelter.
Braking
•Slowdownbeforeyouapproachanobstacle.Thisgives
youextratimetostoporturnaway.Hittinganobstacle
caninjureyouandyourpassenger.Inaddition,itcan
damagethemachineanditscontents.
•GrossVehicleWeight(GVW)hasamajorimpactonyour
abilitytostopand/orturn.Heavyloadsandattachments
makethemachinehardertostoporturn.Theheavierthe
load,thelongerittakestostop.
•Decreasethespeedofthemachineifthecargoboxhas
beenremovedandthereisnoattachmentinstalledon
themachine.Thebrakingcharacteristicschangeandfast
stopsmaycausetherearwheelstolockup,whichwill
affectthecontrolofthemachine.
•Turfandpavementaremuchmoreslipperywhentheyare
wet.Itcantake2to4timeslongertostopthemachine
onwetsurfacesasondrysurfaces.Ifyoudrivethrough
deep-standingwaterandgetthebrakeswet,theywill
notworkwelluntiltheyaredry.Afterdrivingthrough
water,youshouldtestthebrakestomakesuretheywork
properly.Iftheydonot,driveslowlyonalevelground
whileputtinglightpressureonthebrakepedal.Thiswill
drythebrakesout.
OperatingonHills
WARNING
Operatingthemachineonahillmaycausetipping
orrollingofthemachine,ortheenginemaystall
andyoucouldloseheadwayonthehill.Thiscould
resultinpersonalinjury.
•Donotoperatemachineonexcessivelysteep
slopes.
•Donotacceleratequicklyorslamonthebrakes
whenbackingdownahill,especiallywithaload.
•Iftheenginestallsoryouloseheadwayona
hill,slowlybackstraightdownthehill.Never
attempttoturnthemachinearound.
•Operatethemachineslowlyonahillanduse
caution.
•Avoidturningonahill.
•Reduceyourloadandthespeedofthemachine.
•Avoidstoppingonhills,especiallywithaload.
Theseextracautionsneedtobetakenwhenoperatingthe
machineonahill:
•Slowthemachinedownbeforestartingupordownahill.
•Iftheenginestallsoryoubegintolosemomentumwhile
climbingahill,graduallyapplythebrakesandslowlyback
themachinestraightdownthehill.
•Turningwhiletravelingupordownhillscanbedangerous.
Ifyouhavetoturnwhileonahill,doitslowlyand
cautiously.Nevermakesharporfastturns.
•Heavyloadsaffectstability.Reducetheweightofthe
loadandyourgroundspeedwhenoperatingonhillsorif
theloadhasahighcenterofgravity.Securetheloadto
thecargoboxofthemachinetopreventtheloadfrom
shifting.Takeextracarewhenhaulingloadsthatshift
easily(liquid,rock,sand,etc.).
•Avoidstoppingonhills,especiallywithaload.Stopping
whilegoingdownahillwilltakelongerthanstopping
onlevelground.Ifthemachinemustbestopped,avoid
suddenspeedchanges,whichmayinitiatetippingor
rollingofthemachine.Donotslamonthebrakes
whenrollingbackward,asthismaycausethemachine
tooverturn.
•Ifyouwillbeusingthemachineonhillyterrain,youcan
installtheoptionalROPSKit.
OperatingonRoughTerrain
Reducethegroundspeedofthemachineandloadcarriedin
themachinewhenoperatingonroughterrain,unevenground,
andnearcurbs,holes,andothersuddenchangesinterrain.
Loadsmayshift,causingthemachinetobecomeunstable.
Ifyouwillbeusingthemachineonroughterrain,youcan
installtheoptionalROPSKit.
WARNING
Suddenchangesinterrainmaycauseabrupt
steeringwheelmovement,possiblyresultingin
handandarminjuries.
•Reduceyourspeedwhenoperatingonrough
terrainandnearcurbs.
•Gripthesteeringwheellooselyaroundthe
perimeterkeepingthumbsupandoutoftheway
ofthesteeringwheelspokes.
LoadingandDumping
Theweightandpositionofcargoandpassengercanaffect
thestabilityandhandlingofthemachine.Beawareofthe
followingconditiontoavoidlosingcontrolofthemachine
ortippingitover:
•Donotexceedtheratedweightcapacityofthemachine
whenoperatingitwithaloadinthecargobox,when
towingatrailer,orboth;refertoSpecications(page17).
•Usecautionwhenoperatingthemachineonahillsideor
onroughterrain,particularlywithaloadinthecargobox
orwhentowingatrailerorboth.
•Usecautionwhencarryingtallloadsinthecargobox.
5

•Beawarethatthestabilityandcontrolofthemachine
arereducedwhentheloadinthecargoboxispoorly
distributed.
•Carryingoversizedloadsinthecargoboxchangesthe
stabilityofthemachine.
•Thesteering,braking,andstabilityofthemachineare
affectedwhencarryingaloadwheretheweightofthe
materialcannotbeboundtothemachinesuchasthe
liquidinalargetank.
WARNING
Theweightoftheboxmaybeheavy.Handsor
otherbodypartscouldbecrushed.
–Keephandsandotherbodypartsclearwhen
loweringthebox.
–Donotdumpmaterialsonbystanders.
•Neverdumpaloadedcargoboxwhilethemachineis
sidewaysonahill.Thechangeinweightdistributionmay
causethemachinetooverturn.
•Whenoperatingwithaheavyloadinthecargobox,
reduceyourspeedandallowforsufcientbraking
distance.Donotsuddenlyapplythebrakes.Useextra
cautiononslopes.
•Beawarethatheavyloadsincreaseyourstoppingdistance
andreduceyourabilitytoturnquicklywithouttipping
over.
•Therearcargospaceisintendedforloadcarrying
purposesonly,notforpassengers.
•Neveroverloadyourmachine.Thenameplate(located
underthemiddleofthedash)showstheloadlimitsfor
themachine.Neveroverllattachmentsorexceedthe
machinemaximumgrossvehicleweight(GVW).
SoundPressure
Thisunithasasoundpressurelevelattheoperator’searof82
dBA,whichincludesanUncertaintyValue(K)of1dBA.
Thesoundpressurelevelwasdeterminedaccordingtothe
proceduresoutlinedinENISO11201.
Vibration
Hand-Arm
•Measuredvibrationlevelforrighthand=0.41m/s2
•Measuredvibrationlevelforlefthand=0.2m/s2
•UncertaintyValue(K)=0.5m/s2
Measuredvaluesweredeterminedaccordingtotheprocedures
outlinedinEN1032.
WholeBody
•Measuredvibrationlevel=0.3m/s2
•UncertaintyValue(K)=0.5m/s2
Measuredvaluesweredeterminedaccordingtotheprocedures
outlinedinEN1032.
6

SafetyandInstructionalDecals
Safetydecalsandinstructionsareeasilyvisibletotheoperatorandarelocatednearanyareaofpotential
danger.Replaceanydecalthatisdamagedorlost.
106-6755
1.Enginecoolantunder
pressure.
3.Warning—donottouchthe
hotsurface.
2.Explosionhazard—read
theOperator'sManual.
4.Warning—readthe
Operator'sManual.
115-7813
1.Poweroutlet—10A5.Lights,brake—15A
2.Switchedpower—10A6.Hazard—10A
3.Fuelpump,supervisor
switch—10A
7.4WD,Transmission—10A
4.Horn,powerpoint—15A
115-2047
1.Warning—donottouchthehotsurface.
115-7740
1.Warning—maximumtrailerweightis680kg(1500lb),
maximumtongueweightis90kg(200lb).
2.Warning—trailerbrakesarerequiredwhentowinggreater
than680kg(1500lb),maximumtrailerweightwithtrailer
brakesis1591kg(3500lb),maximumtongueweightwith
trailerbrakesis273kg(600lb).
115-7723
1.Warning—thehydraulicoilpressureis124bar(1800psi).
2.CouplerA
3.CouplerB
7

115-2282
1.Warning—readtheOperator'sManual.
2.Warning—stayawayfrommovingparts,keepallguardsandshieldsinplace.
3.Crushing/dismembermenthazardofbystanders—keepbystandersasafedistancefromthevehicle,donotcarrypassengersin
thecargobed,keeparmsandlegsinsideofthevehicleatalltimes,anduseseatbeltsandhandholds.
115-7746
1.Warning—donotoperatethismachineunlessyouaretrained.3.Firehazard—stoptheenginebeforefueling.
2.Warning—locktheparkingbrake,stoptheengine,and
removethestarterkeybeforeleavingthemachine.
4.Tippinghazard—slowdownandturngradually,usecaution
anddriveslowlywhendrivingonslopes,donotexceed32
kph(20mph),anddriveslowlyoverroughterrainorwhen
carryingafullorheavyload.
106-2355
1.Slow3.Transmission—thirdhigh;
nofastspeed
2.Fast
115-7741
1.ReadtheOperator’sManualbeforeservicingtransmission
uid.
106-2353
1.Electricalpowerpoint
105-4215
1.Warning—avoidpinchpoints.
93–9868
1.Crushinghazardofhand—readtheOperator’sManual.
8

BatterySymbols
Someorallofthesesymbolsareonyourbattery
1.Explosionhazard6.Keepbystandersasafe
distancefromthebattery.
2.Nore,opename,or
smoking.
7.Weareyeprotection;
explosivegasescan
causeblindnessandother
injuries
3.Causticliquid/chemical
burnhazard
8.Batteryacidcancause
blindnessorsevereburns.
4.Weareyeprotection9.Flusheyesimmediately
withwaterandgetmedical
helpfast.
5.ReadtheOperator's
Manual.
10.Containslead;donot
discard.
115-7739
1.Falling,crushinghazard,bystanders—noriderson
machine.
93-9899
93-9899
1.Crushinghazard—installthecylinderlock.
115-7756
1.Highowhydraulics—engaged
93-9879
1.Storedenergyhazard—readtheOperator'sManual.
93-9850
1.Donotrepairorrevise—readtheOperator'sManual.
106-7767
1.Warning—readtheOperator'sManual;avoidtippingthe
machine;weartheseatbelt;leanawayfromthedirection
themachineistipping.
9

106-2377
1.Locked8.Warning—readtheOperator'sManual.
2.Differentiallock9.Entanglementhazard,shaft—keepbystander'sasafe
distancefromthevehicle.
3.Unlocked10.Retracthydraulics
4.Hydrauliclock11.Extendhydraulics
5.Engage12.Transmission—highspeed
6.Powertake-off(PTO)13.Transmission—lowspeed
7.Disengage14.Parkingbrake
115-2281
1.Headlights4.Engine—run
2.Horn5.Engine—start
3.Engine—stop
10

121-6286
1.ReadtheOperator's
Manualbeforechecking
theenginecoolantlevel.
2.Donotaddenginecoolant
totheradiator;addengine
coolanttothereservoir,
121-6287
1.Fillthereservoirwithenginecoolanttothebottomofthe
standpipe.
93-9852
1.Warning—readtheOperator’sManual.2.Crushinghazard—installthecylinderlock.
11

Setup
LooseParts
Usethechartbelowtoverifythatallpartshavebeenshipped.
ProcedureDescriptionQty.Use
1Steeringwheel1Installthesteeringwheel(TCmodels
only).
ROPSframe1
2Bolt(1/2inch)6
MounttheRolloverProtectionSystem
(ROPS).
3Nopartsrequired–
Checktheengineoil,the
transaxle/hydraulicuid,andthe
brakeuidlevels.
Note:Determinetheleftandrightsideofthemachinefrom
thenormaloperatingposition.
1
InstallingtheSteeringWheel
(TCmodelsonly)
Partsneededforthisprocedure:
1Steeringwheel
Procedure
1.Releasethetabsonthebackofthesteeringwheelthat
holdthecentercoverinplace,andremovethecover
fromthehubofthesteeringwheel.
2.Removethelocknutandwasherfromthesteeringshaft.
3.Slidethesteeringwheelandwasherontotheshaft.
Alignthesteeringwheelontheshaftsothatthecross
beamishorizontalwhenthetiresarepointedstraight
aheadandthethickerspokeofthesteeringwheelis
downward.
Note:Thedustcoverispositionontothesteering
shaftatthefactory.
4.Securethesteeringwheeltotheshaftwiththelocknut
(Figure3).Torquethelocknutto24to29N-m(18
to22ft-lb)
Figure3
1.Steeringshaft5.Washer
2.Dustcover6.Locknut
3.Steeringwheel7.Cover
4.Tabslotsinwheel8.Tabsincover
5.Alignthetabsofthecoverwiththeslotsinthesteering
wheel,andsnapthecoverontothesteering-wheelhub
(Figure3).
12

2
InstallingtheRollover
ProtectionSystem(ROPS)
Partsneededforthisprocedure:
1ROPSframe
6Bolt(1/2inch)
Procedure
1.AligneachsideoftheROPSwiththemountingholes
intheframeateachsideofthevehicleasshownin
Figure4.
Figure4
1.ROPS-mountingbracket2.Flangedbolts(1/2x1-1/4
inch)
2.SecureeachsideoftheROPStoframewith3anged
bolts(1/2x1-1/4inch),andtightentheboltsto115
N-m(85ft-lb).
3
CheckingtheFluidLevels
NoPartsRequired
Procedure
1.Checktheengine-oillevelbeforeandaftertheengine
isrststarted;refertoCheckingtheEngine-oilLevel
(page19).
2.Checkthetransaxle/hydraulic-uidlevelbefore
theengineisrststarted;refertoCheckingthe
Transaxle/Hydraulic-uidLevel(page21).
3.Checkthebrake-uidlevelbeforetheengineisrst
started;refertoCheckingtheBrake-uidLevel(page
23).
13

ProductOverview
Controls
Note:Determinetheleftandrightsidesofthemachine
fromthenormaloperatingposition.
AcceleratorPedal
Theacceleratorpedal(Figure5)givestheoperatortheability
tovarytheengineandgroundspeedofthemachinewhen
thetransmissionisingear.Pressingthepedalincreasesthe
enginerpmandgroundspeed.Releasingthepedaldecreases
theenginerpmandgroundspeedofthemachine.
Figure5
1.Brakepedal2.Acceleratorpedal
ClutchPedal
Theclutchpedal(Figure5)mustbefullypressedtodisengage
clutchwhenstartingtheengineorshiftingtransmissiongears.
Releasethepedalsmoothlywhenthetransmissionisingear
topreventunnecessarywearonthetransmissionandother
relatedparts.
Important:Donotridetheclutchpedalduring
operation.Theclutchpedalmustbefullyoutorthe
clutchwillslipcausingheatandwear.Neverholdthe
vehiclestoppedonahillusingtheclutchpedal.Damage
totheclutchmayoccur.
BrakePedal
Thebrakepedal(Figure5)isusedtoapplyservicebrakes
tostoporslowvehicle.
CAUTION
Wornormaladjustedbrakesmayresultinpersonal
injury.Ifthebrakepedaltravelstowithin3.8cm
(1-1/2inches)ofthevehicleoorboard,thebrakes
mustbeadjustedorrepaired.
Gear-shiftLever
Fullypresstheclutchpedalandmovetheshiftlever(Figure
6)intothedesiredgearselection.Adiagramoftheshift
patternisshownbelow .
Figure6
Important:Donotshiftthetransaxletothereverseor
forwardgearunlessthevehicleisstandingstill.Damage
tothetransaxlemayoccur.
CAUTION
Downshiftingfromtoohighaspeedcancausethe
rearwheelstoskidresultinginlossofmachine
controlaswellasclutchand/ortransmission
damage.Shiftsmoothlytoavoidgrindinggears.
DifferentialLock
Thedifferentiallockallowsrearaxletobelockedfor
increasedtraction.Thedifferentiallock(Figure7)maybe
engagedwhenthemachineisinmotion.Movethelever
forwardandtotherighttoengagethelock.
Note:Machinemotionplusaslightturnisrequiredto
engageordisengagedifferentiallock.
CAUTION
Turningwiththedifferentiallockoncanresult
inlossofmachinecontrol.Donotoperatewith
differentiallockonwhenmakingsharpturnsorat
highspeeds;refertoUsingtheDifferentialLock
(page28).
14

Figure7
1.Gearshiftlever4.Hydraulicliftlock
2.Parkingbrake5.Differentiallock
3.Hydraulicbedlift6.High–lowrangeshifter
ParkingBrake
Whenevertheengineisshutoff,settheparkingbrake(Figure
7)inordertopreventthemachinefromaccidentallymoving.
•Tosettheparkingbrake,pullbackonthelever.
•Torelease,pushtheleverforward.
Note:Releasetheparkingbrakebeforemovingthe
machine.
Ifyouparkthemachineonasteepgrade,settheparking
brake,shiftthetransmissionintorstgearonauphillgrade
orreversegearonadownhillgrade,andplacechocksatthe
downhillsideofthewheels.
HydraulicLift
Thehydraulicliftraisesandlowersthebed.Moveitrearward
toraisethebed,andforwardtolowerit(Figure7).
Important:Whenloweringthebed,holdtheleverin
theforwardpositionfor1or2secondsafterthebed
contactstheframetosecureitintheloweredposition.
Donotholdthehydraulicliftineithertheraiseorlower
position,formorethan5seconds,oncethecylinders
havereachedtheendoftheirtravel.
Hydraulic-liftLock
Thehydraulic-liftlocklockstheliftlever,sothehydraulic
cylindersdonotoperatewhenthemachineisnotequipped
withabed(Figure7).ItalsolockstheliftleverintheOn
positionwhenusingthehydraulicsforattachments.
High–LowRangeShifter
Thehigh–lowrangeshifteradds3additionalspeedsfor
precisespeedcontrol(Figure7):
•Themachinemustbecompletelystoppedbeforeshifting
betweentheHighandLowrange.
•Shiftonlyonlevelground.
•Presstheclutchpedalfully.
•MovetheleverfullyforwardforHighandfullyrearward
forLow .
Highisforhigherspeeddrivingonlevel,drysurfaceswith
lightloads.
Lowisforlow-speeddriving.Usethisrangewhengreater
thannormalpowerorcontrolisrequired.Forexample,
steepgrades,difcultterrain,heavyloads,slowspeedbut
high-enginespeed(spraying).
Important:ThereisalocationbetweenHighandLow
inwhichthetransaxleisinneitherrange.Donotuse
thispositionasaneutralpositionbecausethevehicle
couldmoveunexpectedlyiftheHigh–Lowshifteris
bumpedandthegear-shiftleverisingear.
StarterSwitch
Thestarterswitchislocatedtotherightofthesteering
columnandbelowtheindicatorlightsforthebattery,engine
oilpressure,enginecoolanttemperature,glowplugs(Figure
8).Usethestarterswitchtostartandstoptheengine.The
switchhas3positions:Off,On,andStart.Rotatethekey
clockwisetotheOnpositiontoactivatetheglowplugs.
Whentheglowplugindicatorlightturnsoff,rotatethekey
counterclockwisetotheStartpositiontostarttheengine.
Toshutofftheengine,rotatethekeycounterclockwiseto
theOffposition.
Figure8
1.Lightswitch8.Fuelgauge
2.High-ow-hydraulics
switch
(TCmodelsonly)
9.Ignitionswitch
3.Horn
(TCmodelsonly)
10.Powerpoint
4.Tachometer11.3rdhighlockoutswitch
5.Hourmeter12.Oilpressurewarninglight
6.Speedometer13.Glow-plugindicator
7.Coolant-temperature
gaugeandlight
14.Chargeindicator
Note:Removethekeyfromthestarterwhenleavingthe
machine.
15

HourMeter
Indicatesthetotalhoursofmachineoperation.Thehour
meter(Figure8)startstofunctionwheneverthekeyswitchis
rotatedtotheOnpositionoriftheengineisrunning.
3rdHighLockoutSwitch
Movethe3rd-high-lockoutswitch(Figure8)totheslow
positionandremovethekeytopreventtheuseofthirdgear
whenintheHighrange.Theenginewillshutoffiftheshift
leverismovedtothirdgearwheninHighrange.Thekeyis
removableineitherposition.
LightSwitch
Pushthelightswitch(Figure8)totoggletheheadlightson
oroff.
OilPressureWarningLight
Theoilpressurewarninglightglows(Figure8)ifthe
engine-oilpressuredropsbelowasafelevelwhiletheengine
isrunning.Ifthelightickersorremainson,stopthevehicle,
turnofftheengine,andchecktheoillevel.Iftheoillevelis
low,butaddingoildoesnotcausethelighttogooutwhen
theengineisrestarted,turntheengineoffimmediatelyand
contactyourlocalTorodistributorforassistance.
Checktheoperationofwarninglightsasfollows:
1.Applytheparkingbrake.
2.TurnthestarterkeytotheOn/Preheatposition,but
donotstarttheengine.
Note:Theoilpressurelightshouldglowred.Ifthe
lightdoesnotfunction,eitherabulbisburnedoutor
thereisamalfunctioninthesystemwhichmustbe
repaired.
Note:Ifenginewasjustturnedoff,itmaytake1to
2minutesforthelighttocomeon.
Glow-plugIndicator
Theglow-plugindicator(Figure8)willglowredwhenthe
glowplugsareactivated.
Important:Theglowplugindicatorwillturnon,foran
additional15seconds,whentheswitchreturnstothe
Startposition.
Coolant-temperatureGaugeandLight
Registersthecoolanttemperatureoftheengine.Operates
onlywhenthestarterswitchisinOnposition(Figure8).
Theindicatorlightwillilluminateblinkingrediftheengine
overheats.
ChargeIndicator
Illuminateswhenbatteryisbeingdischarged.Ifthelight
illuminatesduringoperation,stopthemachine,turnoffthe
engine,andcheckforpossiblecauses,suchasthealternator
belt(Figure8).
Important:Ifthealternatorbeltislooseorbroken,do
notoperatethemachineuntiladjustmentorrepairis
complete.Failuretoobservethisprecautionmayresult
indamagetotheengine.
Checktheoperationofwarninglightsasfollows:
•Applytheparkingbrake.
•TurnthestarterkeytotheOn/Preheatposition,butdo
notstarttheengine.Thecoolanttemperature,charge
indicator,andoil-pressurelightsshouldglow.Ifanylight
doesnotfunction,eitherabulbisburnedoutorthereisa
malfunctioninthesystemwhichmustberepaired.
FuelGauge
Thefuelgaugeshowstheamountoffuelinthetank.It
operatesonlywhenstarterswitchisintheOn/Preheat
position(Figure8).Redindicateslowfuellevelandblinking
redindicatesnearempty.
High-owHydraulicsSwitch(TC
modelsonly)
Turnontheswitchtoactivatethehigh-owhydraulics
(Figure8).
HornButton(TCmodelsonly)
Pressingthehornbuttonactivatesthehorn(Figure8).
Tachometer
Thetachometerregistersthespeedoftheengine(Figure8
andFigure9).Whitetriangleindicatesthedesiredrpmfor
PTOoperation(Figure9).
Figure9
1.Speedoftheengine2.3,300rpmfor540rpm
PTOoperation
16

Speedometer
Registersthegroundspeedofthemachine(Figure8).The
speedometerisinmphbutcaneasilyconvertedtokm/h;
refertoConvertingtheSpeedometer(page51).
PowerPoint
Usethepowerpoint(Figure8)topoweroptional12volt
electricalaccessories.
PassengerHandHold
Thepassengerhandholdislocatedonthedashboard(Figure
10).
Figure10
1.Passengerhandhold2.Storagecompartment
Seat-adjustingLever
Theseatscanbeadjustedbeforeandafterforoperator
comfort(Figure11).
Figure11
1.Seat-adjustinglever
Specications
Note:Specicationsanddesignaresubjecttochange
withoutnotice.
Dimensions
OverallWidth160cm(63inches)
OverallLength
Withoutbed:326cm(128inches)
Withfullbed:331cm(130inches)
With2/3bedinrear-mounting
location:346cm(136inches)
BaseWeight(Dry)
Model07385—887kg(1956lb)
Model07385H—887kg(1956lb)
Model07385TC—924kg(2037lb)
Model07387—914kg(2015lb)
Model07387H—914kg(2015lb)
Model07387TC—951kg(2096lb)
RatedCapacity
(includes91kg(200
lb)operator,91kg
(200lb)passengerand
loadedattachment).
Model07385—1471kg(3244lb)
Model07385TC—1435kg(3163lb)
Model07387—1445kg(3185lb)
Model07387TC—1408kg(3104lb)
Maximum.Gross
VehicleWeight
2359kg(5200lb)
TowCapacityTongueweight:272kg(600lb)
Maximumtrailerweight:1587kg
(3500lb)
GroundClearance18cm(7inches)withnoload
WheelBase118cm(70inches)
WheelTread(center
linetocenterline)
Front:117cm(46inches)
Rear:121cm(48inches)
Height191cm(75inches)totopofROPS
Attachments/Accessories
AselectionofToroapprovedattachmentsandaccessoriesis
availableforusewiththemachinetoenhanceandexpand
itscapabilities.ContactyourAuthorizedServiceDealeror
Distributororgotowww.Toro.comforalistofallapproved
attachmentsandaccessories.
17

Operation
Note:Determinetheleftandrightsidesofthemachine
fromthenormaloperatingposition.
CAUTION
Beforeservicingormakingadjustmentstothe
machine,stoptheengine,settheparkingbrake,
andremovethekeyfromtheswitch.Removeany
loadmaterialfromthebedorotherattachment
beforeworkingunderaraisedbed.Neverwork
underaraisedbedwithoutpositioningthesafety
supportonafullyextendedcylinderrod.
OperatingtheCargoBox
Note:Centerloadsinthecargoboxifpossible.
Note:Removeallcargofromtheboxbeforeliftingthebox
uptoservicethemachine.
RaisingtheCargoBox
WARNING
Drivingthemachinewiththecargoboxraisedmay
causethemachinetotiporrolleasier.Thebox
structuremaybecomedamagedifyouoperatethe
machinewiththeboxraised.
•Onlyoperatethemachinewhenthecargobox
isdown.
•Afteremptyingthecargobox,lowerit.
CAUTION
Ifaloadisconcentratednearthebackofthecargo
boxwhenyoureleasethelatches,theboxmay
unexpectedlytipopeninjuringyouorbystanders.
•Centerloadsinthecargoboxifpossible.
•Holdthecargoboxdownandensurethatno
oneisleaningovertheboxorstandingbehindit
whenreleasingthelatches.
•Removeallcargofromtheboxbeforeliftingthe
boxuptoservicethemachine.
Movetheleverbackwardtoraisethecargobox(Figure12).
Figure12
1.Cargoboxlever
LoweringtheBox
WARNING
Theweightoftheboxmaybeheavy.Handsor
otherbodypartscouldbecrushed.
Keephandsandotherbodypartsclearwhen
loweringthebox.
Movetheleverforwardtolowerthecargobox(Figure12).
OpeningtheTailgate
1.Ensurethatthecargoboxisloweredcompletely.
2.Openthelatchesontheleftandrightsideofthecargo
boxandlowerthetailgate(Figure13).
18

Figure13
1.Latchhandle3.Latchpin
2.Latchgate
CheckingtheEngine-oilLevel
ServiceInterval:Beforeeachuseordaily
Engineoiltype:DetergentdieselengineoilAPICH-4or
higher
Engine-oilviscosity:Chooseanengine-oilviscosity
accordingtotheambient-airtemperaturetothetablein
Figure14.
Figure14
Note:Thebesttimetochecktheengineoiliswhenthe
engineiscoolbeforeithasbeenstartedfortheday.Ifthe
enginehasalreadyran,allowtheoiltodrainbackdowntothe
sumpforatleast10minutesbeforechecking.Iftheoillevel
isatorbelowtheAddmarkonthedipstick,addoiltobring
theoilleveltotheFullmark.Donotoverlltheengine
withoil.IftheoillevelisbetweentheFullandAddmarks,
noadditionaloilisrequired.
1.Positionthemachineonalevelsurface.
2.Removethedipstickandwipeitwithacleanrag
(Figure15).
Figure15
1.Dipstick
2.Oil-llcap
3.Insertthedipstickintothetubeandmakesurethatit
isseatedfully(Figure15).
4.Removedipstickandchecktheleveloftheoil(Figure
15).
5.Iftheoillevelislow ,removetheoil-llcap(Figure15),
andaddenoughoiltoraisetheleveltotheFullmark
onthedipstick.
6.Installthedipstickrmlyinplace(Figure15).
19

AddingFuel
Fueltankcapacity:22L(5.85USgallons).
Useonlyclean,freshdieselfuelorbiodieselfuelswithlow
(<500ppm)orultralow(<15ppm)sulfurcontent.The
minimumcetaneratingshouldbe40.Purchasefuelin
quantitiesthatcanbeusedwithin180daystoensurefuel
freshness.
•Usesummergradedieselfuel(No.2-D)attemperatures
above-7°C(20°F)andwintergrade(No.1-DorNo.
1-D/2-Dblend)belowthattemperature.
•Useofwintergradefuelatlowertemperaturesprovides
lowerashpointandcoldowcharacteristicswhichwill
easestartingandreducefuellterplugging.
Note:Useofsummergradefuelabove-7°C(20°F)will
contributetowardlongerfuelpumplifeandincreasedpower
comparedtowintergradefuel.
Important:Donotusekeroseneorgasolineinsteadof
dieselfuel.Failuretoobservethiscautionwilldamage
theengine.
WARNING
Fuelisharmfulorfatalifswallowed.Long-term
exposuretovaporscancauseseriousinjuryand
illness.
•Avoidprolongedbreathingofvapors.
•Keepyourfaceawayfromthenozzleandgas
tankorconditioneropening.
•Keepfuelawayfromyoureyesandskin.
DANGER
Undercertainconditions,dieselfuelandfuel
vaporsarehighlyammableandexplosive.Are
orexplosionfromfuelcanburnyouandothersand
cancausepropertydamage.
•Beforeremovingthefueltankcap,makesure
thevehicleispositionedonalevelsurface.Open
fueltankcapslowly.
•Useafunnelandllthefueltankoutdoors,in
anopenarea,whentheengineisoffandiscold.
Wipeupanyfuelthatspills.
•Donotllthefueltankcompletelyfull.Addfuel
tothefueltankuntilthelevelis25mm(1inch)
belowthebottomofthellerneck.Thisempty
spaceinthetankallowsthefueltoexpand.
•Neversmokewhenhandlingfuel,andstayaway
fromanopenameorwherefuelfumesmaybe
ignitedbyaspark.
•Storefuelinaclean,safety-approvedcontainer
andkeepthecapinplace.
UsingBiodieselFuel
Thismachinecanalsouseabiodieselblendedfuelofup
toB20(20%biodiesel,80%petrodiesel).Thepetrodiesel
portionshouldbeloworultralowsulfur.Observethe
followingprecautions:
•Thebiodieselportionofthefuelmustmeetspecication
ASTMD6751orEN14214.
•TheblendedfuelcompositionshouldmeetASTMD975
orEN590.
•Paintedsurfacesmaybedamagedbybiodieselblends.
•UseB5(biodieselcontentof5%)orlesserblendsincold
weather.
•Monitorseals,hoses,gasketsincontactwithfuelasthey
maybedegradedovertime.
•Fuellterpluggingmaybeexpectedforatimeafter
convertingtobiodieselblends.
•Contactyourdistributorifyouwishformoreinformation
onbiodiesel.
1.Cleantheareaaroundthefuel-tankcap.
2.Removethefuel-tankcap(Figure16).
Figure16
1.Fuel-tankcap
3.Fillthetankslightlybelowthetopofthetank,(bottom
ofthellerneck),theninstallthecap.
Note:Donotoverllthefueltankwithfuel.
4.Wipeupanyfuelthatmayhavespilledtopreventa
rehazard.
20
This manual suits for next models
6
Table of contents
Other Toro Utility Vehicle manuals

Toro
Toro Workman Topdresser 1800 User manual

Toro
Toro 7383 User manual

Toro
Toro 07383 User manual

Toro
Toro WORKMAN GTX 07131 User manual

Toro
Toro 07413LT User manual

Toro
Toro Groundsmaster 7210 User manual

Toro
Toro 07252 Workman 1100 User manual

Toro
Toro 07252 Workman 1100 User manual

Toro
Toro UTV500AAC00000 User manual

Toro
Toro 12004 User manual

Toro
Toro Groundsmaster 7200 Series User manual

Toro
Toro Workman MDX-D User manual

Toro
Toro 07277 Workman 2110 User manual

Toro
Toro 07211TC User manual

Toro
Toro Workman MD User manual

Toro
Toro 07167 User manual

Toro
Toro Workman 07347 User manual

Toro
Toro 07157 User manual

Toro
Toro 07409 User manual

Toro
Toro Workman GTX User manual