manuals.online logo
Brands
  1. Home
  2. •
  3. Brands
  4. •
  5. Torque
  6. •
  7. Fitness Equipment
  8. •
  9. Torque TANK M1 User manual

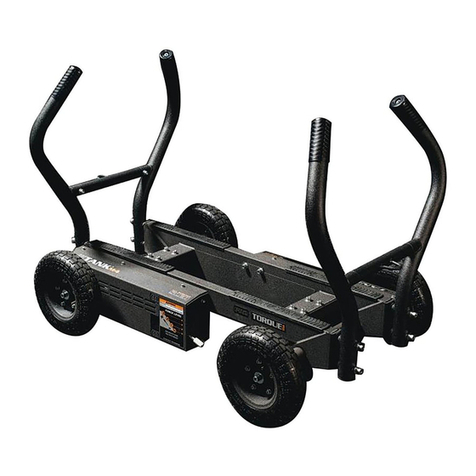
Torque TANK M1 User manual

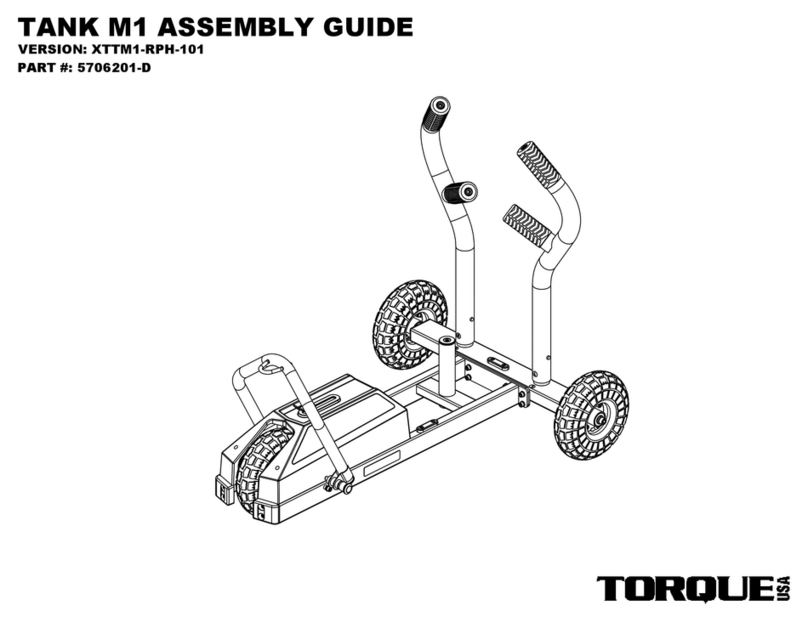
TANK M1 ASSEMBLY GUIDE
PART #: 5706201-B
VERSION: XTTM1-RPH-101
50 180
3
190150 170160
6
130 14012090 110100403010 706020 80
1 2 4 5 7
200
ITEM
PART NUMBER
DESCRIPTION
QTY
1 5661401
ASSY, CHASSIS WITH BRAKE SYSTEM
1
2 5661501
ASSY, REAR FRAME
1
3 2024401
WASHER, 8.4MM X 16MM X 1.8MM CLEAR ZINC
8
4 2009801
SCREW, M8-1.25 X 20L SOC HD GR 12.9
8
5 2010801
WASHER, STEEL 12.7 ID-25 OD-2 THK CLEAR ZINC
2
6 5654501
ASSY, REAR WHEEL 10" DIA X 3" WIDE
2
7 2010901
WASHER, LOCK M12 SAE ST ZN
2
8 2011301
SCREW, M12-1.75 X 30L SOC HD GR 12.9 CLEAR ZINC
2
9
56930PA
PTD ASSY, RH PUSH HANDLE
1
10
56931PA
PTD ASSY, LH PUSH HANDLE
1
11
57144PA
PTD ASSY, UPPER MOUNT
1
12
57145PA
PTD ASSY, LOWER MOUNT (OPTIONAL)
1
13 2001101
WASHER, FLAT 3/8 SAE ST ZN
8
14 5617001
V-STRAP, TANK (OPTIONAL)
1
15 5560801
ASSY, TANK TOW ROPE (OPTIONAL)
1
16 2031101
SCREW, 3/8" LAG X 2.5"L CLEAR ZINC
8
2
TABLE OF CONTENTS:
TANK M1 ASSEMBLY: PAGES 3 - 5
•
TANK M1 ADJUSTMENTS: PAGES 6 - 7
•
TANK M1 OPERATION: PAGE 8
•
OPTIONAL ATTACHMENTS: PAGE 9-10
•
TANK M1 STORAGE (OPTIONAL): PAGE 11-14
•
INSPECTION & LUBRICATION: PAGE 15
•
SHROUD REMOVAL: PAGE 16
•
CHAIN ADJUSTMENT: PAGE 17
•
SAFETY AND WARNING NOTICES: PAGE 18
•
TOOLS NEEDED FOR ASSEMBLY:
10MM ALLEN WRENCH (INCLUDED)
•
6MM ALLEN WRENCH (INCLUDED)
•
AIR PUMP WITH GAUGE
•
PHILLIPS SCREW DRIVER
•
50 180
3
190150 170160
6
130 14012090 110100403010 706020 80
1 2 4 5 7
200
2
1
3
4
3
NOTE:
LOOSELY
tighten bolt connections in this step.
STEP 1
50 180
3
190150 170160
6
130 14012090 110100403010 706020 80
1 2 4 5 7
200
2
6
5
7
8
NOTE:
BEFORE ASSEMBLING TIRES, CHECK
TIRE PRESSURE. MAKE SURE TIRES
ARE INFLATED TO 30 PSI
NOTE:
AFTER TIRES HAVE BEEN
SECURELY ASSEMBLED,
SECURELY TIGHTEN THESE
BOLTS.
4
NOTE:
SECURELY
tighten all bolt connections in this step and previous step.
STEP 2
10
9
NOTE
MATCH THE "L" LABEL ON THE LEFT PUSH
HANDLE WITH THE "L: LABEL ON THE REAR FRAME
NOTE
MATCH THE "R" LABEL ON THE RIGHT PUSH
HANDLE WITH THE "R: LABEL ON THE REAR FRAME
2
NOTE:
ALIGN THE PIN IN THE PUSH
HANDLES WITH THE SLOT IN
THE RECEIVER TUBE
5
STEP 3
PULL BACK ADJUSTER TO INCREASE RESISTANCE
POSITION N:
NEUTRAL
POSITION 1:
LOW RESISTANCE
POSITION 2:
MEDIUM RESISTANCE
POSITION 3:
HARD RESISTANCE
6
TANK M1 RESISTANCE ADJUSTMENT
PULL SPRING PIN AND ROTATE
PUSH/PULL BAR FORWARD
PUSH/PULL BAR
7
TANK M1 PUSH/PULL BAR ADJUSTMENT
PUSH
PUSH
PUSH
MAX WEIGHT PLATES:
2 - 45 LB BUMPER PLATES
3 - 45 LB GRIP PLATES
PULL
See following pages for
optional accessories
8
TANK OPERATION
NOTE:
Weight plates are not included. Weight plates are only needed to
prevent skidding and lifting of the back wheels. Adding weight
does not affect the resistance.
15
1
MAX WEIGHT PLATES:
2 - 45 LB BUMPER PLATES
3 - 45 LB GRIP PLATES
ATTACH V-STRAP TO PUSH/PULL
BAR WITH CARABINER (INCLUDED
WITH STRAP)
9
V-STRAP ATTACHMENT (OPTIONAL)
NOTE:
Weight plates are not included. Weight plates are only needed to
prevent skidding and lifting of the back wheels. Adding weight
does not affect the resistance.
To discover what accessories pair well with the TANK M1, visit our
web site at: www.torquefitness.com/collections/tank-accessories. or
by phone at 877-767-7835.
16
1
MAX WEIGHT PLATES:
2 - 45 LB BUMPER PLATES
3 - 45 LB GRIP PLATES
ATTACH TOW ROPE TO
PUSH/PULL BAR WITH
CARABINER (INCLUDED)
10
TOW ROPE ATTACHMENT (OPTIONAL)
NOTE:
Weight plates are not included. Weight plates are only needed to
prevent skidding and lifting of the back wheels. Adding weight
does not affect the resistance.
To discover what accessories pair well with the TANK M1, visit our
web site at: www.torquefitness.com/collections/tank-accessories. or
by phone at 877-767-7835.
50 180
3
190150 170160
6
130 14012090 110100403010 706020 80
1 2 4 5 7
200
11
12
13
14
1-3/4"
1-3/4"
36"
6" (MIN)
FLOOR
WARNING:
THE LOWER MOUNT
MUST
BE ANCHORED TO THE WALL
USING FOUR WALL ANCHORS SUITABLE FOR THAT
PARTICULAR WALL CONSTRUCTION.
WARNING:
THE UPPER MOUNT
MUST
BE ANCHORED TO THE WALL
USING FOUR WALL ANCHORS SUITABLE FOR THAT
PARTICULAR WALL CONSTRUCTION.
XTWMH
WALL MOUNT HANGER (OPTIONAL)
NOTES:
The images above show the anchoring hardware used for attaching to
typical walls with wood studs spaced 16" on center. The anchors used
will depend on the wall construction.
NOTE:
At least four anchoring
locations must be used in each part
. The pull-out strength of the
anchoring bolts used must be greater than or equal to 200 lbs. (91 kg)
SECURELY
tighten bolt connections in this step.
11
11
12
2
NOTE:
THESE AREAS ARE FOR
ATTACHING BATTLE ROPES
RESISTANCE BANDS AND
INERTIA WAVE
MAX BAND RESISTANCE = 50 LBS.
NOTE:
THESE LOOPS ARE FOR
ATTACHING RESISTANCE
BANDS AND INERTIA WAVE
MAX BAND RESISTANCE = 50 LBS.
XTWMH
WALL MOUNT HANGER (OPTIONAL)
12
10
9
12
13
XTWMH
WALL MOUNT HANGER (OPTIONAL)
14
INSPECTION & LUBRICATION
INSPECTION:
ATTENTION:
PLEASE ENSURE THAT ALL TIRES ARE INFLATED
TO 30 PSI. FAILURE TO DO SO MAY RESULT IN
TANK VEERING DURING USE.
Once a month, check for loose bolts on frame and wheels. Tighten if
necessary.
Once a month, remove shroud as shown on
PAGE 16
and check
that the chain and sprockets are clean, free of rust, dust and grime.
Make sure that the chain is properly lubricated.
If chain ever becomes loose, see
PAGE 17
to adjust
chain.
Once a month, check tire pressure and inflate if needed.
LUBRICATION:
Once a month, the sprockets should be cleaned and the chain
should be lubricated.
RECOMMENDED LUBRICATION:
Use a Dry lubrication for indoor
use, and wet lubrication for outdoor use. Most bicycle shops carry a
variety of different lubricants and can recommend a lubricant based
on the conditions where the TANK will be used.
#TorqueFitness #TorqueTANK
https://www.instagram.com/torquefitnessusa/
https://www.youtube.com/c/TorqueFitness
https://www.facebook.com/groups/thetankcommunity
USE A PHILLIPS SCREW
DRIVER TO LOOSEN AND
REMOVE 6 SCREWS AS
SHOWN. CAREFULLY LIFT
SHROUD OFF M1.
USE A PHILLIPS SCREW DRIVER TO
LOOSEN AND REMOVE 2 SCREWS
AND CAREFULLY REMOVE HANDLE.
BOTTOM VIEW
15
SHROUD REMOVAL - STEP 1 SHROUD REMOVAL - STEP 2
TO SET THE CORRECT CHAIN TENSION
FOLLOW THESE STEPS:
1) TIP M1 BACK SO THAT IT RESTS ON THE
REAR WHEELS AND PUSH HANDLES. AS
SHOWN.
2) LOOSEN ALL FOUR BOLTS ONE FULL
TURN EACH. (BOLT SHOULD BE LOOSE
ENOUGH TO ALLOW THE BRAKE MODULE
TO MOVE). ALLOW GRAVITY TO PULL THE
BRAKE MODULE DOWNWARD REMOVING
THE EXCESS SLACK.
3)
SECURELY
RE-TIGHTEN THE FOUR BOLTS.
16
CHAIN ADJUSTMENT
17
IMPORTANT SAFETY INSTRUCTIONS:
WARNING:
The safety of this product can be maintained only if it is examined regularly for damage
and wear. See inspection and lubrication section on page 13 for more details.
DO NOT
overinflate tires! All tires should be inflated to 30 PSI. Check air pressure periodically.
•
Keep children away from the TANK M1 during use.
•
Keep all loose clothing, hair and shoelaces away from moving parts.
•
DO NOT
attempt to use the TANK M1 for any purposes other than that for which it was intended.
•
Wear shoes with rubber or high-traction soles. High heels, dress shoes, sandals or bare feet are
•
not suitable for use with the TANK M1.
DO NOT
drop the front wheel down when turning the TANK M1 around. Carefully set the front
•
wheel down - especially with weight plates on the weight horn.
DO NOT
place more than 135 LBS. on the weight horn of the TANK M1.
•
DO NOT
drop the weight plates onto the TANK M1. Doing so, may result in damage to the TANK M1.
•
DO NOT
use the TANK M1 in wet or slippery conditions.
•
DO NOT
push the TANK M1 while any accessories are attached to the push/pull bar.
•
DO NOT
stand or ride on the TANK M1.
•
DO NOT
use the TANK M1 without the shroud.
•
Torque Fitness
11201 Xeon Street NW Ste 101
Coon Rapids, MN USA 55448
www.torquefitness.com
Toll free: 1-877-TORQUE5 (1-866-664-9894)
or 763-754-7533 (8:30 am – 5:00 CST).
For sales: [email protected]
For service: [email protected]

Other manuals for TANK M1

2

This manual suits for next models

2

Other Torque Fitness Equipment manuals
Torque X-CREATE User manual

Torque

Torque X-CREATE User manual

Torque XCREATE-4LPDM User manual

Torque

Torque XCREATE-4LPDM User manual

Torque X-LAB-EDGE Series User manual

Torque

Torque X-LAB-EDGE Series User manual

Torque F9 User manual

Torque

Torque F9 User manual

Torque ANKER-7 User manual

Torque

Torque ANKER-7 User manual

Torque X-LAB-EDGE User manual

Torque

Torque X-LAB-EDGE User manual

Torque TANK User manual

Torque

Torque TANK User manual

Torque X-LAB-MONKEY 1 User manual

Torque

Torque X-LAB-MONKEY 1 User manual

Torque X-CREATE WALL SPACE User manual

Torque

Torque X-CREATE WALL SPACE User manual

Torque X-LAB-EDGE User manual

Torque

Torque X-LAB-EDGE User manual

Torque 5854001-B User manual

Torque

Torque 5854001-B User manual

Torque XCREATE-4CCLM User manual

Torque

Torque XCREATE-4CCLM User manual

Torque XG-FB-101 User manual

Torque

Torque XG-FB-101 User manual

Torque XFIB-104 User manual

Torque

Torque XFIB-104 User manual

Torque 21400 User manual

Torque

Torque 21400 User manual

Torque XCREATE-LPDWM User manual

Torque

Torque XCREATE-LPDWM User manual

Torque XCC-103 User manual

Torque

Torque XCC-103 User manual

Torque XCREATE-4SRM User manual

Torque

Torque XCREATE-4SRM User manual

Torque X-GYM XG-FIB-101 User manual

Torque

Torque X-GYM XG-FIB-101 User manual
Torque XGYM-WR-3.0 User manual

Torque

Torque XGYM-WR-3.0 User manual

Torque TANK User manual

Torque

Torque TANK User manual

Torque XGYM-LSR User manual

Torque

Torque XGYM-LSR User manual

Torque XGYM-HSR Series User manual

Torque

Torque XGYM-HSR Series User manual

Torque 5854101-B User manual

Torque

Torque 5854101-B User manual
Popular Fitness Equipment manuals by other brands

Hang ups Teeter EP-950 owner's manual

Hang ups Teeter

Hang ups Teeter EP-950 owner's manual

ParaBody 823 user guide

ParaBody

ParaBody 823 user guide

MARBO-SPORT MS-L102 Assembly instruction

MARBO-SPORT

MARBO-SPORT MS-L102 Assembly instruction

TAG S-Line 750 manual

TAG

TAG S-Line 750 manual

WNQ 518GA manual

WNQ

WNQ 518GA manual

Klarfit Workout Hero 3000 instruction manual

Klarfit

Klarfit Workout Hero 3000 instruction manual

Deltech Fitness DF4900 Assembly instructions

Deltech Fitness

Deltech Fitness DF4900 Assembly instructions

vidaXL 90138 Assembly instructions

vidaXL

vidaXL 90138 Assembly instructions

Freemotion EPIC GZFW2011.3 owner's manual

Freemotion EPIC

Freemotion EPIC GZFW2011.3 owner's manual

URBNfit EXERCISE BALL quick start guide

URBNfit

URBNfit EXERCISE BALL quick start guide

SPORTSTECH VX350 user manual

SPORTSTECH

SPORTSTECH VX350 user manual

Sears Lifestyler expanse 800 user manual

Sears

Sears Lifestyler expanse 800 user manual

Biowave BiowavePRO user manual

Biowave

Biowave BiowavePRO user manual

Huffy SKM 5200 owner's manual

Huffy

Huffy SKM 5200 owner's manual

SportsArt Fitness S770 owner's manual

SportsArt Fitness

SportsArt Fitness S770 owner's manual

Epic Fitness GZFW20411 owner's manual

Epic Fitness

Epic Fitness GZFW20411 owner's manual

Auvon AS8016 manual

Auvon

Auvon AS8016 manual

Reebok Z7 Assembly guide

Reebok

Reebok Z7 Assembly guide

manuals.online logo
manuals.online logoBrands
  • About & Mission
  • Contact us
  • Privacy Policy
  • Terms and Conditions

Copyright 2025 Manuals.Online. All Rights Reserved.