manuals.online logo
Brands
  1. Home
  2. •
  3. Brands
  4. •
  5. TP-Link
  6. •
  7. Accessories
  8. •
  9. TP-Link Tapo Camera User manual

TP-Link Tapo Camera User manual

©2021 TP-Link 7106509168 REV1.0.0
Contact
Sensor
Quick Start Guide
Before You Start
A Tapo Hub is required. Make sure your
Tapo Hub is successfully added via the
Tapo app.
OR
1. Power Up Your Sensor
a. Use a screwdriver to tilt the clip (not pry) and
slide the cover down by hand.
b. Remove the battery insulation tab to power
up your Tapo device.
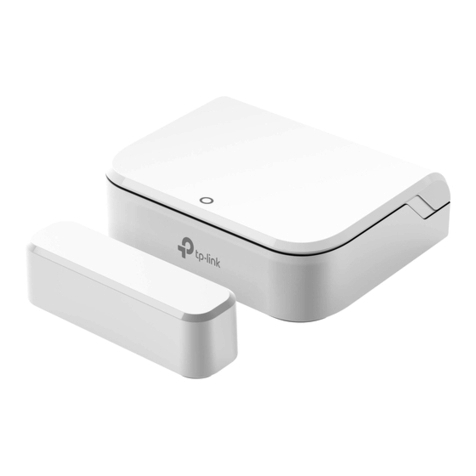
Meet Your Contact Sensor
Know when doors and windows are opened or closed and send you intant alerts via the Tapo app. Open the Tapo app, tap the button in the
app, and select your model. Follow app
instructions to complete the setup.
2. Set Up Your Sensor
Battery Compartment
Remove the battery
insulation tab before use.
Reset Button
LED Light
Sensor
Magnet
Magnet
Alignment
Mark
Do not ingest battery, Chemical Burn Hazard
This product contains a coin / button cell battery. If the coin / button cell
battery is swallowed, it can cause severe internal burns in just 2 hours and can
lead to death.
Keep new and used batteries away from children.
If the battery compartment does not close securely, stop using the product
and keep it away from children.
If you think batteries might have been swallowed or placed inside any part of
the body, seek immediate medical attention.
Safety Information
Keep the device away from water, re, humidity or hot environments.
Do not attempt to disassemble, repair, or modify the device. If you need
service, please contact us.
Do not use the device where wireless devices are not allowed.
Please read and follow the above safety information when operating the
device. We cannot guarantee that no accidents or damage will occur due to
improper use of the device. Please use this product with care and operate at
your own risk.
CAUTION!
Avoid replacement of a battery with an incorrect type that can defeat a
safeguard.
Avoid disposal of a battery into re or a hot oven, or mechanically crushing or
cutting of a battery, that can result in an explosion.
Do not leave a battery in an extremely high temperature surrounding
environment that can result in an explosion or the leakage of ammable liquid
or gas; Do not leave a battery subjected to extremely low air pressure that may
result in an explosion or the leakage of ammable liquid or gas.
3. Test Your Sensor
Open and close the sensor to test it. Make
sure the Tapo app shows the sensor is open
when you pull it apart.
4. Mount Your Sensor
a. Stick the attached tape on the sensor and
magnet.
c. Align the magnet and sensor with no more
than 0.39 inches (10 mm) between them.
Peel the backing from the attached tape and
press the sensor and magnet into place.
b. Choose where you’d like to install (but don’t
ax it yet). Place the magnet near the edge
of the door or window that moves.
How to enter paring mode
How to test the eective range
Remove the cover of your sensor, then use a
pin to press and hold the Reset button for 5
seconds until the LED starts blinking.
Remove the cover of your sensor and single
press the Reset button. If the hub makes a
voice prompt, it indicates the your sensor can
communicate eectively with the hub.
How to replace the battery
Remove the cover of your sensor and replace
the battery with a fresh cell.
1
2
x1x2
Note: The recommended height is below 6.56 ft (2 m).
Additional Info
Support
For technical support, the user guide and more,
please visit https://www.tapo.com/support/
< 0.39 inches (10 mm)
Alignment
Lines
0cm 1 2 3 4 5
FCC compliance information statement
Product Name: Tapo Smart Contact Sensor
Model Number: Tapo T110
Responsible party:
TP-Link USA Corporation
Address: 10 Mauchly, Irvine, CA 92618
Website: https://www.tp-link.com/us/
Tel: +1 626 333 0234
Fax: +1 909 527 6804
E-mail: [email protected]
This equipment has been tested and found to comply with the limits for a Class B digital device,
pursuant to part 15 of the FCC Rules. These limits are designed to provide reasonable protection
against harmful interference in a residential installation. This equipment generates, uses and can
radiate radio frequency energy and, if not installed and used in accordance with the instructions,
may cause harmful interference to radio communications. However, there is no guarantee that
interference will not occur in a particular installation. If this equipment does cause harmful interference
to radio or television reception, which can be determined by turning the equipment o and on, the user
is encouraged to try to correct the interference by one or more of the following measures:
•Reorient or relocate the receiving antenna.
•Increase the separation between the equipment and receiver.
•Connect the equipment into an outlet on a circuit dierent from that to which the receiver is
connected.
•Consult the dealer or an experienced radio/ TV technician for help.
This device complies with part 15 of the FCC Rules. Operation is subject to the following two
conditions:
1)This device may not cause harmful interference.
2)This device must accept any interference received, including interference that may cause
undesired operation.
Any changes or modications not expressly approved by the party responsible for compliance could
void the user’s authority to operate the equipment.
Note: The manufacturer is not responsible for any radio or TV interference caused by unauthorized
modications to this equipment. Such modications could void the user’s authority to operate the
equipment.
FCC RF Radiation Exposure Statement:
This equipment complies with FCC RF radiation exposure limits set forth for an uncontrolled
environment. This device and its antenna must not be co-located or operating in conjunction with any
other antenna or transmitter.
“To comply with FCC RF exposure compliance requirements, this grant is applicable to only Mobile
Congurations. The antennas used for this transmitter must be installed to provide a separation
distance of at least 20 cm from all persons and must not be co-located or operating in conjunction
with any other antenna or transmitter.”
Issue Date: 2022-2-7

Other manuals for Tapo Camera

5

Other TP-Link Accessories manuals

TP-Link KP115 User manual

TP-Link

TP-Link KP115 User manual

TP-Link Tapo D130 User manual

TP-Link

TP-Link Tapo D130 User manual

TP-Link HS100 User manual

TP-Link

TP-Link HS100 User manual

TP-Link Tapo Smart Contact Sensor User manual

TP-Link

TP-Link Tapo Smart Contact Sensor User manual

TP-Link HS110 User manual

TP-Link

TP-Link HS110 User manual

TP-Link Tapo Camera User manual

TP-Link

TP-Link Tapo Camera User manual

TP-Link M5360 User manual

TP-Link

TP-Link M5360 User manual

TP-Link HS105 User manual

TP-Link

TP-Link HS105 User manual

TP-Link Tapo P110 User manual

TP-Link

TP-Link Tapo P110 User manual

TP-Link TL-PBG3350 User manual

TP-Link

TP-Link TL-PBG3350 User manual

TP-Link Kasa Smart KP105 Series User manual

TP-Link

TP-Link Kasa Smart KP105 Series User manual

TP-Link Kasa Smart KP105 Series User manual

TP-Link

TP-Link Kasa Smart KP105 Series User manual

TP-Link Tapo HomeKit P125 User manual

TP-Link

TP-Link Tapo HomeKit P125 User manual

TP-Link Kasa Smart Wi-Fi Plug Mini User manual

TP-Link

TP-Link Kasa Smart Wi-Fi Plug Mini User manual

TP-Link HS105 User manual

TP-Link

TP-Link HS105 User manual

TP-Link HS100 User manual

TP-Link

TP-Link HS100 User manual

TP-Link TL-PB10400 User manual

TP-Link

TP-Link TL-PB10400 User manual

TP-Link HS105 User manual

TP-Link

TP-Link HS105 User manual

TP-Link KASA HS100 KIT V2 Installation instructions

TP-Link

TP-Link KASA HS100 KIT V2 Installation instructions

TP-Link Tapo T110 User manual

TP-Link

TP-Link Tapo T110 User manual

TP-Link Tapo P100 User manual

TP-Link

TP-Link Tapo P100 User manual

TP-Link Kasa Smart KD110 User manual

TP-Link

TP-Link Kasa Smart KD110 User manual

TP-Link tapo T310 User manual

TP-Link

TP-Link tapo T310 User manual

TP-Link M5360 User manual

TP-Link

TP-Link M5360 User manual

Popular Accessories manuals by other brands

Tronsmart PBD02 user manual

Tronsmart

Tronsmart PBD02 user manual

Atex FSCQ Series instructions

Atex

Atex FSCQ Series instructions

PASCO PASPort PS-2120 quick start guide

PASCO

PASCO PASPort PS-2120 quick start guide

ELSYS.se ERS Eye operating manual

ELSYS.se

ELSYS.se ERS Eye operating manual

Xovis PC Series user manual

Xovis

Xovis PC Series user manual

Lenovo Precision Pen manual

Lenovo

Lenovo Precision Pen manual

croydon RDACO-160001 B8 instruction manual

croydon

croydon RDACO-160001 B8 instruction manual

Bosch Blue Line P1 quick start guide

Bosch

Bosch Blue Line P1 quick start guide

ESTEBAN VOLUTO Use Instructions Leaflet

ESTEBAN

ESTEBAN VOLUTO Use Instructions Leaflet

Beckett Pond Liner 7114010 Specifications

Beckett

Beckett Pond Liner 7114010 Specifications

Radio Shack 63-1064 user guide

Radio Shack

Radio Shack 63-1064 user guide

Alpha Comm Enterprises D215C user manual

Alpha Comm Enterprises

Alpha Comm Enterprises D215C user manual

Swann SWADS-WVDP720 quick start guide

Swann

Swann SWADS-WVDP720 quick start guide

Ezviz T51C manual

Ezviz

Ezviz T51C manual

Omron E2C-EDA Series brochure

Omron

Omron E2C-EDA Series brochure

Cognex DS1000 Series Reference

Cognex

Cognex DS1000 Series Reference

Aperto PacketWave 1000 Series installation instructions

Aperto

Aperto PacketWave 1000 Series installation instructions

Sensata Nanoprecise 6VW quick start guide

Sensata

Sensata Nanoprecise 6VW quick start guide

manuals.online logo
manuals.online logoBrands
  • About & Mission
  • Contact us
  • Privacy Policy
  • Terms and Conditions

Copyright 2025 Manuals.Online. All Rights Reserved.