manuals.online logo
Brands
  1. Home
  2. •
  3. Brands
  4. •
  5. TP-Link
  6. •
  7. Control Unit
  8. •
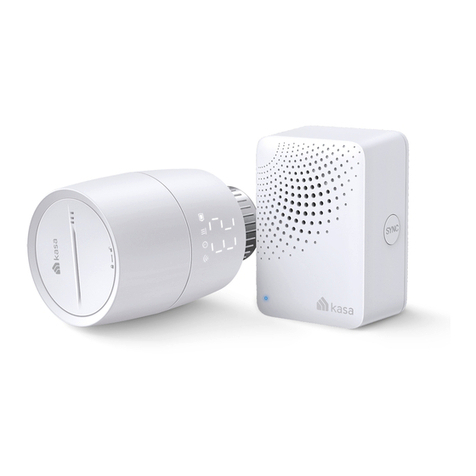
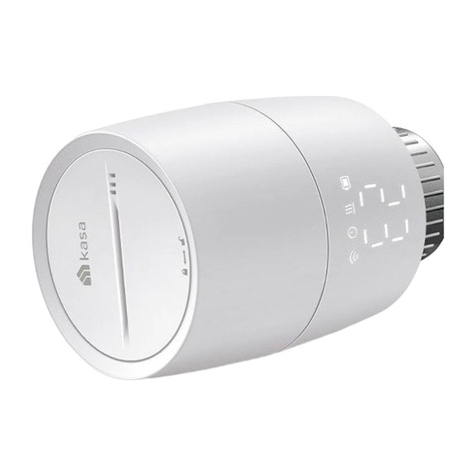
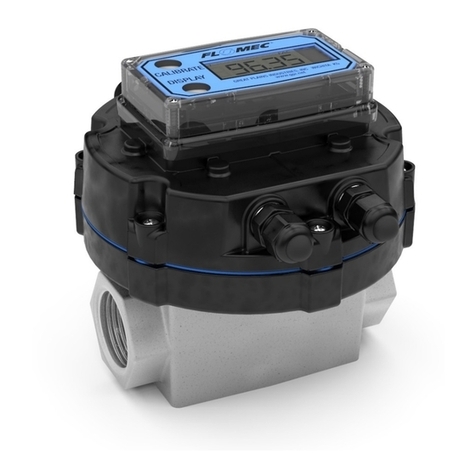
  9. TP-Link kasa smart KE100 V1.20 User manual

TP-Link kasa smart KE100 V1.20 User manual

Quick Start Guide
Visit www.tp-link.com/support/
for technical support, user guides, and
more information
?
7106510711 REV1.2.1© 2023 TP-Link
Smart Thermostatic Radiator Valve
*Images may dier from your actual products.
Install Guide:
Scan QR code or visit
https://www.tp-link.com/support/faq/3404/
CONTENTS
1 / Compatibility & Overview
5 / English
13 / Deutsch
21 / Español
29 / Français
37 / Italiano
45 / Nederlands
53 / Suomi, Svenska
54 / Eλληνικά,Português
55 / Norsk, Dansk
Figure1: Compatibility
M30 x 1.5
(No adapter required.)
RAVL Adapter
RA Adapter
30mm
1.5mm
CAL Adapter 1
2
RAV Adapter
GIA Adapter
3
M28 Adapter
4
LEDs:
Indicates the position
of the display
Temperature
Heating Battery
Connection Schedule
SYNC/RESET
Control Knob
Figure 2: Overview
5
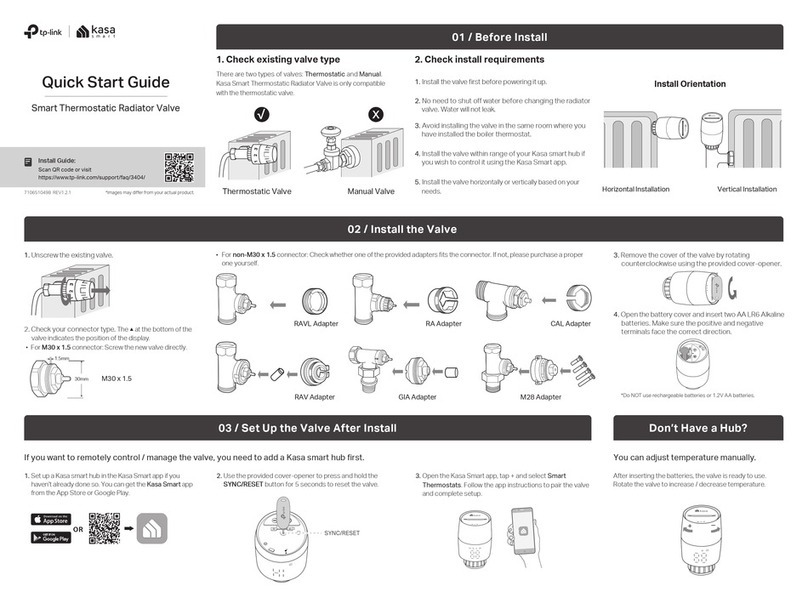
Install Requirements
1. Kasa Smart Thermostatic Radiator Valve is only compatible
with the thermostatic valve, not manual valve.
2. No need to shut off water before changing the radiator
valve. Water will not leak.
3. Avoid installing the valve in the same room where you have
installed the boiler thermostat.
English
6
Install the Valve
1. Unscrew the existing valve.
2. Refer to Figure 1toinstallthenewvalve.The▲atthebottom
of the valve indicates the position of the display.
• For M30 x 1.5 connector: Screw the new valve directly.
• For non-M30 x 1.5 connector: Check whether one of the
provided adapters fits the connector. If none of them fit your
connector, please purchase a proper one yourself.
English
7
English
3. Remove the cover of the valve by rotating counterclockwise
using the provided cover-opener.
4. Open the battery cover and insert two AA LR6 alkaline batteries.
Make sure the positive and negative terminals face the correct
direction.
Battery Type Voltage Work Temp.
AA LR6 alkaline battery 1.5V 0℃ -40℃
Compatible Batteries:
*Do NOT use rechargeable batteries or 1.2V
AA batteries.
8
Set Up the Valve
1. Kasa smart hub required. Download the Kasa Smart app in
theAppStoreorGooglePlay.
2. Use the provided cover-opener to press and hold the SYNC/
RESET button for 5 seconds to reset the valve.
OR
SYNC/RESET
English
9
3. Open the Kasa Smart app, tap + and select Smart
Thermostats. Follow the app instructions complete setup.
Don't Have a Hub?
You can adjust temperature manually.
After inserting the batteries, the valve is
ready to use. Rotate the valve to adjust
the temperature.
Visit www.tp-link.com/support/ for technical support, user
guides, FAQs, warranty & more.
Check frequently asked questions at
https://www.tp-link.com/support/faq/3404/.
English
10
English
LED Explanations
Connection
Blinking slowly Ready to be paired;
Offline
Blinking fast Pairing;
Device resetting
Solid on Pairing complete
Schedule Solid on Adjust temperature based
on your schedule
Heating
Solid on Raise temperature
LED is off Keep/lower temperature
Battery
Blinking Low battery
Solid on Sufficient battery power
11
English
Blinking twice, then
blinking Starting up
Moving light Calibrating
Switching between
and normal temperature Child lock enabled
Switching between
and normal temperature Frost protection
Displaying Low battery;
Valve can’t work properly
Displaying Sleep mode enabled
Displaying No valve detected or valve
not compatible
Displaying Valve blocked
12
English
Button Explanations
Button Operation Result
Control
Knob
Rotate clockwise Raise temperature.
Rotate counterclockwise Lower temperature.
Rotate with no shown
display Activate the display.
SYNC/
RESET
Press and hold for
5 seconds
Restore to factory
default settings, and
enter pairing mode.
13
Installationsanforderungen
1. Das Kasa Smart Thermostat-Heizkörperventil ist nur mit
einem thermostatischen Ventil kompatibel, nicht mit einem
manuellen Ventil.
2. vor dem Wechsel des Heizkörperventils muss das Wasser
nicht entleert werden. Wasser wird nicht auslaufen.
3. Vermeiden Sie es, das Ventil in demselben Raum zu
installieren, in dem Sie den Thermostat des Heizkessels
installiert haben.
Deutsch
14
Einbau des Ventils
1. Schrauben Sie das vorhandene Ventil ab.
2.fürdenEinbaudesneuenVentilssieheAbbildung1.Das▲an
der Unterseite des Ventils zeigt die Stellung des Displays an.
• Für M30 x 1,5-Anschluss: Schrauben Sie das neue Ventil direkt an.
• Für Nicht-M30 x 1,5-Anschluss:PrüfenSie,obeinerder
mitgelieferten Adapter auf den Anschluss passt. Sollte keiner der
Adapter für Ihren Anschluss passen, bitten wir Sie, selbst einen
passenden Adapter zu kaufen.
Deutsch
15
Deutsch
3. Entfernen Sie die Abdeckung des Ventils, wobei Sie sie
mit Hilfe des mitgelieferten Abdeckungsöffners gegen den
Uhrzeigersinn drehen.
4. Öffnen Sie den Batteriefachdeckel und legen Sie zwei Alkali-
Batterien vom Typ AA LR6 ein. Achten Sie darauf, dass die
positiven und negativen Kontakte in die richtige Richtung zeigen.
Batterie Typ Spannung Arbeitstemp.
AA LR6 Alkalibatterie 1.5V 0℃ -40℃
Kompatible Batterien:
*Verwenden Sie KEINE wiederaufladbaren
Batterien oder 1.2V AA-Batterien.
16
Einrichten des Ventils
1. Ein Kasa Smart Hub ist erforderlich. Laden Sie die Kasa
SmartAppimAppStoreoderbeiGooglePlayherunter.
2. Verwenden Sie den mitgelieferten Öffner, um die SYNC/
RESET-Taste 5 Sekunden lang gedrückt zu halten, und dadurch
das Ventil zurückzusetzen.
OR
SYNC/RESET
Deutsch
17
3. Öffnen Sie die Kasa Smart App, tippen Sie auf + und wählen
Sie Smart Thermostat. Folgen Sie den Anweisungen in der
App, um die Einrichtung abzuschließen.
Sie haben keinen Hub?
Sie können die Temperatur manuell
einstellen.
Nachdem Sie die Batterien eingelegt haben,
ist das Ventil einsatzbereit. Drehen Sie das
Ventil, um die Temperatur einzustellen.
Besuchen Sie www.tp-link.com/support/ für technische
Unterstützung, Benutzerhandbücher, FAQs, Garantie und mehr.
Häufig gestellte Fragen finden Sie unter
https://www.tp-link.com/support/faq/3404/.
Deutsch
18
LED-Erklärungen
Verbindung
Blinkt langsam Bereit für die Kopplung;
Offline
Blinkt schnell Wird gerade gepaart;
Gerät wird zurückgesetzt
Leuchtet durchgehend Paarung abgeschlossen
Zeitplan Leuchtet durchgehend Passen Sie die Tempera-
tur nach Ihrem Zeitplan an
Heizung
Leuchtet durchgehend Erhöhen der Temperatur
LED ist aus Temperatur beibehalten/
senken
Batterie
Blinkend Schwache Batterie
Leuchtet durchgehend Ausreichende
Batterieleistung
Deutsch

Other TP-Link Control Unit manuals

TP-Link TL-SM331T User manual

TP-Link

TP-Link TL-SM331T User manual

TP-Link KLM100 User manual

TP-Link

TP-Link KLM100 User manual

TP-Link ecoNET300 Specification sheet

TP-Link

TP-Link ecoNET300 Specification sheet

TP-Link kasa smart KE100 User manual

TP-Link

TP-Link kasa smart KE100 User manual

TP-Link TL-SM311LS User manual

TP-Link

TP-Link TL-SM311LS User manual

TP-Link TL-SM311LS User manual

TP-Link

TP-Link TL-SM311LS User manual

TP-Link TL-SM321A User manual

TP-Link

TP-Link TL-SM321A User manual

TP-Link kasa smart KE100 User manual

TP-Link

TP-Link kasa smart KE100 User manual

TP-Link kasa smart KE100 User manual

TP-Link

TP-Link kasa smart KE100 User manual

TP-Link Omada SM311LS V5 User manual

TP-Link

TP-Link Omada SM311LS V5 User manual

TP-Link DS-PMA-C+ V1 User manual

TP-Link

TP-Link DS-PMA-C+ V1 User manual

TP-Link TL-SM321A User manual

TP-Link

TP-Link TL-SM321A User manual

TP-Link TL-SM321A User manual

TP-Link

TP-Link TL-SM321A User manual

TP-Link TL-SM201 Series User manual

TP-Link

TP-Link TL-SM201 Series User manual

TP-Link TL-SM311 Series User manual

TP-Link

TP-Link TL-SM311 Series User manual

TP-Link TL-SM321A User manual

TP-Link

TP-Link TL-SM321A User manual

TP-Link TL-SM331T User manual

TP-Link

TP-Link TL-SM331T User manual

TP-Link Kasa Smart KE100 KIT User manual

TP-Link

TP-Link Kasa Smart KE100 KIT User manual

Popular Control Unit manuals by other brands

Phoenix Contact ILB BT ADIO MUX-OMNI datasheet

Phoenix Contact

Phoenix Contact ILB BT ADIO MUX-OMNI datasheet

Phoenix Mecano DewertOkin MC11 installation instructions

Phoenix Mecano

Phoenix Mecano DewertOkin MC11 installation instructions

LINK LABS LL-RLP-20 manual

LINK LABS

LINK LABS LL-RLP-20 manual

Stafsjö HL Maintenance Instruction

Stafsjö

Stafsjö HL Maintenance Instruction

Rauch QUANTRON-A instruction manual

Rauch

Rauch QUANTRON-A instruction manual

Danfoss 088U0200 instructions
Danfoss

Danfoss 088U0200 instructions
NewMar BMS-19/23 Installation & operation manual

NewMar

NewMar BMS-19/23 Installation & operation manual

Farfisa Alba AB3G Get started

Farfisa

Farfisa Alba AB3G Get started

Bristan OP TS1503 EL C Installation instructions and user guide

Bristan

Bristan OP TS1503 EL C Installation instructions and user guide

Miele professional A 315 operating instructions

Miele professional

Miele professional A 315 operating instructions

Minarik DLC500 user manual

Minarik

Minarik DLC500 user manual

TRAILPARTS Credo Product guide

TRAILPARTS

TRAILPARTS Credo Product guide

Enclustra Mercury+ XU8 SoC user manual

Enclustra

Enclustra Mercury+ XU8 SoC user manual

Exsys EX-1304 manual

Exsys

Exsys EX-1304 manual

Grundfos RSL instructions

Grundfos

Grundfos RSL instructions

ZENEX AUTOMATION RS485-ZDM556-C user manual

ZENEX AUTOMATION

ZENEX AUTOMATION RS485-ZDM556-C user manual

Lenze E82ZAFCC210 Mounting instructions

Lenze

Lenze E82ZAFCC210 Mounting instructions

Anden A76 owner's manual

Anden

Anden A76 owner's manual

manuals.online logo
manuals.online logoBrands
  • About & Mission
  • Contact us
  • Privacy Policy
  • Terms and Conditions

Copyright 2025 Manuals.Online. All Rights Reserved.