Trek Pro RT User manual

About this product
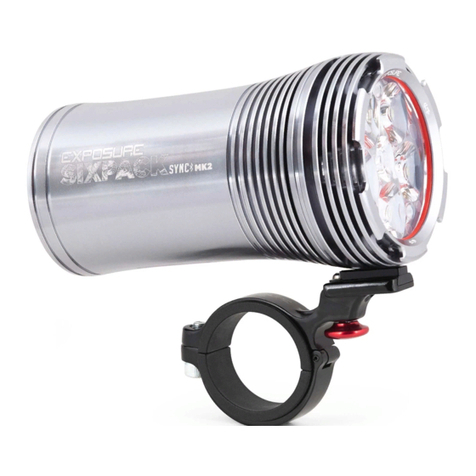
The Commuter Pro RT has an anti-glare beam to provide light exactly where needed, and not into
oncoming traffic. This light is daytime visible from 2km.
The Bontrager Flare RT adds safety as a rear daytime running light. Both are rechargeable and remote
controllable when paired with our Transmitr Micro Remote.
The front light is very bright. Do not stare at an operating front light. Staring may be harmful
to the eyes.
WARNING:
The front light may be hot and could cause a burn or damage material it may contact.
Do not activate (turn on) light in enclosed area.
WARNING:
Do not use if the battery is impacted. Also do not puncture, crush, deform, disassemble, or heat a
lithium-ion battery above the permitted temperature. Inflicted damage to the battery may result in a fire,
explosion, or coming in contact with specks of lithium or lithium dust.
WARNING:
IMPORTANT: Check your local lighting laws. Flashing lights and full brightness may not be allowed in all
locations. These lights do not conform to the German road traffic regulation StVZO.
Specifications
• Battery charging and operating temperature: 32˚F to 104˚F (0˚C to 40˚C)
Reduced performance when operating below freezing.
• Commuter Pro RT: 4900 mAh, 3.6V, 17.64Wh, 21700 lithium-ion battery
Weight: 228g (8.0oz)
• Flare RT: 420mAh, 3.7 Vdc, 1.6 Wh lithium polymer battery
• Commuter Pro RT/Flare RT: Water Proof Rating IPX7
Commuter Pro RT and
Bontrager Flare RT
trekbikes.com
For more information
If you need help not offered by this manual, talk to your Trek bike shop or visit trekbikes.com.
Parts list
Commuter Pro RT (included)
Light
Mount 25.4 - 35.0mm Adjustable Bar
Mount with shim
PN W552375
Charging
Cable
USB-C Cable
PN W5268686
Flare RT (included)
Light
Mount Quick-connect bracket for tail light
PN W533846
Charging
Cable
Micro USB Cable
PN W559136 (4-wire)
A bicycle without correct lights and reflectors might be difficult for other people to see, and you
might not be able to see them. If you cannot see, or other people cannot see you, you could have an
accident. Make sure your lights are set up, operating correctly, and that batteries are charged.
WARNING
Table 1
Modes, run times, and battery life
Power Button/
Status LED Mode Max Output (lumens) Run time (hours) Power Button
High beam 1000 1.5 Blue
Low beam 500 3.0 White
Day Flash 300 / OFF 12 Blue pulse
Fuel Gauge
Power Button
Basic operation Commuter Pro RT (see Table 1)
1. To turn on, double click the power button.
• The power button illuminates.
2. To turn off, press and hold the power button for 1 second.
3. To change modes, single-click the power button to advance through the mode list:
High beam > Low beam > Day Flash
• The power button shows blue solid for High beam, white solid for Low beam, and blue pulse for Day Flash.
- If Wireless is enabled, the power button will show blue flash before indicating the mode.
Enable/Disable Flash Bypass mode
For riding at night, you can disable the flash mode to easily transition between steady (basic) modes.
1. To enable Flash Bypass mode: With the light on, press and hold the power button for 8 seconds.
2. Release the button after the flash.
• Flash Bypass mode changes the light from flashing to steady. In this setting, a single button click will
alternate between High beam and Low beam modes only — no flash.
Charge-out feature (cable not included)
The Commuter Pro RT can become a backup battery device.
1. To enable the charge-out feature, turn the light off.
2. Press and hold the power button for 8 seconds.
3. When the main light flashes once, release the button.
• Once in charge out mode, connect a USB-C cable from the Commuter Pro RT to the device to charge.
NOTE: The light must be in charge out mode before the USB-C cable is connected to the device.
• The left light row indicates the remaining battery life for the Commuter Pro RT.
• The right light row flashes to indicate power is shared to the other device.
4 To exit charge-out mode, unplug any external device and single-click the power button.
• The right light row will stop blinking.
Pairing feature
The Commuter Pro RT can be paired to another Trek/Bontrager RT light wirelessly.
1. To pair a light, turn the Commuter Pro RT off.
2. Place the light within 6in (15cm) of the Commuter Pro RT.
3. Press and hold the Commuter Pro RT power button for 15 seconds.
4. When the main light flashes twice, release the button.
• The bottom indicator button LED flashes red while searching, then a quick blue flash when discovered.
• Once discovered, the remote light turns on and pairing stops.
• The right light row shows the remote light’s battery status, then row lights disappear.
5. To disable a tethered light, press and hold the Commuter Pro RT power button for 15 seconds.
Control a paired light
1. To turn on a paired light, double-click the Commuter Pro RT.
2. To turn off the paired light, press the Commuter Pro RT power button for 1 second.
3. To change the remote light’s mode, use the Commuter Pro RT to turn the paired light on (double-click).
4. Use the button on the paired light to advance the mode.
5. Turn the light off with the Commuter Pro RT
Reset
To reset the light to factory default settings:
• With the light plugged in to charge, press and hold the power button for 15 seconds.
The main LED will flash once at 8 seconds and again at 15 seconds.
• Release the button after the second flash.
Basic operation Flare RT (see Table 2)
• To power on, press the power button.
The light will be in the output mode last used.
• To power off, press and hold the power button until the light turns off.
Locking/Unlocking the mode
Turn on and select the desired mode, then press and hold the power button 8 seconds to select it. The light
will turn off and the main LED will flash once.To unlock, repeat the process.
Reset
To reset the light to factory default settings, with the light on, press and hold the power button for 15 seconds.
The main LED will flash once at 8 seconds, and again at 15 seconds. Release the button after the second flash.
Wireless Communication
The light is shipped with ANT+ and Bluetooth wireless connectivity enabled. To disable, with the light off,
press and hold the power button for 15 seconds. The main LED will flash once at 8 seconds, and again at
15 seconds. Release the button after the second flash.
NOTE: The status LED turns on blue for 3 seconds IF the wireless is enabled. After 3 seconds,
the status LED continues to display the battery level. If the wireless is detected, the status LED immediately
displays the battery level.
Power
button
Status
LED
PN 5286387
Table 2
Flare RT mode change
Quick-press the power button. Each press moves to the next mode.
Model Power Button/Status
LED Mode Max Output
(lumens)
Runtime
(hours)2
Power Button/
Status LED Color
Battery
Life, %
Flare
RT
POWER BUTTON STATUS LED Day Flash190 6 Green Steady 25 to
100%
All Day Flash145 12
Night Flash 5 15 Red Steady 5 to 25%
Day Steady125 4.5 Red Flashing Less than
5%
Night Steady 5 13.5
*With auto brightness enabled.
Battery charging and care (see Table 3)
Both the Commuter Pro RT and Flare RT were charged prior to packaging, but we recommend that you
charge them before first use.
To charge the battery
IMPORTANT: For best results, charge at room temperature in a dry place.
Use a certified CE or UL approved USB-C cable rated for 2Amps
or greater. Avoid extreme conditions including wet, cold, or extreme heat.
Note: If the main button indicator is flashing red while plugged in, the light
is either too hot or too cold to charge. Charging will begin when the light is
between 32˚F and 104˚F (0˚C and 40˚C).
1. Open the USB port cover.
2. Plug the USB-C cable into the USB port on the light.
3. Plug the cable into a wall adapter.
4. When the charge is complete, unplug the USB-C cable and close the USB port cover.
IMPORTANT: Ensure the USB cover is latched before riding in rain or in wet conditions. If the USB cover is
not closed, damage to the light may occur.
Table 3
Commuter Pro RT battery charging and care
• Left row: Commuter Pro RT battery level
• Right row: blank when charging
• Top light will flash until charged
Fuel Gauge Charge, % Charge Duration
Five lights green 80% – 100%
5 hours
Four lights green 60% – 80%
Three lights green 40% – 60%
Two lights amber 20% – 40%
One light red 5% – 20%
One light red flashing 0% – 5%
1. When fully charged, the five green lights stay on for 1 minute, then turn off.
2. When plugged in after the battery is completely discharged, it may take a minute for the LED indicator
to turn on indicating a charge is occurring.
Table 4
Flare RT charging status indicator
The status LED tells the percent of battery charge that remains.
Power Button/Status LED Color Charge, % Charge Duration (hours)
Red Flash 0% – 75%
1.5Green Flash 75%-99%
Green Steady299%-100%
Low battery feature Commuter Pro RT
The left row of lights will show:
• One red light when below 20%
• One red light flashing when 5% or below
NOTE: When below 5%, the modes and settings will be disabled.
Low battery feature Flare RT
When the battery has fallen below 20% life, the bottom LED will flash red.
Caring for the battery
• Store the light at room temperature in a dry place. Avoid moisture, or extreme hot or cold.
• Store the light in a charged condition. Battery life will decrease if the battery is stored in a fully
discharged condition.
• Over time, the run time of the battery will diminish. Expect about 500 full charges, depending on
care. After a full life, the battery will continue to charge but with a lower run time. When the run time is
unsatisfactory, do not open the case of the light or incinerate; please recycle.
Traveling with the battery
When traveling by air, verify with your carrier how lithium ion batteries of this capacity must be treated. Often
these lights need to be packed in carry-on luggage.
Protection
These lights are designed and tested for use in all riding conditions and have an ingress rating of IPX7.
Lights are not intended to be stored outdoors and should be stored indoors after use.
Recycling
Please recycle the light with the battery. In the US, you can find out where to do this at
www.call2recycle.org.
European and International consumers, please contact your bike shop.
This symbol on the product(s) and / or accompanying documents means that used
electrical and electronic products should not be mixed with general household waste.
For proper treatment, recovery and recycling, outside the US, please take this product(s)
to designated collection points. Alternatively, in some countries you may be able to
return your products to your local retailer upon purchase of an equivalent new product.
Disposing of this product correctly will help save valuable resources and prevent any potential negative
effects on human health and the environment, which could otherwise arise from inappropriate waste
handling. Please contact your local authority for further details of your nearest designated collection point.
Penalties may be applicable for incorrect disposal of this waste, in accordance with your national legislation.
Commuter Pro RT Flare RT
OR

Light installation
Commuter Pro RT information, installation,
and special features
NOTE: Due to the unique cutoff beam, this front light cannot be mounted upside down.
Installation
1. Loosen knob and open.
2. Adjust for bar size (31.8mm or 35mm).
3. Close and tighten knob.
4. Slide light onto mount until it locks in place.
NOTE: Use provided shim to fit 25.4 bars.
Removal
5. Press down.
6. Slide light to remove.
Flare RT installation
1. Install the quick-connect bracket on the seatpost with the lever to
the drive side of the bike. When installed properly, the lens will be
perpendicular to the ground and the saddle icon will point the same
direction as the saddle on the bike.
2. Stretch the strap around the seatpost and connect to the hook.
3. Slide the light onto the bracket.
1.
2.
31.8mm
35mm
6.
5.
4.
3.
Trek Bicycle Corporation contact information:
North America
Trek Bicycle Corporation
801 West Madison Street
Waterloo, WI 53594 USA
Tel: 1-800-585-8735
Europe
Bikeurope BV
Ceintuurbaan 2-20C
3847 LG Harderwijk
The Netherlands
Tel: +31 (0)88 4500699
Australia
Trek Bicycle Corp. Au.
8 Townsville Street
(Level One)
Fyshwick (ACT)
2609 AU
Tel: +61 (02) 61 732 400
United Kingdom
Trek Bicycle Corporation Ltd.
9 Sherbourne Drive, Tilbrook,
Milton Keynes, MK7 8HX
Tel: +44 1908 360 140
Statements of Regulatory Compliance
FCC Compliance
Commuter Pro RT & Flare RT
These devices comply with part 15 of the FCC Rules. Operation is subject to the following conditions: (1)
these devices may not cause harmful interference, and (2) these devices must accept any interference
received, including interference that may cause undesired operation.
NOTE: This equipment has been tested and found to comply with the limits for a Class B digital device,
pursuant to Part 15 of the FCC Rules. These limits are designed to provide reasonable protection against
harmful interference in a residential installation. This equipment generates uses and can radiate radio
frequency energy and, if not installed and used in accordance with the instructions, may cause harmful
interference to radio communications. However, there is no guarantee that interference will not occur in a
particular installation.
These products may cause interference to radio equipment and should not be installed near maritime safety
communications equipment or other critical navigation or communication equipment operating between
0.45-30 MHz.
If this equipment does cause harmful interference to radio or television reception, which can be determined
by turning the equipment off and on, the user is encouraged to try to correct the interference by one or
more of the following measures:
— Reorient or relocate the receiving antenna.
— Increase the separation between the equipment and receiver.
— Connect the equipment into an outlet on a circuit different from that to which the receiver is connected.
— Consult the dealer or experienced radio / TV technician for help.
NOTES: TREK BICYCLE CORPORATION IS NOT RESPONSIBLE FOR ANY RADIO OR TV INTERFERENCE
CAUSED BY UNAUTHORIZED MODIFICATIONS TO THIS EQUIPMENT. ANY CHANGES OR MODIFICATIONS
NOT EXPRESSLY APPROVED BY TREK BICYCLE CORPORATION OF THIS DEVICE COULD VOID THE USER’S
AUTHORITY TO OPERATE THE DEVICE.
Exposure to radio frequency energy.
The radiated output power of this device meets the limits of FCC/IC radio frequency exposure limits.
This device should be operated with a minimum separation distance of 5mm (1/4 inches) between the
equipment and a person’s body.
If you wish to see these manuals in another language, please visit www.trekbikes.com/support and look for
the Commuter Pro RT & Flare RT manual on the Manuals and user guides page.
CZ Pokud si přejete vidět tyto příručky v jiném jazyce, navštivte prosím www.trekbikes.com/support a
vyhledejte příručku Commuter Pro RT & Flare RT na stránce Návody a uživatelské příručky.
DE Wenn Sie dieses Handbuch in einer anderen Sprache lesen möchten, besuchen Sie bitte www.
trekbikes.com/support und suchen Sie auf der Seite Handbücher und Benutzerhandbücher nach dem
Commuter Pro RT -Handbuch.
FR Si vous souhaitez voir ce manuel dans une autre langue, rendez-vous sur le site www.trekbikes.com/
support et recherchez le manuel Commuter Pro RT sur la page Manuels et guides de l’utilisateur.
ES Si desea ver este manual en otro idioma, visite www.trekbikes.com/support y busque el manual de
Commuter Pro RT en la página Manuales y guías del usuario.
IT Se desideri vedere questi manuali in un’altra lingua, visita www.trekbikes.com/support e
cercare il manuale Commuter Pro RT e Flare RT nella pagina Manuali e guide utente.
PL Jeśli chcesz zobaczyć tę instrukcję w innym języku, odwiedź stronę www.trekbikes.com/support i
poszukaj instrukcji Commuter Pro RT na stronie Podręczniki i instrukcje obsługi.
PT Se você deseja ver este manual em outro idioma, visite www.trekbikes.com/support e procure o
manual Commuter Pro RT na página Manuais e guias do usuário.
NL Als u deze handleiding in een andere taal wilt bekijken, gaat u naar www.trekbikes.com/
support en zoekt u naar de Commuter Pro RT -handleiding op de pagina Handleidingen en
gebruikershandleidingen.
SL Ak si chcete pozrieť tieto príručky v inom jazyku, navštívte stránku www.trekbikes.com/support a
vyhľadajte príručku Commuter Pro RT & Flare RT na stránke Návody a používateľské príručky.
JA
このマニュアルを別の言語で表示したい場合は、www.trekbikes.com/supportにアクセスし、マニュアル およびユーザーガイドページのCommuter Pro RT マニュアルを参照してください。KO ZH 如果您希望以其他语言查看本手册,请访问www.trekbikes.com/support, 并在手册和用户指南页面上查找Commuter Pro RT 手册。
Industry Canada Compliance
CAN ICES-3(B)/NMB-3(B)
These devices comply with Industry Canada license-exempt RSS standard(s).
Operation is subject to the following two conditions: (1) these devices may not cause interference, and
(2) these devices must accept any interference, including interference that may cause undesired operation
of the device.
Leprésent appareil est conforme aux CNR d’Industrie Canada applicable aux appareils radio.
Exempts de licence. L’exploitation est autorisée aux deux conditions suivantes:
(1) l’appareil ne doit pas produire de brouillage, et (2) l’utilsateur de l’appareil doit accepter tout brouillage
radioélectrque subi, meme si le brouillage est susceptible d’en compromettre le fonctionnement.
The Commuter Pro RT and the Flare RT lighting equipment comply with FCC and IC radiation
exposure limits set forth for an uncontrolled environment. Status of the listing in the Industry Canada’s
REL (Radio Equipment List) can be found at the following web address:
http://www.ic.gc.ca/app/sitt/reltel/srch/ nwRdSrch.do?lang=eng
Additional Canadian information on RF exposure also can be found at the following web address:
http://www.ic.gc.ca/eic/site/smt-gst.nsf/eng/sf08792.html
Cet appareil est conforme aux limites d’exposition à la fréquence radio (FR) d’IC et de FCC. La puissance
de sortie émise par l’appareil de sans fil Ion Pro RT est inférieure à la limite d’exposition aux fréquences
radio d’Industry Canada (IC). Cet appareil est en contact direct avec l’utilisateur dans des conditions
normales d’utilisation. L’émetteur ne doit pas être co-implémenté ou utilisé conjointement avec une autre
antenne ou un autre émetteur. Ce périphérique est homologué pour l’utilisation au Canada. Pour consulter
l’entrée correspondant à l’appareil dans la liste d’équipement radio (REL - Radio Equipment List)d’Industry
Canada rendez-vous sur: http://www.ic.gc.ca/app/sitt/reltel/srch/nwRdSrch. do?lang=fra
Pour des informations supplémentaires concernant l’exposition aux RF au Canada rendezvous sur:
http://www.ic.gc.ca/eic/site/smt-gst.nsf/fra/sf08792.html
European Union Compliance
Trek Bicycle Corporation and Bontrager hereby declare that the lighting device(s) identified as ‘Commuter
Pro RT’ and ‘Flare RT’ are in compliance with the following European Directives:
Commuter Pro RT
• EMC Directive 2014/30/EU
• Low Voltage Directive 2014/35/EU
• RoHS Directive 2011/65/EU
• RoHS Directive 2015/863/EU
• Radio Equipment Directive 2014/53/EU
Flare RT
• EMC Directive 2014/30/EU
• Low Voltage Directive 2014/35/EU
• RoHS Directive 2011/65/EU
• RoHS Directive 2015/863/EU
• Radio Equipment Directive 2014/53/EU
The full text of the EU declaration of conformity is available from your dealer, or at the following internet
address: www.trekbikes.com/coc-doc
The Commuter pro RT and the Flare RT do not conform to the German StVZO regulations.
This manual suits for next models
2
Other Trek Bicycle Accessories manuals
