manuals.online logo
Brands
  1. Home
  2. •
  3. Brands
  4. •
  5. TREND
  6. •
  7. Controllers
  8. •
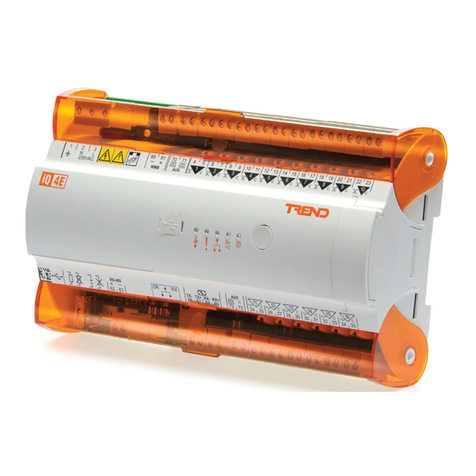
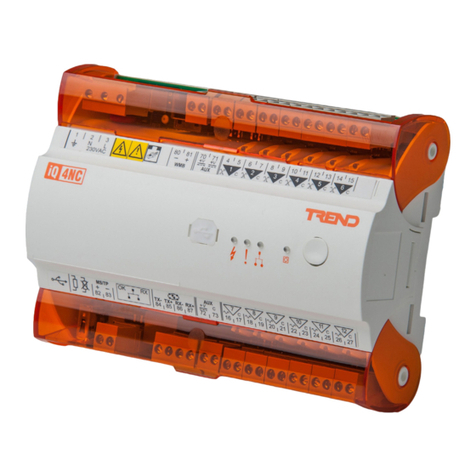
  9. TREND IQ3 series User manual

TREND IQ3 series User manual

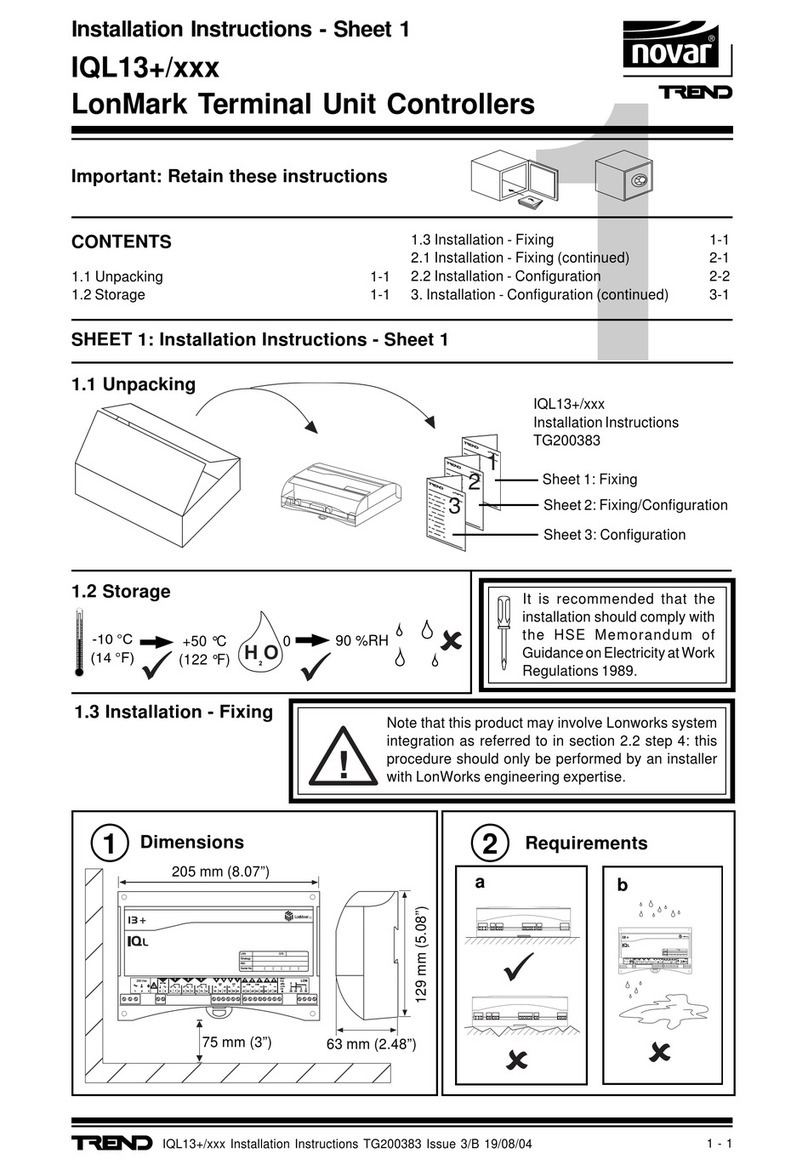
1
IQ3../.../XNC/... Controller/Interface Installation Instructions TG200911 Issue 1/D 03/09/07
Important: Retain these instructions
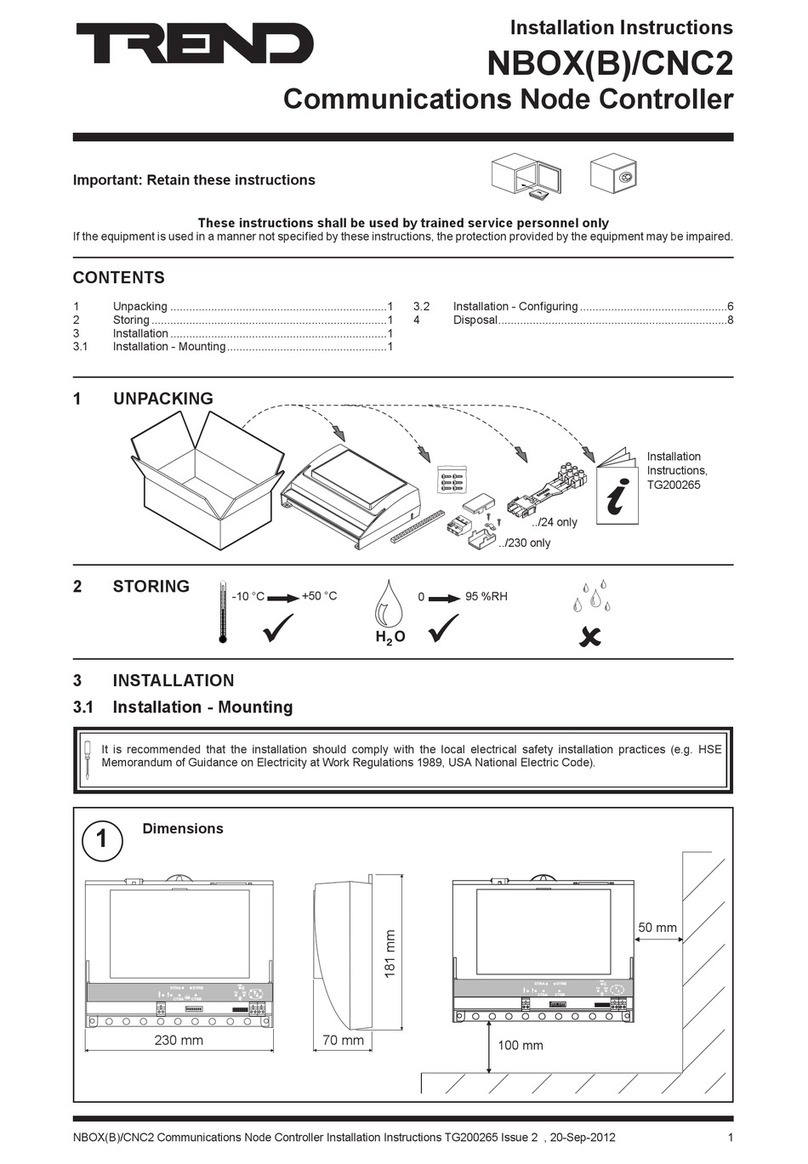
Installation Instructions
IQ3.../.../XNC/...
Controller/Interface
CONTENTS
1 Installation - Mounting ....................................................... 1
2 Installation - Configuration ................................................ 4
3 Insertion/Replacement of battery ..................................... 7
4 Disposal ............................................................................. 8
1 Installation - Mounting
Install
1
IQ3xact Installation Instructions TG200766
IQ3xcite Installation Instructions TG200626
Install according to IQ3xact or
IQ3xcite installation instructions
section 3 steps 1 to 11
Connect Serial Interface
2
If /SER/.., serial interface auxiliary board, fitted
or RS232
4 5 6
4 5 6
2
7 8 9
7 8 9
3
10 11 12
4
13 14 15
5
16 17 18
6
19 20 21
7
22 23 24
8
25 26 27
9
28 29 30
10
+ 0
+ 0 + 0 + 0 + 0 + 0
+ 0
+ 0
+ 0
1 2 3
1 2 3
1
+ 0
+ 0
0V
24V
24V
34 35 36
12
37 38 39
13
40 41 42
14
A
31 32 33
P
11
43 44 45
15
46 47 48
16
100-240V
OK RX
P 0 P 0 P 0
P 0
P 0 P 0
TX
RX
RTS/TXEN
CTS/RXEN
RS485 RS232
1
2
3
4
5
6
7
8
9
RX
TX
GND
RTS
CTS (held high)
1
2
3
4
5
6
RX
TX
GND
RTS
CTS
either 9 way D type plug
or RJ11 socket
If RS485 2 wire
Note that only one of the two RS232 connectors can be used at a time
0V
T
A
T
B
RA
RB
0V AB 0V AB 0V AB
120ohm
terminator
Terminator switch ON
IQ3../.../SER/XNC/...
either RS485 2 wire, RS485 4 wire, or RS422
2 part connector with 5 screw terminals fo 0.5 to 2.5 mm2cross
section area (14 to 20 AWG) cable
If RS485 4 wire
0V
T
A
T
B
RA
RB
0V TA TB RA
RB
0V TA TB RA
RB
0V TA TB RA
RB
120ohm
terminators
Terminator switch ON
IQ3../.../SER/XNC/...
If RS422
0V
TA
TB
RA
RB
TA
TB
RA
RB
0V
Terminator switch OFF
external 100 ohm
terminator
100 ohm
terminator
IQ3../.../SER/XNC/...
32 devices maximum
32 devices maximum
Note pins 1,6,9 - no connection
Note pin 2 - no connection
Note that only one of the RS232 or RS485 connectors can have
a cable connected at any one time in order to comply with Class
BEMC emissionstandard (EN61000-6-3,residential, commercial,
and light industrial environments).
WARNING: Failure to comply with this requirement will reduce
the unit to Class A (industrial environments); in a domestic
environment the unit may cause radio interference, in which
case the user may be required to take adequate measures.
If the IQ3/XNC/SER controller and its slave units are in the same
cabinet using the same power supply, each device should have
a good physical earth (ground) connection.
Step 2 continued over page
2IQ3../.../XNC/... Controller/Interface Installation Instructions TG200911 Issue 1/D 03/09/07
IQ3../.../XNC/... Installation Instructions
Connect Serial Interface (continued)
2
0V
T
A
T
B
RA
RB
0V
A
B
0V
A
B
0V
A
B
0V
A
B
Cabinet A
0V
AB
0V
AB
0V
AB
0V
AB
0V
AB
0V
AB
Cabinet B
Isolating
Repeater
Isolating
Repeater
Surge
Protection
Surge
Protection
terminate at far end
Backbone Bus
to more cabinets
Surge Ground or Earth Bond
Surge Ground
or Earth Bond
Multiple Cabinets
If the IQ3/XNC/SER controller and its slave units are in different cabinets or use different power supplies (e.g. different
UPSs), the cabinets should be isolated from each other. If the bus is likely to suffer from surge and grounding problems,
surge protection should be added. The isolator should be connected to the earth (ground) of the nearest device, the 0V
of the isolator and the surge protector should be connected together, and earth (ground) of the surge protector’s exposed
side (e.g. backbone bus) should be connected as directly as possible to the surge ground or earth bond.
1 Installation - Mounting (continued)
RS485 2 wire, RS485 4 wire, or RS422 (continued)
3
IQ3../.../XNC/... Controller/Interface Installation Instructions TG200911 Issue 1/D 03/09/07
Installation Instructions IQ3../.../XNC/...
Connect IQ System Current Loop Network
3
If /LAN/.., IQ system current loop Lan auxiliary board,
fitted
4 5 6
4 5 6
2
7 8 9
3
10 11 12
4
13 14 15
5
16 17 18
6
19 20 21
7
22 23 24
8
25 26 27
9
28 29 30
10
+ 0
+ 0 + 0 + 0 + 0
+ 0
+ 0
+ 0
+ 0
+ 0
+ 0
1 2 3
1 2 3
1
+ 0
0V
24V
24V
34 35 36
12
37 38 39
13
40 41 42
14
A
31 32 33
P
11
43 44 45
15
46 47 48
16
100-240V
OK RX
P 0 P 0
P 0
P 0
P 0
P 0 P 0
TX RX
OK
1 Installation - Mounting (continued)
25 26 27
N
+ 0
1234
1 2 3 4
IQ LAN
IQ LAN
T- T+ R- R+
T- T+ R- R+
1234
1 2 3 4
T- T+ R- R+
T- T+ R- R+
2 off 2 part connectors with 4 screw terminals for 0.5 to 2.5 mm2cross
section area (14 to 20 AWG) cable
INOUT
earth (ground) screen to convenient
input channel screen terminal
Using 2 wire method
25 26 27
N
+ 0
1234
1 2 3 4
IQ LAN
IQ LAN
T- T+ R- R+
T- T+ R- R+
1234
1 2 3 4
T- T+ R- R+
T- T+ R- R+
INOUT
Using 4 wire method
polarity independent
Continue Installation
4
IQ3xact Installation Instructions TG200766
IQ3xcite Installation Instructions TG200626
Install according to IQ3xact installation instructions section 4 step 1 to step 19,
or IQ3xcite installation instructions from section 3 step 12 to section 4 step 20.
Network Engineering Manual, 92-1735
elbaCduab6k9duab2k91seriWfo.oN
2819nedleB m0001
)sdy0901(
m007
)sdy567( 2
7029nedleB m0001
)sdy0901(
m005
)sdy545( 2
dnerT
002/FH/22/1/1/PT
)1678nedleB(
m007
)sdy567(
m053
)sdy083( 2
dnerT
002/FH/22/2/2/PT
)3278nedleB(
m005
)sdy54
5(
m052
)sdy072( 4
earth (ground) screen
to convenient input
channel screen terminal
4IQ3../.../XNC/... Controller/Interface Installation Instructions TG200911 Issue 1/D 03/09/07
IQ3../.../XNC/... Installation Instructions
19K2
0
1
9K6
9k6
19k2
2 Installation - Configuration
Continue Installation
1
IQ3../.../XNC/... Installation Instructions TG200911 sheet 1
IQ3xact Installation Instructions TG200766
IQ3xcite Installation Instructions TG200626
Complete IQ3../.../XNC/... installation instructions sheet 1
and IQ3xact installation instructions up to section 4 step 19,
or IQ3xcite Installation Instructions up to section 4 step 20.
Select Terminator Switch Position
2
If /SER/.., serial interface auxiliary board, fitted
4 5 6
2
7 8 9
3
10 11 12
4
13 14 15
5
16 17 18
6
19 20 21
7
22 23 24
8
25 26 2725 26 27
9
28 29 30
10
+ 0
+ 0 + 0 + 0 + 0 + 0
+ 0
+ 0
+ 0
1 2 3
1
+ 0+ 0
0V
24V
24V
34 35 36
12
37 38 3937 38 39
13
40 41 42
14
A
31 32 33
P
11
43 44 4543 44 45
15
46 47 4846 47 48
16
100-240V
OK RX
P 0P 0 P 0P 0 P 0P 0
P 0
P 0P 0 P 0P 0
TX
RX
RTS/TXEN
CTS/RXEN
RS485 RS232
terminator in circuit terminator out of circuit
RS485 4 wire
RS485 2 wire
RS422
terminator in either position
RS232
Set current loop Network Baud Rate and Address
3If /LAN/.., IQ system current loop Lan auxiliary board, fitted
4 5 6
2
7 8 9
3
10 11 12
4
13 14 15
5
16 17 18
6
19 20 21
7
22 23 24
8
25 26 27
9
28 29 30
28 29 30
10
+ 0
+ 0 + 0 + 0 + 0 + 0
+ 0
+ 0
+ 0
1 2 3
1
+ 0
+ 0
0V
24V
24V
34 35 36
12
37 38 39
13
40 41 42
14
A
31 32 33
P
11
43 44 45
15
46 47 48
16
100-240V
OK RX
OK RX
P 0
P 0
P 0
P 0
P 0
P 0
P 0
P 0
P 0
P 0
P 0
TX RX
OK
a, Set address switch
1 2 4 8 16 32 64
0
1
e.g. Address = 2 + 16 = 18 NOTSET
SET
Address = A
=A*
IQ3../LAN/XNC/...
*Note that the IQ3../LAN/XNC/... may also use addresses
for its virtual CNC, and for its local supervisor CNC which
should also be unique on the Lan.
=A/
=A/
=A/
address
1, 4 to 9, 11 to 119
0, 2, 3,10 or >119
b, Set baud rate switch
current loop Lan baud rate = B
= B
= B
= B
= B
e.g. Baud Rate = 19k2
5
IQ3../.../XNC/... Controller/Interface Installation Instructions TG200911 Issue 1/D 03/09/07
Installation Instructions IQ3../.../XNC/...
IQ3../.../LAN/XNC/...
?
IQ3../.../LAN/XNC/...
?
2 Installation - Configuration (continued)
Check current loop network
4
4 5 6
4 5 6
2
7 8 9
7 8 9
3
10 11 12
4
13 14 15
5
16 17 18
6
19 20 21
7
22 23 24
8
25 26 27
9
28 29 30
10
+ 0
+ 0 + 0 + 0 + 0 + 0
+ 0
+ 0
+ 0
1 2 3
1 2 3
1
+ 0
+ 0
0V
24V
24V
34 35 36
12
37 38 39
13
40 41 42
14
A
31 32 33
P
11
43 44 45
15
46 47 48
16
100-240V
OK RX
P 0 P 0 P 0
P 0
P 0 P 0
TX RX
OK
TX RX
OK
b RX
a TX
c OK
Network Address
0,2,3 or >119
IQ3../.../LAN/XNC/...
O
I
1234
1 2 3 4
IQ LAN
IQ LAN
T- T+ R- R+
T- T+ R- R+
1234
1 2 3 4
T- T+ R- R+
T- T+ R- R+
1234
1 2 3 4
IQ LAN
IQ LAN
T- T+ R- R+
T- T+ R- R+
1234
1 2 3 4
T- T+ R- R+
T- T+ R- R+
IQ Faulty
Check network cabling for
short circuits with a
multimeter (NOT Megger)
Check baud rate. Switch on
other nodes until faulty
node is found (OK ).
Correct fault.
OK
OK
TCLTool2ManualTC200832
TCL Manual TE200017
Create TCL Application
5
Creat TCL application using TCLTool2
TCLTool2
runs within SET
IQ3../.../XNC
If using /SER/, ensure that interface type is set up in the TCL
application (RS232, RS485 2 wire, or RS485 4 wire). See
step 8 below.
If /LAN/.., IQ system current loop Lan auxiliary board, fitted
6IQ3../.../XNC/... Controller/Interface Installation Instructions TG200911 Issue 1/D 03/09/07
IQ3../.../XNC/... Installation Instructions
TCLTool2ManualTC200832
SET Manual TE200147
Download TCL Application
6
Use TCLTool2 or SET to download TCL Application (XNC file)
Note that if XNC (TCL application) file is protected, the installer should send MAC address(es) of the targetted controller(s)
to the XNC file supplier. On receipt of this data the supplier will send back an unlock code which can be used to authorise
the file within SET to run on the designated MAC Address(es).
Router
IQ3
Ethernet
either across IQ system network over Ethernet or across IQ system network using local Ethernet
connection
Note that downloading IQ3 TCL application is possible through a virtual CNC once the virtual CNC address is set up,
and if IP addressing is set up correctly in both PC and IQ3.
TCLTool2,SET
100-240 V
OK RX
RJ45
TCLTool2,SET
standard Ethernet connection
standard Ethernet cable XCITE/XA crossover adaptor
order separately (XCITE/XA/5 pack of 5)
local PC (Ethernet) connection can be either to adjacent
Ethernet hub using standard cable only, or directly to IQ3
using standard cable and crossover adaptor, XCITE/XA.
2 Installation - Configuration (continued)
Continue Installation
9
IQ3xact Installation Instructions TG200766
IQ3xcite Installation Instructions TG200626
Continue installation according to IQ3xact installation
instructions section 4 step 21 on, or IQ3xcite installation
instructions section 4 step 22 on
Check Serial interface type
7
If /SER/.., serial interface auxiliary board, fitted
4 5 6
4 5 6
2
7 8 9
7 8 9
3
10 11 12
4
13 14 15
5
16 17 18
6
19 20 21
7
22 23 24
8
25 26 27
9
28 29 30
10
+ 0
+ 0 + 0 + 0 + 0 + 0
+ 0
+ 0
+ 0
1 2 3
1 2 3
1
+ 0
+ 0
0V
24V
24V
34 35 36
12
37 38 39
13
40 41 42
14
A
31 32 33
P
11
43 44 45
15
46 47 48
16
100-240V
100-240V
OK RX
OK RX
P 0 P 0 P 0
P 0
P 0 P 0
TX
RX
RTS/TXEN
CTS/RXEN
RS485 RS232
RS485 RS232
RS485
0V T
A
T
B
RARB
AB
0V
RS485
0V
T
A
T
B
RARB
TA TB RA RB
0V
RS232
RJ11 or 9 way D
either
RS485 2 wire RS485 4 wire RS232
The interface type is set up in the TCL application (see
step 5 above)
Check Serial interface operation
8If /SER/.., serial interface auxiliary board, fitted
Note perform this step after the ‘Configure IQ3’ step in
the main installation instructions
4 5 64 5 6
2
7 8 97 8 9
3
10 11 12
4
13 14 15
5
16 17 18
6
19 20 21
7
22 23 24
8
25 26 27
9
28 29 3028 29 30
10
+ 0
+ 0 + 0 + 0 + 0+ 0 + 0
+ 0
+ 0
+ 0
1 2 31 2 3
1
+ 0+ 0
0V
24V
24V
34 35 3634 35 36
12
37 38 3937 38 39
13
40 41 4240 41 42
14
A
31 32 33
P
11
43 44 45
15
46 47 4846 47 48
16
100-240V
OK RX
P 0P 0 P 0P 0 P 0P 0
P 0
P 0P 0 P 0P 0
TX
RX
RTS/TXEN
CTS/RXEN
RS485 RS232
TX
RX
RTS/TXEN
CTS/RXEN
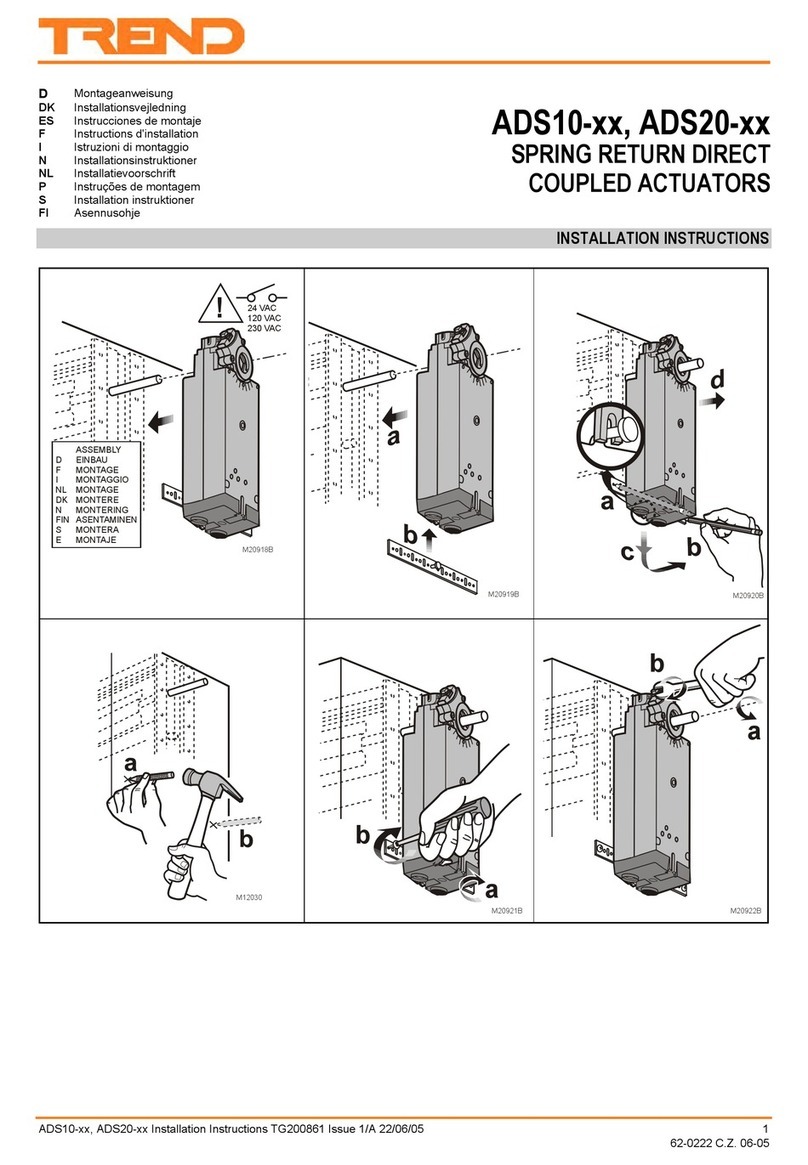
TCL LEDs activated by TCL application
LED 1 (yellow)
LED 2 (green)
LED 3 (red)
LED 4 (yellow)
Communications LEDs
TX: (yellow) messages transmitted; flashes while communicating
RX: (yellow) messages received; flashes while communicating
RTS/TXEN: RS232 - RTS ready to send if handshaking selected
RS485 4 wire -enabled to transmit
RS485 2 wire -in transmit mode (extinguished in receive mode)
CTS/RXEN: RS232 - CTS clear to send if handshaking selected
RS485 4 wire -enabled to receive
RS485 2 wire -permanently extinguished
Note perform this step after the ‘Configure IQ3’ step in
the main installation instructions
7
IQ3../.../XNC/... Controller/Interface Installation Instructions TG200911 Issue 1/D 03/09/07
Installation Instructions IQ3../.../XNC/...
3 Insertion/Replacement of Battery (if battery required)
O
I
Switch Off
1Isolate I/O
2
4 5 6
2
7 8 9
3
10 11 12
4
13 14 15
5
16 17 18
6
+ 0
+ 0
+ 0
+ 0
+ 0
1 2 3
1
+ 0
0 V
24 V
24 V
34 35 36
12
37 38 39
13
40 41 42
14A
31 32 33
P
11
43 44 45
15
46 47 48
16
100-240 V
OK RX P 0 P 0 P 0
P 0
P 0 P 0
O
I
O
I
WARNING: The
connecting leads
may be connected
to supplies. Isolate before
touching.
Open Panel
3
A
0V
24V
24V
34 35 36
12
37 38 39
13
40 41 42
14A
31 32 33
P
11
43 44 45
15
46 47 48
16
100-240V
OK RX P 0 P 0 P 0
P 0
P 0 P 0
4 5 6
2
7 8 9
3
10 11 12
4
13 14 15
5
16 17 18
6
19 20 21
7
22 23 24
8
25 26 27
9
28 29 30
10
+ 0
+ 0 + 0 + 0 + 0 + 0
+ 0
+ 0
+ 0
1 2 3
1
+ 0
WARNING: Openingthepanelmay expose
dangerous voltages.
417-IEC-5036
Remove Auxiliary Board Cover
4
a
b
cd
CR 2032
CR 2032
Remove battery (if replacing battery)
5
Replace Auxiliary Board Cover
7
Warning: Thelithium batterymustnotberecharged,
disassembled, burnt or short circuited.
Misuse may cause explosion or fire.
Dispose of carefully (see Section 4,
Disposal, below). Refer to Health and
Safety Executive Guidance Note GS43.
+
Insert new battery
6
CR2032 3 V ab
9Reconnect Supply to I/O
Close Panel
8
A
0V
24V
24V
3435 36
12
3738 39
13
4041 42
14A
3132 33
P
11
4344 45
15
4647 48
16
100-240V
OK RX P 0 P 0 P 0
P 0
P 0 P 0
4 5 6
2
7 8 9
3
1011 12
4
1314 15
5
1617 18
6
1920 21
7
2223 24
8
2526 27
9
2829 30
10
+ 0
+ 0 + 0 + 0 + 0 + 0
+ 0
+ 0
+ 0
1 2 3
1
+ 0
10 Switch On
4 5 6
2
7 8 9
3
10 11 12
4
13 14 15
5
16 17 18
6
+ 0
+ 0
+ 0
+ 0
+ 0
1 2 3
1
+ 0
0 V
24 V
24 V
34 35 36
12
37 38 39
13
40 41 42
14A
31 32 33
P
11
43 44 45
15
46 47 48
16
100-240 V
OK RX P 0 P 0 P 0
P 0
P 0 P 0
O
I
O
I
O
I
IQ3.../.../XNC/.../USA/UL/24
is UL rated as ‘UL916 listed
open energy management
equipment’.
8IQ3../.../XNC/... Controller/Interface Installation Instructions TG200911 Issue 1/D 03/09/07
IQ3../.../XNC/... Installation Instructions
Manufactured for and on behalf of the Environmental and Combustion Controls Division of Honeywell Technologies Sàrl, Ecublens, Route
du Bois 37,Switzerland by its Authorized Representative, Trend Control Systems Limited.
Trend Control Systems Limited reserves the right to revise this publication from time to time and make changes to the content
hereof without obligation to notify any person of such revisions or changes.
Trend Control Systems Limited
P.O. Box 34, Horsham, West Sussex, RH12 2YF, UK. Tel:+44 (0)1403 211888 Fax:+44 (0)1403 241608 www.trend-controls.com
Trend Control Systems USA
6670 185th Avenue NE, Redmond, Washington 98052, USA. Tel: (425)897-3900, Fax: (425)869-8445 www.trend-controls.com
WEEE Directive :
At the end of their useful life the packaging,
product, and any battery should be disposed
of by a suitable recycling centre.
Do not dispose of with normal household waste.
Do not burn.
4 Disposal

This manual suits for next models

2

Other TREND Controllers manuals

TREND IQ23 Series User manual

TREND

TREND IQ23 Series User manual

TREND IQ4E User manual

TREND

TREND IQ4E User manual

TREND IQ41 Series User manual

TREND

TREND IQ41 Series User manual

TREND IQ422 User manual

TREND

TREND IQ422 User manual

TREND NBOX(B)/CNC2 User manual

TREND

TREND NBOX(B)/CNC2 User manual

TREND CNC2 User manual

TREND

TREND CNC2 User manual

TREND ADS10 Series User manual

TREND

TREND ADS10 Series User manual

TREND AD05-24 Operation manual

TREND

TREND AD05-24 Operation manual

TREND IQ422 User manual

TREND

TREND IQ422 User manual

TREND IQX12 User manual

TREND

TREND IQX12 User manual

TREND CNC2 User manual

TREND

TREND CNC2 User manual

TREND IQ3xcite User manual

TREND

TREND IQ3xcite User manual

TREND INC2 User manual

TREND

TREND INC2 User manual

TREND LonMark IQL13+ Series User manual

TREND

TREND LonMark IQL13+ Series User manual

TREND IQ41 Series User manual

TREND

TREND IQ41 Series User manual

TREND IQ251 User manual

TREND

TREND IQ251 User manual

TREND AL0620-24-K User manual

TREND

TREND AL0620-24-K User manual

TREND IQECO31/230 User manual

TREND

TREND IQECO31/230 User manual

Popular Controllers manuals by other brands

WELBA MRF-M2 Installation and operating instructions

WELBA

WELBA MRF-M2 Installation and operating instructions

Eaton Cuttler-Hammer Pow-R-Command 100 Technical data

Eaton

Eaton Cuttler-Hammer Pow-R-Command 100 Technical data

Watts VALPES VRX Installation and operation manual

Watts

Watts VALPES VRX Installation and operation manual

Eaton FC6 user manual

Eaton

Eaton FC6 user manual

Interpump Group Setmatic manual

Interpump Group

Interpump Group Setmatic manual

Moeller DEX-KEY-10 installation instructions

Moeller

Moeller DEX-KEY-10 installation instructions

Smartgen HGM8140D user manual

Smartgen

Smartgen HGM8140D user manual

Vitlab maneus operating manual

Vitlab

Vitlab maneus operating manual

Micropelt MVA003 EnOcean quick start

Micropelt

Micropelt MVA003 EnOcean quick start

Computherm Q4Z operating instructions

Computherm

Computherm Q4Z operating instructions

Sime Eurotrol 2 Installation and user instructions

Sime

Sime Eurotrol 2 Installation and user instructions

Eaton 9315P Installation and operation manual

Eaton

Eaton 9315P Installation and operation manual

SGM C5 user manual

SGM

SGM C5 user manual

Elk Products M1 Cross Platform M1Gold user guide

Elk Products

Elk Products M1 Cross Platform M1Gold user guide

Regin TTC40FX Instruction

Regin

Regin TTC40FX Instruction

Sinovo SD200 Series user manual

Sinovo

Sinovo SD200 Series user manual

Santerno Sinus Penta user manual

Santerno

Santerno Sinus Penta user manual

Hydrofarm Xtrasun LT1 user manual

Hydrofarm

Hydrofarm Xtrasun LT1 user manual

manuals.online logo
manuals.online logoBrands
  • About & Mission
  • Contact us
  • Privacy Policy
  • Terms and Conditions

Copyright 2025 Manuals.Online. All Rights Reserved.