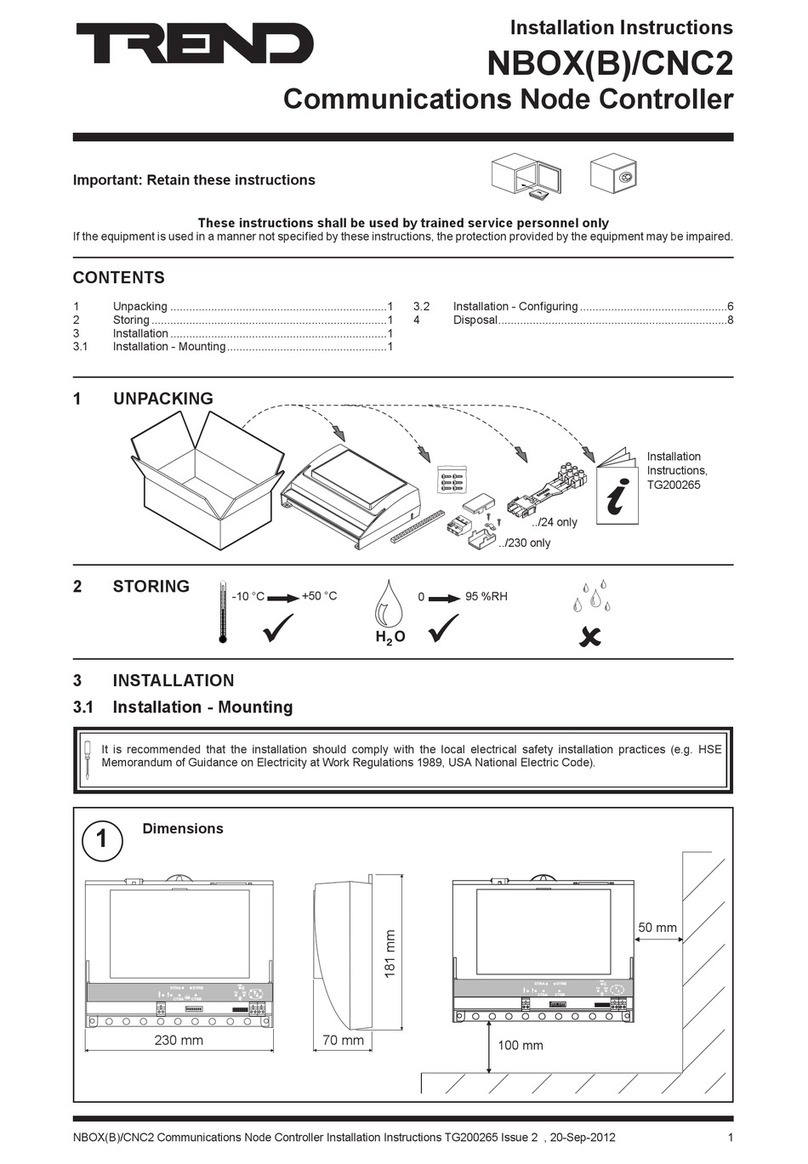
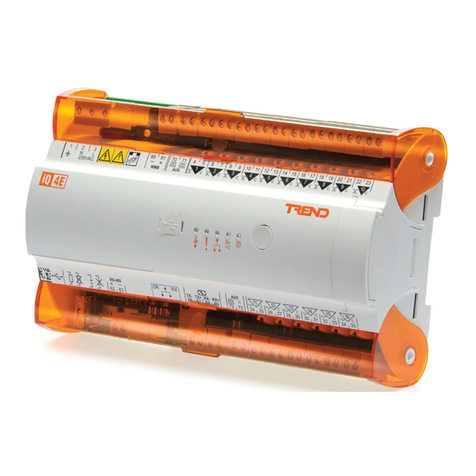
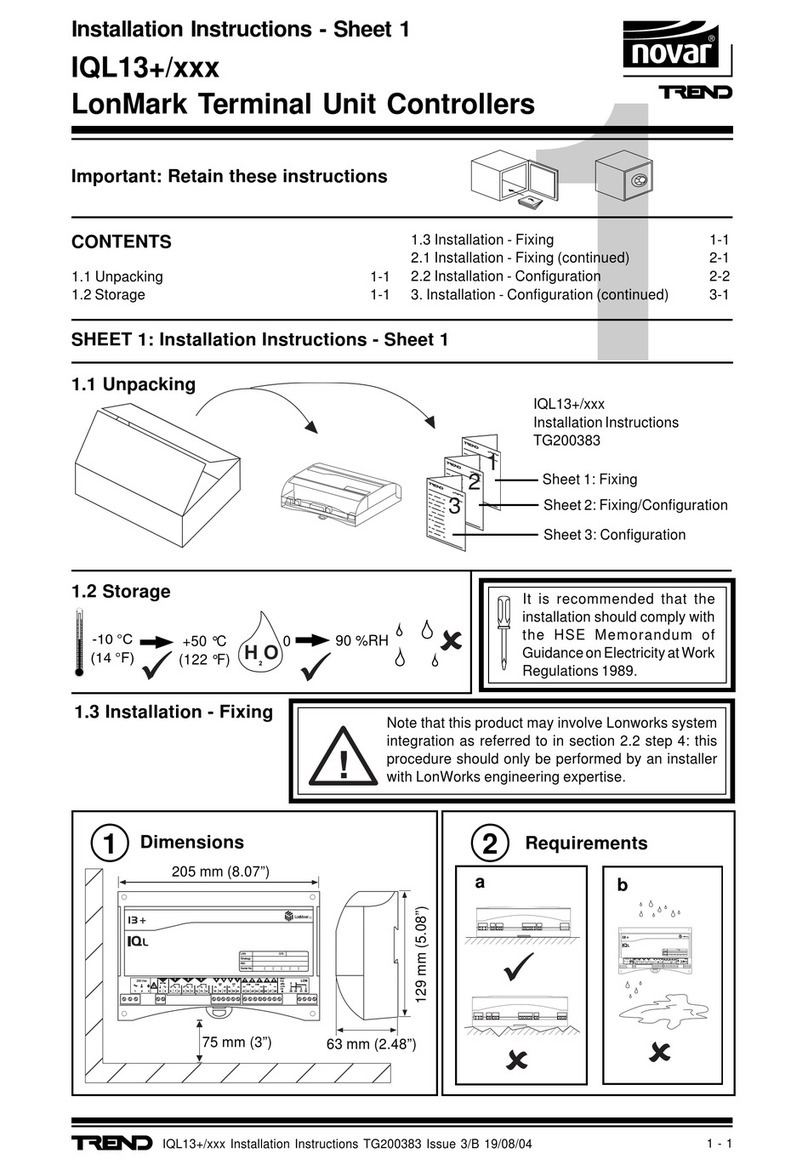
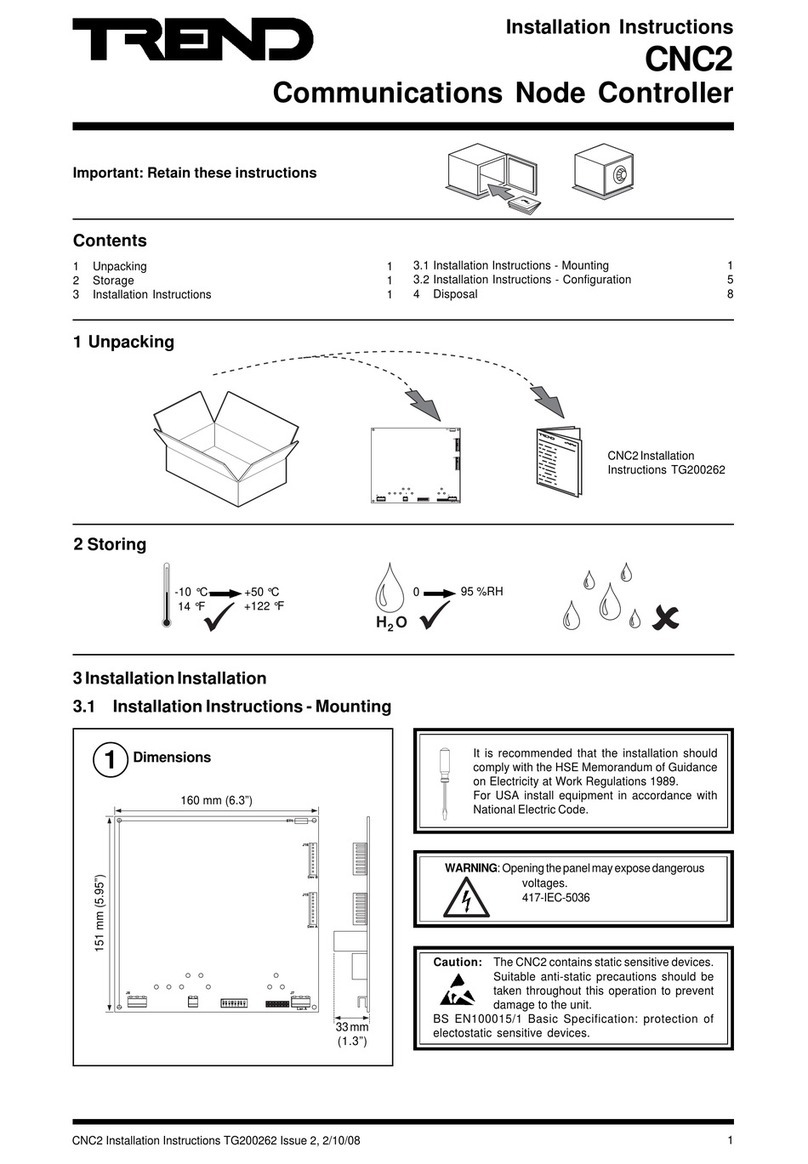
TREND IQ3xcite User manual

IQ3xcite Installation Instructions - Mounting TG200626 Issue 4, 29/12/2010 1
Installation Instructions – Mounting
IQ3xcite
Web Enabled Controller
Important: Retain these instructions
IQ3xcite Installation Instructions
- Mounting TG200626
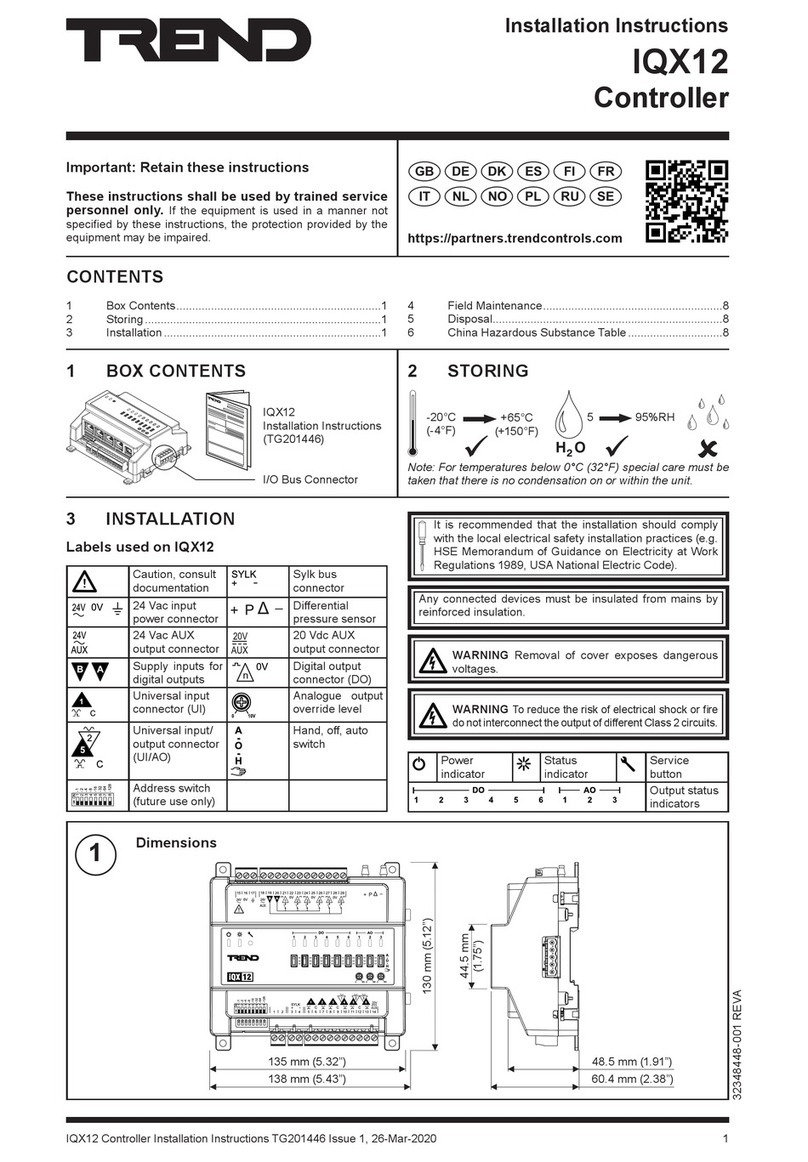
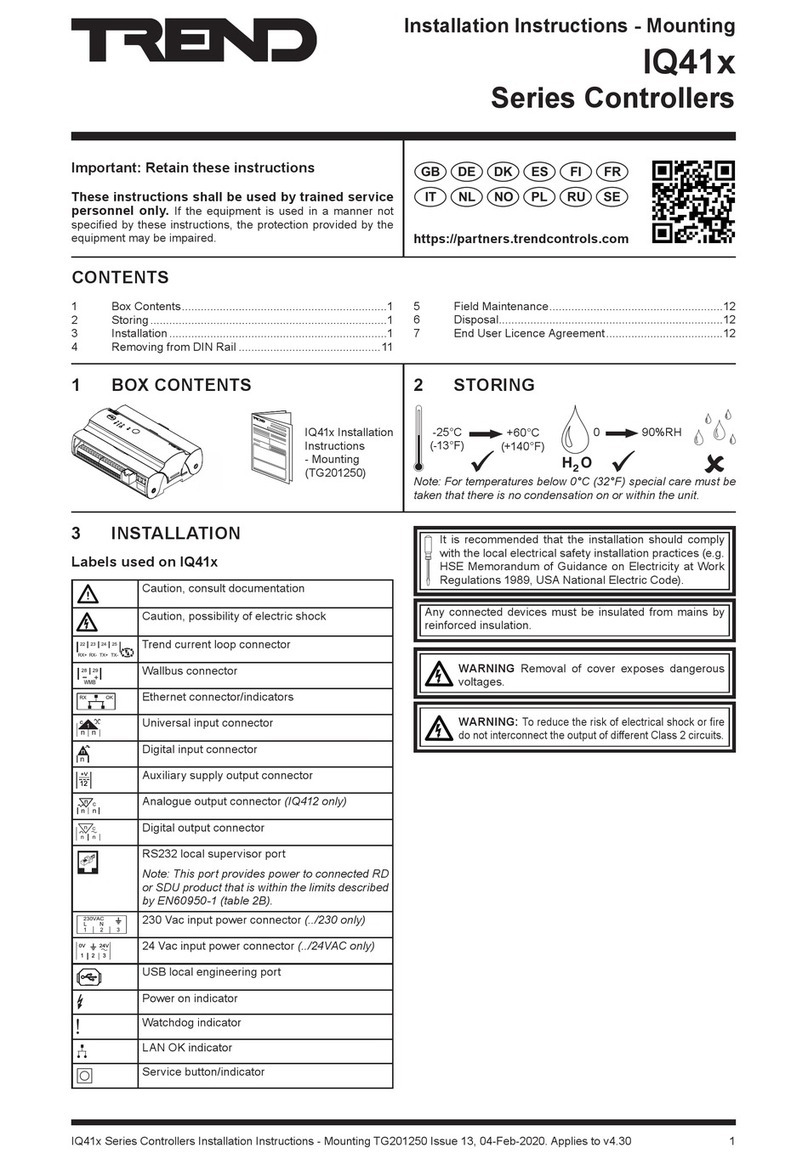
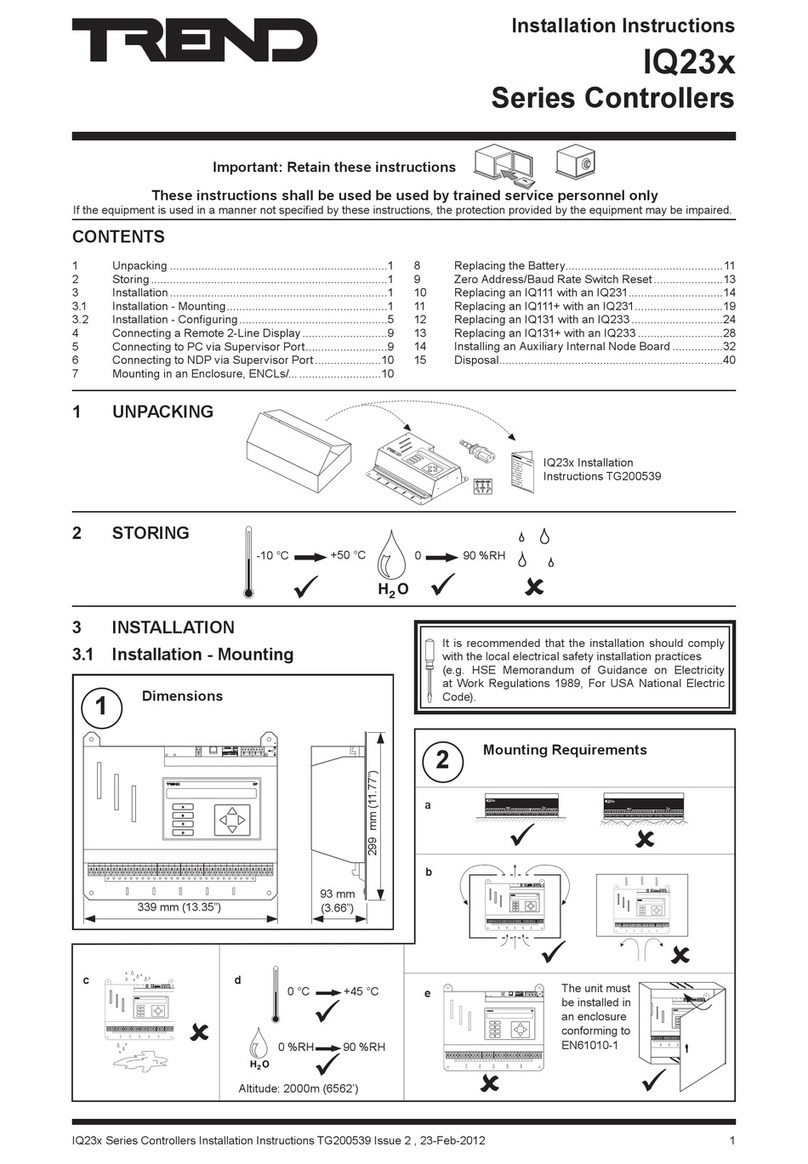
1Dimensions 2Requirements
A
0V
24V
24V
3435 36
12
3738 39
13
4041 42
14A
3132 33
P
11
4344 45
15
4647 48
16
100-240V
OK RX
P 0 P 0 P 0
P 0
P 0 P 0
4 5 6
2
7 8 9
3
1011 12
4
1314 15
5
1617 18
6
1920 21
7
2223 24
8
2526 27
9
2829 30
10
+ 0
+ 0 + 0 + 0 + 0 + 0
+ 0
+ 0
+ 0
1 2 3
1
+ 0
a
H
2
O
0 °C
(32 °F)
+45 °C
(113 °F)
0 %RH 90 %RH
b
A
0V
24V
24V
3435 36
12
3738 39
13
4041 42
14A
3132 33
P
11
4344 45
15
4647 48
16
100-240V
OK RX
P 0 P 0 P 0
P 0
P 0 P 0
4 5 6
2
7 8 9
3
1011 12
4
1314 15
5
1617 18
6
1920 21
7
2223 24
8
2526 27
9
2829 30
10
+ 0
+ 0 + 0 + 0 + 0 + 0
+ 0
+ 0
+ 0
1 2 3
1
+ 0
Protection IP20, NEMA1
4 5 6
2
7 8 9
3
10 11 12
4
13 14 15
5
16 17 18
6
19 20 21
7
22 23 24
8
25 26 27
9
28 29 30
10
+ 0
+ 0 + 0 + 0 + 0 + 0
+ 0
+ 0
+ 0
1 2 3
1
+ 0
0 V
24 V
24 V
34 35 36
12
37 38 39
13
40 41 42
14A
31 32 33
P
11
43 44 45
15
46 47 48
16
100-240 V
OK RX P 0 P 0 P 0
P 0
P 0 P 0
access for connections
263 mm (10.35”)
access for connections
access for cover, auxiliary board
option, and I/O bus flap
130 mm (5.12”)
46 mm (1.81”)
150 mm (5.9”)
42 mm (1.65”)
50 mm
(1.97”)
terminal cover
auxiliary board cover
I/O bus flap
(I/O bus terminator
fitted inside)
3 INSTALLATION
1 UNPACKING
2 STORING
It is recommended that the installation should comply
with the HSE Memorandum of Guidance on Electricity
at Work Regulations 1989.
For USA, install equipment in accordance with National
Electric Code
CONTENTS
1 Unpacking .....................................................................1
2 Storing ...........................................................................1
3 Installation .....................................................................1
4 Disposal.........................................................................8
H
2
O
+50 °C
(122 °C)
0
-10 °C
(14 °F)
90 %RH
DANGER: High voltage. No serviceable parts
inside. Other than removing terminal cover,
DO NOT OPEN UNIT.
!
WARNING: If the unit is used in a manner other
than that specified in these instructions, the
protection provided by the unit may be impaired.
continued next page

2 IQ3xcite Installation Instructions - Mounting TG200626 Issue 4, 29/12/2010
IQ3xcite Installation Instructions – Mounting
3Mounting
cab
4 5 6
2
7 8 9
3
10 11 12
4
13 14 15
5
16 17 18
6
19 20 21
7
22 23 24
8
25 26 27
9
28 29 30
10
+ 0
+ 0 + 0 + 0 + 0 + 0
+ 0
+ 0
+ 0
1 2 3
1
+ 0
0 V
24 V
24 V
34 35 36
12
37 38 39
13
40 41 42
14A
31 32 33
P
11
43 44 45
15
46 47 48
16
100-240 V
OK RX P 0 P 0 P 0
P 0
P 0 P 0
2Requirements (continued)
A
0V
24V
24V
3435 36
12
3738 39
13
4041 42
14A
3132 33
P
11
4344 45
15
4647 48
16
100-240V
OK RX
P 0 P 0 P 0
P 0
P 0 P 0
4 5 6
2
7 8 9
3
1011 12
4
1314 15
5
1617 18
6
1920 21
7
2223 24
8
2526 27
9
2829 30
10
+ 0
+ 0 + 0 + 0 + 0 + 0
+ 0
+ 0
+ 0
1 2 3
1
+ 0
4 5 6
2
7 8 9
3
10 11 12
4
13 14 15
5
16 17 18
6
19 20 21
7
22 23 24
8
25 26 27
9
28 29 30
10
+ 0
+ 0 + 0 + 0 + 0 + 0
+ 0
+ 0
+ 0
1 2 3
1
+ 0
0V
24V
24V
34 35 36
12
37 38 39
13
40 41 42
14A
31 32 33
P
11
43 44 45
15
46 47 48
16
100-240V
OK RX P 0 P 0 P 0
P 0
P 0 P 0
d
c
4 5 6
2
7 8 9
3
10 11 12
4
13 14 15
5
16 17 18
6
19 20 21
7
22 23 24
8
25 26 27
9
28 29 30
10
+ 0
+ 0 + 0 + 0 + 0 + 0
+ 0
+ 0
+ 0
1 2 3
1
+ 0
0V
24V
24V
34 35 36
12
37 38 39
13
40 41 42
14A
31 32 33
P
11
43 44 45
15
46 47 48
16
100-240V
OK RX P 0 P 0 P 0
P 0
P 0 P 0
e
4 5 6
2
7 8 9
3
10 11 12
4
13 14 15
5
16 17 18
6
19 20 21
7
22 23 24
8
25 26 27
9
28 29 30
10
+ 0
+ 0 + 0 + 0 + 0 + 0
+ 0
+ 0
+ 0
1 2 3
1
+ 0
0V
24V
24V
34 35 36
12
37 38 39
13
40 41 42
14A
31 32 33
P
11
43 44 45
15
46 47 48
16
100-240V
OK RX P 0 P 0 P 0
P 0
P 0 P 0
4 5 6
2
7 8 9
3
10 11 12
4
13 14 15
5
16 17 18
6
19 20 21
7
22 23 24
8
25 26 27
9
28 29 30
10
+ 0
+ 0 + 0 + 0 + 0 + 0
+ 0
+ 0
+ 0
1 2 3
1
+ 0
0V
24V
24V
34 35 36
12
37 38 39
13
40 41 42
14A
31 32 33
P
11
43 44 45
15
46 47 48
16
100-240V
RX OK P 0 P 0 P 0
P 0
P 0 P 0
4 5 6
2
7 8 9
3
10 11 12
4
13 14 15
5
16 17 18
6
19 20 21
7
22 23 24
8
25 26 27
9
28 29 30
10
+ 0
+ 0 + 0 + 0 + 0 + 0
+ 0
+ 0
+ 0
1 2 3
1
+ 0
0V
24V
24V
34 35 36
12
37 38 39
13
40 41 42
14A
31 32 33
P
11
43 44 45
15
46 47 48
16
100-240V
OK RX P 0 P 0 P 0
P 0
P 0 P 0
4 5 6
2
7 8 9
3
10 11 12
4
13 14 15
5
16 17 18
6
19 20 21
7
22 23 24
8
25 26 27
9
28 29 30
10
+ 0
+ 0 + 0 + 0 + 0 + 0
+ 0
+ 0
+ 0
1 2 3
1
+ 0
0V
24V
24V
34 35 36
12
37 38 39
13
40 41 42
14A
31 32 33
P
11
43 44 45
15
46 47 48
16
100-240V
RX OK P 0 P 0 P 0
P 0
P 0 P 0
DIN rail
end stop
IQ3XACT/12/USA/UL/../24
is UL rated as ‘UL916 listed
open energy management
equipment’.
4Connect Power 5Connect Ethernet
If required
/100-240 100 to 240 Vac ±10% 50/60 Hz at 28 VA max
(A 240 Vac, 1 A, switch or circuit breaker must be included in the supply
to the unit and be in close proximity to it, and must be clearly marked
as the disconnecting device for the unit.)
/24 24 to 60 Vdc (36 Vdc maximum for /UL versions),
24 Vac 50/60 Hz, at 40 VA max
WARNING:
This apparatus must be earthed (grounded) (through
power connector)
Terminal size 0.5 to 2.5 mm2(14 to 20 AWG)
EN61010:2001
INSTALLATION CATEGORY III
(fixed installations)
4 5 6
2
7 8 9
3
10 11 12
4
13 14 15
5
16 17 18
6
19 20 21
7
22 23 24
8
25 26 27
9
28 29 30
10
+ 0
+ 0 + 0 + 0 + 0 + 0
+ 0
+ 0
+ 0
1 2 3
1
+ 0
0 V
24 V
24 V
34 35 36
12
37 38 39
13
40 41 42
14A
31 32 33
P
11
43 44 45
15
46 47 48
16
100-240 V
OK RX P 0 P 0 P 0
P 0
P 0 P 0
100-240 V
LNE
ensure DIN rail is
earthed (grounded)
/100-240 USA/UL/24
24 to 36 Vdc
24 Vac
(36 Vdc
maximum
for /UL)
DO NOT APPLY
POWER
O
1
4 5 6
2
7 8 9
3
10 11 12
4
13 14 15
5
16 17 18
6
19 20 21
7
22 23 24
8
25 26 27
9
28 29 30
10
+ 0
+ 0 + 0 + 0 + 0 + 0
+ 0
+ 0
+ 0
1 2 3
1
+ 0
0 V
24 V
24 V
34 35 36
12
37 38 39
13
40 41 42
14A
31 32 33
P
11
43 44 45
15
46 47 48
16
100-240 V
OK RX P 0 P 0 P 0
P 0
P 0 P 0
Cat 5e twisted pair
RJ45
100 m
(max)
Trend Ethernet Products
Engineering Guide
TE200369
Ethernet hub or switch
e.g EDS205 5 port unmanaged switch
(available from IQ system supplier)
Note that a single device may be connected directly to
the IQ3 from Ethernet using the standard Ethernet cable
plus an XCITE/XA crossover adaptor, see ‘Connect
IPTool’ (IQ3 Installation Instructions - Configuration
TG201160, section 1 step 14)
Standard Ethernet
cable
3 INSTALLATION (continued)

IQ3xcite Installation Instructions - Mounting TG200626 Issue 4, 29/12/2010 3
Installation Instructions – Mounting IQ3xcite
6Connect Inputs (channels 1 to 6)
N
7Segregate Screen Earth (Ground)
4 5 6
2
7 8 9
3
10 11 12
4
13 14 15
5
16 17 18
6
19 20 21
7
22 23 24
8
25 26 27
9
28 29 30
10
+ 0
+ 0 + 0 + 0 + 0 + 0
+ 0
+ 0
+ 0
1 2 3
1
+ 0
0 V
24 V
24 V
34 35 36
12
37 38 39
13
40 41 42
14A
31 32 33
P
11
43 44 45
15
46 47 48
16
100-240 V
OK RX P 0 P 0 P 0
P 0
P 0 P 0
4 5 6
2
7 8 9
3
10 11 12
4
13 14 15
5
16 17 18
6
19 20 21
7
22 23 24
8
25 26 27
9
28 29 30
10
+ 0
+ 0 + 0 + 0 + 0 + 0
+ 0
+ 0
+ 0
1 2 3
1
+ 0
0 V
0 (0 V)
N (in)
+ (+24V)
N
e.g
TTL
CMOS
0 V
Current input (external powered)
linking
V
(0 to 10V)
0 (0 V)
N (in)
+ (+24V)
N
Voltage input
Current input (loop powered)
SIG
®1
(0 to 20 mA)
0 (0 V)
N (in)
+ (+24V)
N
®
1
(0 to 20 mA)
0V
SIG
0 (0 V)
N (in)
+ (+24V)
N
linking
linking
Digital input
linking
V
I
ID
Note that setting
input links is
described in
IQ3 Installation
Instructions -
Configuration
TG201160, section 1
step 7
EN61010:2001 MEASUREMENT CATEGORY 1. Separate from 230 Vac input power supply by double or reinforced insulation.
TP/1/1/22/HF/200 (Belden 8761) cable recommended for all inputs. Cable size 0.5 to 2.5 mm2(14 to 20 AWG) - Cu only.
(20 to 36 V)
5 V supply
Thermistor input
0V
0 (0 V)
N (in)
+ (+24V)
N
linking
T
5 V bridge supply
volt free contact
logic open collector
if required to segregate screen earth (ground) from controller input power supply earth (ground)
3 INSTALLATION (continued)
SERVICE
0V
24 V
24 V
34 35 36
12
37 38 39
13
40 41 42
14
A
31 32 33
P
11
43 44 45
15
46 47 48
16
100-240 V
OK RX
P 0P 0 P 0 P 0
P 0
P 0P 0 P 0
4 5 6
2
+ 0
1 2 3
1
+ 0
4 5 6
2
7 8 9
3
10 11 12
4
13 14 15
5
16 17 18
6
19 20 21
7
22 23 24
8
25 26 27
9
28 29 30
10
+ 0
+ 0 + 0 + 0 + 0 + 0
+ 0
+ 0
+ 0
1 2 3
1
+ 0
0 V
24 V
24 V
34 35 36
12
37 38 39
13
40 41 42
14A
31 32 33
P
11
43 44 45
15
46 47 48
16
100-240V
OK RX P 0 P 0 P 0
P 0
P 0 P 0
Note that screen earth (ground) link must be cut (see IQ3 Installation Instructions - Configuration TG201160, section 1 step 8)
separate
earth (ground)
connection

4 IQ3xcite Installation Instructions - Mounting TG200626 Issue 4, 29/12/2010
IQ3xcite Installation Instructions – Mounting
8Connect Outputs (channels 11 to 16)
N
4 5 6
2
7 8 9
3
10 11 12
4
13 14 15
5
16 17 18
6
19 20 21
7
22 23 24
8
25 26 27
9
28 29 30
10
+ 0
+ 0 + 0 + 0 + 0 + 0
+ 0
+ 0
+ 0
1 2 3
1
+ 0
0 V
24 V
24 V
34 35 36
12
37 38 39
13
40 41 42
14A
31 32 33
P
11
43 44 45
15
46 47 48
16
100-240 V
OK RX P 0 P 0 P 0
P 0
P 0 P 0
34 35 36
12
37 38 39
13
40 41 42
14
31 32 33
11
43 44 45
15
46 47 48
16
P 0 P 0 P 0
P 0
P 0 P 0
IQ3
Relay
Module
SRMV =
x 1
2SRM =
x 2
3RM =
x 3
6RM =
x 6
2RM =
x 2
nRM
N
Additional Relay Modules
(R/L, H/L)
(HCM/TRM)
Cable size 0.5 to 2.5 mm2(14 to 20AWG) - Cu only
0
(out) N
P
NLOAD
(0 V)
(+24 V)
optional
(0 to 10 Vdc, <=20 mA)
If P terminal used, P input terminal must
be connected as in step 9 below
I<=20 mA
TP/1/1/22/HF/200 (Belden 8761) cable recommended for voltage outputs
EN61010:2001 MEASUREMENT CATEGORY 1. Separate from 230 Vac input power supply
by double or reinforced insulation
If screened cable is used, terminate screen to earth (ground) at one end
WARNING
If external supply is used to supply P input terminal, note whether
P bus is 24 Vac or 24 Vdc and only connect appropriate output
devices to P output terminals
e.g.
IQ3 SRMV
P
0
SRMAC Analogue
outputs are
not suitable
for ac relays
9Connect Output Power (P)
3 INSTALLATION (continued)
either use IQ3 24 Vdc auxiliary supply
4 5 6
2
7 8 9
3
10 11 12
4
13 14 15
5
16 17 18
6
19 20 21
7
22 23 24
8
25 26 27
9
28 29 30
10
+ 0
+ 0 + 0 + 0 + 0 + 0
+ 0
+ 0
+ 0
1 2 3
1
+ 0
0 V
24 V
24 V
34 35 36
12
37 38 39
13
40 41 42
14A
31 32 33
P
11
43 44 45
15
46 47 48
16
100-240 V
OK RX P 0 P 0 P 0
P 0
P 0 P 0
or use 24 Vdc or 24 Vac external supply
A
0 V
24 V
24 V
A
31 32 33
P
11
P 0
Fit external link
if P terminal used (see step 8 above)
Check IQ3 24 Vdc combined and
auxiliary output current availability:
IQ3 Configuration Manual TE200768
A
PSU
0V
24 V
24 V
A
31 32 33
P
11
P 0
External PSU
WARNING
External PSU must be dedicated to
I/O channel use, and comply with
relevant EMC and safety standards
WARNING
If external supply is used, note whether P bus is 24 Vac
or 24 Vdc and only connect appropriate output devices
to P output terminals
EN61010:2001
MEASUREMENTCATEGORY1
Separate from 230 Vac input
power supply by double or
reinforced insulation
Connect external supply (no external link)
terminal size 0.5 to 2.5 mm2(14 to 20 AWG)
10 Connect Auxiliary Supply (24 V ) if required
4 5 6
2
7 8 9
3
10 11 12
4
13 14 15
5
16 17 18
6
19 20 21
7
22 23 24
8
25 26 27
9
28 29 30
10
+ 0
+ 0 + 0 + 0 + 0 + 0
+ 0
+ 0
+ 0
1 2 3
1
+ 0
0 V
24 V
24 V
34 35 36
12
37 38 39
13
40 41 42
14A
31 32 33
P
11
43 44 45
15
46 47 48
16
100-240 V
OK RX P 0 P 0 P 0
P 0
P 0 P 0
A
0 V
24 V
24 V
A
P
IQ3
24 V
0 V
A
terminal size 0.5 to 2.5 mm2 (14 to 20 AWG)
Imax = 150 mA(including current to P bus,
- see step 9 above)
Check IQ3 24 Vdc
combined and
auxiliary output
current availability:
IQ3 Data Sheet
TA200505
Note that the 24 Vdc supply is normally about 22 V
and drops to about 20.7 V at full load.
EN61010:2001 MEASUREMENT CATEGORY 1
Separate from 230 Vac input power supply by double
or reinforced insulation

IQ3xcite Installation Instructions - Mounting TG200626 Issue 4, 29/12/2010 5
Installation Instructions – Mounting IQ3xcite
11 Auxiliary Board Installation
12 Install I/O Modules (IQ3XCITE/96/.. and /128.. only)
3 INSTALLATION (continued)
13 Connect I/O Bus (IQ3XCITE/96/.. and /128.. only)
if auxiliary board already fitted
(for fitting and installing battery board, XCITE/BBC, see IQ3 Installation Instructions - Configuration TG201160,
section 1 step 10). Note that fitting IQ3/LAN/UGR Lan board upgrade is described in IQ3/LAN/UGR installation
instructions TG201162.
for IQ3../.../XNC/..., including
IQ3../.../LAN/XNC/..., IQ3../.../SER/XNC/...
IQ3../.../XNC/... Installation
Instructions-Mounting, TG200911
section 1
for IQ3../.../LAN/...
IQ3../.../LAN/... Installation
Instructions-Mounting, TG200916
section 1
XCITE Standard I/O Modules Installation Instructions-Mounting
TG200627, section 3 steps 1 to 11 only
if required
Remove Terminator
b
XCITE/IC interconnector (supplied)
(XCITE/IC/5, pack of 5 available separately)
Open Flap
a• A maximum of 15 I/O modules can be connected.
• A maximum of 96 or 128 points (16 points in the
IQ3xcite and 80 or 112 expansion points) can be
used.
• The controller and its I/O modules are to be fitted
inside enclosures.
• No spurs are allowed on the I/O bus.
• If a single earth (ground) screened and bonded
contiguous metal enclosure is used, then total
I/O bus length can be up to 30 m (includes use of
multisection panels e.g. Form 4 enclosures)
If any other type of enclosure is used, or I/O bus
runs between enclosures, then total I/O bus cable
length can be up to 10 m.
(For cable length calculation, rigid interconnectors
can be ignored)
•Multiple enclosures must be earthed (grounded)
to a common earth (ground) point (according to
latest IEE Regs).
either use XCITE/IC interconnector (supplied with I/O module)c
4 5 6
2
7 8 9
3
10 11 12
4
13 14 15
5
16 17 18
6
19 20 21
7
22 23 24
8
25 26 27
9
28 29 30
10
+ 0
+ 0 + 0 + 0 + 0 + 0
+ 0
+ 0
+ 0
1 2 3
1
+ 0
0 V
24 V
24 V
34 35 36
12
37 38 39
13
40 41 42
14A
31 32 33
P
11
43 44 45
15
46 47 48
16
100-240 V
OK RX P 0 P 0 P 0
P 0
P 0 P 0
24 V
P13 14 15
5
P 0
16 17 18
6
P 0
19 20 21
7
P 0
22 23 24
8
P 0
1 2 3
1
+ 0
4 5 6
2
+ 0
7 8 9
3
+ 0
10 11 12
4
+ 0
continued next page

6 IQ3xcite Installation Instructions - Mounting TG200626 Issue 4, 29/12/2010
IQ3xcite Installation Instructions – Mounting
13 Connect I/O Bus (continued)
DIN rails must
be earthed
(grounded)
DIN rails must be
earthed (grounded)
cable type B
(left to left)
+24 Vdc
0 V
Data Hi
Data Lo
+24 Vdc
0 V
Data Hi
Data Lo
Ground Ground
Red
White
Blue
Black
5
4
3
2
1
5
4
3
2
1
Signal direction
connector rotated
through 180 °
XCITE/CC connectors
Order separately (XCITE/CC/10, pack of 10)
Belden 3084A cable
cable type B
(right to right)
cable type B (right to right)
cable type A
cable type A
+24 Vdc
0 V
Data Hi
Data Lo
+24 Vdc
0 V
Data Hi
Data Lo
Ground Ground
Red
White
Blue
Black
1
2
3
4
5
1
2
3
4
5
Belden 3084A cable
XCITE/CC connectors
Order separately (XCITE/CC/10, pack of 10)
+24 Vdc
0 V
Data Hi
Data Lo
+24 Vdc
0 V
Data Hi
Data Lo
Ground Ground
Red
White
Blue
Black
1
2
3
4
5
5
4
3
2
1
or wire special cable using XCITE/CC connectors and Belden 3084A cable
cable type B (left to left)
Note that the maximum current that can be flow through an I/O module using the 24 Vdc and 0 V terminals, from one module
to the next, is 2.5 A.
WARNING: External PSU must have isolated output and
comply with relevant EMC and safety standards IQ3 Configuration Manual TE200768
An additional 24 Vdc ±15% power supply must be used to supply the IO modules if:
• There are more than 6 I/O modules (excluding /8AO, /4AO, /16DI, /8DI, /8DI/8TI, /8DO/HOA, /4DO/HOA, and
/8DO serial number >= M3D8 C0 508 1136, /4DO serial number >=M3D4 C0 508 012; which do not need to be
included in the count).
or • The main controller 24 Vdc combined supply would be overloaded Check
IQ3xcite 24 Vdc
combined supply
current availability
Fully screened and bonded contiguous multi-section cabinet
terminator
type B
type A type B
L+
L+
L-
L-
L
N
DC
ADJ.
IN
PSR
L+
L+
L-
L-
L
N
DC
ADJ.
IN
PSR
continued next page
3 INSTALLATION (continued)
c continued

IQ3xcite Installation Instructions - Mounting TG200626 Issue 4, 29/12/2010 7
Installation Instructions – Mounting IQ3xcite
13 Connect I/O Bus (continued)
14 Terminate I/O Bus
ba Open flap Plug in terminator (supplied) cClose flap
XCITE/TERM terminator
(supplied with IQ3xcite)
(XCITE/TERM/5,
pack of 5 available separately)
15 Configure IQ3
L+
L+
L-
L-
L
N
DC
ADJ.
IN
Black
Red
Black
White
Blue
PSR
1
2
3
4
5
L+
L+
L-
L-
L
N
DC
ADJ.
IN
Black
Red
Black
White
Blue
PSR
5
4
3
2
1
24 Vdc
PSU
+24 Vdc
0 V
Data Hi
Data Lo
+24 Vdc
0 V
Data Hi
Data Lo
Ground Ground
White
Blue
Black
Black Red
1
2
3
4
5
5
4
3
2
1
24 Vdc
PSU
+24 Vdc
0 V
Data Hi
Data Lo
+24 Vdc
0 V
Data Hi
Data Lo
Ground Ground
White
Blue
Black
Black Red
1
2
3
4
5
5
4
3
2
1
230 Vac input
power supply
External PSU with isolated output
External PSU with isolated output XCITE/PCON/50, for adjacent
modules available, order separately
(modules separated by 10 mm)
XCITE/PCON/1000, 1 metre cable (typeA)
available, order separately
Close flapd
Trend can supply the PSR range of DIN rail mounted auxiliary power supplies (e.g. 1.3 A or 2.5 A). They have isolated outputs.
230 Vac input
power supply
PSR connection to right side
PSR connection to left side
c continued
3 INSTALLATION (continued)
IQ3 Installation Instructions -
Configuration, TG201160

8 IQ3xcite Installation Instructions - Mounting TG200626 Issue 4, 29/12/2010
IQ3xcite Installation Instructions – Mounting
© 2010 Honeywell Technologies Sàrl, ECC Division. All rights reserved. Manufactured for and on behalf of the Environmental and Combustion Controls
Division of Honeywell Technologies Sàrl, Z.A. La Pièce, 16, 1180 Rolle, Switzerland by its Authorized Representative, Trend Control Systems Limited.
Trend Control Systems Limited reserves the right to revise this publication from time to time and make changes to the content hereof without obligation
to notify any person of such revisions or changes.
Trend Control Systems Limited
Albery House, Springfield Road, Horsham, West Sussex, RH12 2PQ, UK. Tel:+44 (0)1403 211888 Fax:+44 (0)1403 241608 www.trendcontrols.com
Trend Control System USA
6670 185th Avenue NE, Redmond, Washington 98052, USA. Tel:(425) 869-3900 Fax:(425) 869-8445 www.trendcontrols.com
4 DISPOSAL
WEEE Directive:
At the end of their useful life the packaging and
product should be disposed of by a suitable
recycling centre.
Do not dispose of with normal household waste.
Do not burn.
Table of contents
Other TREND Controllers manuals

TREND
TREND IQ4E User manual

TREND
TREND CNC2 User manual

TREND
TREND IQ41 Series User manual

TREND
TREND IQECO31/230 User manual

TREND
TREND IQX12 User manual

TREND
TREND AL0620-24-K User manual

TREND
TREND IQ41 Series User manual

TREND
TREND IQ23 Series User manual

TREND
TREND IQ251 User manual

TREND
TREND LonMark IQL13+ Series User manual
Popular Controllers manuals by other brands

Emerson
Emerson Dixell XR75CX Series Installation and operation manual

Traxxas
Traxxas EVX-2 Marine instructions

Tekonsha
Tekonsha Prodigy RF installation guide

Honeywell
Honeywell HON 380 User and maintenance instructions

ANDERSON-NEGELE
ANDERSON-NEGELE AV-9900 Basic configuration guide

Zanotti
Zanotti DFZ Description and Operation Manual