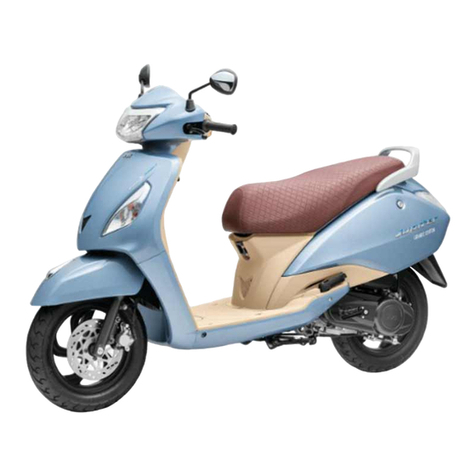
TVS WEGO 110 User manual

OWNER’S MANUAL

FOREWORD
1
FOREWORD
Dear WEGO Owner,
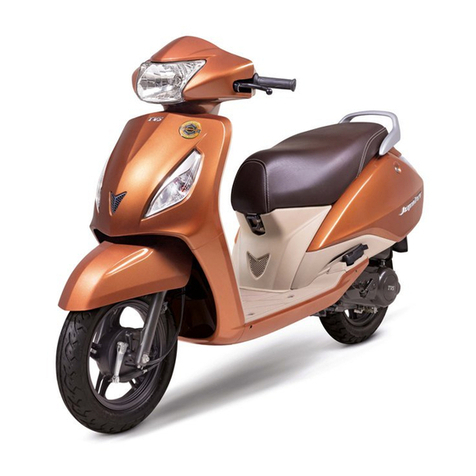
Thank you for choosing TVS WEGO , a Multi-User friendly, scooter with Body Balance Technology, CVT-i Engine &
many class-leading features. With its aerodynamic stance, unrivaled comfort and best in class mileage, Wego
represents a new direction in the class of scooters. Hand-crafted for dual usage and urban mobility, Wego is the
luxury scooter that adapts to your needs and personality.
It's more than a scooter. It is a statement, an intelligent choice. As a proud owner of TVS WEGO, you are now part of
a family of millions of satisfied TVS customers.
This manual explains the features and operations of your TVS WEGO. Kindly read it carefully and follow the
instructions to enjoy years of safe riding. To ensure reliable performance, we urge you to get your TVS WEGO
serviced only at TVS Motor Company Authorised Dealers / Authorised Service Centers at specified Distributor or
regular periodic intervals.
We welcome you once more to a world of comfortable and easy riding!
TVS MOTOR COMPANY LIMITED

NOTICE
2
All information, illustrations, photographs and specifications contained in this owner‘s manual are based on the
latest product information available at the time of this publication. TVS Motor Company Limited may, however
incorporate modifications or improvements on its vehicles at any time without notice and therefore, in such
events it is possible that the relevant part of the owner‘s manual does not apply to your vehicle.
Prior permission of TVS Motor Company Limited is required for quoting, copying or reproducing any part of this
owner‘s manual.
Part number:- K6210560 Revision 0, July 2014
Accessories shown in the picture may not be part of the standard equipment.
This mannual is applicable for TVS WEGO Drum & Disc versions and TVS WEGO Refresh.
NOTICE
Note

CONTENTS
3
CONTENTS
Information 04
Safe Riding Tips 05
Know your TVS WEGO 08
Riding your TVS WEGO 29
Maintenance 33
Service Record Sheet 52
Technical Specifications 54

4
INFORMATION
Operating this vehicle safely is an important
responsibility of the rider. To help you make decisions
about safety, we have provided operating procedure
and other information in this manual. This information
alerts you on potential hazards that could hurt you or
others. Since it is not possible to warn you about all
hazards associated with operating or maintaining the
vehicle, you must use your own judgement.
You will find important safety information in following
form in this manual. These words carry the following
connotations:
Disregarding this message might result in injury to the rider.
This message indicates special procedures or precautions to be
followed to avoid damage to the vehicle.
This message provides further clarification for clearer
understanding of any particular information.
Warning
Caution
Note
INFORMATION
SAFETY INFORMATION
The first 1000 km is a crucial part of your scooter.
Proper running-in operation during this period helps in
ensuring a maximum life and smooth performance of
your scooter.
The reliability and performance of your scooter
depends on the special care and restraint exercised
during the running-in period. It is especially important
that you avoid operating the engine in high speed
(RPM), which could expose the engine parts to
excessive stress. Maximum recommended speed
during the running-in is:
Maximum 50 kmph speed upto 1000 km (vary the
engine speed for better mating of parts).
The first service at 500 ~ 750 km is most important.
During running-in period all the engine components
and other parts will have set in. All adjustments to be
restored, all fasteners to be tightened. Engine and
transmission oil to be replaced. Timely performance of
the first free service will ensure optimum service life
and performance from the engine.
RUNNING-IN INFORMATION

5
SAFE RIDING TIPS
SAFE RIDING TIPS
SAFE RIDING RECOMMENDATIONS
Any two wheeler riding requires some precautions to
be taken to ensure the safety of the rider, pillion and
other road users. These precautions are:
Familiarise yourself with TVS WEGO
Riding skill and your mechanical knowledge form the
foundation of safe riding practices. We suggest you to
practice riding TVS WEGO in a low-traffic condition
until you are thoroughly familiar with your vehicle and
its controls. Remember practice makes you perfect.
Riding apparel
Loose, fancy clothing can be uncomfortable and
unsafe when riding a two-wheeler. Choose good
quality two wheeler riding apparel.
Two wheeler safety equipment starts with a safety
helmet of good quality. One of the most serious injuries that
can happen is a head injury. Always wear good quality helmet.
You should also have good suitable eye protection.
Warning
Know your limits
Ride within the boundaries of your own skill at all
times. Knowing these limits and staying within the
limits will help you avoid accidents.
Posture
Proper vehicle riding starts with proper posture.
1. Keep your elbows inside close to the body and
flexible.
2. Hold your arms at an angle of about 120°.
3. Hips should be in a position so that arms and
shoulders are relaxed.
4. Look widely instead of gazing at one point.
5. Relax to guard against a sudden impact.
6. Point the toes straight ahead.
Cornering
When cornering, centrifugal force works in a direction
perpendicular to the direction in which the vehicle is
moving. Centrifugal force increases in proportion with

6
SAFE RIDING TIPS
SAFE RIDING TIPS
speed and the radius of the corner.
During cornering, reduce speed so as to lessen the
effects of centrifugal force. By all means, avoid abrupt
application of brake or sudden steering.
Warning
One-hand riding is dangerous. Keep both hands firmly on
the handle bar and both feet securely on the floor board.
Under no circumstances should both the hands be removed
from the handle bar, as it is very dangerous.
Avoid use of mobile phones while riding as it could lead
to fatal accident.
Slow down to a safe speed before negotiating a corner. If this is
the first time that you are riding a vehicle of this type, we
suggest that you practice on a safe, open area to become
thoroughly familiar with the operation of the vehicle.
Braking
For safe riding, it is very important to master the
braking techniques.
1. Close / release the throttle.
2. Hold the vehicle upright as you apply the brake.
3. Progressive application of brake is safer.
4. Apply both the brakes.
5. Riding down hills, while cornering and wet roads
close throttle and come to a slower speed to
avoid the loss of control over the vehicle due to
skidding.
Causes for poor braking
1. If the brake shoes / pads or drum / disc are worn
out or if there is water or oil on them, sufficient
friction does not develop and brakes do not work
well.
2. Even when the brake works normally, if the road
surface is wet or the tyre surface is worn-out,
tyres do not take a firm hold on the surface,
increasing the stopping distance.
3. Approximately 60% braking effect is from f r o n t
brake. Non-usage of front brake causes poor
braking.

7
SAFE RIDING TIPS
SAFE RIDING TIPS
Warning
As the vehicle speed increases, the stopping distance also
increases progressively. Be sure that, you have sufficient
distance between you and the vehicle or obstruction ahead of
you.
Using only the front or rear brake is dangerous and can cause
skidding and loss of control. Apply both the brakes together
and with great care on a wet road or other slippery surfaces.
Any abrupt braking on slippery or irregular roads can cause
loss of rider control.
ACCESSORY INSTALLATION AND SAFETY TIPS
Use extreme caution while selecting and installing the
accessories for your scooter.
The addition of unsuitable accessories can lead to
unsafe operating conditions. Your friendly Dealer will
assist you in selecting quality accessories and
installing them correctly.
While selecting the accessories, make sure the
accessories should not obstruct lighting, steerability,
suspension level and ground clearance.
Additional electrical equipments and controls should
not exceed the specified electrical system load of the
vehicle (capacity of battery and magneto).
EMISSION CONTROL
All the TVS vehicles are tested in the factory for
optimum fuel efficiency and lowest possible CO levels.
Do not disturb the Carburettor settings as this may
lead to higher fuel consumption and also higher CO
levels.
If the vehicle needs any adjustments, please consult
nearest TVS Motor Company Authorised Distributor
or Dealer / Authorised Service Centers.
While adequate care is exercised at the factory to
ensure that the emissions are within the limits, it is
essential for the owner to always maintain the scooter
in good condition by getting it periodically checked
and serviced by TVS Motor Company Authorised
Distributor or Dealer / Authorised Service Centers so
that the emission and fuel consumption levels are
maintained as per norms.
8
KNOW YOUR TVS WEGO
KNOW YOUR TVS WEGO
VEHICLE IDENTIFICATION NUMBER
Serial numbers of both frame and engine are required for vehicle identification. They are also required to assist
your Dealer for ordering parts or referring to special information.
The engine serial number is stamped on the left side of
the engine, at bottom, near centre stand mounting.
See bottom to read serial number.
The frame serial number is stamped on the frame, at
the rear end below the seat assembly. Open the seat
assembly to read the frame number.
Frame number
Engine number
Control key number Please fill the above box now for future reference

9
KNOW YOUR TVS WEGO
KNOW YOUR TVS WEGO
8
7
6
5
4
3
2
1
910 11 12
13
14
15
16
17
LOCATION OF PARTS - HANDLE BAR
HANDLE BAR For WEGO Drum & Disc Version
1. Glove box lock**
2. Bag hook
3. Choke knob
4. Horn switch
5. Turn signal lamp switch
6. Rear brake lever
7. Rear view mirror L
8. High / low beam switch
9. Fuel gauge
10. Speedometer assembly
11. Brake fluid inspection window
12. Rear view mirror R
13. Front brake lever
14. Throttle grip
15. Light ON/OFF switch
16. Electric starter switch
17. Ignition cum steering lock
** Applicable for select variant only

10
KNOW YOUR TVS WEGO
KNOW YOUR TVS WEGO
HANDLE BAR For WEGO Refresh
* Applicable for select variant only
** Applicable only for disc brake model
1. Glove box lock*
2. Bag hook (front)
3. Choke knob
4. Horn switch
5. Turn signal lamp switch
6. Rear brake lever
7. Parking brake (rear brake lock)
8. Rear view mirror L
9. High / low beam switch
10. Full digital speedometer
11. Rear view mirror R
12. Brake fluid inspection window**
13. Front brake lever
14. Throttle grip
15. Lights switch (ON/OFF)
16. Electric starter switch
17. Ignition cum steering lock
1
89 11
12
13
14
15
16
17
10
2
5
3
6
4
7

10 11
12
3
4
5
6789
11
KNOW YOUR TVS WEGO
KNOW YOUR TVS WEGO
LOCATION OF PARTS - VEHICLE LEFT SIDE
1. Rear brake adjuster nut
2. Lady foot rest - foldable
3. Kickstarter lever
4. Patented E-Z centre stand
5. Side stand*
6. Pillion foot rest L
7. Floor mat
8. Speedometer cable
9. Front brake adjusting nut
10. Seat cum fuel tank cap lock
11. Pillion handle
Vehicle shown is drum brake version * Mandatory accessory will be charged extra

12
3
4
5
6
7 8
12
KNOW YOUR TVS WEGO
KNOW YOUR TVS WEGO
LOCATION OF PARTS - VEHICLE RIGHT SIDE
Vehicle shown is drum brake version * Mandatory accessory will be charged extra
1. Front wheel axle nut
2. Cover front
3. Pillion foot rest R
4. Gauge oil level
5. Muffler assembly
6. Rear fender
7. Fuel tank cap
8. Seat assembly

1
2
3
4
5
6
8
9
10
11
12
13
7
13
KNOW YOUR TVS WEGO
KNOW YOUR TVS WEGO
Vehicle shown is drum brake version
FRONT
1. Head lamp
2. Head lamp focus adjust screw
3. Turn signal lamp L
4. Position lamp L
5. Position lamp R
6. Turn signal lamp R
7. License plate front*
8. Throttle cable adjuster
REAR
9. Fuel tank cap
10. Tail lamp
11. Licence plate lamp
12. Licence plate rear*
13. Transmission oil level screw
LOCATION OF PARTS - VEHICLE FRONT & REAR
* Optional accessories will be charged extra

14
KNOW YOUR TVS WEGO
KNOW YOUR TVS WEGO
CONTROL KEY
TVS WEGO comes with a pair of identical control keys.
These keys are to operate ignition cum steering lock,
seat lock, fuel tank cap and glove box(optional).
IGNITION CUM STEERING LOCK
TVS WEGO is provided with a self illuminating ring
(glow ring) around the ignition cum steering lock, for
better visibility of lock location in darkness.
Ignition cum steering lock
There are three positions in the ignition cum steering
lock. They are:
1. ‘OFF’ position
All the electrical circuits are turned ‘OFF‘ in this
position. Engine will not start . Key can be taken out.
2. ‘ON’ position
In this position, all the electrical circuits are turned
‘ON’ and the engine can be started now. Key cannot be
removed in this position.
3. ‘LOCK’ position
TVS WEGO steering can be locked in both ‘left’ and
‘right’ directions.
To lock the steering, turn the handle bar all the way to
the ‘left’ or ‘right’. Push the key in and turn it to the
‘LOCK’ position and take out. All the electrical circuits
are turned ‘OFF’ in this position. Insert the key into the
lock and turn it to ‘OFF’ or ‘ON’ position to unlock the
steering.
Leaving the ignition cum steering lock in ‘ON’ position will
drain the battery when the vehicle is not in use. So “Switch Off”
and take the key out when the vehicle is not in use.
Caution

15
KNOW YOUR TVS WEGO
KNOW YOUR TVS WEGO
Never attempt to move the vehicle when the steering is locked,
you may lose balance.
When the ignition lock is turned ‘ON’, the speedometer
performs self test and the back light of the speedometer glows
continuously. Wait till the self test cycle of speedometer gets
over.
Warning
Note
2
1
345
6
SPEEDOMETER ASSEMBLY
1. Fuel gauge
Fuel gauge indicates the approximate quantity of fuel
available in the fuel tank. Fill fuel as soon as possible
when the fuel gauge needle enters into the red band
indicated on the gauge dial.
Approximately 1 litre of petrol will be available in the
tank when the needle is in ‘RED’ band of speedometer
dial. Approximately 4.0 litres of petrol will be available
in the tank when the needle is in ‘F’ position.
2. Turn signal indicator lamp left
Turn signal indicator lamp left flashes when the turn
signal lamp switch knob is pushed to the left.
3. Speedometer
Indicates vehicle speed in kilometers per hour.
4. Odometer
Registers the total distance covered by the vehicle in
kilometers. The last digit denotes one tenth of a
kilometer.
5. High beam indicator lamp
When the head lamp high beam is ‘ON’, a blue high
Speedometer Assembly For WEGO Drum & Disc Version

16
KNOW YOUR TVS WEGO
KNOW YOUR TVS WEGO
beam indicator lamp will glow.
6. Turn signal indicator lamp right
Turn signal indicator lamp right flashes when the turn
signal lamp switch knob is pushed to the right.
FULL DIGITAL SPEEDOMETER
3 4
6
2
5
1. Mode switch
Press the switch to change the display mode (‘ODO’ or
‘TRIP’).
2. High beam indicator lamp
Glows when the head lamp high beam is activated.
3. Turn signal indicator lamp left
Flashes when the left side turn signal indication is
activated.
4. Turn signal indicator lamp right
Flashes when the right side turn signal indication is
activated.
5. Economy and power indicators
Economy indicator (green lamp) indicates that the
vehicle is running in economy mode which gives
better fuel economy.
Power indicator (amber lamp) indicates that the
vehicle is running in power mode
Always ride the vehicle in economy mode for better fuel
efficiency.
Note
Speedometer Assembly For WEGO Refresh
1

17
KNOW YOUR TVS WEGO
KNOW YOUR TVS WEGO
Note
When the engine is started first time and restarting of engine
from switch off condition, the power mode indicator blinks. If
the engine remains running in idle condition for approximately
110 seconds and informs you that the fuel is getting wasted
and the engine needs to be switch ‘OFF’ to save the fuel.
Similarly, during running, if the engine is kept more than 20
seconds in idling condition, the power mode indicator blinks
and warns again.
If the battery voltage is very low, power mode lamp will glow
once you switch ‘ON’ the ignition key till you start the vehicle.
Electric starter will not work in this condition. Use kick starter
only. Contact TVS Motor Company Authorised Distributor or
Dealer / Authorised Service Centers for assistance.
6. Multi functional digital display
E
F
a
b
c
d
e
a. Odometer / trip meter
Odometer registers and displays the total distance
covered by the vehicle in kilometers. The digit after
the dot mark denotes one tenth of a kilometer. Set
the display in ‘ODO’ mode to know the reading.

18
KNOW YOUR TVS WEGO
KNOW YOUR TVS WEGO
Trip meter registers and displays the partial distance
covered in kilometers. The digit after the dot mark
denotes one tenth of a kilometer. Set the display in
‘TRIP’ mode to know the reading. P r es s t he m o de
switch for a few seconds (in ‘TRIP’ mode) to reset trip
meter whenever required.
b. Speedometer
Digital bars displays the driving speed in kilometer per
hour (km/h) in real time. Each bar indicates 2 km/h.
c. Fuel gauge
Digital bars indicates the approximate fuel quantity
available in fuel tank. There are eight bars to indicate
the quantity of fuel available in the fuel tank. All the
eight bars will be displayed when the fuel in the tank
reaches 4.8 liters approximately (full tank).
When the fuel reaches half tank (2.5 liters approx.)
the fuel gauge displays only four bars as shown.
The fuel gauge shows only single bar when the fuel
reaches reserve level (1.0 liter approx.) At the same
time a fuel tank symbol (A) starts to blink indicating
that the fuel reached to reserve level and the fuel
need to be refilled immediately. Once the fuel level
reaches 0.5 liter (empty), no bar will be visible and
the fuel tank symbol (A) keeps blinking.
E
F
E
F
E
F
E
F
A

19
KNOW YOUR TVS WEGO
KNOW YOUR TVS WEGO
Please note that, the fuel gauge is not a mileage
calculating medium and it should not be used for
calculating the mileage.
d. Service reminder
If the service is due, whenever the ignition switch is
turned ‘ON’, an icon with spanner symbol ‘ ’
blinks for 10 seconds after the self test cycle of
speedometer and continues to glow till the vehicle is
serviced and reset. Get the vehicle serviced at TVS
Motor Company Authorised Distributor or Dealer /
Authorised Service Centers.
e. Low battery indicator
An icon with battery symbol ‘ ’ glows when the
battery charge is too low. Contact your nearest TVS
Motor Company Authorised Distributor or Dealer /
Authorised Service Centers.
Service reminder indicator lamp works only based on the
distance (km) covered by the vehicle. This is only a reminder
indicator. Customers are advised to keep track and follow the
service schedule.
Note
HANDLE BAR LEFT SIDE
3
4
12
Handle Bar Left Side For WEGO Drum & Disc Version
1. Horn switch for Both Versions
Press the switch ‘ ’ to operate the horn.
2. Turn signal lamp switch for Both Versions
Slide the turn signal lamp switch to left ‘ ’ or right
side ‘ ’ to operate respective turn signal lamps (LH /
RH). Press the switch to turn ‘OFF’.
3. Rear brake lever for Both Versions
The rear brake is applied by squeezing the rear brake
Table of contents
Other TVS Scooter manuals

TVS
TVS Jupiter ZX User manual

TVS
TVS Jupiter BS-VI User manual

TVS
TVS NTORQ 125 User manual

TVS
TVS WEGO User manual

TVS
TVS Scooty Pep Plus User manual

TVS
TVS ETFI Jupiter User manual

TVS
TVS Jupiter BS-V1 User manual

TVS
TVS NTORQ 125 User manual

TVS
TVS JUPITER GRANDE EDITION User manual

TVS
TVS iQUBE User manual