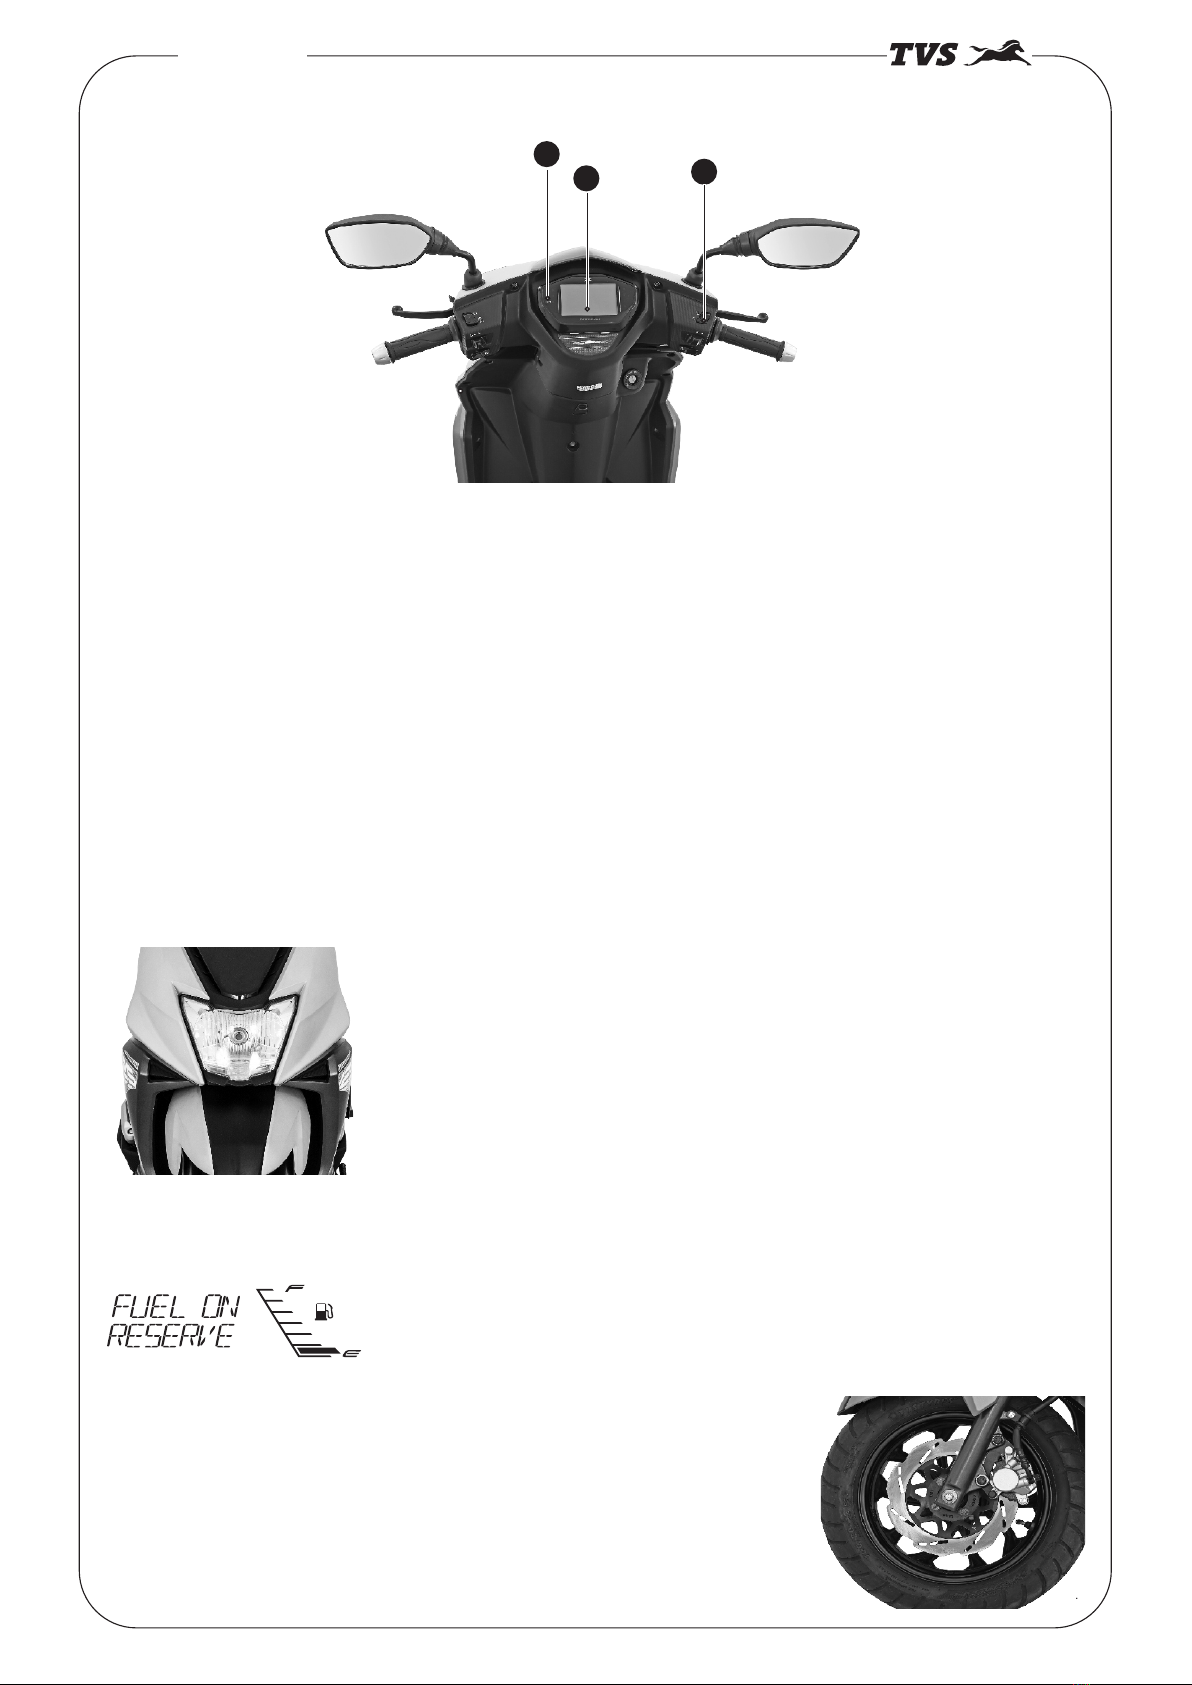
TVS NTORQ 125 Installation guide

TRAINING HAND BOOK
NOTICE
All information including in this publication is based on the latest product information available at the time of
approval from printing
All the illustrations given in this manual may vary from the actual vehicles
TVS MOTOR COMPANY LIMITED reserves the right to make changes at any time without prior notice and
without any obligations what so ever
No parts of this publication should be reproduced without written permission from TVS MOTOR COMPANY
LIMITED
-I-
NTORQ 125

CONTENTS
DESCRIPTION PAGE NO
View of NTORQ 125 1
Feature of NTORQ 125 2
Technical specification 22
Dimension and weight 22
Engine 22
Transmission 22
Chassis 22
Electrical 23
Capacity 23
Periodic maintance 24
Lubrication schedule 25
Service schedule 25
Electrical system 26
Electrical component 28
Mandatary job in LH & RH jobs 29
Activity 30
-II-
NTORQ 125

TVS NTORQ 125
RIGHT SIDE VIEW
LEFT SIDE VIEW
-01-
NTORQ 125

FEATURES OF TVS NTORQ 125
-02-
.
NTORQ 125
5
23
1
1) FULLY DIGITAL SPEEDOMETER - SMART CONNECT -BLUETOOTH CONNECTIVITY
The scooter is fitted with full digital speedometer. This first in class speedometer housing of your scooter.The
speedometer of scooter has a inbuilt bluetooth connectivity through which you can connect your android smart phone
to access features like CALLER ID and SMS notification on speedometer and ride status share last parked location on
your android smart phone.
2) ECONOMETER
Your scooter’s speedometer has an ‘ECONOMETER’ witch indicates weather you are riding in economy
mode or power mode. This is an unique feature of your scooter which guides you to ride your scooter fuel
efficiently
3) ENGINE KILL SWITCH
Engine kill switch is an another unique feature whichh allows to shut the engine without switching OFF the ignition.
HEADLAMP WITH DRL
Your scooter has a brightest Headlamp with multi Focal reflector and halogen
bulb for better visibility. It also has a stylish ‘Day Running Lamp’ Day -DRL at
the bottom
LOW FUEL INDICATOR
‘LOW FUEL INDICATOR’ is yet another unique feature of scooter which
indicates you to refill the fuel when the fuel in tank goes below the minimum
safe level
PETAL DISC BRAKE
Your scooter is fitted with ‘220 mm Roto - Petal Disc’ at the front for effective
braking and safe riding even at higher speeds.

FEATURES OF TVS NTORQ 125
-03-
NTORQ 125
1
1
1) DIAMOND - CUT ALLOY WHEELS
The scooter has sporty diamond cut alloy wheels
2
3
2) PATENTED E-Z CENTRE STAND
‘E-Z Centre Stand’ of your scooter reduces the effort required to place the scooter on stand.
3) TEXTURED FLOORBOARD
Your scooter comes with a stylish textured floor board.
AUTO-CHOKE
The auto-choke helps your scooter start effortlessly even in cold weather
LED TAIL LAMP-CUM -BRAKE LAMP
Your scooter has a ‘LED Tail lamp-cum-brake lamp’for better visibility
and stylish looks.
SMART PHONE CHARGER AND UTILITY BOX LIGHT
Your scooter has a ‘Smart Phone Charger’ enable to charge your mobile phone
when you are travelling. The ‘Utility Box Light’ which lights up the utility box
whenever the seat is open.

FEATURES OF TVS NTORQ 125
Digital speedometer :
1. Economy and power indicator
Eco indicator (green lamp) indicates that the vehicle is running in economy mode which gives better fuel
economy.Power indicator (amber lamp) indicates that the vehicle is running in power mode which results in
reduced fuel economy.This indicator glows only when the engine is ON.
2. High beam indicator lamp ( )
Glows when the head lamp is activated in high beam.
3. Turn signal indicator left ( )
Flashes when the ‘left’ side turn signal indication is activated.
4. Turn signal indicator right ( )
Flashes when the ‘right’ side turn signal indication is activated.
5.Low fuel indication ( )
The low fuel indicator glows when the fuel level reaches to reserve fuel level and a message ‘FUEL ON
RESERVE If the fuel level reaches empty level, the low fuel indicator continues to glow and a message ‘FUEL ’
EMPTY’
6. Smart-connect Notification LED
A green colour LED indicator glows and indicates whenever there is an incoming call or message received by
the ‘Smart Phone’ paired with your TVS NTORQ 125.speeometer
33 44
66
77
11 22
55
88
-04-
NTORQ 125

7. Alpha numeric display
The customized alpha-numeric display indicates different modes of instrument cluster, vehicle information and
smart-connect related messages, when the ignition key is turned ON.
8. Mode and Set buttons
Mode button is used to change the connected instrument cluster display to various modes like ‘Street mode’,
‘Sport mode’, ‘Ride stats mode’ etc.
Set button is used to ‘set’ or ‘erase the stored value’ in various modes.
MODE AND SET BUTTONS :
TVS NTORQ 125’s connected instrument cluster having five modes and their selection and their work explained
below.
1. Street mode 2. Sport mode 3. Ride stats mode 4. BT pair mode
5. Set clock mode
1. Street mode
NTORQ 125
-05-
1a
1i 1b
1c1e 1d
1f
1g
1h

In street mode, the following features will be displayed on the connected instrument cluster :
1a. Odometer
1b. Clock
1c. Fuel gauge
1d. Speedometer
1e. Engine temperature gauge
1f. Helmet icon
1g. Low battery indicator
1h. Service reminder
1i. Trip A, B and F
1a. Odometer
Odometer registers the total distance covered by the vehicle in kilometer.
1b. Digital clock
Indicates the time in 12 hour format (AM or PM).
1c. Fuel gauge
It indicates the approximate quantity of fuel available in the fuel tank .There are six bars to indicate the quantity of
fuel available in the tank
If all six bar shows means fuel in the tank reaches above 5 litre approximately (Full tank)
When the fuel reaches half tank (3.3 liters approx.) the fuel gauge displays only three bars as shown.
When the fuel reaches minimum safe level (1.5 liters approx.), the last bar of the fuel gauge starts blinking and
low fuel indicator starts glowing. When the fuel reaches minimum safe level (1.5 liters approx.), the last bar of the
fuel gauge starts blinking and low fuel indicator starts glowing. The message ’FUEL ON RESERVE’ will be
displayed at alpha numeric display
If the fuel level goes below minimum safe level (1.1 liters approx.) ‘FUEL EMPTY’ message will be displayed at
alpha numeric display as shown.
-07-
NTORQ 125

1d. Speedometer
Indicates the vehicle speed in kilometer per hour by default when the ignition is turned ON.
1e. Engine temperature gauge
The temperature gauge displays the engine temperature in digital bars. There are six bars to indicate the engine
temperature .If the engine temperature raises beyond normal operating temperature then six bar will indication
and a diagnostic message show as ‘ENGINE WARNING’ in alpha numerical display
1f. Helmet icon
With every ignition ‘ON’, Helmet icon ‘ ‘ blinks for 10 seconds on the left side of the connected instrument
cluster to remind the rider to wear a helmet.
1g. Low battery indicator
An icon with battery symbol ‘ ‘ glows when the battery charge is too low.
1h. Service reminder
If the service is due, whenever the ignition is turned ‘ON’, a icon with spanner symbol ‘ ’ blinks for 10 seconds
after the self-check cycle of connected instrument cluster and continues to glow till the vehicle is serviced and the
reminder is reset.
1i. Trip A and B
In street mode, ‘TRIP A’ will be displayed by default. Press mode button once to enter ‘TRIP B’. To reset any of
the trips (A or B), press the ‘SET’ button more than 3 seconds while display is in the respective trip in vehicle
static condition only
Trip F
This function shows the distance traveled after the low fuel indication symbol ( ) is ‘ON’ and ‘ FUEL ON
RESERVE’ message displayed at alpha numeric display.
The display switches automatically to ‘TRIP F’ once the low fuel indication is ‘ON’ and starts counting from 0.0
km.
-06-
NTORQ 125

2. Sport mode
To enter into sport mode, short press the ‘Mode’ button in street mode while ‘Trip B’ in display.
In sport mode, the following features will be displayed on the connected instrument cluster :
2a. Lap distance
2b. Lap timer
2c. Shortest time indicator
2a. Lap distance
The total distance covered by the vehicle in a particular lap will get captured in ‘Lap distance’ counter. Once the
vehicle speed crosses 2 km/h, the lap distance counter starts counting distance automatically and stops when
the speed goes below 2 km/h. If the speed increases again, the counter continues the distance counting. The lap
distance counter ends when the ignition is turned ‘OFF’.
2b. Lap timer
Lap timer is the total time taken by the vehicle for completing a single lap.
Similar to lap distance, the lap timer also starts once the vehicle speed crosses 2 km/h and stops when the
speed goes below 2 km/h indicated by blinking of lap timer ‘ ‘ icon. The lap timer ends when the ignition is
turned ‘OFF’
2c. Shortest time indicator
Shortest time indicator records the minimum time taken to reach 60 km/h from start. The timer starts once the
vehicle speed crosses 2 km/h and the time will be displayed on crossing 60 km/h speed.
2d
2a 2b 2c
-08-
NTORQ 125NTORQ 125NTORQ 125

3. Ride stats mode
To enter into ride stats mode, short press the ‘Mode’ button in sport mode when the vehicle is static.
Following two features are available in ride stats mode.
3.1. Ride stats last lap
3.2. Ride stats best lap
`
3.1. Ride stats last lap
‘RIDE STATS LAST LAP’ appears by default on entering ride stats mode. The details displayed in this mode are
as given below :
3.1a. Previous lap distance
3.1b. Previous lap timer
3.1c. Previous lap average speed
3.1d. Previous lap shortest time
3.1e. Previous lap top speed
3.1a. Previous race lap distance
Previous race lap distance is the total distance covered by the vehicle in the last lap.
3.1b. Previous race lap timer
Previous race lap timer is the total time taken by the vehicle to complete the last lap.
3.1c. Previous race average speed
Previous race average speed is the average speed of vehicle traveled during last lap.
3.1d. Previous race shortest time
Previous race shortest time is the shortest time taken to reach 0 to 60 km/h in the last lap. If there are more than
one record in the same lap, the best value will be displayed.
3.1e. Previous race top speed
Previous race top speed is the top speed that the vehicle has achieved during last lap.
3.2. Ride stats best lap
To enter ‘RIDE STATS BEST LAP’ mode, press ‘MODE’ button once in ‘RIDE STATS LAST LAP’. The details in
this mode are as given below :
3.2a. Best average speed
3.2b. Best lap timer
3.2c. Best lap distance
3.2d. Best top speed
3.2e. Best shortest time
3.1a
3.1b
3.1e
3.1c
3.1d
-09-
NTORQ 125

3.2. Ride stats best lap
3.2a. Best average speed
‘Best average speed’ is the best average speed amongst the previously concluded laps.
3.2b. Best shortest time
‘Best shortest time’ is the shortest time taken ever to reach 0 to 60 km/h speed since the time of
vehicle purchase or since last reset.
3.2c. Best top speed
‘Best top speed’ is the highest speed that the vehicle has reached since the time of vehicle purchase or since last
reset.
3.2d. Best lap distance
‘Best lap distance’ is the total distance covered by the vehicle corresponding to the best ever average speed.
3.2e. Best lap timer
‘Best lap timer’ is the total time taken by the vehicle corresponding to the best ever average speed.
4. BT pair mode
This mode can be entered by pressing ‘MODE’ button for 5 secs from STREET / SPORT mode.
ä
The connected instrument cluster of yourTVS NTORQ 125 can be connected to your Android smart phone via
â
Bluetooth through a TVS NTORQ app which can be downloaded from Google Play.
3.2d 3.2e
3.2c
3.2a
3.2b
-10-
NTORQ 125

5. Set clock mode
To enter the set clock mode, press ‘Mode’ button for more then 5 secs in Bluetooth paring mode. The digital
clock starts blinking once the connected instrument cluster enters the set clock mode.
l Press the ‘Mode’ button while the digital clock is blinking. The hour digits of clock starts blinking and enables
you to change the hours.
l Press the ‘Set’ button to increase the hours while hour digits are blinking.
l On pressing the ‘Mode’ button again the hours gets set and the minute digits starts blinking.
l Now, press the ‘Set’ button to increase the minutes while minute digits are blinking.
l Once again press the ‘Mode’ button so the minutes of the clock is set and the hours format ‘AM’ or ‘PM’
starts blinking.
l Press the ‘Set’ button to change the hour format either to set ‘AM’ or ‘PM’.
lPress the ‘Mode’ button once again to set clock and wait for 5 sec to come out of set clock mode.
TVS NTORQ APP
This smart phone app is available in the Google Play for your TVS NTORQ 125 and it can be installed in your
Android smart phone. This dedicated mobile app of your TVS NTORQ 125 can be downloaded from the Google
Play by searching the key word ‘TVS NTORQ’.
This smart phone app is compatible only for the smart phones with Android OS version Kitkat (4.4) and
above and the Bluetooth version 4.0 and above.
Android and Google Play are trademarks of Google LLC.
Home screen
The home screen of your TVS NTORQ 125’s mobile app has the following icons in it.
1. Profile setting 2. Camera 3. Connect 4. Last parked location 5. Trip report
6. Turn by turn Navigation assist 7. App setting 8. Help
Note
-11-
NTORQ 125
2
6
7 8
1
3
4
5

1. Profile setting
By clicking profile setting ‘ ‘ icon in app, you can customize the profile name in the app. This name will be
automatically synced with your vehicle’s connected instrument cluster on pairing your mobile. The welcome
message will change from ‘HELLO RIDER’ to ‘HELLO (your profile name)’.
Your current location will be updated automatically by third party Map provider when your GPS and mobile data
connection is good or it can be fed in-case of no Internet or GPS connection.
2. Camera
By clicking camera ‘ ‘ icon in app. your smart phone’s camera opens and you can click a picture and set as a
profile picture of your app.
3. Connect
By clicking the connect ‘ ‘ icon in app, you can connect the smart phone with the vehicle’s connected
instrument cluster via Bluetooth.
First time Bluetooth paring
To pair your Android smart phone with your TVS NTORQ 125’s via Bluetooth, for the first time, follow the
procedure as described below :
1 Switch ‘ON’ the vehicle.
2. Change the connected instrument cluster mode to ‘BT pair mode
3. Open the app and long press connect ‘ ‘ icon, ensure the smart phone is near to the vehicle and open
the app.
4. A confirmation dialogue box opens in the app and asks if connection to a new vehicle is to be initiated.
Press ‘YES’ to search.
5. The app searches for all Bluetooth devices nearby and displays the list of devices available.
6. The connected instrument cluster’s Bluetooth name is prefixed by TVS and followed by minimum one
and maximum six alpha-numeric digits. Ex : ‘TVS440’
7. Now, select the ‘TVS440’ in app to initiate the pairing process. The Bluetooth icon ‘ ‘ is connected with
instrument cluster and starts blinking and the alpha-numeric display will display the name of paired mobile
device Ex: ‘PAIRING PHONE’.
8. A Bluetooth pair key will be generated and displayed in your smart phone’s screen. Now accept the
request in app to complete the pairing procedure. On pairing, the alpha-numeric display of connected
instrument cluster displays ‘CONNECTION SUCCESSFUL’ message for 3 secs . Additionally phone’s
battery icon and signal strength icon will be displayed on connected instrument cluster. After successful
connection, inside the app the connect icon color will also illuminate to indicate that you are connected .
Conditions to re-initiate first time pairing:
First time pairing to be repeated if any of bellow conditions occurs:
1. Whenever the battery of the vehicle is disconnected or when the fuse is blown and replaced.
2. When the Bluetooth settings of your smart phone are reset or when the vehicle’s Bluetooth is manually
modified or when ‘factory reset’ is done on your smart phone.
3. Whenever the app is uninstalled or if storage settings of the app is modified or cleared.
4. If the first pair key is missed (consequent pair key requests will appear in your phone within few seconds).
5. When master reset is done on the smart phone.
-12-
NTORQ 125

Auto pairing
Once the first time pairing is done between vehicle’s connected instrument cluster and your smart phone, the
phone will automatically pair with the vehicle when the following conditions are met :
1. Vehicle is switched ‘ON’ and vehicle is near to the smart phone.
2. Smart phone’s Bluetooth is turned ‘ON’
3. First time pairing is ensured.
Every time auto-pairing happens, app will open automatically and connect with the Instrument cluster. The
connected instrument cluster shows ‘CONNECTION SUCCESSFUL’.
If your smart phone is disconnected from the vehicle’s connected instrument cluster then Ex: ‘PHONE
DISCONNECTED’ message will be displayed on the alpha-numeric display of connected instrument cluster.
4. Last parked location
The last parked location of the vehicle, the current location of the user and a route is plotted for user guidance in the
map on clicking the last parked location icon ‘ ‘ of the app, provided the GPS and internet connection is turned
‘ON’; in your smart phone.
The last parked location can be shared by clicking the share icon ‘ ‘.
5. Ride report
By clicking the ride report ‘ ‘ icon, the app opens a screen with ‘Recent trips’ and ‘My favorites’ report.
User can save maximum 10 ride reports in ‘Recent trips’ tab and 10 ride reports in ‘My favorites’ tab. On saving the
11th ride report, the 1st report gets deleted automatically (only in recent ride reports). Click on the ‘last ride details’
tab to view the ride details of your TVS NTORQ 125. Click on a particular ride to view the ride report details like
P
TRIP
-13-
NTORQ 125

Click on the ‘last ride details’ tab to view the ride details of your TVS NTORQ 125. Click on a particular ride to
view the ride report details like
1.Distance covered
Total distance covered by the vehicle in that selected trip.
2. Traveling time
Total time taken by the vehicle to complete the trip.
3. Traffic time
Traffic time is recorded whenever the vehicle speed is less than 2km/h.
4. Time of travel
Time of travel is the start time to end time of the selected trip.
5. Fuel remaining
Fuel remaining in the vehicle at the end the selected trip.
6. Maximum speed
Maximum speed that the vehicle has reached in the selected ride.
If these ride details are your favorite you can move these details to favorite ride details by clicking the heart symbol
( ) on the top the screen. By clicking the ‘My favorite’ tab you can view these details again.
Your ride also route also can be viewed in the map by clicking to map ‘ ‘ icon on the top of to screen and can be shared to others by
clicking share ‘ ‘ icon
6. Turn by turn navigation assist
Ensure that your smart phone is connected with your vehicle’s connected instrument cluster. Press the navigation
‘ ‘ icon in the app to open a map screen.
On the map screen following icons are displayed.
1
2
3
6
5
4
-14-
NTORQ 125
1
2
3
4

1.Search box
Search box lets you search for a destination. The search box displays results when more than three characters
are typed. These results are sorted based on the aerial distance.
2.Map screen
In map screen your current location and destination location will be displayed. The app allows the user to zoom,
pan and rotate the vector map. Also the user can ping any destination on the map screen itself.
3 Locate me
By clicking the locate me icon the map shows the GPS location of the user.
4.One touch icons
One touch icons lets the user to search for near by hospitals, fuel pumps, restaurants and TVS Motor Company
Authorised Main Dealer.
Once the map screen is opened in the app the vehicle’s connected instrument cluster will display ‘NAVIGATION
ASSIST ON’.
A navigation plan screen is shown in the app after selecting the destination. Press ‘START NAVIGATION’ button to
start the Turn by Turn Navigation.
Ensure smart phone is connected to the vehicle before pressing ‘START NAVIGATION’.On clicking ‘START
NAVIGATION’ icon following navigation details will be displayed :
1. Turn by turn directional assist information 2.Voice guidance 3. Estimated time of arrival
4. Remaining distance to reach destination
-15-
NTORQ 125
2
1
43

Navigation display on connected instrument cluster :
Once rider starts the navigation then turn instruction will shown the connected in instrument cluster. When the rider
is approaching a turn connected instrument cluster displays the distance along with instruction Ex: ‘AFTER 900m TAKE
RIGHT’.
When distance is more than 1km the displays assists the rider to stay in the same road. Ex ‘10km 700m STAY SAME
RD’ is displayed on the connected instrument cluster.
when the distance is lesser than 1km the directional assist information is updated on the connected instrument
cluster display Expected time to reach the destination and the distance remaining features are also available in the
connected instrument cluster. To get these information, press ‘SET’ button during navigation once. Time and
distance remaining information will be available for 3 seconds each
If the route shown in the maps is not followed, auto-re-routing will happen within some distance and ‘RE-ROUTING’
will be displayed on connected instrument clusters alpha numeric display.
Recalculation of route by the Map always prefers the quickest route. After re-routing, If there is a new route from the
current place to destination, it will be plotted in maps and new instructions will be loaded in both app and connected
instrument cluster.
But if the new route taken is completely opposite to the destination, the app and connected instrument cluster will
instruct ‘Take U-turn’.
During navigation, if GPS signal is not available, then the navigation assist will be temporarily unavailable and the
connected instrument cluster display ‘SEARCHING GPS SIGNAL’.
If data is not available in your smart phone (if there is any problem with mobile internet), then the navigation assist
will be temporarily unavailable and the connected instrument cluster displays ‘FETCHING MOBILE DATA’.
On reaching to desired destination within 100m radius the connected instrument cluster displays the message
‘YOU ARRIVED’
-16-
NTORQ 125

The message ‘CROSSED DESTINATION‘ will be displayed in the connected instrument cluster after crossing the
destination.
If you ride further more after crossing the destination then the navigation ends and the map is closed automatically in
the app.
7. App setting
By pressing the app setting ‘ ‘ icon, the following setting will be displayed.
1.Do not disturb 2. Auto reply SMS 3. Auto sync clock 4. Over speed alert 5. Save route
Do not disturb
When the do not disturb is enabled, all incoming calls are disconnected both in smart phone and the connected
instrument cluster while you are connected.
Auto reply SMS
On enabling the ‘Auto reply SMS’, the app automatically replies to the caller with a pre-set message (for example :
I’m driving please call me later). You can alter this pre-set message as you wish by clicking the edit icon ‘ ‘ in the
app.
Over speed alert
When over speed alert is enabled, the vehicle’s connected instrument cluster will display ‘HIGH SPEED ALERT’ if
the current speed is crossing the speed limit set by the user in the app.
This alert can be customized by tapping the over speed alert text in the app, A pop - up will appear on screen where
you can set the high speed limit.
Save route
When save route is enabled, the app will save the last traveled route which can be viewed along with the trip report.
If any changes are made from the default setting, the setting must be saved by clicking the ‘APPLY’ icon.
-17-
NTORQ 125

8. Help menu
On clicking the ‘HELP’ menu, the app screen displays the following tabs :
1. User guide 2.App version 3. Email feedback 4. About us
5. Customer care - tollfree call 6. Terms and Conditions 7. Privacy policy
1. User guide
On clicking the ‘User guide’ the app will display the following.
a. How to connect my TVS NTORQ?
b. Points to take care!
c. How to see the report?
d. Navigation and maps
a. ‘How to connect my TVS NTORQ?’ is a step by step procedure of connecting smart phone with the vehicles
connected instrument cluster. refer to page no : 16.
b. ‘Points to take care !’ is the troubleshooting guide of the app. Incase if any issue is faced in the app regarding
app permissions, app management and Bluetooth pairing, refer this procedure.
c. ‘How to see the report ?’ is the step by step procedure about generating and accessing the report in the app.
Refer page No. 22 and 23 for detailed procedure.
d. Navigation and maps lists out the settings to be done in the smart phone for better experience of navigation
and maps in the TVS NTORQ app.
2. ‘App version’ displays the current version of the installed app.
3. ‘Email feedback’ enables the user to send their valuable feedback to TVS Motor Company Limited.
4. ‘About us’ will take the user to a TVS Motor Company Website (www.tvsmotor.com).
5. ‘Customer care’ - is a tollfree call, which automatically dial to TVSM customer care. Use this facility if you require
any assistance to your TVS NTORQ 125.
-18-
NTORQ 125
Other manuals for NTORQ 125
2
Table of contents
Other TVS Scooter manuals

TVS
TVS XL Series User manual

TVS
TVS iQube Electric S User manual

TVS
TVS Jupiter BS-VI User manual

TVS
TVS Jupiter BS-V1 User manual

TVS
TVS ETFI Jupiter User manual

TVS
TVS NTORQ 125 User manual

TVS
TVS Jupiter ZX User manual

TVS
TVS Jupiter Fi User manual

TVS
TVS Jupiter User manual

TVS
TVS Scooty Zest 110 User manual