Ubiquiti airFiber AF 60 User manual
Other Ubiquiti Wireless Access Point manuals

Ubiquiti
Ubiquiti NanoBeam M5 User manual

Ubiquiti
Ubiquiti AirOS B2 User manual

Ubiquiti
Ubiquiti UniFi AC Mesh User manual

Ubiquiti
Ubiquiti Rocket2AC Prism User manual

Ubiquiti
Ubiquiti UniFi UAP-IW-HD User manual

Ubiquiti
Ubiquiti UniFi AP AC EDU User manual

Ubiquiti
Ubiquiti airFiber AF-11 User manual

Ubiquiti
Ubiquiti UniFi User manual

Ubiquiti
Ubiquiti UniFI UAP-AC User manual

Ubiquiti
Ubiquiti UAP User manual

Ubiquiti
Ubiquiti NBE--2AC--13 User manual

Ubiquiti
Ubiquiti PBE-M5-620 User manual

Ubiquiti
Ubiquiti nano station M User manual

Ubiquiti
Ubiquiti airFiber AF-5XHD User manual

Ubiquiti
Ubiquiti Loco5AC User manual

Ubiquiti
Ubiquiti NanoBeam NBE2ACN User manual

Ubiquiti
Ubiquiti UniFi AC SHD User manual

Ubiquiti
Ubiquiti UniFi AP FlexHD User manual

Ubiquiti
Ubiquiti UniFi UAP-AC-LR-5-EU User manual

Ubiquiti
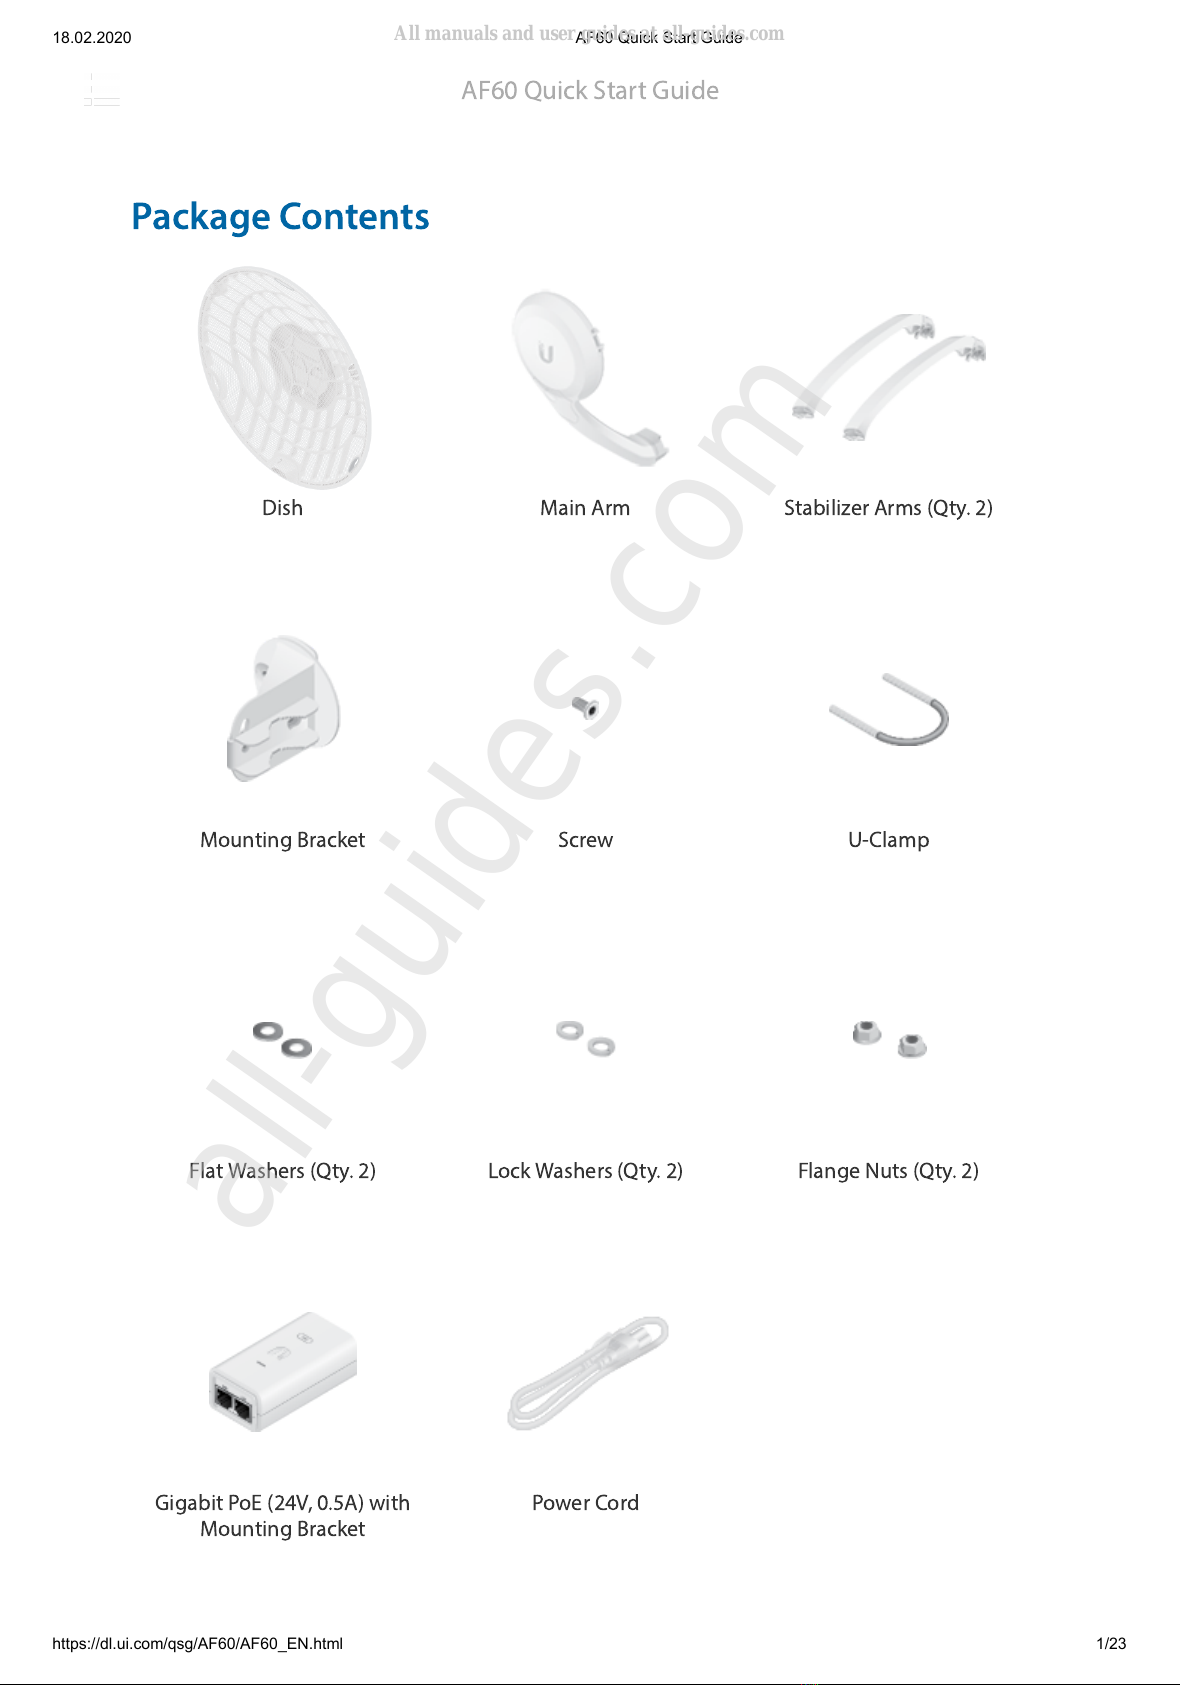
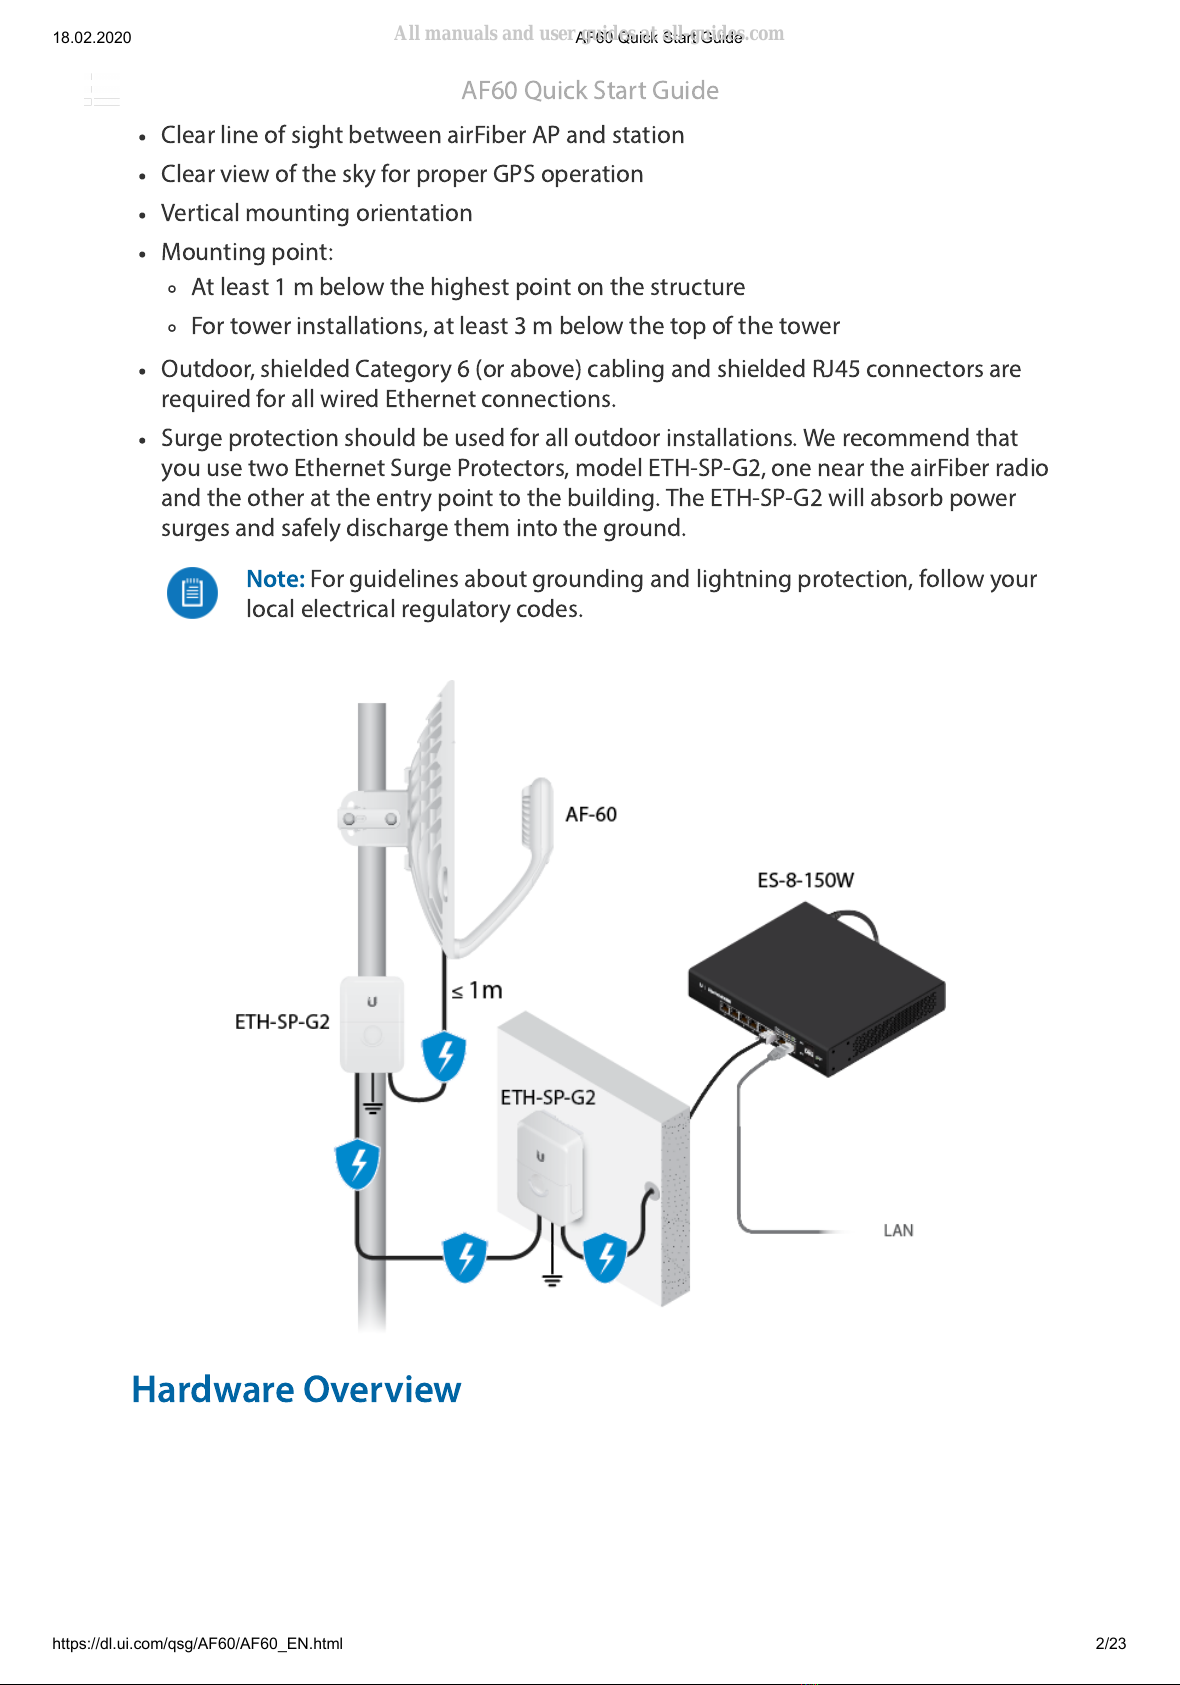
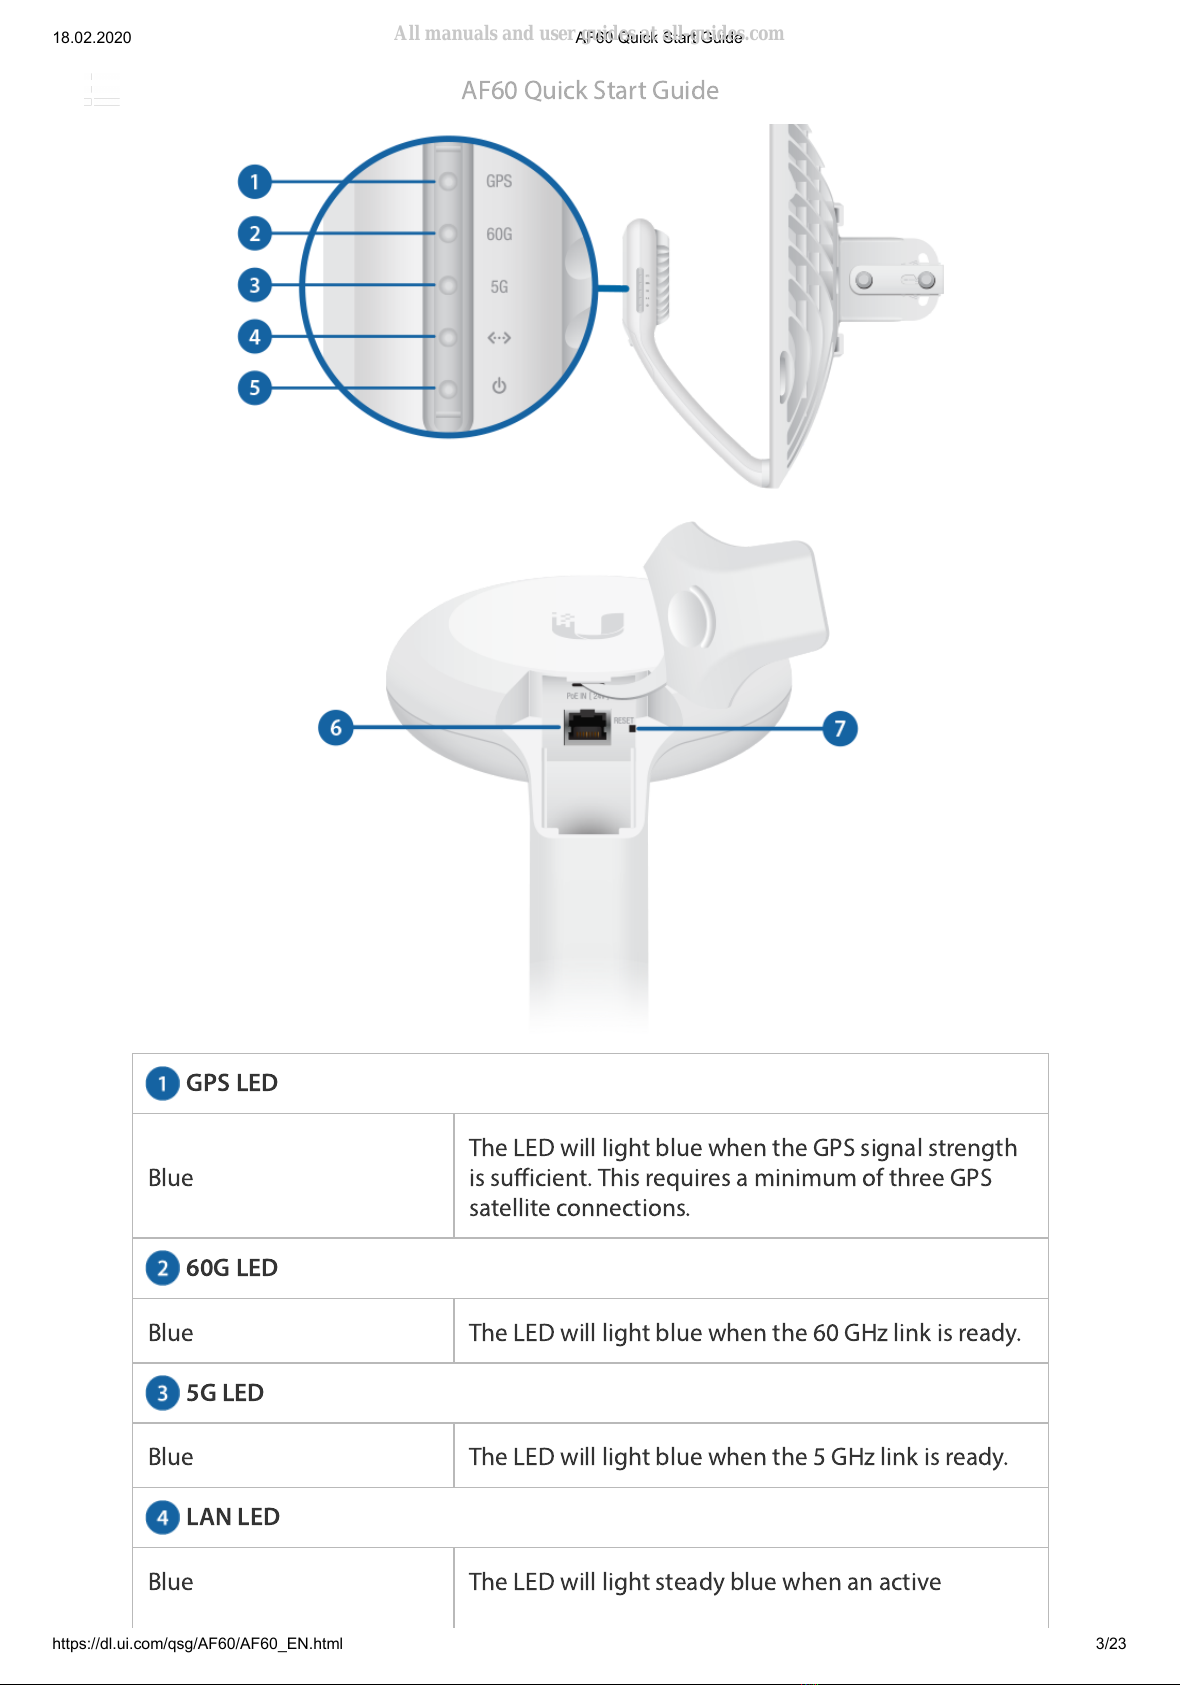
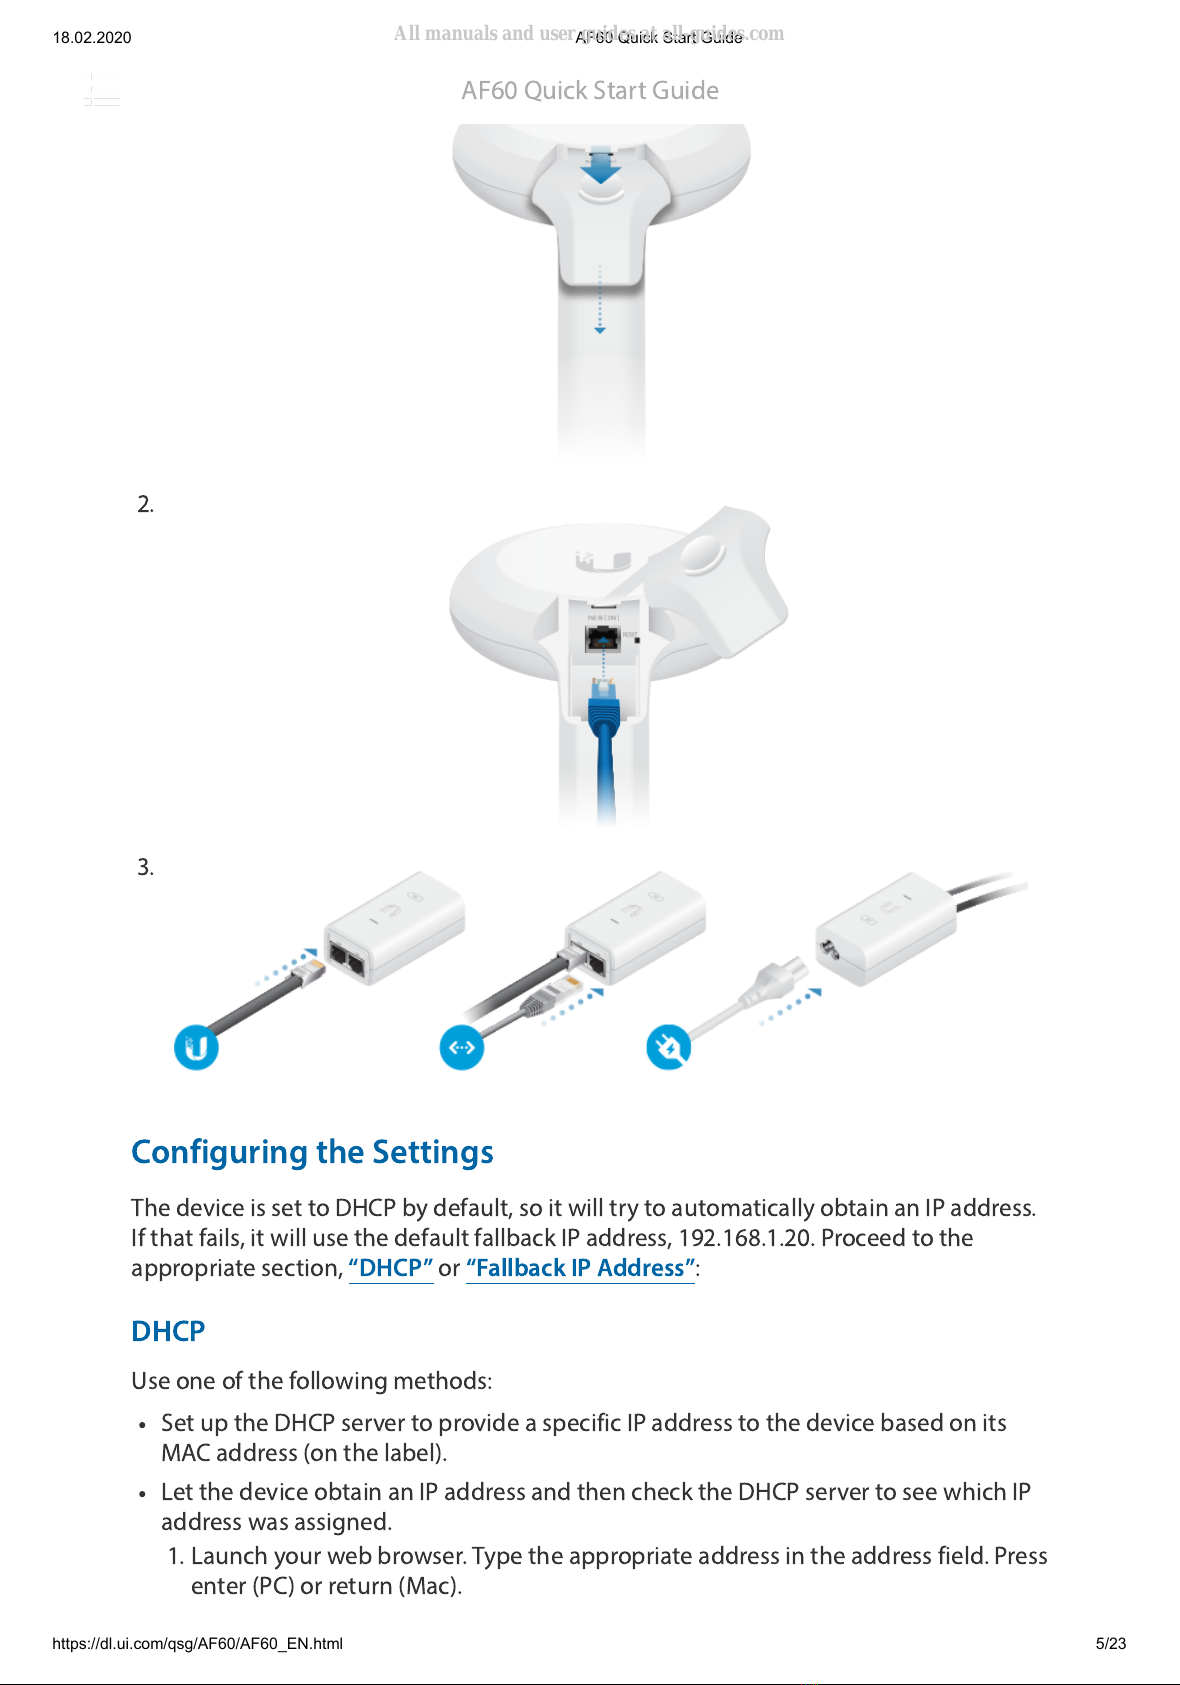
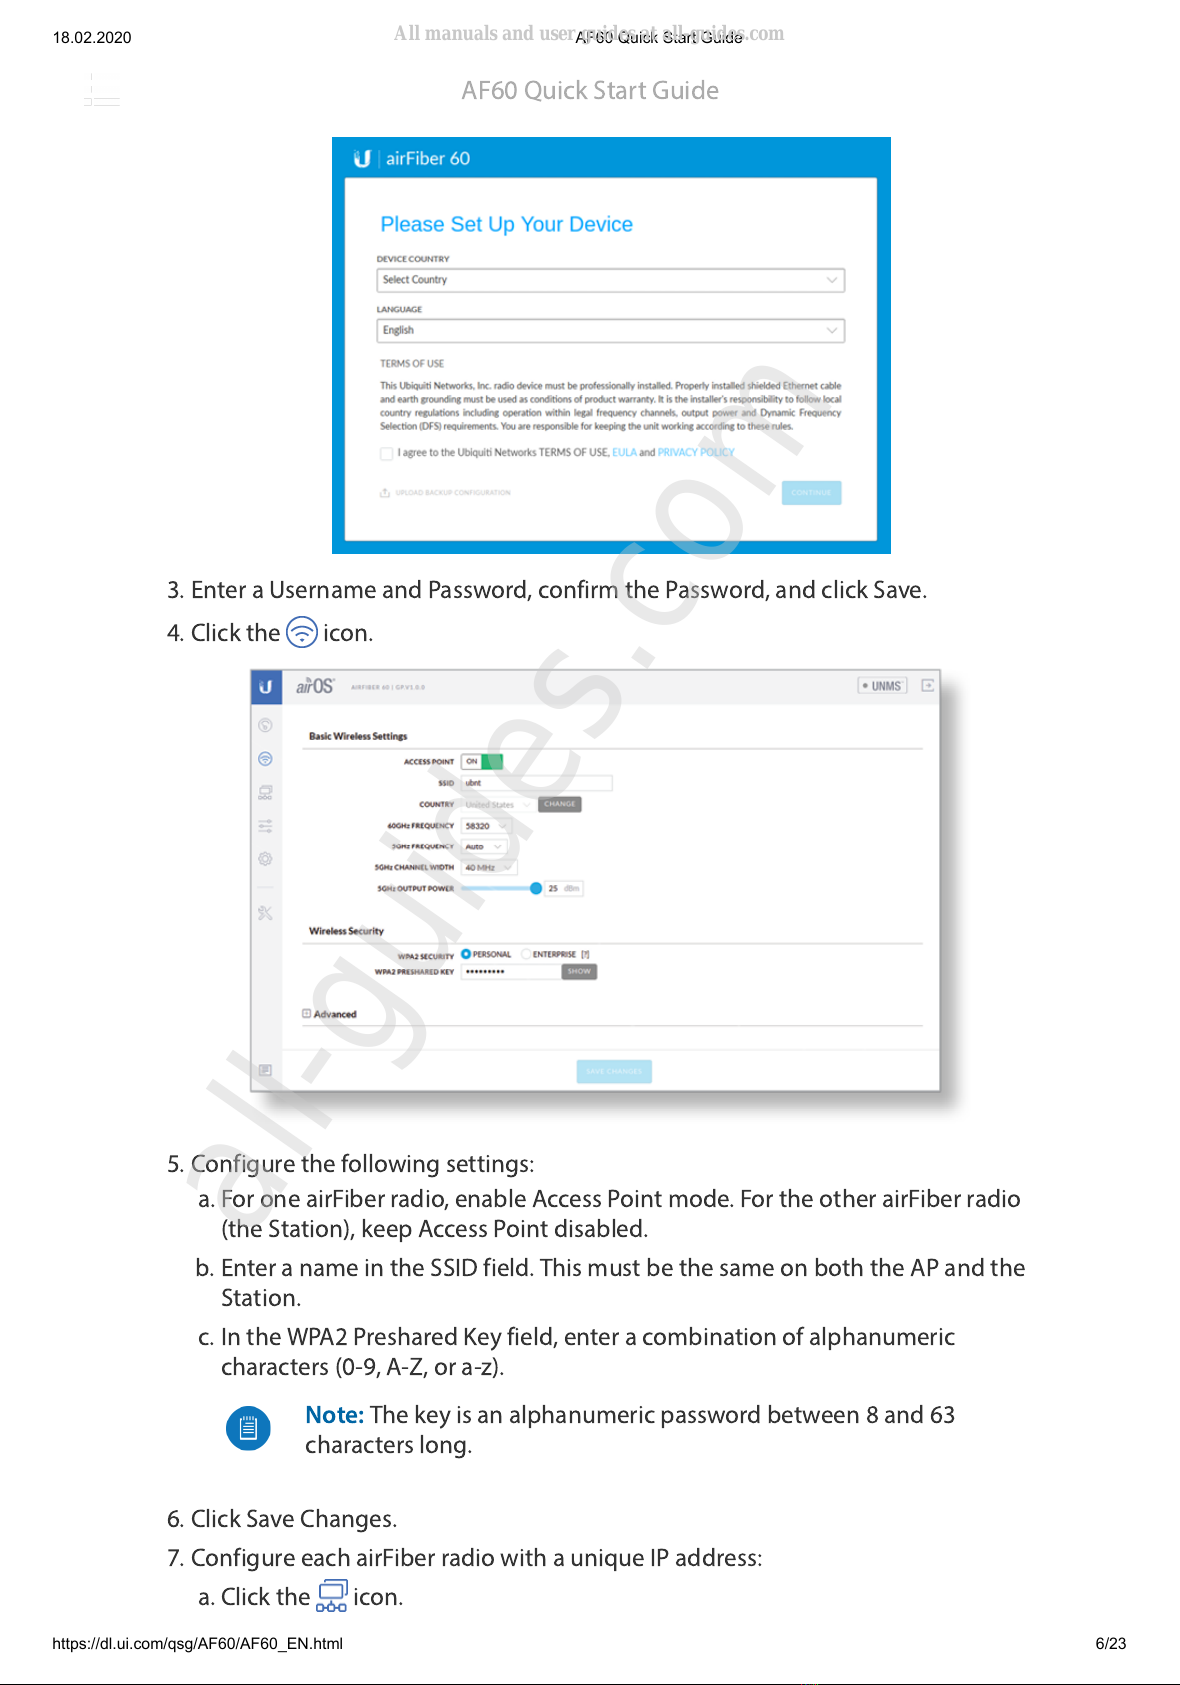
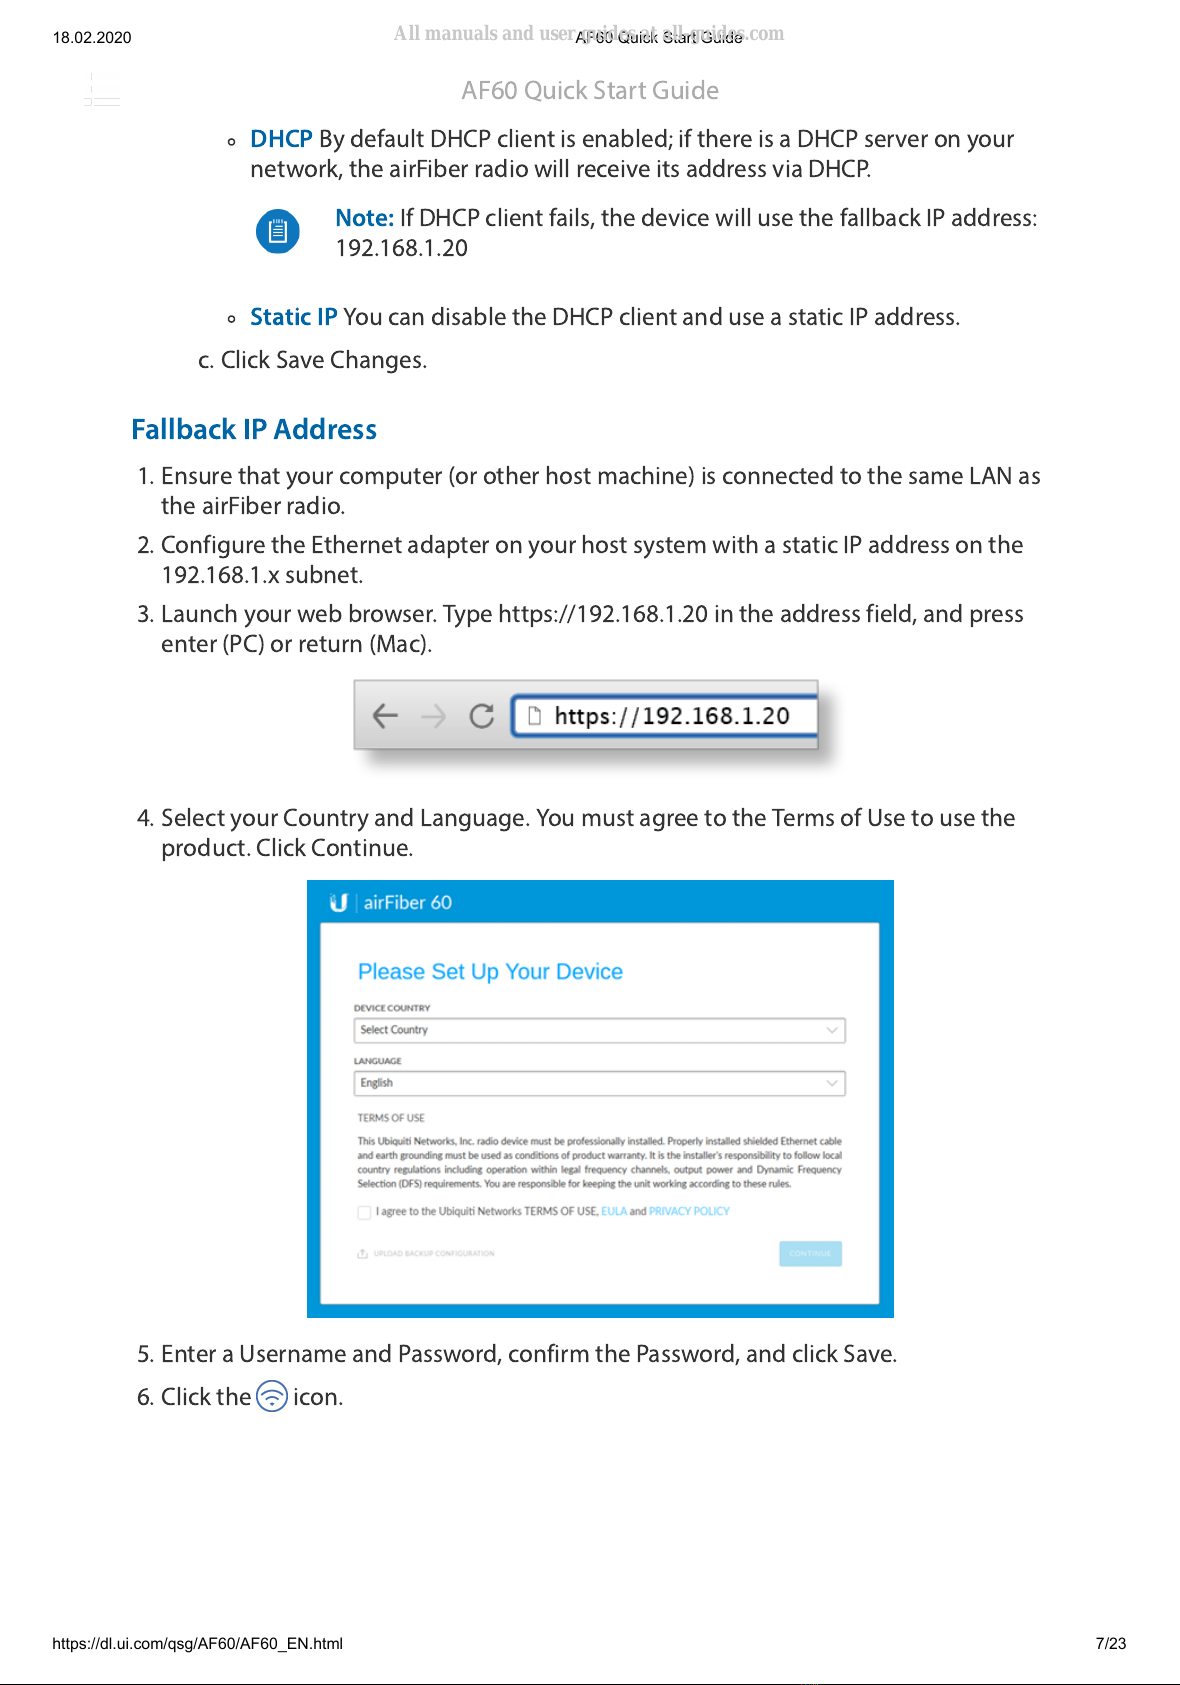
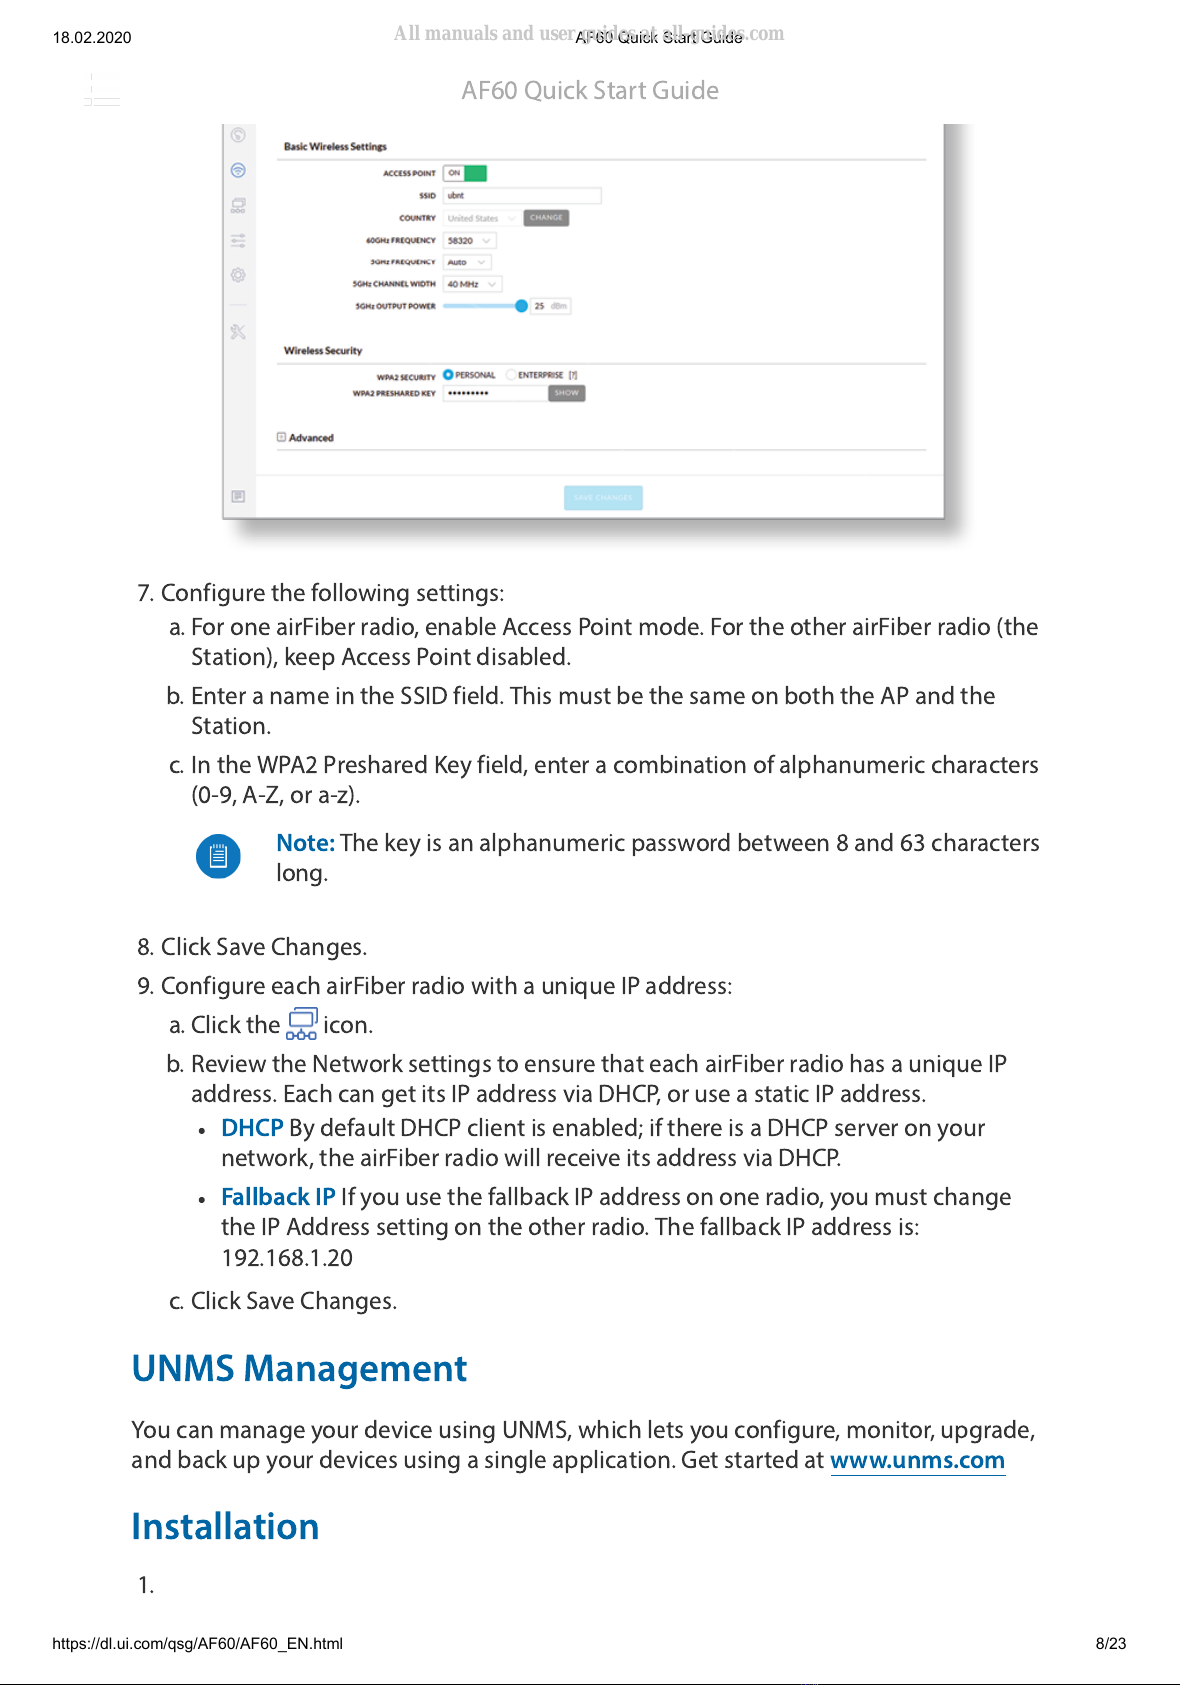
Ubiquiti airFiber AF 60 User manual


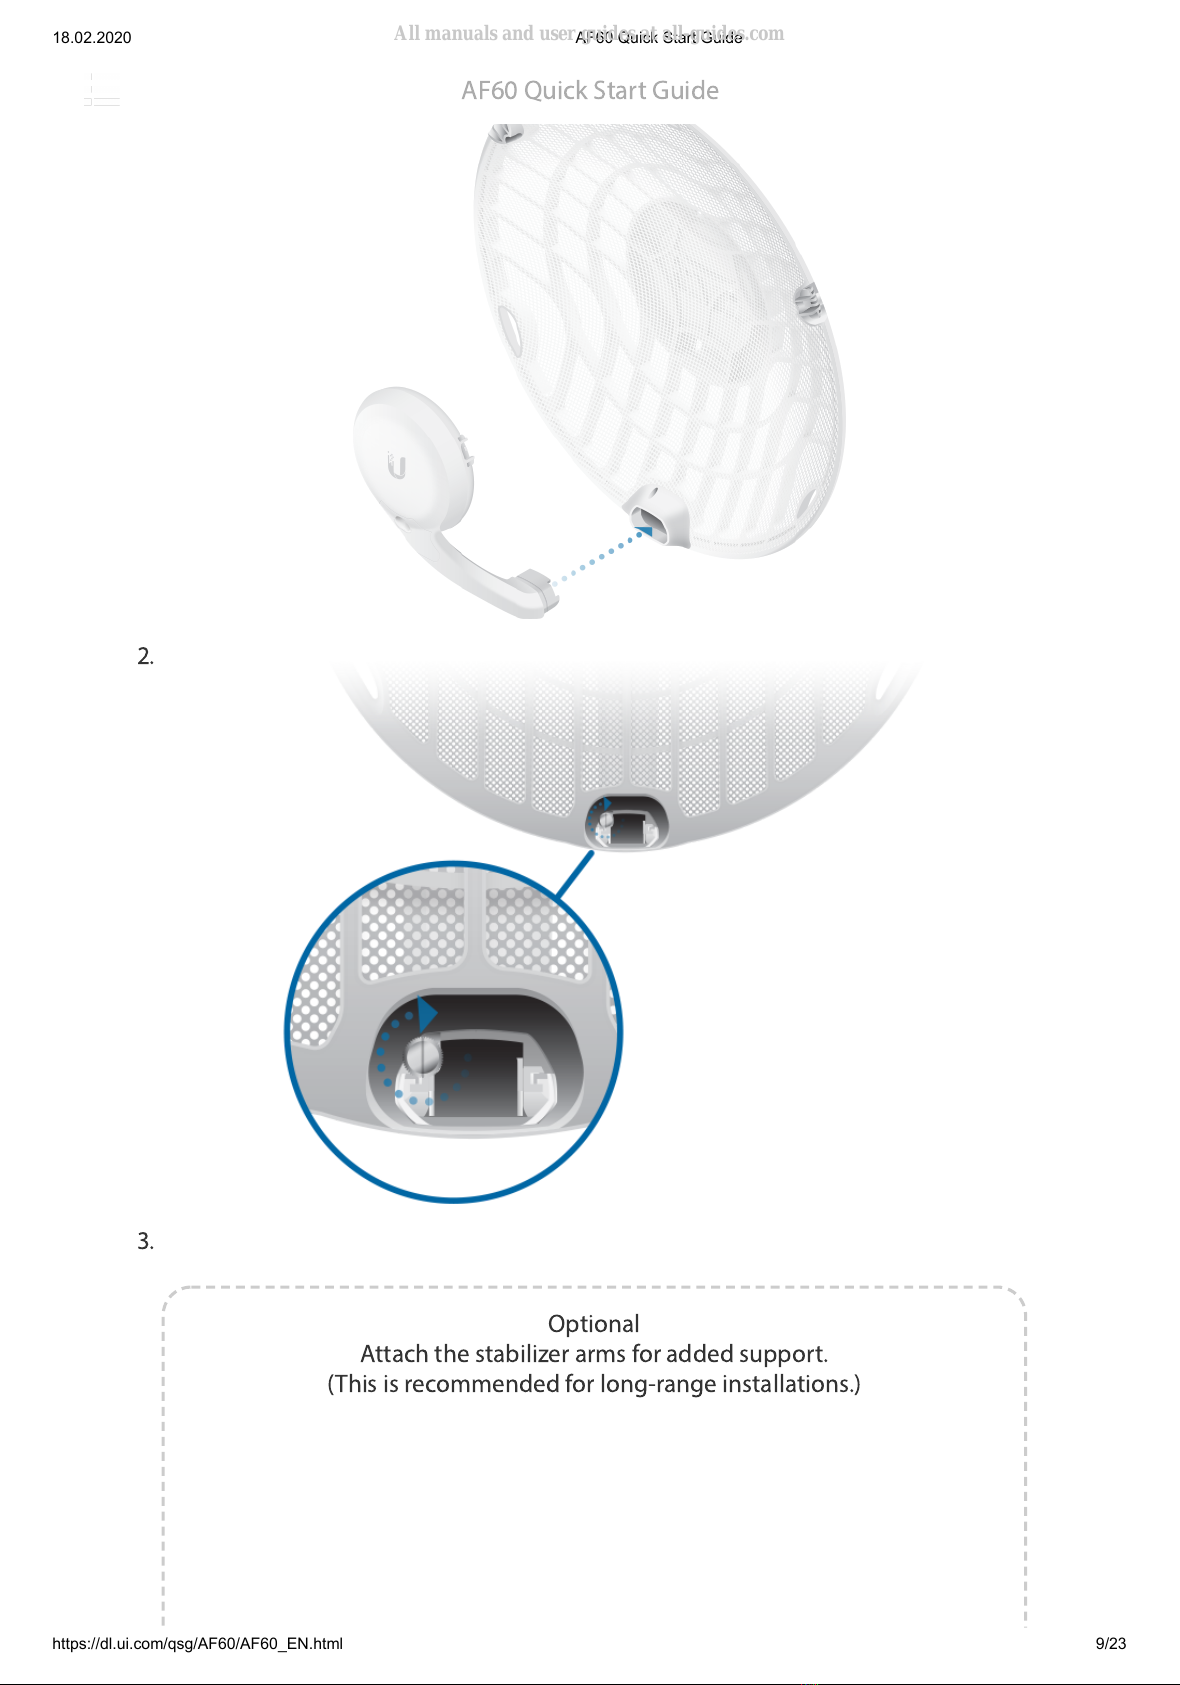
 installation guide")