Ubiquiti GigaBeam User manual
Other Ubiquiti Wireless Access Point manuals

Ubiquiti
Ubiquiti UniFi nanoHD AP User manual

Ubiquiti
Ubiquiti UAP-PRO UNIFI User manual

Ubiquiti
Ubiquiti Rocket M2 Titanium RM2-Ti User manual

Ubiquiti
Ubiquiti UAP-AC-PRO User manual

Ubiquiti
Ubiquiti LTU-LR User manual

Ubiquiti
Ubiquiti UniFi XG UAP-XG User manual

Ubiquiti
Ubiquiti LiteAP ac LAP-120 User manual

Ubiquiti
Ubiquiti NanoStation 5AC Loco User manual

Ubiquiti
Ubiquiti UniFi nanoHD AP User manual

Ubiquiti
Ubiquiti UniFi User manual

Ubiquiti
Ubiquiti PowerBeam PBE-5AC-Omni User manual

Ubiquiti
Ubiquiti airFiber AF 60 User manual

Ubiquiti
Ubiquiti UniFi nanoHD AP User manual

Ubiquiti
Ubiquiti LiteBeam M5 LBE-M5-23 User manual

Ubiquiti
Ubiquiti UniFi USW-Flex-Mini User manual

Ubiquiti
Ubiquiti IsoStation AC IS-5AC User manual

Ubiquiti
Ubiquiti UAP-AC-M User manual

Ubiquiti
Ubiquiti AG-PRO-INS User manual

Ubiquiti
Ubiquiti UniFi AP FlexHD User manual

Ubiquiti
Ubiquiti LiteBeam LBE-5AC-LR User manual


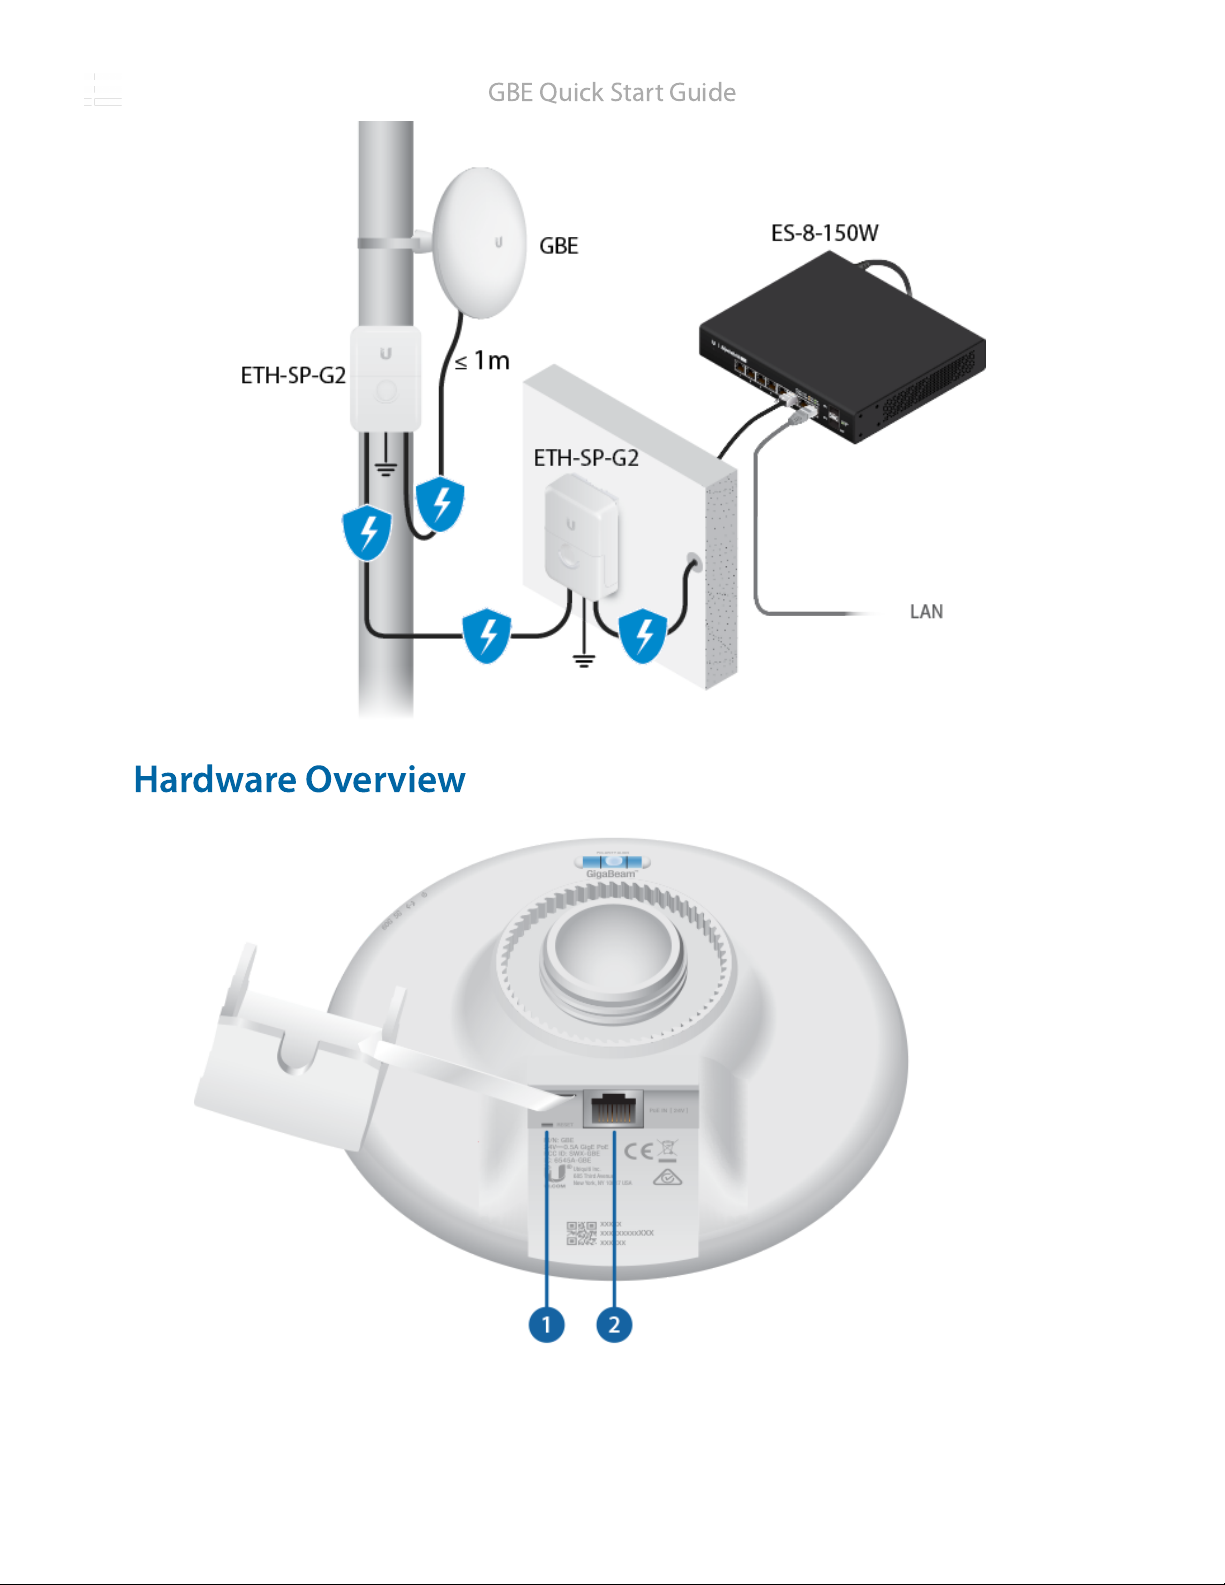
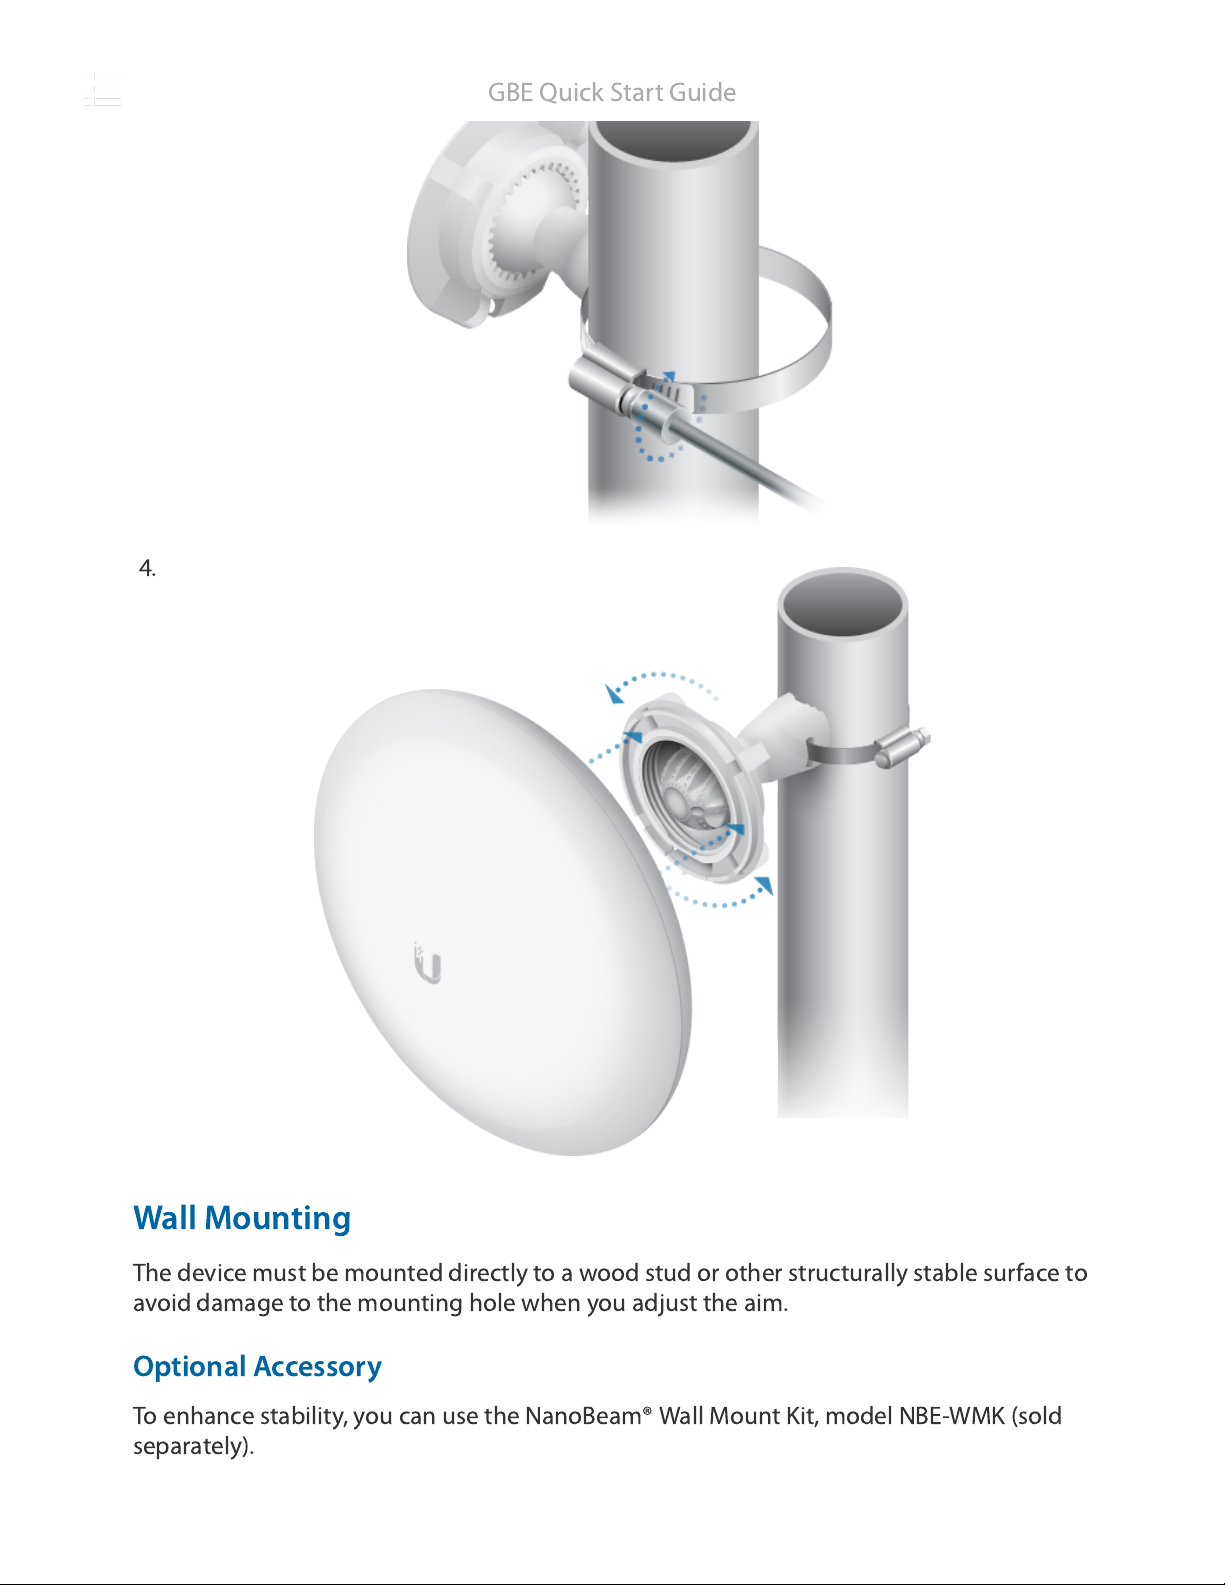
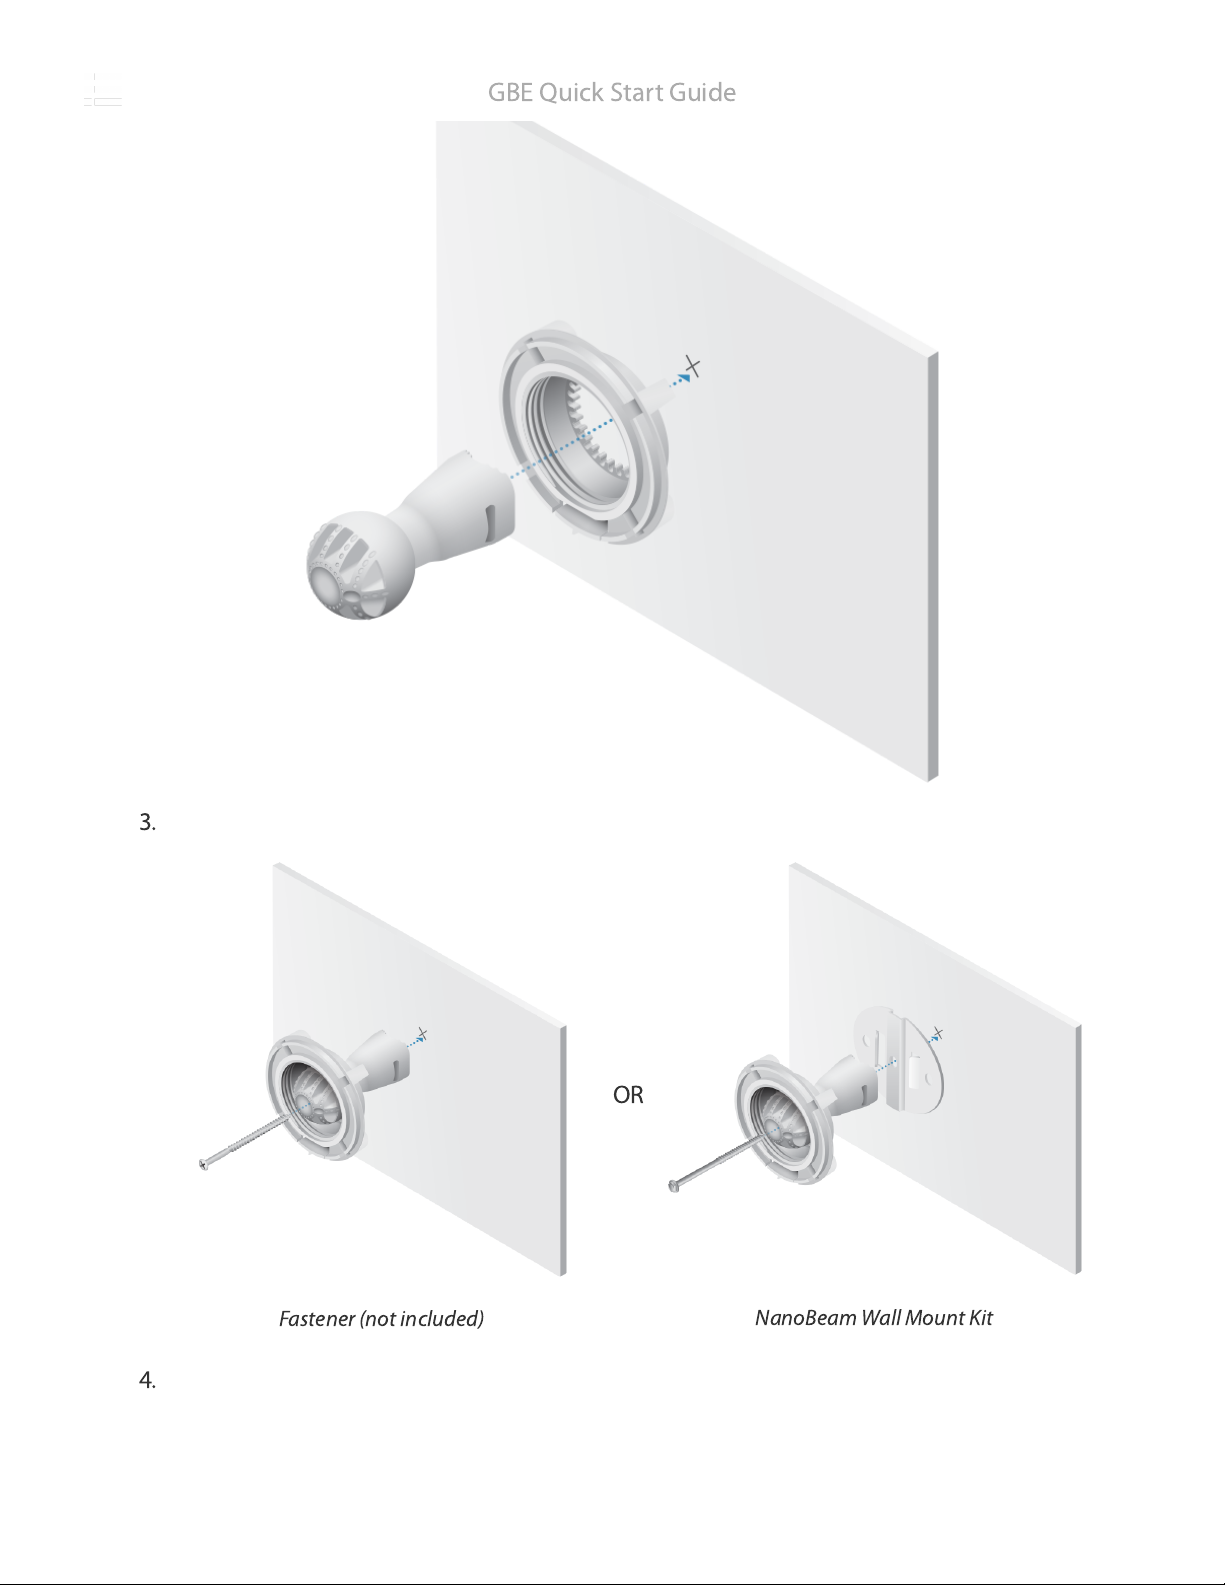
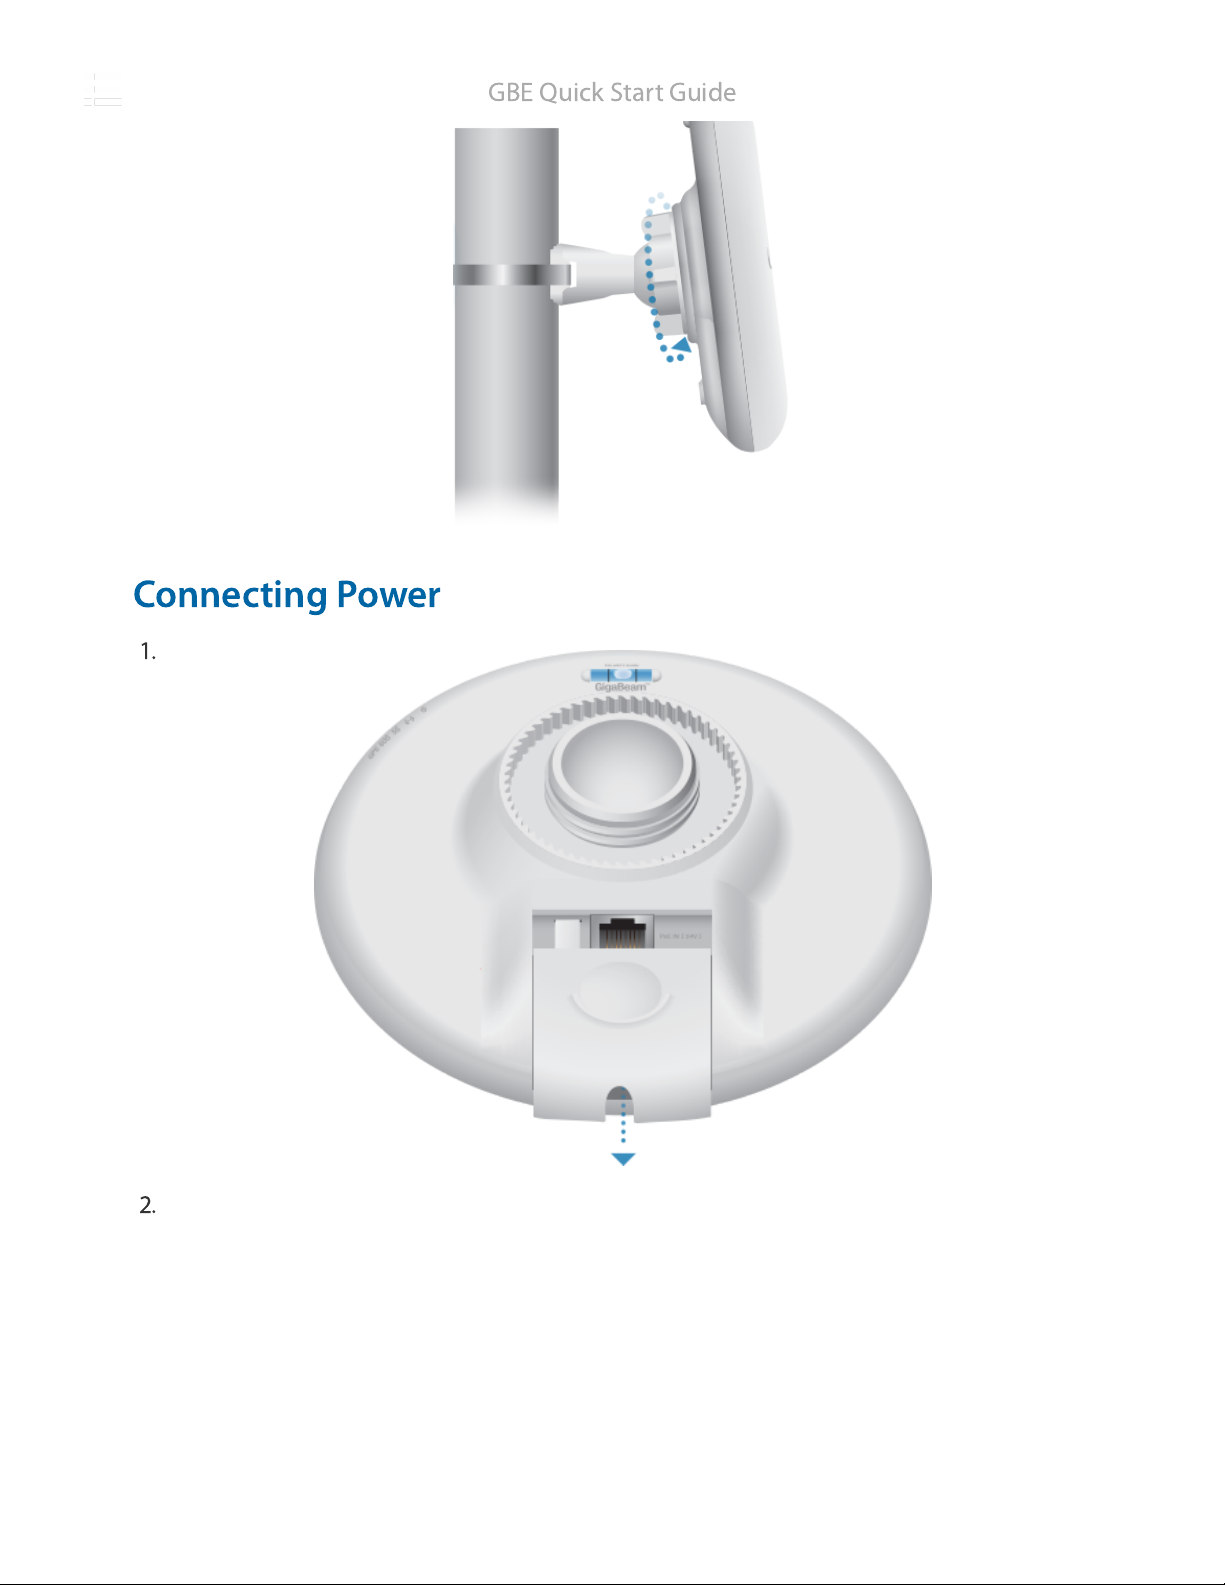
 installation guide")