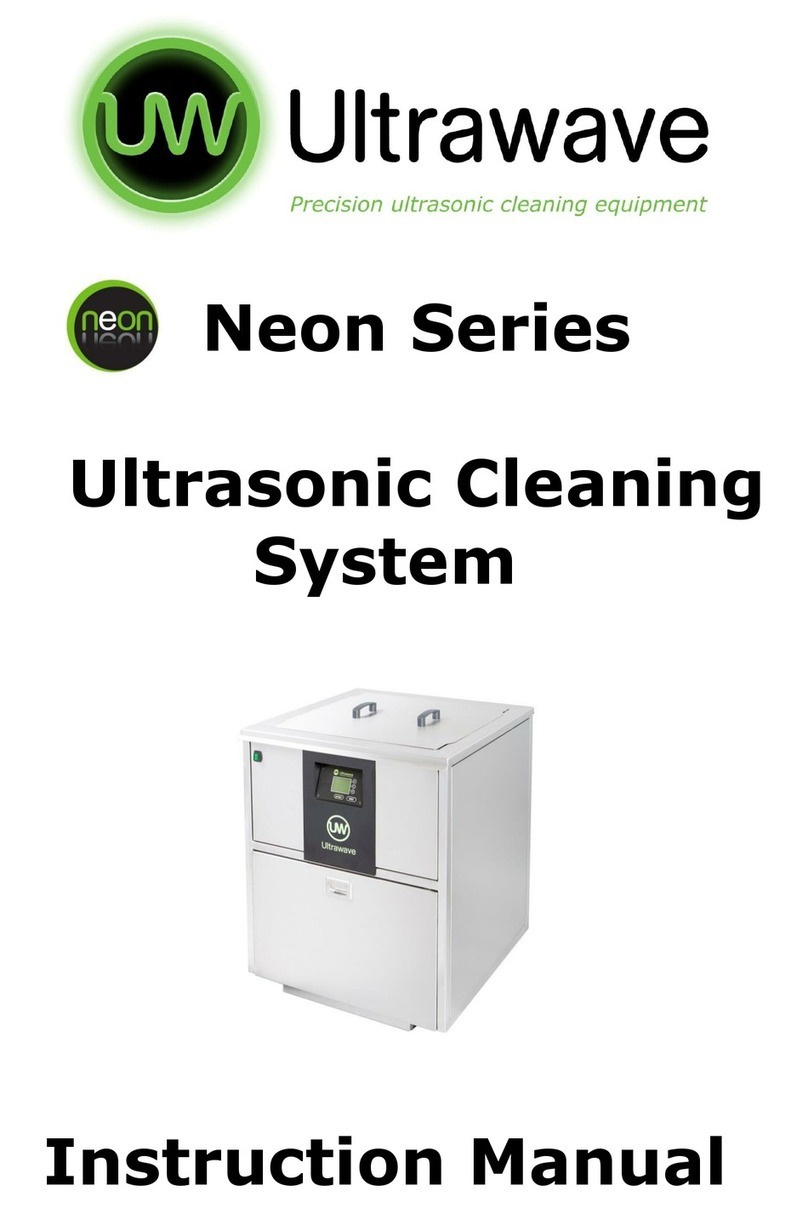
Ultrawave Neon Series User manual

Neon Series
Ultrasonic Cleaning
System
Operator Manual


1
Contents
Safety Instructions .......................................................................................................... 2
Quick guide ...................................................................................................................... 3
Administrator instructions .............................................................................................
Screen 1: Setting the time ..............................................................................................
Screen 2: Setting the date ............................................................................................. 5
Screen 3: Setting the temperature ............................................................................... 6
Screen : Setting the cycle time ................................................................................... 7
Operator instructions ..................................................................................................... 8
Cycle abort messages..................................................................................................... 11
Draining the tank ............................................................................................................ 12
Changing/Inspecting the filters .................................................................................. 13
Ultrasonic cleaning detergents .................................................................................... 15
Technical information .................................................................................................... 16
Compliance with the Control of Noise at Work Regulations ................................. 17
Troubleshooting ............................................................................................................. 18
Maintenance ................................................................................................................... 19
After Sales Service ......................................................................................................... 19
Warranty ......................................................................................................................... 20
Service record ................................................................................................................ 23
Notes ............................................................................................................................... 25
Ultrawave equipment is manufactured in the United Kingdom.
Ultrawave equipment conforms to the relevant international standards.

2
Safety Instructions
Electrical
Your Neon Series must be connected to a 230Vac supply.
Your unit is supplied with either a 3-pin Plug top (BS1363) or a 3-pin blue BS 3 3 plug
as follows:
Neon 35 13A BS1363
Neon 60 13A BS1363
Neon 90 16A BS 3 3
Neon 125 32A BS 3 3
A suitably rated 230Vac supply socket should be used to supply the unit.
It is dangerous to operate your ultrasonic cleaning system without a connection to
mains earth.
Ensure that excess mains cable is stored neatly.
General use
Ensure that the tank contains liquid before you switch it on.
Always use a basket to support items to be cleaned.
Not doing so may damage the
Neon Series
and invalidate your warranty.
Do not place hands, fingers or other body parts in the tank when in operation.
Care should be taken when operating the ultrasonic cleaning system at higher
temperatures as external surfaces may become hot.
Consult Ultrawave before using any detergents, solutions or chemicals not approved
by Ultrawave.
Do not move the Neon Series when it is full of water.
Read the whole of these instructions. Safety may be impaired if they are not followed.
Ultrawave will not be responsible for damage or injury caused by incorrect use of the
equipment.
WEEE Compliance
Ultrawave are complying with the WEEE regulations by contracting our obligations to
a Producer Compliance Scheme. Once it is deemed that this Neon Series is no longer
effective, please contact Ultrawave to arrange collection by our compliance scheme
provider, who will pick up the machine from your premises.

3
Quick guide
Place the Neon Series in its final working position.
Fill the tank with fluid until it overflows into the overflow-weir. Fill the weir to at least
half way before use, but ensure that it is not completely full.
When filling the Neon Series prior to its first use or after a complete system drain, it
may be necessary to top up the weir after the pump first runs, to ensure there is fluid
in the system.
Add the required dose of detergent (see page 16).
Switch on the machine via the switch at the front of the Neon Series case.
To operate the Neon Series, please refer to the appropriate instructions on the
following pages.
Change the cleaning fluid at regular intervals. Your cleaning process will determine how
often the fluid needs changing – the more soiled your items, the more often you will
need to change the fluid.
The pump & filter system is supplied with filter cartridges that must be routinely
inspected and replaced if there are any signs of reduced liquid flow or the visible state
of the filter cartridge deems it necessary (see page 1 ).
REMEMBER
-Always ensure the fluid is above the level sensor when in operation.
-Do not put excessively hot water into the tank.
-Always use the basket supplied.
-Never expose hands or other body parts to cleaning solutions.
-Contact Ultrawave before using any solutions, detergents or chemicals which are
not specifically approved by Ultrawave.
-Never breathe the fumes from strong solutions.
Once the cleaning cycle has finished, remove the cleaned items and rinse them in clean
water.
Subjecting the ultrasonic cleaning system to improper treatment or misuse will
invalidate the warranty.

4
Administrator instructions
The Neon Series has a Split Level Security function. Cycle programming can only occur
in Administration mode.
To enter Administrator mode:
-Ensure the mains supply is switched off.
-Press button (Enter) and button 5 (Esc) simultaneously.
-Keep both buttons depressed whilst you turn the Neon Series on at the mains
switch on the front of the unit.
Screen : Setting the time
The Neon Series is factory pre-set with United Kingdom time, and automatically
changes from GMT to BST on the designated days.
If the time should be incorrect, use this screen to amend it.
Use the “Up” and “Down” buttons to scroll through the numbers.
When the correct number has been selected, use the “Next” button to move to the next
character.
Once the correct time has been entered, press the “Accept” button to save the settings.
Button 1
Button 2
Button 3
Button 5
Button 4

5
Screen 2: Setting the date
The Neon Series is factory pre-set with the correct date. If the date should be incorrect,
use this screen to amend it.
At the position of the flashing cursor use the use the “Up” and “Down” buttons to scroll
through the numbers.
When the correct number has been selected, use the “Next” button to move to the next
character.
Once the correct date has been entered, press the “Accept” button to save the settings.

6
Screen 3: Setting the temperature
The Neon Series has three process temperature settings:
Min temperature: this is the minimum temperature at which the bath will operate. If
the liquid falls below this temperature, the bath will not operate until the liquid rises to
the min. temperature again. The Neon Series automatically starts heating the liquid if it
is below the min. temperature.
Normal temperature: this is the optimum operating temperature. If the liquid
temperature falls more than 2°C below “normal”, the electrical water heater will switch
on until the liquid reaches the “normal” temperature.
Max temperature: this is the maximum temperature at which the bath will operate. If it
rises above this temperature it will not operate. To overcome this problem, drain the
tank and refill with cooler liquid.
The Neon Series is factory pre-set with the following:
-Minimum temperature 5°C
-Normal temperature 40°C
-Maximum temperature 70°C
Use the “Up” and “Down” buttons to scroll through the numbers. When the correct
number has been selected, use the “Next” button to move to the next character.
Pressing ‘Enter’ saves the current set temperatures and advances to the ‘Set Cycle’
screen.
Pressing ‘Esc’ returns to the ‘Set Date’ screen without saving.

7
Screen 4: Setting the cycle time
The Neon Series has three cycle stages:
Circ : this is the time that the pump will operate for, before the ultrasonics operate.
Sonic: this is the time that the ultrasonics will operate for.
Circ 2: this is the time that the pump will operate for, after the ultrasonics operate.
Total cycle time is the sum of all three individual set times.
The pump operating at the start of the cycle will flush and filter excess contaminants
before the ultrasonic cleaning process begins.
The main cleaning action occurs during the ultrasonic cleaning process.
The pump operating at the end of the cycle will flush and filter contaminants that have
been removed from the component during the cleaning process and minimise the
effect of “drag through” (contaminants resting on the component), when it is removed
from the tank.
Use the “Up” and “Down” buttons to scroll through the numbers in order to increase or
decrease the time.
Each stage can be programmed from 0-2 0 minutes, as long as the total maximum
cycle time is no more than 2 0 minutes. If any of the stages are not required, then these
can be programmed to 0 minutes.
When the correct number has been selected, use the “Next” button to move to the next
character.
Once the correct cycle time has been entered, press the “Accept” button to save the
settings.
This completes the Administrator programming of the Neon Series.
Power down the Neon Series, using the switch at the front of the case, to exit ‘Admin’
mode. When the Neon Series is then powered up, “Operation” mode will be in use.
0 1 0 T O T A c c e p t > > < < E s c
D n
c l eS e t C y
U p
0 1 - C i r c 1
0 8 - S o n i c
N e x t
0 1 - C i r c 2

8
Operator instructions
When the Neon Series is first switched on, the following screen will appear for
approximately 3 seconds:
While this screen is displayed, the buttons are inoperative. This is normal as the Neon
Series is running through its start-up routine and checking all internal systems are
working correctly.
The top line of the display indicates the serial number and software version number,
uniquely identifying the machine.
After 3 seconds, the ultrasonic cleaning system is ready for use.
The symbols on the display indicate the following:
So Sonics When this symbol is flashing, the sonics are in operation
Ht Heat When this symbol is flashing, the heaters are in operation
Rc Recirc When this symbol is flashing, the recirculation is in operation
(missing symbols indicate that function is not available)

9
The Neon Series is fitted with a liquid temperature sensor. If this temperature is below
the minimum set temperature, the heaters will operate and begin to heat the cleaning
fluid once the machine is turned on.
When the heaters are in operation, the symbol above Ht will oscillate showing the
heaters are in operation.
Pressing the ‘enter’ button (under the flashing Start) will start a pre-set cycle, as long as
the recorded temperature of the cleaning fluid is above the minimum programmed
temperature.
The Neon Series cycle will now begin, indicated by the ‘Running’ message on the display.
The ultrasonic cycle will run for the programmed time and any re-circulation will also
run once at the cycle start point, and once at the end of the cycle.
The display will illustrate the temperature of the bath during operation and the cycle
time remaining.

10
On successful completion of the cycle, the following message will be displayed.
The user must acknowledge the complete cycle, by pressing the enter button, before
the screen will return to the start ready for another cycle to be started.

11
Cycle abort messages
The Neon Series software has fault modes which will abort the cycle if the programmed
parameters are not met or if any fault occurs.
If the cycle aborts, the reason will be displayed on the screen. An audible warning will
sound to signal a process fail.
To stop the audible warning, press and hold the “enter” button until the warning stops.
If a fault occurs, the Neon Series will display a message on screen and the cycle will
abort:
The cycle may abort for the following reasons:
Level Low The liquid level is too low
Under Temp The fluid is below the minimum set temperature
Over Temp The fluid is above the maximum set temperature
Operator The operator has aborted the cycle
Sonics Low The ultrasonic power is too low
Sensor fail The temperature sensor is faulty
Power fail There has been a power failure during a cycle
Press and hold the ‘enter’ button to acknowledge the fault and return to operation
mode.

12
Draining the tank
The tank is drained via a valve on the underside of the unit, shown here in the “off” /
“closed” position. This will need to be “on” / “open” to drain the main tank:
There is also another drain valve situated lower down on the pump (shown here in the
“off / normal position). This is used to drain any remaining fluid in the pipework along
with the pump drain plug for a complete drain-down of the system:
Step – Ensure that the drain (on rear of unit) is connected to a suitable drain outlet or
container.
Step 2 – Turn the valve 90 degrees to the “on / “open” position to drain the unit.
Step 3 – Allow the liquid to drain.
Step 4 – Close the valve when the tank is completely drained
Step 5 – Wipe or flush the inside of the tank to remove debris and/or residual fluid

13
Changing/Inspecting the filters
There are two more valves used as isolation devices when changing the filters on a
pump & filter stand and also as a flow control throttle for the re-circulation system,
shown here in the normal open position:
Note: Do not shut off both valves when the Neon Series is in operation as this will
damage the pump.
The main tank/weir does not need to be emptied to change the filters.
Step – Ensure that the bund tray is in place below the filter housings:
Step 2 – Turn both valves 90 degrees to the “off / “closed” position to isolate the tank
fluid:

14
Step 3 – Open the filter housing bleed valve on the bottom of one of the housings:
Step 4 – Dispose of all fluid in the filter housing.
Step 5 – Repeat the same process with the second filter housing.
Step 6 – Remove each filter housing using the tool provided, by turning the housing
locking ring left/anti-clockwise:
Step 7 – The filter can now be inspected and replaced if necessary.
Step 8 – Repeat the same process for the second filter.
Before returning the isolation valves to their normal working positions make sure that
filter housings are replaced and re-tightened.
Return the two isolation valves to their original “on / open” positions

15
Ultrasonic cleaning detergents
Detergents are a vital component in the ultrasonic cleaning process, aiding in the
removal and loosening of debris from the surfaces of items placed in the tank while also
intensifying the power of the ultrasonic activity.
Ultrawave offer a range of specially formulated ultrasonic detergents for use in
applications including medical and heavier industrial cleaning requirements.
Ultrawave recommend using 2-5% of detergent by volume (if unsure, start with 2%). The
required dosage will depend on your cleaning application and the level of
contamination. Items should be rinsed with water and dried immediately after
processing.
Ultraclean SA: A general purpose cleaning detergent suitable for use on aluminium
and other soft metals.
Ultraclean M2: A general purpose cleaning detergent for all plastics, glass and metals
(except aluminium and other soft metals), which is also suitable for use on medical
instruments.
Ultraclean CS: Moderate grease and heavy contaminant removal for industrial
cleaning applications. Not suitable for use on aluminium and other soft metals.
Ultraclean CBX: An alkaline detergent for heavy grease and carbon removal. Not
suitable for use on aluminium and other soft metals.
Ultraclean SPX: A strong alkaline detergent for removal of tough grease and heavy
carbon deposits. Not suitable for use on aluminium and other soft metals.
Ultraclean PH: A strong acidic based detergent for heavy descaling, light rust removal
and metal brightening. Not suitable for use on aluminium and other soft metals.
Ultraclean CTA: An acidic based detergent for descaling, degreasing and brightening
of metals. Fair compatibility with aluminium.
Ultraclean RI: Rust inhibitor for corrosion prevention of ferrous metals.
Ultraclean Test Kit: A sample pack of 1L each of the Ultraclean: SA, M2, CS, CBX, SPX
and PH.
The Safety Data Sheet for these detergents are available on the Ultrawave website
www.ultrawave.co.uk . [Visit the Downloads section of the Product Support area of the
site]
For more information, contact us via e-mail at admin@ultrawave.co.uk or call on:
+ (0)8 5 330 236.

16
Technical information
The need to degas: gases are present in tap water. In order to allow optimum ultrasonic
activity, these gases need to be driven out of the cleaning solution.
The time needed to degas the liquid varies depending on the amount of gas present in
the liquid. Ultrawave recommends a degas period of 5 minutes.
Increased “cold-boiling” at the liquid surface indicates that the liquid is degassed. Once
the liquid is degassed, the bath is immediately useable.
Cleaning fluids: Ultrasonic baths require the presence of a cleaning detergent to work
effectively. Ultrawave have several cleaning fluids which have been specifically
formulated for ultrasonic cleaning of industrial items.
Consult Ultrawave before using any detergents, solutions or chemicals not approved
by them
The effect of heat: Heating the liquid in the bath will aid the cleaning process. Normally
a temperature of 20-50°C is sufficient to accelerate the process.
Ultrasonic activity itself will heat up the liquid at a rate of approximately 5-10°C per hour.
If the unit is operated continuously, it may eventually reach the ‘over temp’ state and
set off the audible alarm because the liquid is too hot.
Cleaning time: The time required to clean components will vary depending on the
nature and level of contamination to be removed.

17
Compliance with the Control of Noise at Work Regulations
The Control of Noise at Work Regulations 2005 (the Noise Regulations
[1]
) came into
force for all industry sectors in Great Britain on 6 April 2006. The Control of Noise at
Work Regulations 2005 replaces the Noise at Work Regulations 1989.
The aim of the Noise Regulations is to ensure that workers’ hearing is protected from
excessive noise at their place of work, which could cause them to lose their hearing
and/or to suffer from tinnitus (permanent ringing in the ears)
The level at which employers much provide hearing protection and hearing protection
zones is now 85 decibels (daily or weekly average exposure) and the level at which
employers must assess the risk to workers’ health and provide them with information
and training is now 80 decibels. There is also an exposure limit value of 87 decibels,
taking account of any reduction in exposure provided by hearing protection, above
which workers must not be exposed.
To help you calculate your workers’ exposure, Ultrawave publish the noise generated
by your ultrasonic cleaner on the Certificate of Test. The figure is that experienced by
a worker standing in the operating position.
The full test of the Control of Noise at Work Regulations 2005
[2]
and the full text of the
Noise at Work Regulations 1989
[2]
can be viewed online.
Guidance on the 2005 Regulations can be found in the free HSE leaflet ‘Noise at Work’
(INDG362 (rev 1)
[ ]
and in HSE’s priced book ‘Controlling Noise at Work’ (L108) (ISBN 0
7176 616 ) available from HSE Books
[5]
or from bookshops.
[1]
http://www.hse.gov.uk/noise/regulations.htm
[2]
http://www.opsi.gov.uk/si/si2005/200516 3.htm
[3]
http://www.opsi.gov..uk/si/si1989/Uksi_19891790_en_1.htm
[ ]
http://www.hse/gov/uk/pubns/indg362.pdf
[5]
http://www.hsebookds.co.uk

18
Troubleshooting
Ultrawave have a dedicated After Sales team who are able to resolve any problems that
occur with your Neon Series. However, on many occasions, it is possible that the
problem can be rectified by the operator.
The Neon Series fails to
turn on (no display is
shown)
Check that the machine is plugged in and that mains
electricity is present.
The screen displays:
“Level Low”
Fill the
tank
with liquid so that it is above the float switch
inside the tank.
If the screen still displays “LEVEL LOW”, there is an
internal fault and the Neon Series will need to be
serviced.
The screen displays:
“Power Fail”
The
Neon Series
had lost power during a cycle, this will
be indicated at next power-up. This is just a notification
to the user that the last cycle may not have completed.
The screen displays:
“Sonics Low”
The liquid may have not de
gassed yet or
there
is an
internal fault and the bath will need to be serviced.
The screen displays:
“Under temp”
Allow the Neon Series to reach the minimum set
temperature before starting the cycle.
The screen displays:
“Over temp”
Allow the Neon Series to cool, or remove some of the hot
liquid and replace with cold liquid.
The screen displays:
“Sensor Fail”
Switch the Neon Series off and then back on again. If the
screen still displays “Sensor Fail”, there is an internal fault
and the machine will need to be serviced.
If any of these problems persist, the Ultrawave After Sales Department can be
contacted on:
Tel: + (0) 8 5 330 238
E-mail: service@ultrawave.co.uk
There are no user serviceable parts inside the Neon Series.
Other manuals for Neon Series
1
This manual suits for next models
4
Table of contents
Other Ultrawave Cleaning Equipment manuals

Ultrawave
Ultrawave ARGON Assembly instructions

Ultrawave
Ultrawave Neon Series User manual

Ultrawave
Ultrawave IND Series User manual

Ultrawave
Ultrawave Qi Series User manual

Ultrawave
Ultrawave Q Series Assembly instructions

Ultrawave
Ultrawave Hygea 6427 Assembly instructions

Ultrawave
Ultrawave U Series User manual

Ultrawave
Ultrawave hygea d3ntal Assembly instructions