Uni-ram UG5000W Manual

PLACE THE SPRAY GUN IN THE CLEANING TANK:
• Place the spray gun on a nozzle extension in the wash tank with
the air cap facing the corner. Select the nozzle extension that best fits your spray
gun. There is a fixed nozzle extension in the wash tank and push-on extensions in the
accessory kit.
PREPARE THE SPRAY GUN FOR CLEANING:
• Loosen the air cap 2 turns.
• Use the Trigger Lock Spring (120-350) as shown
in the photos to the right to hold the trigger in the
open position.
WASH CYCLE:
• Close the lid of the cleaning tank and turn the
“Auto Wash Timer” clockwise to start cleaning.
The wash cycle takes about 60 seconds.
• Push and hold the “Air Rinse” button for about 2
seconds to evacuate the wash solvent.
• Press and hold the “Clean Rinse” button for about
2 seconds to send 100 cc of clean solvent through the
jets to rinse the spray guns. Clean-rinse is limited to
100 cc of solvent to minimize consumption.
Wait 30 seconds before re-using the clean rinse to allow the rinse pump to refill.
• Push and hold the “Air Rinse ” button for about 2 second to air-rinse the guns.
• After cleaning the spray guns, remove the guns from the tank and wipe them dry.
Do not store spray guns and cups in the wash tank.
• Clean any splashed paint from the spray gun cleaner.
PRE-CLEAN:
• Disconnect the spray gun from the air line and remove the
cup.
• Squirt solvent into the paint channel allowing waste solvent
to drain into a waste container (not supplied). (photo on right)
If you have a conventional cup drain paint into waste container.
UG5000W - SOLVENT TANK
STANDARD OPERATING PROCEDURES
To prevent solvent from entering the air passage way of your spray gun:
• Insert the white plastic plug into the air fitting of the spray gun. If you have
removed the air fitting, attach the knurled nut (attached to the Trigger Lock Spring)
to the air passageway of the spray gun.
USING THE FLOW-THROUGH BRUSH:
• Step on the foot pedal to send wash solvent
through the Brush to wash the spray gun. See photo on
right.
• Solvent flow is set at the factory but may be adjusted
using the left side “Brush Flow Control”. See photo on far
right.
• To increase flow, loosen the locking nut, rotate the
dial anti-clock wise, and tighten the locking nut.
Trigger Lock Spring
Trigger Lock
Spring in
position
Air Plug
(140-230)
Nozzle
Extrension
Auto Wash
Timer Air Rinse
Clean
Rinse
Flow-Through Brush Brush Flow
Control
For detailed instructions refer to your user manual or the user manual at www.uniram.com, Technical Support.
SOP-UG5 JULY 2020
PUSH
PUSH

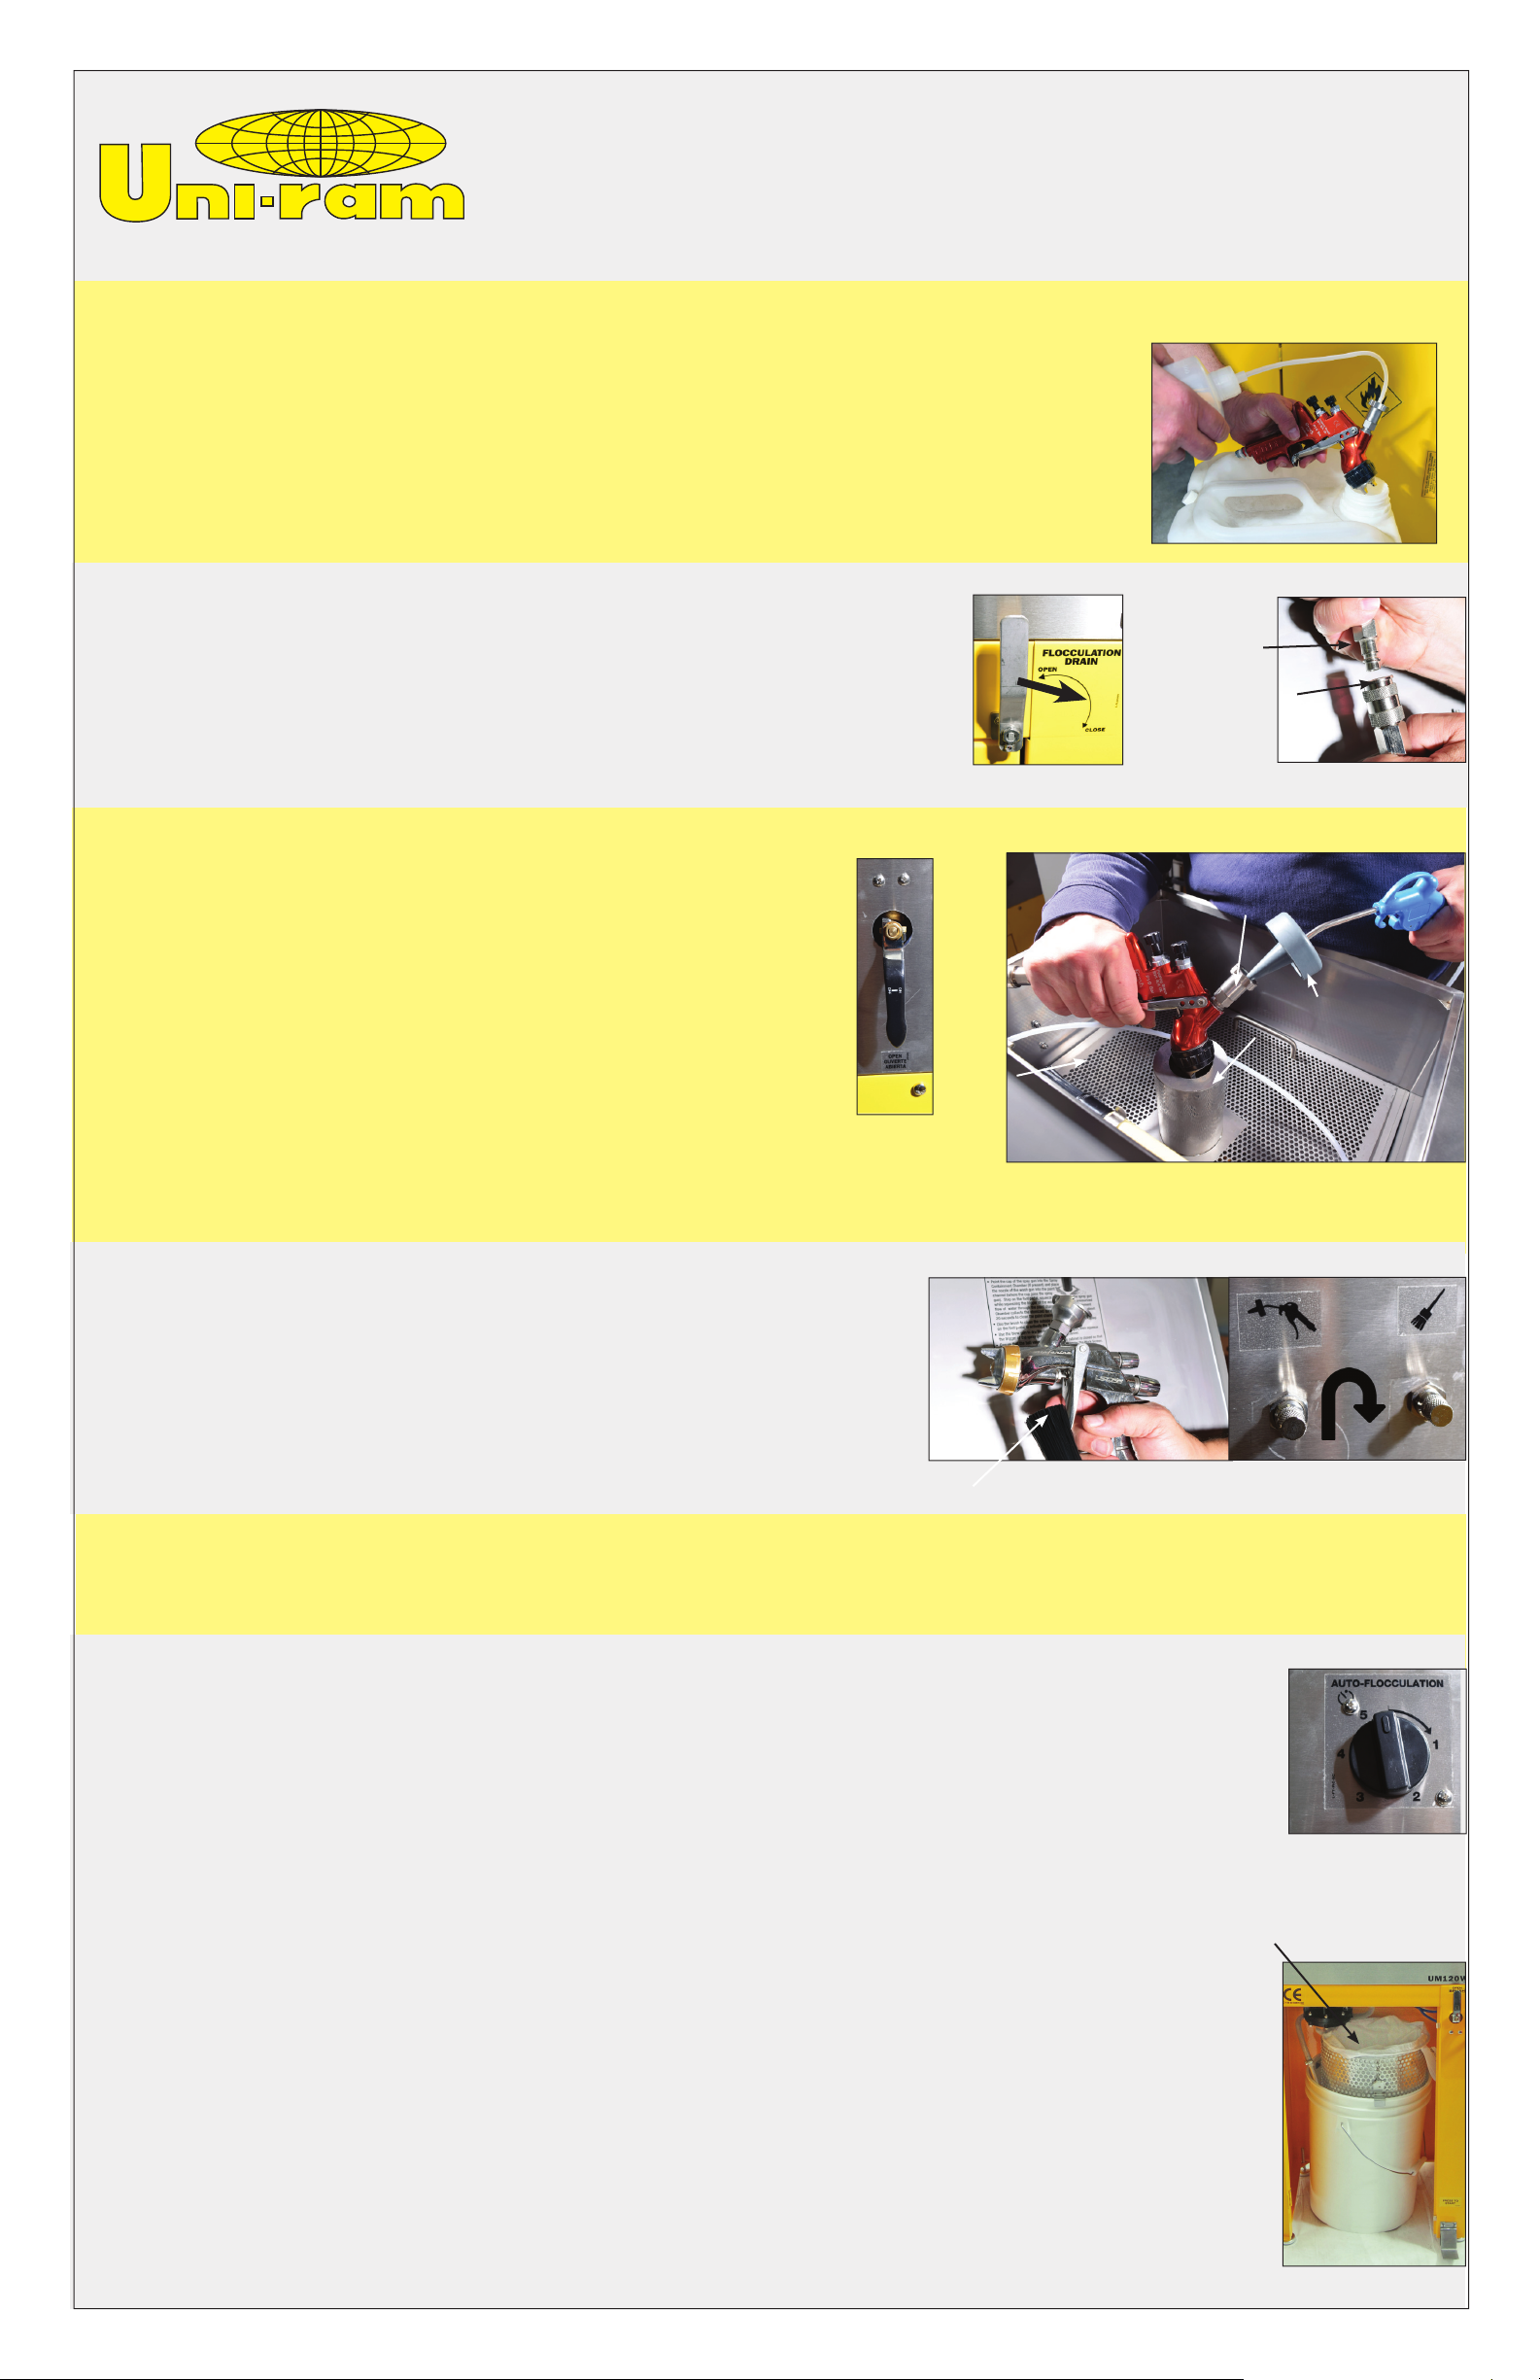
USE WATER GUN TO FLUSH THE PAINT CHANNEL:
• Move the handle of the Selector Valve to the Wash Gun position.
See photo on right.
• Step on the foot pedal, squeeze the trigger of the spray gun and
Wash Gun to send a pressurized flow of water through the paint
channel. The Spray Containment Chamber contains the spray.
• Allow water to flow for about 20 seconds to clean the
paint channel. See photo on far right.
• Use the Wash Gun Flow Control to adjust the water volume.
See photo on the far right in next section.
PREPARE FOR CLEANING:
• Move the handle of the drain flocculation valve to the closed position.
See photo on right.
• Connect the quick connect of the whip line to the air fitting of the spray
gun. See photo on far right.
DRY SPRAY GUN:
• Squeeze the trigger of the spray gun and use the blow gun to dry the paint channel and then the outside of the spray gun.
PRE-CLEAN:
• Disconnect the spray gun from the air line and remove the
cup.
• Squirt water into the disposable cup adapter, pull the trigger and
allow waste water to drain into a waste container (not supplied).
See photo on right.
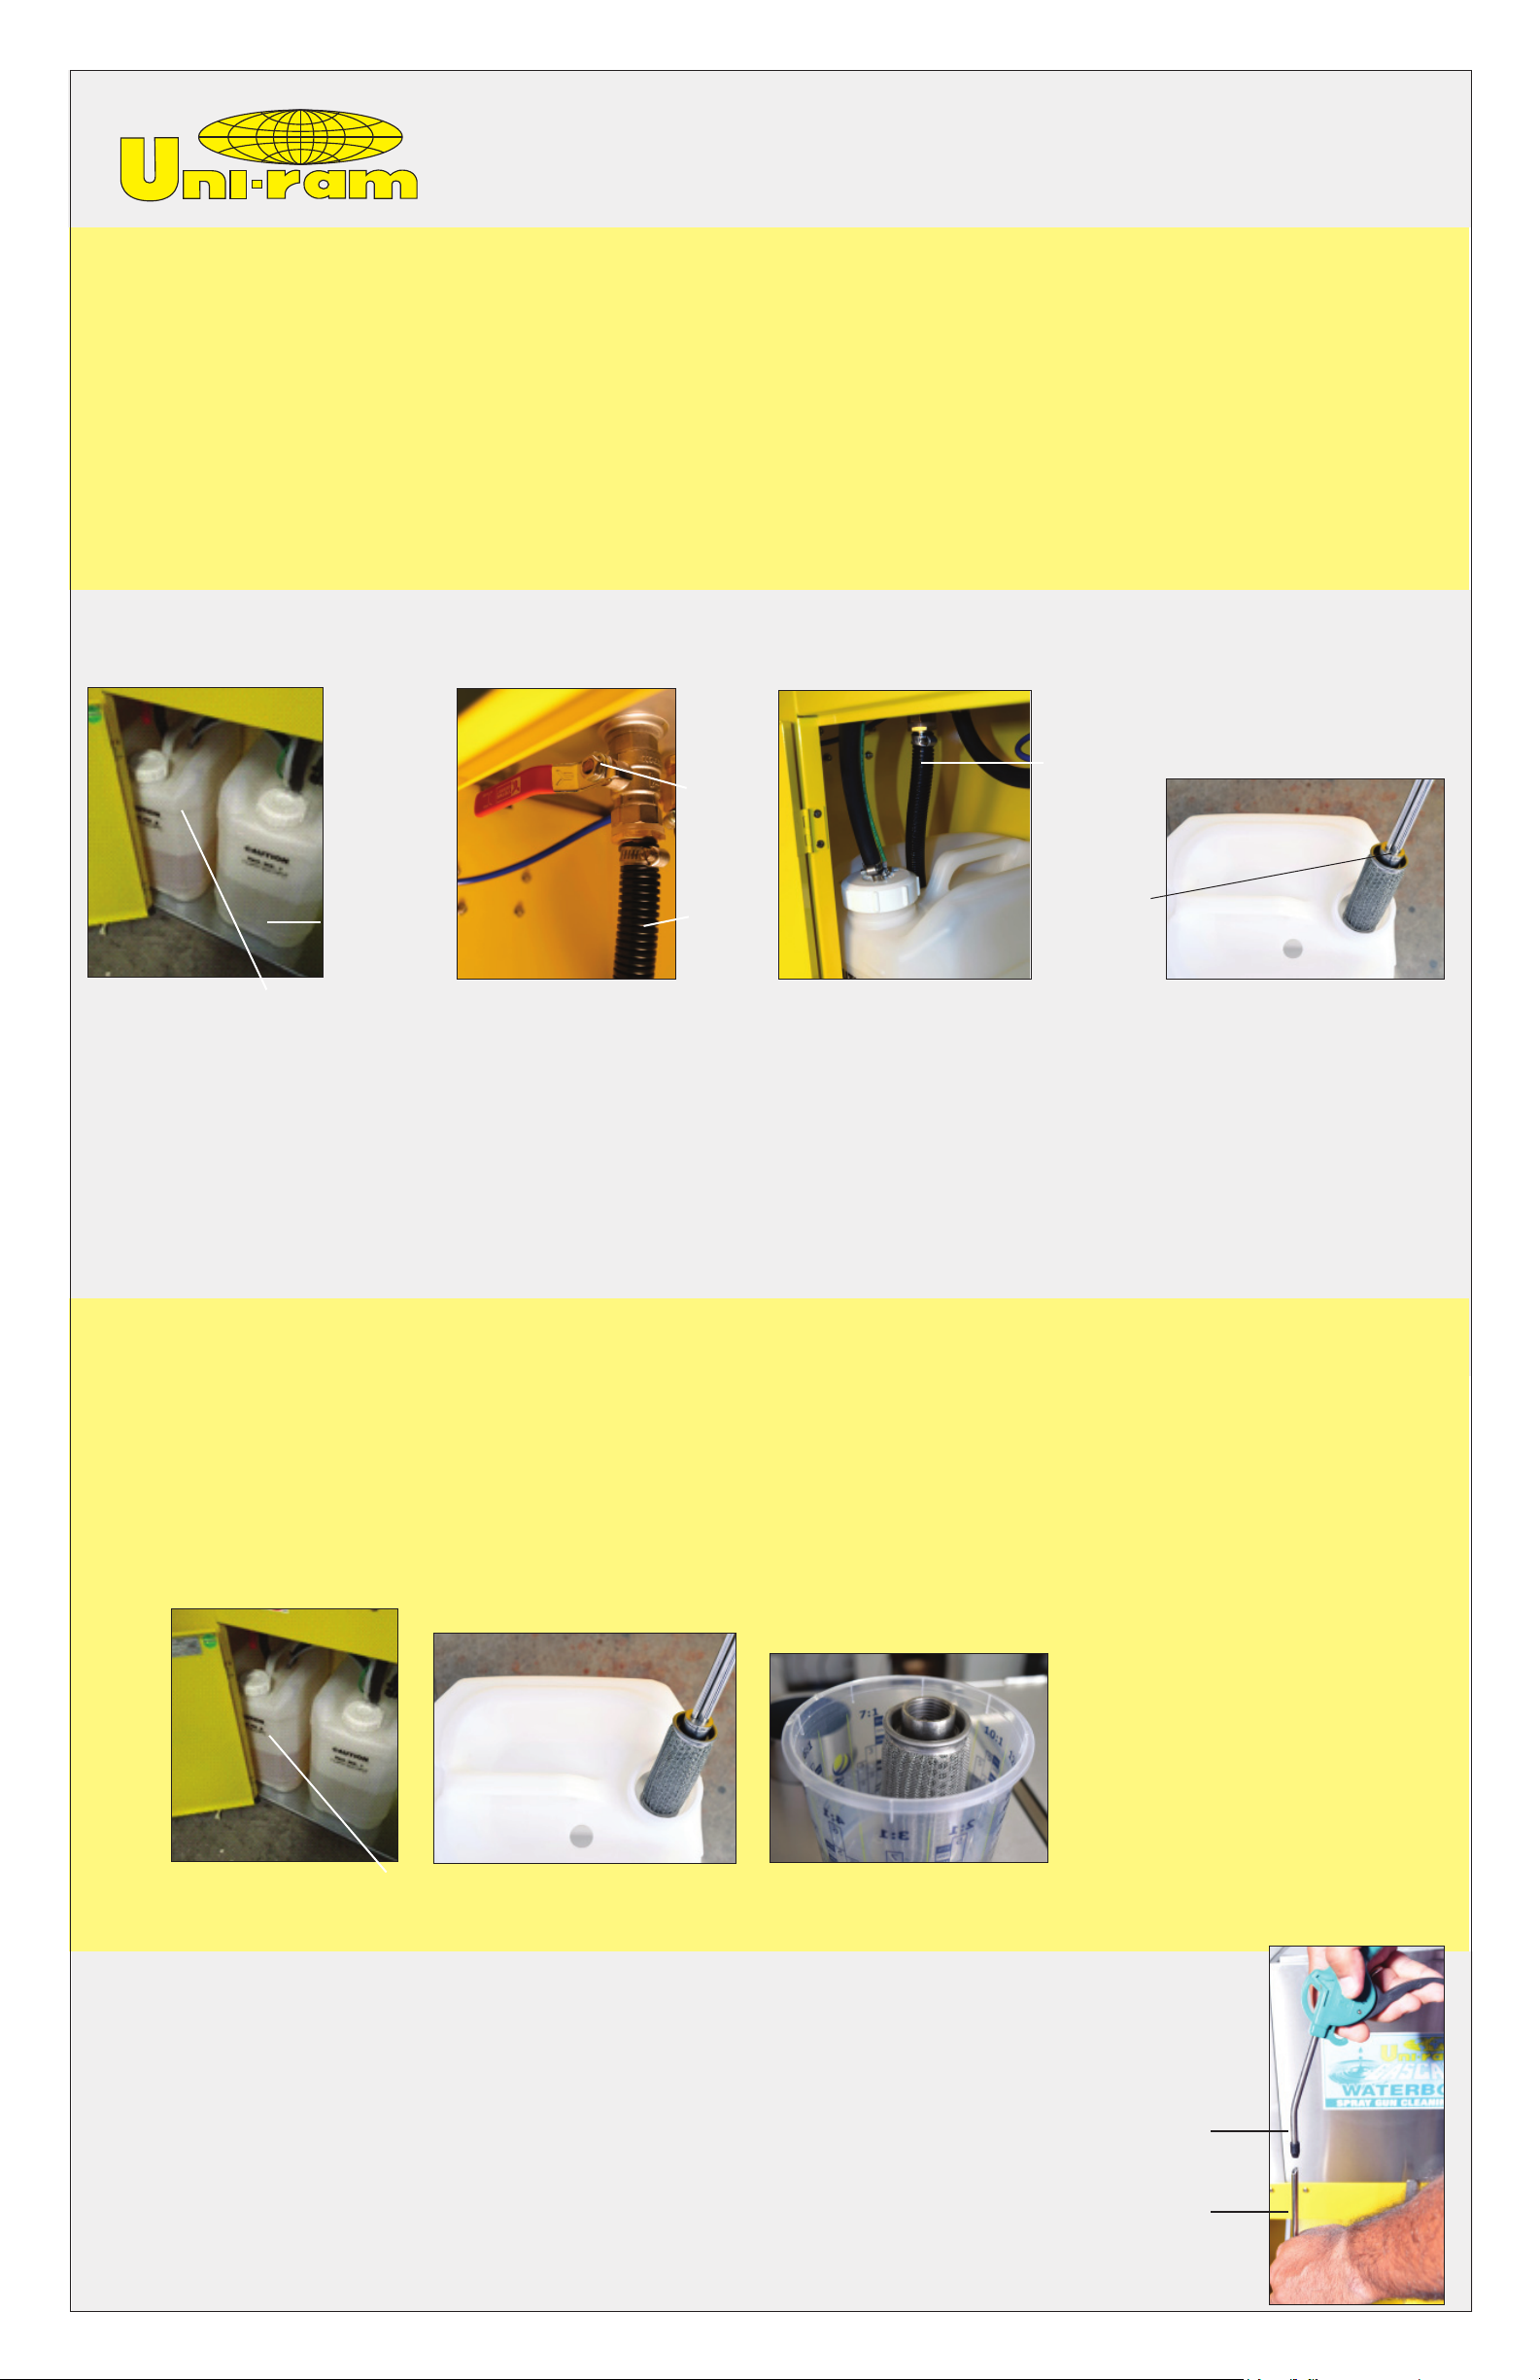
UG5000W - WATER TANK
STANDARD OPERATING PROCEDURES
Wash
Gun
Fluid Passage of
Spray gun
USE THE FLOW-THROUGH BRUSH TO WASH THE SPRAY GUN:
• Move the handle of selector valve to the horizontal position and step on
the foot pedal to send a pressurized flow of water through the Brush.
• Use the Brush Flow Control to adjust the water volume.
See photo on the far right. To increase flow, loosen the locking nut,
rotate the dial anti-clock wise, and tighten the locking nut.
Spray Containment
Chamber
Air fitting of
spray gun
Coupler of the
whip line
Flow-through Brush
Selector
Valve
Flow Control
Flocculation Timer
Primary Filter
Water Pail
BrushWash Gun
WATER RECLAIM:
When no water remains in the water pail under the cleaning tank it is time to reclaim the dirty water.
• Remove the Work Screen. Sprinkle 2 full scoops of the flocculant, COAG-KLEEN,
evenly over the dirty water. Close the lid and turn the Flocculation Timer fully. When the Timer is
finished wait 2 minutes and turn the timer a second time to the one minute mark.
• Note: As the flocculation proceeds, the water will become clear below the surface. Open the
Flocculation drain valve to drain and filter the dirty water. Clean the tank with the wash gun, wipe
off the work screen, reinsert it and then close the drain valve. Ensure that the Air Agitator in the bottom
of the tank lies flat.
• Remove the two filters containing the debris and set aside for about 20 minutes to “dry”. When the
debris is “dry”, it should have an "oatmeal like" consistency. Dispose of the debris according to local
environmental regulations.
• If the filtered water is not clean, see the Troubleshooting section in the manual.
• The treated water can be reused until it becomes "silky" to the touch and then it should be disposed of
according to local environmental regulations. When adding fresh water, refill until the water reaches
the bottom of the filter holder.
• Reuse the filters and replace as required.
SOP-UG5 JULY 2020

(C) PROCEDURE TO CLEAR WATER LINES FOR WATER GUN AND BRUSH
1) Move the Selector Valve to the Brush position.
2) Lift the Water Inlet Tube out of the water pail as shown in the photo on
the right.
3) With a blow gun that is not connected to the gun cleaner blow air through
the Water Inlet Tube and at the same time step on the foot pedal to clear
the water line to the brush of any debris.
4) Move the Selector Valve to the Water Gun position and follow the procedure 2-3.
SOP-UG5 JULY 2020
UG5000W
MONTHLY MAINTENANCE
(B) PROCEDURE TO CLEAN METAL FILTER IN SOLVENT WASH PAIL :
• The removable metal filter is installed at the end of the suction tube, inside the wash pail. See 1st photo below. The filter
prevents debris from entering the pump and cleaning tank.
• Remove the wash pail from the cabinet, then remove the suction tube as in the 2nd photo below.
• Unscrew the metal filter (104-4310S) from the tube and clean the metal filter in a mixing cup of clean solvent. See 3rd
photo below. Tighten the filter by hand only.
Metal Filter Clean Metal Filter
in solvent
Solvent Wash Pail
Drain hose
Suction Tube
with Filter
PROCEDURE:
1) Check the solvent level in the solvent wash pail and clean rinse pail. If the wash pail is less than 75% full, top up to the 75%
mark. If the clean rinse pail is less than 50 % full, top up to the 100% mark. If the spray guns feel sticky after cleaning
or if there has been 100 cleanings replace the solvent in the wash pail following procedure (A) below.
2) Clean the stainless steel metal filter (104-4310S) located in the wash pail. Follow procedure (B) below.
3) Check the operation of the solvent wash timer, rinse pump and brush and check for the presence of the trigger clips (120-350)
4) Check the operation of the water gun and brush. Clean the water lines used in the water tank. Follow procedure (C) below.
5) Maintain a supply of Aqua-Kleen (102-8200), Coag Kleen (102-8300), primary filter (102-8125) and secondary filter (102-8126).
6) Clean the solvent wash tank and the water wash tank. Clean all jets with a wire cleaning tool as necessary.
7) Carry out the flocculation procedure and clean or replace filters as required.
Solvent
Wash Pail
Solvent
Rinse Pail
Drain
Hose
Drain Valve Solvent Wash Pail Suction Tube with Filter
Drain
Valve
(A) PROCEDURE TO REPLACE THE WASH SOLVENT
• Remove the Rinse Pump from the clean solvent pail and move the clean pail out of the cabinet.
Water Inlet Tube
Blow gun connected to
building air supply
• Close the drain valve, (horizontal position) as in the 2nd photo above. Remove the drain hose and suction tube with filter
from the wash pail. See 3rd and 4th photo.
•Remove the solvent wash pail from the cabinet. Pour the used wash solvent into the waste drum. Install the drain hose and
suction tube in the wash pail and return the wash pail to the cabinet. Open the drain valve and pour solvent into the cleaning
tank to fill the wash pail to the 75 % mark. Return the clean rinse pail to the cabinet and move the drain hose from the wash
pail to the clean rinse pail. Pour solvent into the clean tank to fill the clean pail to the 100% mark. Return the drain hose to
the wash pail and install the rinse pump in the clean rinse pail. Ensure the drain valve is in the open (vertical) position.
Other manuals for UG5000W
2
Table of contents
Other Uni-ram Ultrasonic Jewelry Cleaner manuals

Uni-ram
Uni-ram UG4000D Manual

Uni-ram
Uni-ram UG4000D User manual

Uni-ram
Uni-ram UG110 User manual

Uni-ram
Uni-ram UG2000DM Series User manual

Uni-ram
Uni-ram UG5000W User manual

Uni-ram
Uni-ram UG7500 Series User manual

Uni-ram
Uni-ram UG2000DMV User manual

Uni-ram
Uni-ram UM80W User manual

Uni-ram
Uni-ram UG7500W User manual
Popular Ultrasonic Jewelry Cleaner manuals by other brands

Aircare
Aircare TruckMaster Operating instructions manual

Silvercrest
Silvercrest SHBR 560 B1 operating instructions

Sonoswiss
Sonoswiss PRESET SW 1/H instruction manual

E-MAG
E-MAG emmi 4 user manual

Silvercrest
Silvercrest SUR 48 C4 operating instructions

Garten Meister
Garten Meister 81 63 64 Original instructions