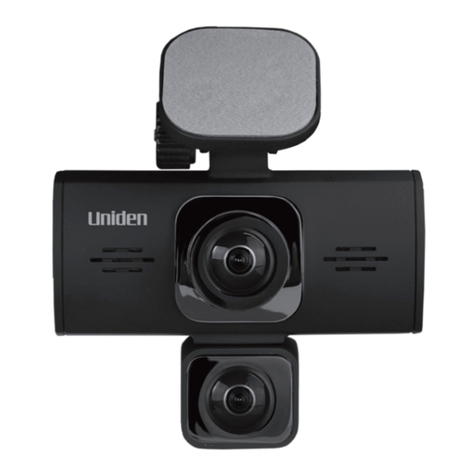
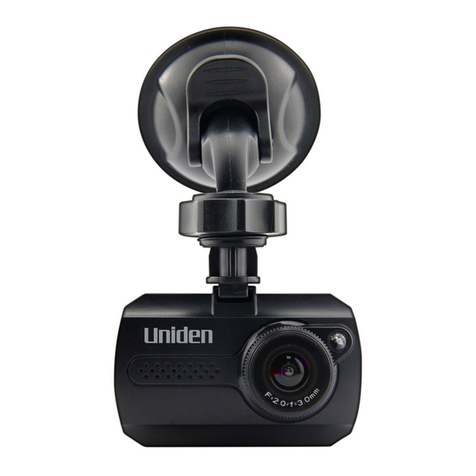
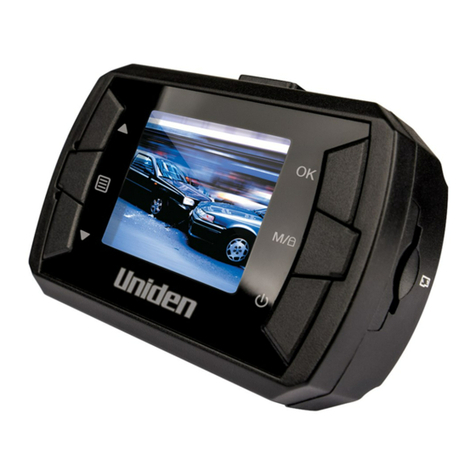
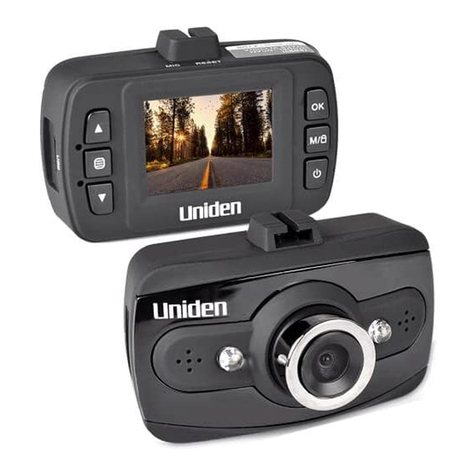
Uniden DC12 User manual

DC12
Issue 1, June 2016
Printed in China
© 2016 Uniden America Corporation
Irving, Texas
OWNER’S MANUAL
DUAL CAMERA
AUTOMOTIVE VIDEO RECORDER
iWitness

IMPORTANT SAFETY INSTRUCTIONS
• Unidendoesnotrepresentthisproducttobe
waterproof.Donotexposethisproducttorainor
moisture.
• Thisproductisintendedforuseinamotorvehicle.
Don’tinstallthedevicewhereitwillblockthedriver’s
viewoftheroad(includingthemirrors)orthe
deploymentoftheairbag.
• Keepyourattentionontheroad!Don’ttrytooperate
orfocusonanydevicewhiledriving.Ifyouhaveto
concentrateonthedevice,pullofftheroadforafew
minutes.
• Ensurethatthecameralensiskeptcleanandthereis
nothingblockingthelens.
• Don’tleavethedeviceindirectsunlightforalong
periodoftimeorwherethetemperaturecouldgo
above140°F(60°C).

CONTENTS
IMPORTANT SAFETY INSTRUCTIONS ..................... 2
OVERVIEW .................................................................. 5
FEATURES..................................................................................... 5
WHAT’S IN THE BOX? .................................................................. 6
CONTROLS AND INDICATORS.................................................... 7
INSTALLATION AND POWER UP - DC12 FRONT
CAMERA.................................................................... 9
INSTALLATION SAFETY WARNINGS .......................................... 9
DC12 FRONT CAMERA INSTALLATION.................................... 10
INSTALL THE MICROSD CARD............................................... 10
ATTACH THE DC12 FRONT CAMERA .................................... 11
POWER UP THE DC12 ............................................................. 11
INSTALLATION AND POWER UP - DC12 REAR
CAMERA.................................................................. 12
INSTALLATION SAFETY WARNINGS ........................................ 12
DC12 REAR CAMERA INSTALLATION...................................... 13
SETTING UP THE DC12............................................ 13
CONFIGURATION MENU ............................................................ 13
CAR/DRIVER ID ........................................................................ 18
ADAS SYSTEM ......................................................................... 20
DC12 OPERATING MODES ........................................................ 20
Video Mode ............................................................................... 20
Snapshot Mode ........................................................................ 20
USING THE DC12...................................................... 22
RECORD VIDEO.......................................................................... 22
SAVE CURRENT RECORDING (LOCK FILE) ............................ 22
PLAY BACK RECORDED FILES (PLAYBACK MODE) ............. 23
View Files.................................................................................. 23
MANAGE RECORDED FILES..................................................... 23
USE THE BACKUP CAMERA................................... 24
VIEW FILES ON A PC ............................................... 25
Download the Uniden Player................................................... 25
Connect microSD Card to PC ................................................. 25
View Files on Player................................................................. 26
Video Playback Screen............................................................ 28
VIEWING SNAPSHOTS FROM VIDEO ON PC........................... 29
TROUBLESHOOTING............................................... 30
SPECIFICATIONS...................................................... 31
FCC/INDUSTRY CANADA COMPLIANCE ............... 33
ONE-YEAR LIMITED WARRANTY ........................... 34

5
DC12
AUTOMOTIVE VIDEO RECORDER
OVERVIEW
TheUnidenDC12isadualcameraultra-compact
recorderwithFHD1920x1080highresolutionvideothat
canbesetuptocontinuouslycapturehighqualityvideo
eveninlowlightconditions.Thebuilt-inG-Sensorsystem
triggersthecameratoinstantlybeginrecordingifthe
vehicleisbumpedorscraped.TheDC12frontcamera
canevenrecordoutsidethevehicleforthedurationofthe
internalbattery’spower.
Asecondcamera,installedabovetherearwindshield
orlicenseplate,displaysvideoonthefrontcamera
screeninapicture-in-pictureformat.Itconnectsto(and
ispoweredby)themainunitviaaminiUSBconnector.
Ifconnectedtothebackuptaillights,itdisplaysinfull
screenwithbackupguidelineswhenthevehicleisin
reverse.
FEATURES
• 3.0”colorscreen
• FHD1920x1080@30fps
• Frontcamera:170°ViewingAngle(diagonal);Rear
camera:140°ViewingAngle
• SupportsH.264videocompressiontechnology
• Licenseplaterecognitiontechnology
• Savescurrentvideoincaseofaccident(G-force)
• AudioRecording

6
• ADASsystem
• LoopRecording
• AutoPowerOn/Offwhenengineturnedon/off
• DateStamponVideoPlayback
• RecordsontomicroSDCard(16GBincluded)
• InternalRechargeableBattery(upto10minutes)
• Built-InMicrophone
WHAT’S IN THE BOX?
UnidenDC12
FrontCamera
Windshield
Mount
UnidenDC12
RearCamera
andcables
DC(CAR)
Adapter
MiniUSBtoUSB
Cable
16GBMicroSD
card
NotShown:MicroSDtoSDCardConverter,Owner’s
Manual,Installationkit
If any items are missing or damaged, get answers
24/7 at our website: www.uniden.com.

7
CONTROLS AND INDICATORS
3
5
2
7
6
9
8
11
12
14
13
10
1615
1
4 2
14
3
Number Name Purpose
1 Unnamed
jack
Futureexpansion
2 Latch Connectcameratowindshield
mount.
3Power DC5Vpowerconnection.

8
Number Name Purpose
4 USBSlot ConnecttheDC12toa
computertoviewrecorded
video/photos.
5Menu InVideo,Snapshot,and
Playbackmodes:Pressto
accesscongurationmenu.
Pressagaintoreturntolive
video.
Duringvideorecording:Pess
andholdtoturnmicrophone
on/off.
6,7 ▲▼ InLiveview:Turnrecording
microphoneonoroff.
InMenumode:UporDown.
InVideoPlaybackmode:Press
▼toskipahead2to3seconds.
Press▲torewind2to3
seconds.
8 Mode SwitchbetweenVideo,
Snapshot,andPlayback
modes.
Whilerecording:Presstolock
therecordedle.
9 Screen Displayscreen
10 Speakers Listentoaudiofromthecamera
11 LED Duringrecording-Flashing

9
Number Name Purpose
12 Power Presstoturnuniton.Pressand
holdtoturnoff.
InStandbyorRecording:
Shortpresstoputthescreen
inStandbymode.Shortpress
againtoreturntoactivemode.
13 REC InVideomode:Presstostart
andstoprecording.
InSnapshotmode:Pressto
takephoto.
InMenumode:Pressto
conrmanentryorselection.
14 microSDslot InsertmicroSDcard.
15 Reset Ifthecamerafreezesorlocks
up,insertapinoranunfolded
paperclipintothisspace.Press
andholdtheResetbuttonto
resetthecamera.Turnthe
camerabackon.
16 MIC Microphone
INSTALLATION AND POWER UP -
DC12 FRONT CAMERA
INSTALLATION SAFETY WARNINGS
WARNING! Failure to comply with the following
warnings could result in an accident or collision,

10
resulting in death or serious injury.
Do not obstruct the driver’s view or the operation of
the vehicle itself.
Do not place it unsecured on the dashboard or in
front/above an airbag.
Do not mount the camera where it will become a
distraction if it becomes loose.
Do not attempt to operate the camera while driving. If
you need to access the DC12 to change settings, etc.,
pull off the road in a safe manner to do so.
Some state laws prohibit drivers from mounting
anything on the windshield, or restrict mounting to
specic areas of the windshield. It is the owner’s
responsibility to mount the DC12 in compliance with
local laws.
DC12 FRONT CAMERA INSTALLATION
INSTALL THE MICROSD CARD
A compatible microSD card (16GB supplied) is
required to record and store videos and photos.
ThecameracansupportmicroSDHCcards(High
CapacitymicroSD)upto64GBincapacity.Uniden
recommendsusingagoodqualitymicroSDHCcardof
atleast16GBcapacityandminimumClass10speed.
(A16GBmicroSDcardandSDtomicroSDadapterare
included.)
GentlyinsertaformattedmicroSDcard(seepage21)
intheslotonthesideofthecamera.Toremovethecard

11
fromtheslot,presstheedgeofthemicroSDcardinwards
forittopopoutandthenpullitoutoftheslot.
ATTACH THE DC12 FRONT CAMERA
1. Besurethebracketlockingringissettounlock.
2. SlidetheDC12ontothebrackethookonthebottom
ofthewindshieldmountuntilitlocksintoposition.
3. Turnthelockingringtolock.Makesurethebracket
islockedtothewindshield.
4. Tounmountthebracket,turnthelockingringtothe
unlock( )positionandthenlifttheplasticapon
thebasetoreleaseitfromthewindshield.
POWER UP THE DC12
Only use the DC car adapter that comes with your
device. Any other adapter might damage the device.
1. Refertoyourcar’sowner’smanualtoverifywhere
thepoweroutletsareonandaroundthedashboard.
Locateanoutletthatsupplies12Velectricpower
whenthekeyisintheONorACCposition.
2. Connectthecaradaptertothecamerathroughthe
DC5Vportandtothe12Vpoweroutlet.
3. Startthecar.Thecameraturnsonautomaticallyand
beginsrecording.Whenthecar’sengineisturned
off,thecamerawillautomaticallyturnoffinafew
seconds.
Charge the camera for at least 15 minutes after it is
turned on for the rst time or after it has been turned
off for more than three weeks.
4. Atothertimes,pressthe buttontoturniton.

12
Pressandholdthe buttontoturnitoff.
Thecamerachargesthebatterywheneverpoweris
connected.Whenthecameraisbeingcharged,thered
LEDglows.Thecameratakesabout120minutesto
chargecompletelyfromanemptystate.ABatteryStatus
icondisplayswhenthecameraisdisconnectedfrom
powerandtellsyouhowfullthebatteryis.
Empty1/2 FullFull 1/4 Full3/4 Full
INSTALLATION AND POWER UP -
DC12 REAR CAMERA
INSTALLATION SAFETY WARNINGS
WARNING! Failure to comply with the following
warnings could result in an accident or collision,
resulting in death or serious injury.
Do not obstruct the driver’s view or the operation of
the vehicle itself.
Do not mount the camera where it will become a
distraction if it becomes loose.
Always check the area behind where you are drilling
mounting holes. Be aware of what you are drilling
into.

13
DC12 REAR CAMERA INSTALLATION
CAUTION: Uniden STRONGLY recommends
professional installation of the rear camera.
Thebackupcameradisplaysina“picture-in-picture”
formatwhenthefrontcamerapowersup.Whenthe
vehicleisinreverse,thebackcameradisplaysfull
screen,withguidelinesforbackupdisplayed.Seepage
24fordetails.
SETTING UP THE DC12
Beforerecordingvideoortakingsnapshots,setuphow
youwantyourDC12tooperate.Thecongurationmenu,
commontoallthreemodes,letsyousetthedateand
timestamp,turnaudiorecordingonoroff,settheimage
resolution,etc.
CONFIGURATION MENU
Inanymode,pressMENUtoaccesstheconguration
menu.
You cannot access the menus if the DC12 is
recording. Press REC to stop recording, then press
MENU.
Press▲or▼toscrollthroughthevariousoptionsand
thenpressRECtoselectthatoption.

14
Option Description
Car/DriverID Providesawaytoidentifythevehicle
inwhichthedeviceismounted(upto
8alphanumericcharacters).(Seepage
18fordetails.)
VideoQuality Setsthevideoresolution.
• 1080FHD
• 720PHD
Picture
Quality
Denesthequalityoftheimageyou
take.
• 1M
• 2M
• 5M
• 8M
Loop
Recording
Denethelengthoftimevideorecords
beforerecordingstopsandanother
recordingbegins.Forexample-ifLoop
Recordingissetto3minutesandyou
haverecordedfor17minutes,you
mayhave53-minuteand12-minute
recordedvideos.
• 1minute
• 3minutes
• 5minutes
• Off
ADAS AdvancedDrivingAssistantSystem.
PressRECtocheckforONorOFF.
(Seepage20formoreinformation.)

15
Option Description
DisplayCar/
DriverID
PressRECtochecktheboxtodisplay
theCar/DriverIDduringvideoplayback.
CameraFlip Checkthiseldtohavethebackup
cameradisplayareverseimage.
Monitor
Parking
Whenchecked,thecamerabegins
recordingaccordingtoG-Sensor
activation(nexteldinthemenu).
G-Sensor Detectssignicantorsudden
movement;automaticallyactivatesand
locksrecordingpreventingitfrombeing
erased.
Levelsofmotionrequiredtoactivate
recordingare:
• High
• Medium
• Low
• Off

16
Option Description
Auto
Shutdown
Setsthetimedurationtoautomatically
poweroffthecamerawhenidle,
regardlessofwhetherornotthecar
chargerispluggedin.
• 1min
• 3min
• 10min
• Off
IfthesettingisOffandthecarcharger
isunpluggedwhilethecamerais
recording,thecamerawillpowerdown
in10seconds.
Ifthecarchargerisunpluggedwhilethe
cameraisNOTrecording,thecamera
willpowerdownaccordingtothisAuto
Shutdowneld.IfOFFisselected,
cameraremainsonuntilinternalbattery
runsout.
Motion
Detection
Enablethissettingtoallowtherecorder
tostartrecordingwhenitdetects
movement.
Volume Settheplaybackvolumelevel:
• High
• Medium
• Low

17
Option Description
White
Balance
• Automatic
• Sunny
• Cloudy
• Incandescentlight
• Flourescence
Contrast 0-5
Exposure -3,-2,-1,0,1,2,3
Automatically
Record
Checktosetvideorecordingtostart
whenthecamerapowerson.
Screen
Switch
SetatimedelaybeforetheLCDturns
offafterthecameraisturnedon.
OFF(alwayson)or10,20,30seconds
RecordAudio Turnrecordingmicrophoneofforon.
Date YYYYMMDDHHMMSS
Setthetimein24hourformat(00-23);
however,timedisplaysonthescreen
in12-hourformat(AM/PM).(Press
MODEtoreturntothemenus.)

18
Option Description
TimeZone Press▲or▼toselectaTimeZone.
Themostcommonlyusedtimezones
forthissystemare:
• -5-EasternStandard
• -6-CentralStandard
• -7-MountainStandard
• -8-PacicStandard(Default)
• -9-YukonStandard
• -10-Alaska-HawaiiStandard
PressRECtoconrmandreturntothe
menu.
Language • English
• Français
• Español
TimeStamp Selecttodisplaythedateandtimeon
recordedvideo
Format ReformatsthemicroSDcard.
Factory
Reset
Resetsthermwaretothefactory
defaults.
Version Displayscurrentrmwareversion
CAR/DRIVER ID
Thismenuoptionletsyouenterthelicensenumberor
anyotheridentier(upto8alphanumericcharacters)to
labelthevehicleinwhichthedeviceismounted.This
featureisusefulifthedeviceissharedbetweenvehicles
andvideoneedstobelinkedtoaspecicvehicleorifyou

19
aremonitoringmultipledevicesamongseveralvehicles.
1. Ifrecording,pressRECtostop.PressMENU.
2. Press▲or▼toscrolltoCar/DriverIDifneeded
andpressRECtoselectit.
3. UNIDENdisplaysonthescreenthersttimethis
optionisaccessed.PressRECtotogglebetween
UNIDENandblankspaces.
4. Press▲or▼toselecttherstspaceorpressREC
tomovetothenextspace
5. Press▲or▼toscrollthroughthecharacter
optionsbelowtheboxesandpressRECtoselecta
character.
Character options are blank, 1 - 0, blank, comma (,),
dash (-), and A - Z (capital letters). The current letter
is greyed out.
U NEDIN
1234567890 .-ABCDEFGHIJKLMNO
PQRSTUVWXYZ
Car/Driver ID
6. Afteryoucompletetheentry,pressMODEtoreturn
tothemenu.
7. Theidentierdisplaysafterthedate/timestamp
whenthevideoisplayedbackifDisplayCar/Driver
IDisturnedon(Seepage15).
Tochangeacharacter:PressRECrepeatedlytocycle
throughthecharacterstoreachthecharactertochange.
Changethecharacterusing▲or▼andthenpressREC

20
tomovetothenextcharacter.PressMODEtoreturnto
themainmenuwhentheentryiscomplete.
Toremoveacharacter(insertingablank):PressREC
repeatedlytocyclethroughthecharacterstoreachthe
charactertoremove.Selecttheblankcharacterand
pressREC.Youwillnowhaveablankcharacterinthat
spot.PressMODEtoreturntothemainmenuwhenthe
entryiscomplete.
ADAS SYSTEM
ADAS(AdvancedDrivingAssistantSystem)iscomprised
oftwosystems-LDWS(LaneDepartureWarning
System)andFCWS(ForwardCollisionWarningSystem.
• LDWS-LaneDepartureWarningSystem.Warns
driverwhenvehicleisdriftingintoanotherlane.Uses
lanemarkings.
• FCWS-FrontCollisionWarningSystem.Warnsdriver
ofpotentialcrashaheadintimefordrivertotake
evasiveaction.
DC12 OPERATING MODES
TheDC12operatesinthreemodes:Video,Snapshot,
andPlayback.QuicklypressMODEtocyclethroughthe
modes.Stopwhenyouareonthemodeyouwant.
Video Mode
PresRECtostartandstoprecording.Recordedvideois
savedonthemicroSDcard.Seepage22fordetails.
Snapshot Mode
TheDC12letsyoutakestillimages(snapshots)oflive
videothatisnotrecording.Youcannottakeasnapshot
Table of contents
Other Uniden DVR manuals

Uniden
Uniden PRO400X1 User manual

Uniden
Uniden Pro7400H1 User manual

Uniden
Uniden UDVR46-4 User manual

Uniden
Uniden DCAM User manual

Uniden
Uniden Pro12800N0-4K User manual

Uniden
Uniden Pro71600N3 User manual

Uniden
Uniden Pro12800N0-4K User manual

Uniden
Uniden PRO Series User manual

Uniden
Uniden GNVR 167 Series User manual

Uniden
Uniden Pro7800N1 User manual
Popular DVR manuals by other brands

Avermedia
Avermedia AVertV USB HD DVR datasheet

Bosch
Bosch Divar -Digital Versatile installation instructions

Gogen
Gogen PVR3050 user manual

Interlogix
Interlogix truVision 11c Series installation manual

Swann
Swann DVR4-NET-PLUS SW243-4NU Specifications

Digital Watchdog
Digital Watchdog VMAX A1 Plus DW-VA1P8 quick start guide