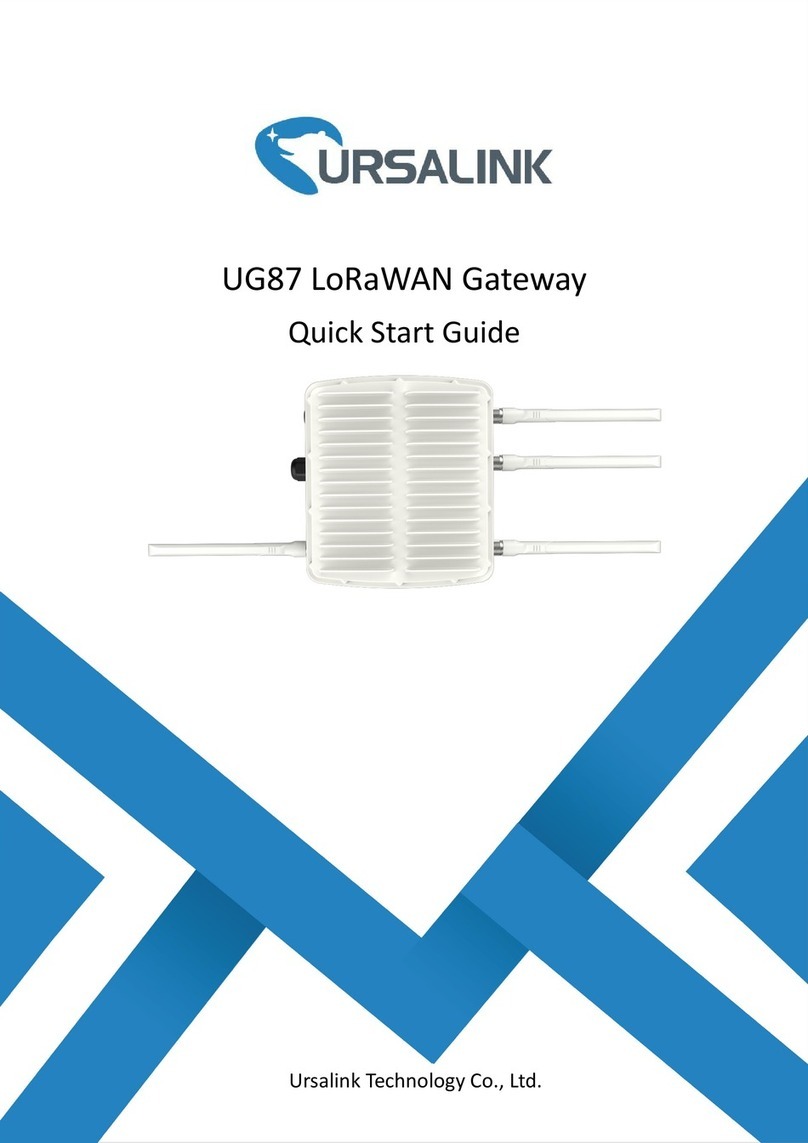
Ursalink UG87 User manual

1
UG87-Out LoRaWAN Gateway
Quick Start Guide
Ursalink Technology Co., Ltd.

www.ursalink.com
1
Welcome
Thank you for choosing Ursalink UG87 LoRaWAN Gateway.
This guide teaches you how to install the UG87 (Outdoor) and how to log in the web GUI to configure the
device. Once you complete the installation, refer to the Ursalink UG87 User Guide for instructions on how to
perform configurations on the device.
Related Documents
This Quick Start Guide only explains the installation of Ursalink UG87 LoRaWAN Gateway. For more
functionality and advanced settings, please refer to the relevant documents as below.
Document
Description
Ursalink UG87 Datasheet
Datasheet for the Ursalink UG87 LoRaWAN Gateway.
Ursalink UG87 User Guide
Users can refer to the guide for instruction on how to log in the
web GUI, and how to configure all the settings.
The related documents are available on Ursalink website: http://www.ursalink.com.
Declaration of Conformity
UG87 is in conformity with the essential requirements and other relevant provisions of the CE, FCC, and
RoHS.
For assistance, please contact
Ursalink technical support:
Email: support@ursalink.com
Tel: 86-592-5023060
Fax: 86-592-5023065

Ursalink UG87 Quick Start Guide
www.ursalink.com
2
Before you begin to install the UG87 LoRaWAN Gateway, please check the package contents to verify that
you have received the items below.
1.1 Package Contents
Optional Accessories
1 × Pole Mount A + 2 × U-Bolt
1 × Pole Mount B + 2 × U-Bolt
Screws
Required Additional Equipment
If any of the above items is missing or damaged, please contact your Ursalink sales
representative.
1 × UG87
1 × Ethernet Extension Cord
1 × Water-proof Connector
1 × Power Supply Cable
2 × Cellular Antennas
1 × LoRa Antenna
1 × GPS Antenna
1 × Warranty Card
1 × Quick Start Guide
1 × Wall Mounting Kit
2 × Pole Mounting Kit
Screws
1 × Personal Computer
1 × Ethernet Cable
1 × Wrench M6
2 × Screwdrivers
( Phillips-head and Flathead )
1. Packing List
+
+

Ursalink UG87 Quick Start Guide
www.ursalink.com
3
2.1 Overview
2.2 Dimensions (mm)
2. Hardware Introduction
Top View Bottom View Front & Rear View

Ursalink UG87 Quick Start Guide
www.ursalink.com
4
2.3 LED Indicators
LED indicators are on the front panel of device.
LED
Indication
Status
Description
POWER
Power Status
On
The power is switched on
Off
The power is switched off
STATUS
System Status
Green Light
Static: Start-up
Blinking slowly: the system is running properly
Off
The system goes wrong
LoRa
LoRa Status
Green Light
Packet Forwarder mode is running well.
Off
Packet Forwarder mode is running off.
VPN
VPN Status
Green Light
VPN is connected
Off
VPN is disconnected
SIM1/SIM2
SIM Card Status
Off
SIM1 or SIM2 is registering or fails to register (or
there are no SIM cards inserted)
Green Light
Blinking slowly: SIM1 or SIM2 has been registered
and is ready for dial-up
Blinking rapidly: SIM1 or SIM2 has been registered
and is dialing up now
Static: SIM1 or SIM2 has been registered and dialed
up successfully
Signal
Strength
Signal 1/2/3
Off
No signal
Green Light
Static/Off/Off: weak signals with 1-10 ASU (please
check if the antenna is installed correctly, or move
the antenna to a suitable location to get better
signal)
Static/Static/Off: normal signals with 11-20 ASU
(average signal strength)
Static/Static/Static: strong signals with 21-31 ASU
(signal is good)
2.5 Reset Button
Reset button is on the front panel of device.
Function
Description
STATUS LED
Action
Reboot
Blinking
Press and hold the reset button for about 5-15 seconds.
Static Green
Release the button and wait for system to reboot.
Reset
Blinking
Press and hold the reset button for more than 15 seconds.
Static Green →
Rapidly Blinking
Release the button and wait.
Off → Blinking
The gateway is now reset to factory default.

Ursalink UG87 Quick Start Guide
www.ursalink.com
5
2.6 Ethernet Port Indicator
Ethernet port indicators are on the front panel of device.
Indicator
Status
Description
Link Indicator (Orange)
On
Connected
Blinking
Transmitting data
Off
Disconnected
Rate
Indicator (Green)
On
1000 Mbps mode
Off
100 Mbps mode

Ursalink UG87 Quick Start Guide
www.ursalink.com
6
Environmental Requirements
- Power Input: 100-240VAC (Option: 9-48 VDC)
- Power Consumption: Typical 3.3W (Max 6.4 W)
- Ingress Protection: IP67
- Operating Temperature: -40°C to 70°C (-40°F -158°F)
- Relative Humidity: 0% to 95% (non-condensing) at 25°C/77°F
3.1 SIM Card Installation
3.1.1 Remove the detachable cover
Remove the detachable cover of the housing with a screwdriver (M4).
Note: Your device has been installed into the enclosure before delivery.
3.1.2 SIM Card Installation
A. Push the yellow button on the left panel of the B. Put SIM card onto the slot then insert the
slot, and then you will see the SIM card back into the hole.
slot popping out directly.
3. Hardware Installation

Ursalink UG87 Quick Start Guide
www.ursalink.com
7
3.2 Antenna Installation
3.2.1 Remove the protective caps
Remove the protective caps from the antenna connectors. Take cellular connector as an example.
3.2.2 Connect the antenna
Connect the antenna to the corresponding antenna connector by holding on the metal part of the antenna
and rotating it clockwise.
Note: Each antenna is labeled as 3G, 4G or LoRa.
3.3 Power Connection
3.3.1 Remove the protective caps
Locate the power port marked POWER on the left side of the enclosure and remove the protective cap to
find the connection pins.

Ursalink UG87 Quick Start Guide
www.ursalink.com
8
3.3.2 Connect the power cable
Connect a power supply cable to the power port, and rotate it clockwise.
3.4 Ethernet Connection
1. Get the network cable through the screw nut, rubber ring and the screw bolt;
2. Insert the rubber ring into the screw bolt;
3. Connect the screw nut to the screw bolt;
4. Place the O-Ring on the network port connector;
5. Connect the RJ45 to the Network port connector, and tighten the screw bolt and the connector.
PIN
Color
Description
1
Brown
L (VIN+)
2
Black
GND
3
Blue
N (VIN-)

Ursalink UG87 Quick Start Guide
www.ursalink.com
9
3.5 Connect UG87 to a Computer
3.6 Mount Gateway
The gateway can be mounted to a wall or a pole.
3.6.1 Wall Mounting
Make sure you have mounting bracket, bracket mounting screws, wall plugs, wall mounting screws and
other required tools.
1. Before you start, make sure that your SIM card has been inserted, your antennas have been attached and
that all cables have been disconnected from your enclosure.
2. Mount the enclosure to the mounting bracket with the bracket mounting screws.
3. Align the mounting bracket horizontally to the desired position on the wall, use a marker pen to mark
four mounting holes on the wall, and then remove the mounting bracket from the wall.
Note: The connecting lines of adjacent points are at right angles.
4. Drill the four holes with a depth of 32 mm by using your drill with a 6 mm drill bit on the positions you
marked previously on the wall.
5. Insert four wall plugs into the holes respectively.
6. Mount the mounting bracket horizontally to the wall by fixing the wall mounting screws into the wall
plugs.
Note: Place the power port on the button when installing.

Ursalink UG87 Quick Start Guide
www.ursalink.com
10
7. Reconnect the cables.
3.6.2 Pole Mounting ( Hose clamp)
Make sure you have mounting bracket, bracket mounting screws, hose clamp and other required tools.
1. Before you start, make sure that your SIM card has been inserted, your antennas have been attached and
that all cables have been disconnected from your enclosure.
2. Mount the enclosure to the mounting bracket with the bracket mounting screws.
3. Loosen the hose clamp by turning the locking mechanism counter-clockwise.
4. Straighten out the hose clamp and slide it through the rectangular holes in the mounting bracket, wrap
the hose clamp around the pole.

Ursalink UG87 Quick Start Guide
www.ursalink.com
11
5. Use a screwdriver to tighten the locking mechanism by turning it clockwise.
6. Reconnect the cables.
3.6.3 Pole Mounting (U-bolt)
Note: Pole mounting (U-bolt) is optional.
Make sure you have mounting bracket, bracket mounting screws, hose clamp and other required tools.
1. Before you start, make sure your SIM card has been inserted, your antennas have been attached and that
all cables have been disconnected from your enclosure.
2. Mount the enclosure to the mounting bracket with the bracket mounting screws.
3. Wrap the U-bolt around the pole and mount the bracket with the mounting screws.

Ursalink UG87 Quick Start Guide
www.ursalink.com
12
4. Reconnect the cables.

Ursalink UG87 Quick Start Guide
www.ursalink.com
13
Getting Started
Please connect PC to GE port of UG87 directly. PC can obtain an IP address, or you can configure a
static IP address manually. The following steps are based on Windows 10 operating system for your
reference.
③Click “Ethernet” (May have different names). ④Click “Properties”.
4. PC Configuration for UG87 Web GUI
①Click “Search Box” to search “Control Panel” on the
Windows 10 taskbar.
②Click “Control Panel” to open it, and then click
“View network status and tasks”.

Ursalink UG87 Quick Start Guide
www.ursalink.com
14
(Note: Remember to click “OK” to finish configuration.)
⑤Double Click “Internet
Protocol Version 4
(TCP/IPv4)” to configure IP
address and DNS server.
⑥Method 1: click “Obtain an IP
address automatically”;
Method 2: click “Use the
following IP address” to assign a
static IP manually within the
same subnet of the gateway.

Ursalink UG87 Quick Start Guide
www.ursalink.com
15
This chapter explains how to log in UG87 Web GUI, and connect the gateway to cellular network.
Ursalink UG87 provides web-based configuration interface for management. If this is the first time you
configure the gateway, please use the default settings below:
IP Address: 192.168.1.1
Username: admin
Password: password
5.1 Log in the Gateway
Make sure your PC is connected to the same network as shown in Section 4.
A. Start a Web browser on your PC (Chrome and IE are recommended), type in the IP address, and press
Enter on your keyboard.
B. Enter the username and password, click “Login”.
If you enter the username or password incorrectly more than 5 times, the login page will be locked
for 10 minutes.
C. When you log in with the default username and password, you will be asked to modify the password. It’s
suggested that you change the password for the sake of security. Click “Cancel” button if you want to modify
it later.
5. Access to UG87 Web GUI for Cellular Connection

Ursalink UG87 Quick Start Guide
www.ursalink.com
16
D. After you log in the Web GUI, you can view system information and perform configuration on the
gateway.
5.2 Configure the Cellular Connection
Take inserting SIM card into SIM1 slot as an example; please refer to the following detailed operations.
A. Click “Network” → “Interface” → “Cellular” → “Cellular Setting” to configure the cellular info.
B. Enable SIM1.
C. Choose relevant network type. “Auto”, “4G First”, “4G Only”, “3G First”, “3G Only”, “2G First” and “2G
Only” are optional.
D. Click “Save” and “Apply” for configuration to take effect.

Ursalink UG87 Quick Start Guide
www.ursalink.com
17
If you select “Auto”, the gateway will obtain ISP information from SIM card to set APN, Username, and
Password automatically. This option will take effect when the SIM card is issued from a well-known ISP.
If you select “4G First” or “4G Only”, you can click “Save” to complete the configuration directly.
If you select “3G First”, “3G Only”, “2G First” or “2G Only”, you should manually configure APN, Username,
Password, and Access Number.
UG87 have two cellular interfaces, named SIM1 & SIM2. Only one cellular interface is active at one time. If
both cellular interfaces are enabled, SIM1 interface takes precedence by default.
5.3 Check the Cellular Connection Status
5.3.1 Check the Cellular Connection Status by Web GUI of Gateway
Click “Status” → “Cellular” to view the status of the cellular connection. If it shows “Connected”, it means

Ursalink UG87 Quick Start Guide
www.ursalink.com
18
SIM1 has dialed up successfully.
5.3.2 Check the Cellular Connection Status by Hardware
On the other hand, you can check the status of SIM1 indicator. If it keeps on green light statically, it means
SIM1 has dialed up successfully.
5.4 Check if Network Works Properly by Browser on PC
Open your preferred browser on PC, then type any available web address into address bar and see if it is
able to visit Internet via UG87.

Ursalink UG87 Quick Start Guide
www.ursalink.com
19
6.1 Node Parameters
Channel Plan
AS923
Frequency
923.4MHZ, 923.2MHZ
Join Type
OTAA
Device EUI
60C5A8FFFE0003F9
Application EUI
70B3D57ED0007AC2
App Key
328F2A3F5BA8D0B236459CF06D0512B5
6.2 Configure The Things Network
A. Gateway Configuration
B. Applications Configuration
Gateway EUI
24E124FFFEF0132E
Frequency Plan
Asia 920-923MHZ
Server ID
Switch-router (ttn.opennetworkinfrastructure.org)
6. Packet Forwarder Testing
Other manuals for UG87
1
Table of contents
Other Ursalink Gateway manuals

Ursalink
Ursalink UR75 Edge User manual

Ursalink
Ursalink LoRa User manual

Ursalink
Ursalink urbana GI01 User manual

Ursalink
Ursalink UG65 User manual

Ursalink
Ursalink UG85 User manual

Ursalink
Ursalink UG85 User manual

Ursalink
Ursalink UG87-LW User manual
Ursalink
Ursalink UG87 User manual
Ursalink
Ursalink UG87-In User manual
Popular Gateway manuals by other brands

ZyXEL Communications
ZyXEL Communications USG310 quick start guide

Verizon
Verizon Fios G1100 installation guide

ZyXEL Communications
ZyXEL Communications P-2304R-P1 Series quick start guide

FireAngel
FireAngel WG-2 installation guide

IMesh X
IMesh X Probe S Series Configuration guide

Advantech
Advantech UniGateway EH-2101W user manual