Warnings
To prevent damage to your LifePod® or injury to yourself or to others, read the following safety
precautions before using this unit.
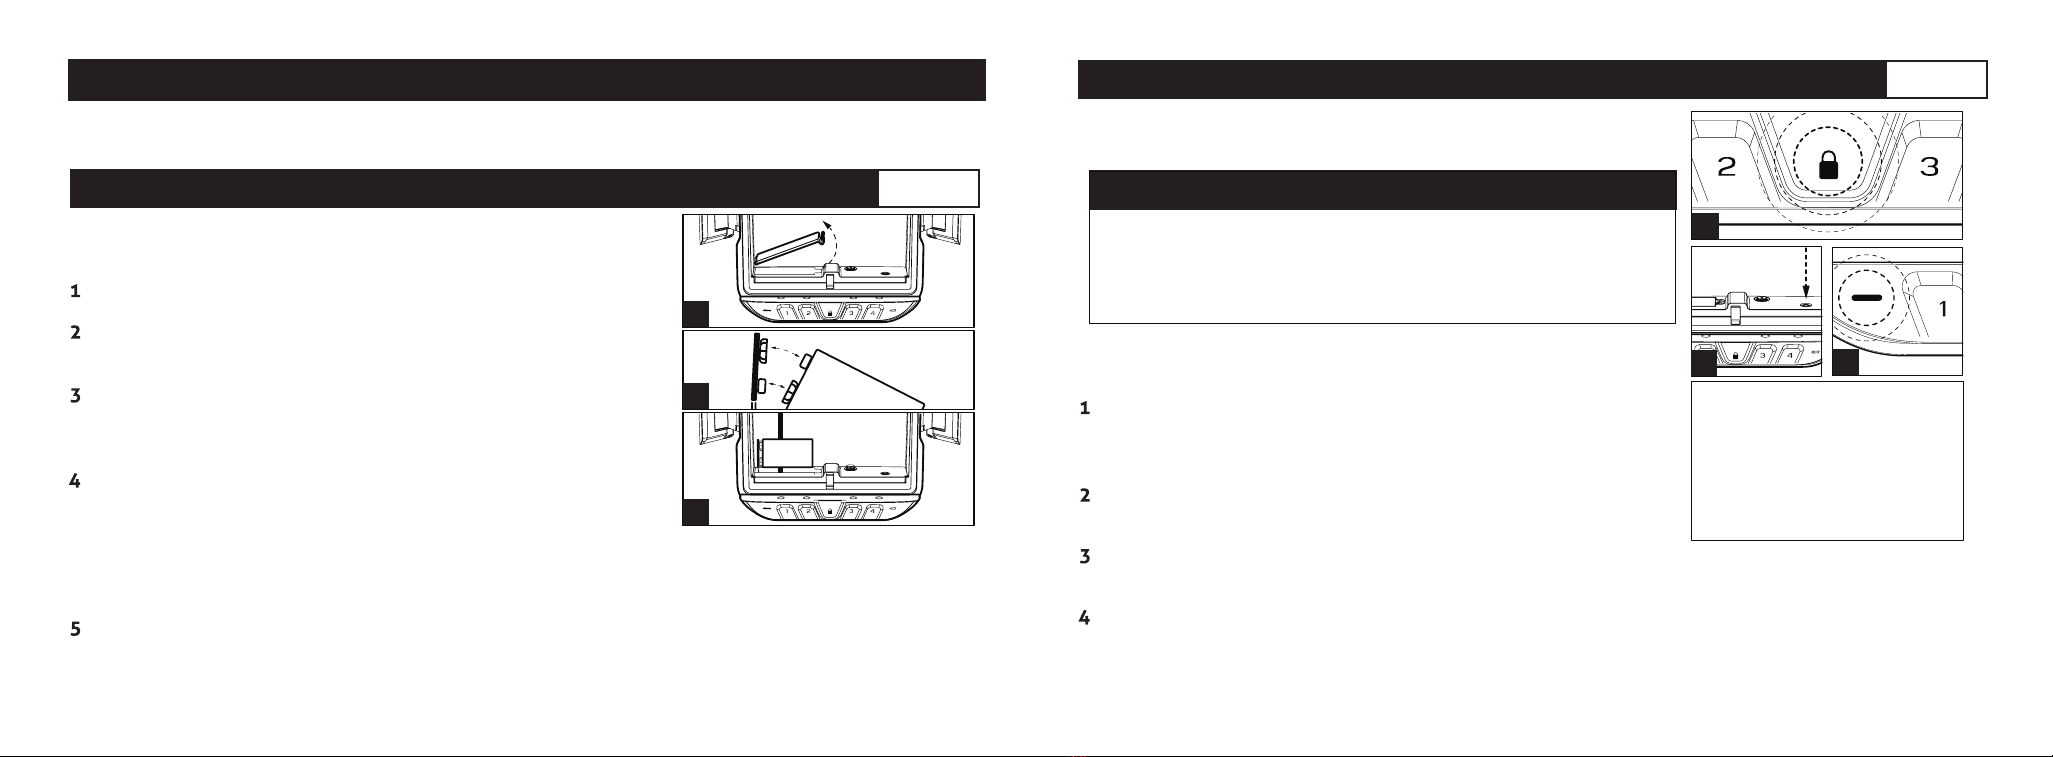
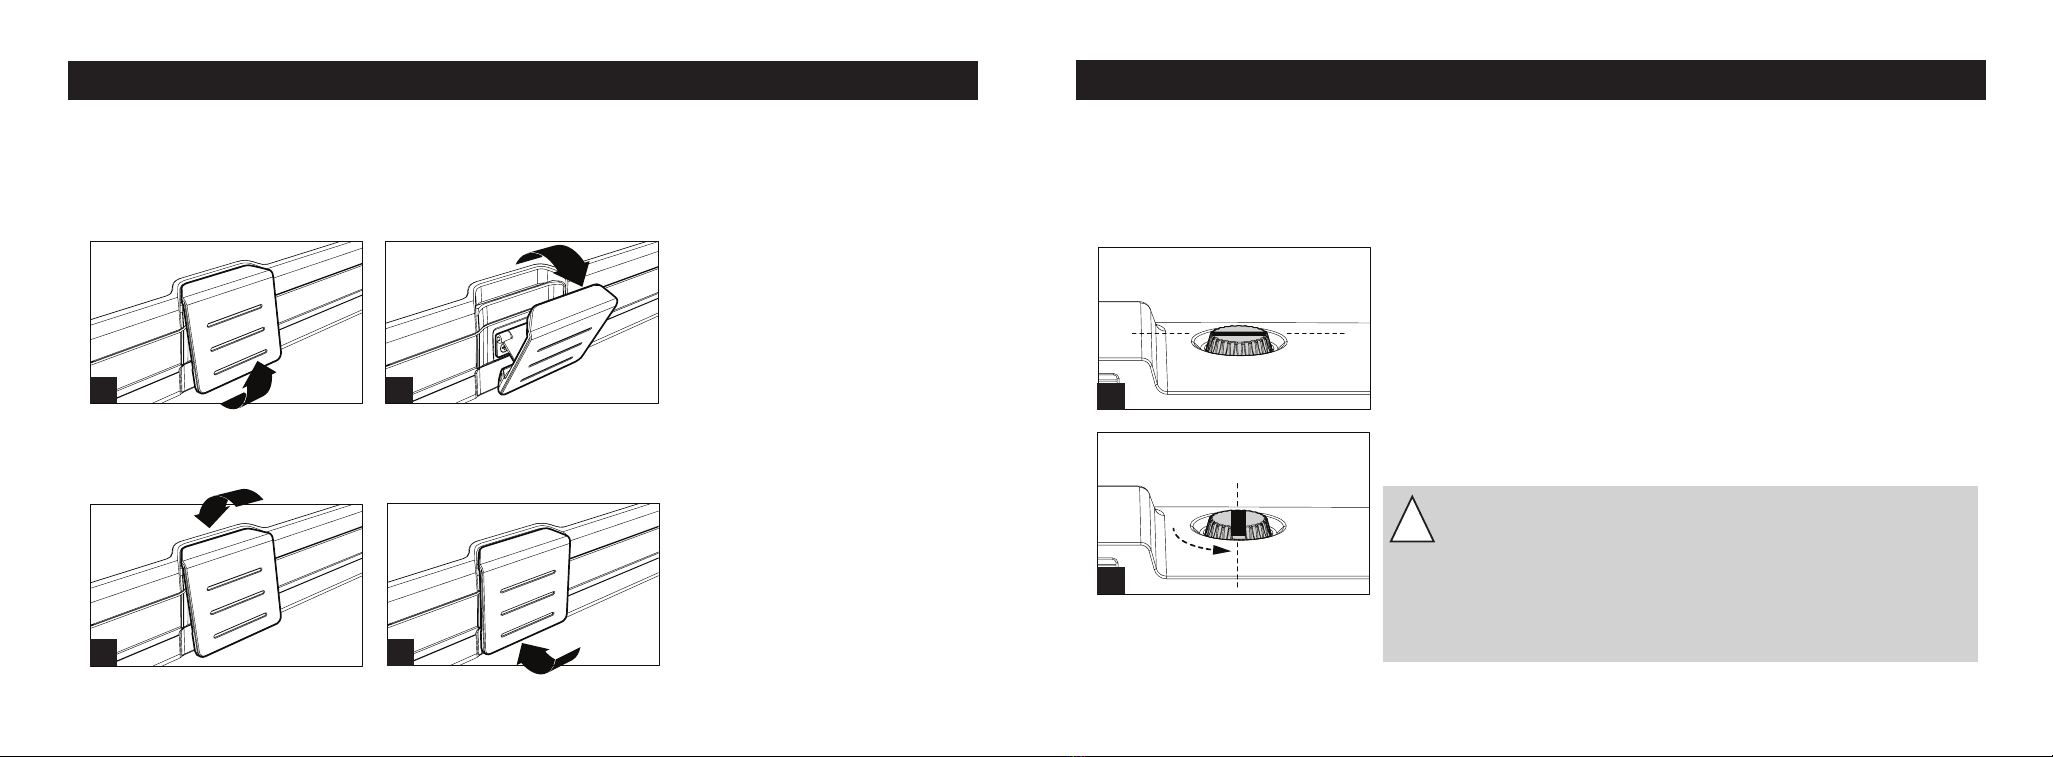
IMPORTANT Before locking your LifePod®, always be sure the
side compression latches are latched closed rst. This will
ensure the locking mechanism engages properly.
IMPORTANT Do not undo the compression latches until the
unit has been unlocked with the correct master code rst.
Undoing the compression latches rst may cause binding
on the lock mechanism and will not unlock.
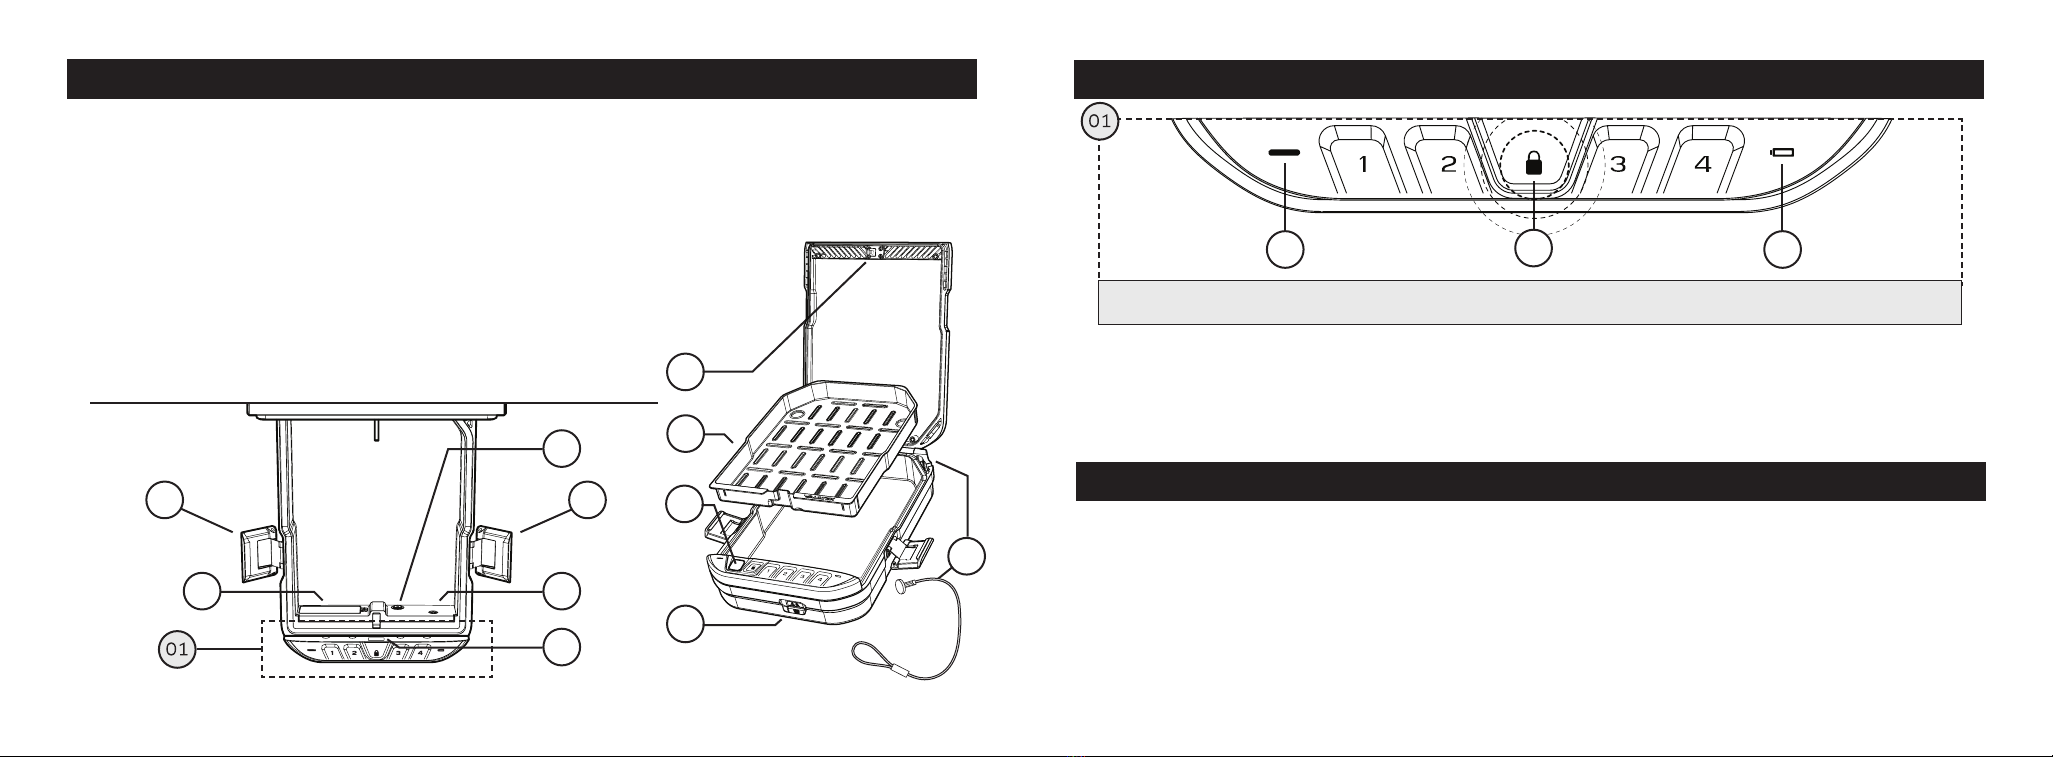
LifePod®is designed to protect against dust and splashes
with brief short immersions and will oat when loaded with
weight up to 2lb.
LifePod®can be submerged to 1 foot up to 30 minutes.
To ensure proper weather sealing:
ALWAYS check that the rubber gasket is free
of debris before closing the lid
ALWAYS check that the side compression
latches are fully engaged and closed
ALWAYS check that the front rubber cover is
closed tightly
DO NOT expose to extreme heat or cold.
Battery power may be aected. Acceptable
operation range is -14˚f to 120˚f.
DO NOT store loaded rearms in this unit.
DISCLAIMERS:
Neither seller nor manufacturer shall be liable for any injury, loss or damage, direct or consequential, arising
out of the use of, or the inability to use, the Vaultek®LifePod®.
The user shall determine the suitability of the Vaultek®LifePod®before the intended use and user assumes
all risk and liability whatsoever in connection therewith.
•
•
•
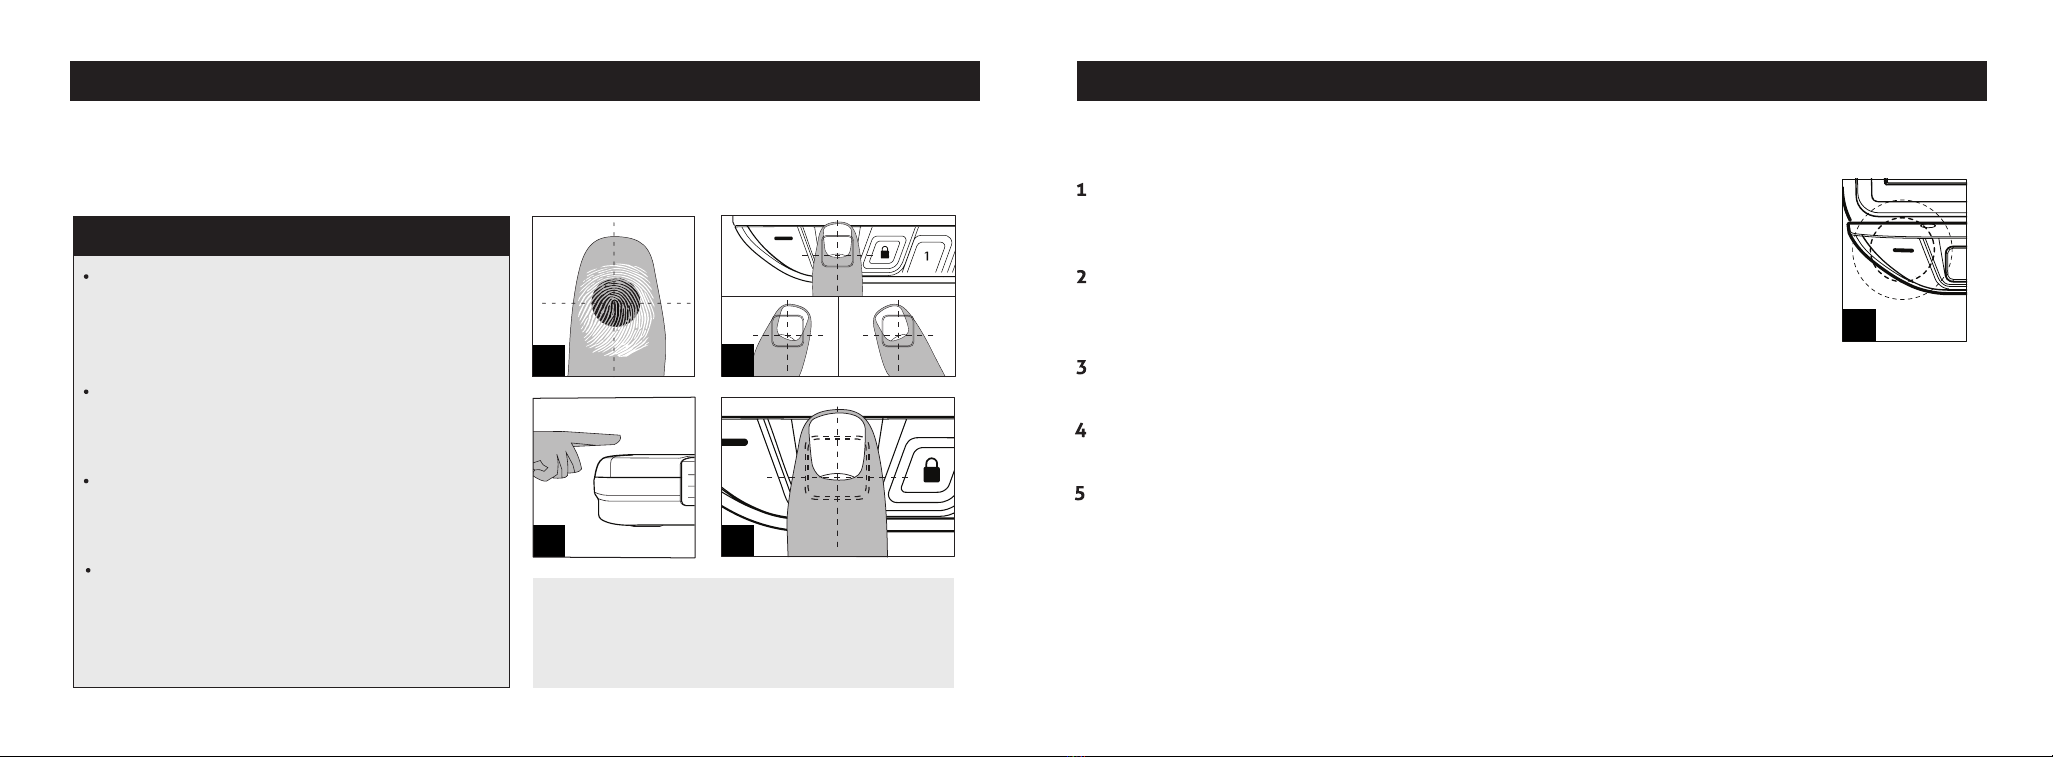
IMPORTANT! The PROGRAM button will not function when
locked. Be sure the LifePod®latch is in the unlocked position.
First open the unit and tap the lock pad to wake the unit up
(Fig A). When the keypad lights up, your LifePod®is awake and
ready for programming.
While LifePod®is awake press and hold the PROGRAM button
A
Master Code Programming
First time users should change the default code as soon as
possible to prevent unauthorized access when using the lock.
TIP: Code Requirements
Your code can be a minimum of 4 digits, or as long as 8 digits
Two keys can not be pressed simultaneously.
Programming a new code will overwrite your previous code.
C
B
for 3 seconds (Fig B) until ALL keys (1-4) turn solid RED.
Enter your new code. Immediately press and hold the PROGRAM
button a second time for 3 seconds (Fig B) until ALL keys (1-4) turn solid RED.
Enter your new code a second time. Immediately press and hold the PROGRAM button a third
time for 3 seconds (Fig B). The status LED (Fig C) will ash GREEN and LifePod®will beep to
conrm the code change is successful. If you make a mistake start over with step 1.
Tip! Water will aect the keypad
performance. Wipe away excess
water and dry o the keypad
when opening for best results
and to prevent unwanted water
from entering the storage
compartment.
09 Vaultek®10 Vaultek®