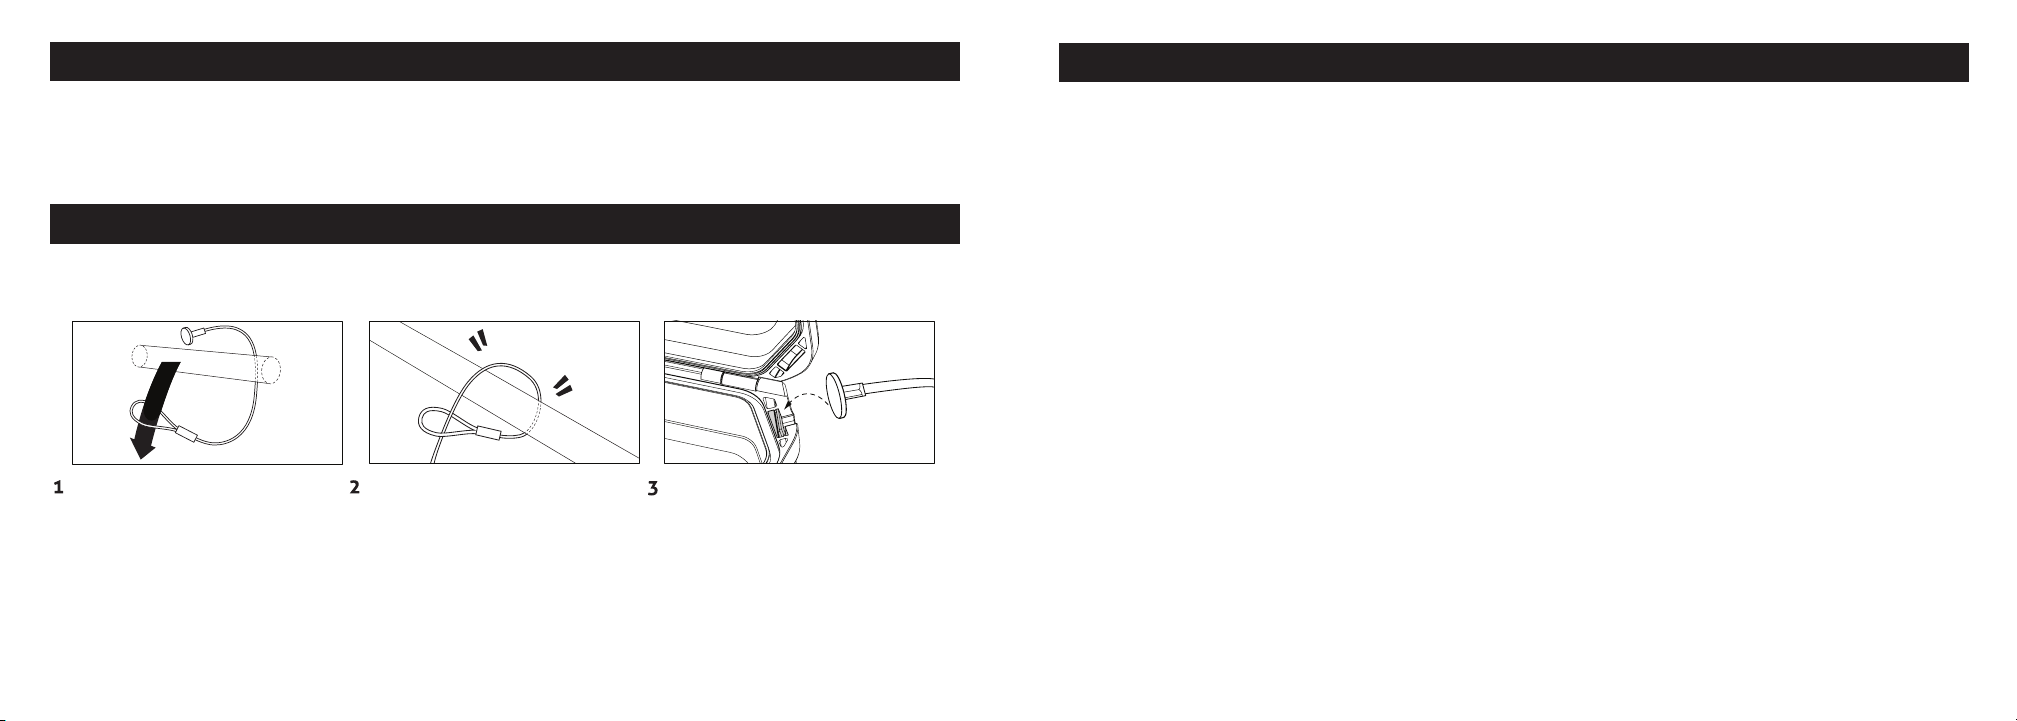
Securing your LifePod®
Included is a tether lanyard and steel security cable that can be used to secure the LifePod®to a
xed object.
13 Vaultek®
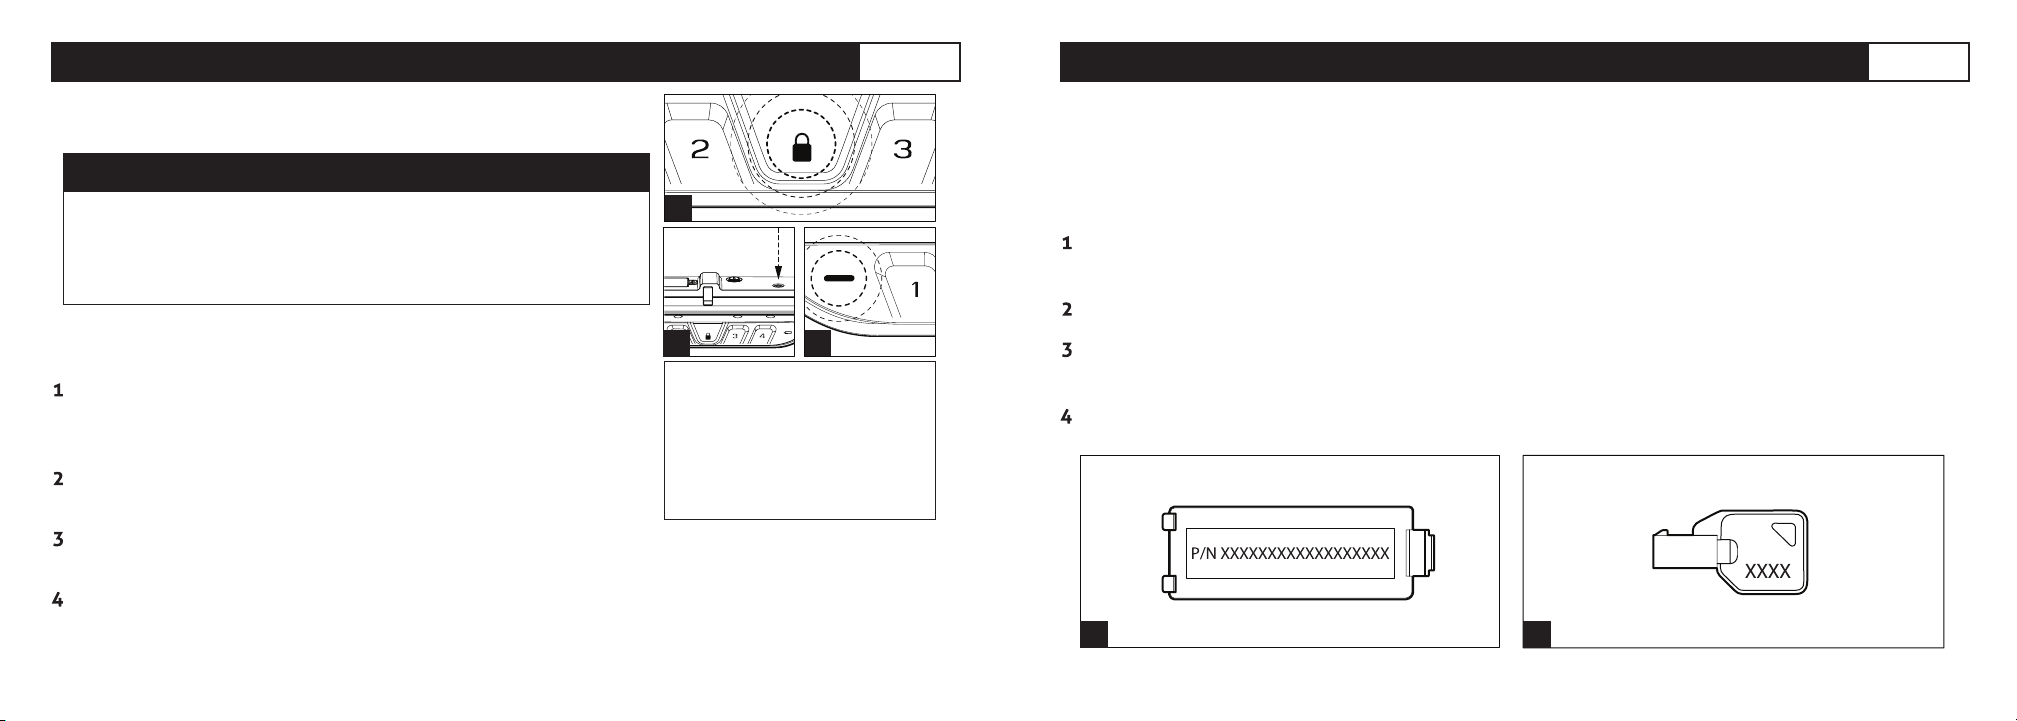
Hot Key to Control Sound
Toggle Sound ON/OFF: By default, the sound is ON. To toggle the sound ON/OFF you need to
wake up LifePod®by tapping the center Lock Pad (Fig U on page 12) then press and hold keys
‘2’ and ‘3’ together. The status LED (Fig T on page 12) will ash RED indicating OFF or GREEN
indicating ON.
14 Vaultek®
FAQ / Troubleshooting More online at vaulteksafe.com under Support
Q: What do I do if the keypad is ashing RED after installing the
battery? A: Your battery is likely low. Replace the battery with a new
9v Alkaline battery. We recommend a brand name battery like Duracell
or Energizer.
Q: Installed a new battery and it is not working. A: Test normal
function by removing the battery and plugging in a micro-USB cable
to the micro-USB port. If the unit resumes normal function then the
installed battery is bad.
Q: How do I unlock the case if the battery is dead but the case is
locked? A: Plug a micro-USB cable into the front micro-USB port to
power the unit so you can unlock and replace the battery.
Q: How come my backup keys CAN NOT lock LifePod? A: LifePod’s
backup keys are designed to unlock in the event of an electrical
failure, but they can not lock LifePod. NOTE: Enabling the Anti-Picking
feature ON, will prevent the keys from being able to unlock LifePod
as this feature disables the front keyway altogether.
Q: Why isn’t the keypad lighting up when programming the master
code? A: LifePod must be awake when programming the unit. Tap the
lock pad to get all the keys to turn red, and then resume programming.
Q: What do I do when my keypad is unresponsive? A: Your battery is
likely dead. Replace the battery with a new 9v Alkaline battery. We
recommend a brand name battery like Duracell or Energizer.
Q: What happens if I lose the keys? A: First, make sure you registered
your LifePod®in the event you do lose your keys. Contact us via email
at support@vaulteksafe.com. Be
prepared to provide your order
details and product number to us
so we can verify ownership.
Q: Can I travel with my LifePod®
through US Customs or TSA
security at the airport? A:
Yes, LifePod® qualies as a
secured lockbox for traveling. If
transporting rearms, be sure to
inform your airline agent when
checking in due to Federal law. Be
aware, that you may be asked to
open your LifePod®, and person
having the master code should be
present in case such a request is
made by a government authority.
Q: What happens if the lid is
not opening? A: If you have
been traveling the atmospheric
pressure dierence could create
a vacuum holding the lid down.
Release the pressure by opening
the key hole cover.
First wrap the looped end of
the security cable an object
of your choice, such as a seat
bracket under your car seat.
Pull the adapter piece through
the loop, and cinch tight.
Place the adapter piece in its
slot in the LifePod®, and close
the lid.