manuals.online logo
Brands
  1. Home
  2. •
  3. Brands
  4. •
  5. Verco
  6. •
  7. Indoor Furnishing
  8. •
  9. Verco JENSEN HUT User manual

Verco JENSEN HUT User manual

JENSEN HUT ROOF INSTALLATION
INSTRUCTIONS
Fixings supplied:
A. Bolt, Washer &
Spacer
B. Bolt & washer
C. Apex Bracket
1. Assemble the Seats, Arms and Intermediate Panel as
instructed on addional Jensen-Up instrucons.
3. Remove the screw on top of the Arm that secures the
Cable String, loosen the string from the leg. Do NOT let
the string drop down the Arm.
2. Separate the Inner
Ceiling and the Roof Outer
parts using a Screwdriver,
along the edge that is
labelled.
4. Select the Ceiling panel with the marked Power Unit
posion. Place on top of the arm with the cable string.
Line up the slots with the inserts.
Loosely secure using 6No. A Fixings.
Ensure the Black Spacer is ed between the Arm and
Ceiling panel
Black Spacer washer
5. Tie the boom of string to the power cable, pull
cable up through the Arm and Ceiling panel.
6. Secure the 2 light suspension cables to the ceiling
panel with the two bolts and washers
Chapel Lane, High Wycombe, Buckinghamshire HP12 4BG
t: +44 (0) 1494 448000 w: verco.co.uk
7. Hang the Light—Ensure the power cables sit in the
notch within the Ceiling panel. Connect all 3 cables to
the Power Unit. Secure with cable clips provided
10. To t the Apex Brackets, apply gentle pressure
downwards to the apex, and t all three brackets with
the 12No. B xings so they are nger ght.
11. When all brackets are in and the two ceilings are
aligned ghten the apex bracket bolts
12. Adjust the posion of the two Ceiling panels so they
are an equal distance from each end, and ghten all
xings starng with the four boom corners.
9. Install the other Inner Ceiling, lining up the front and
back edges with the other Inner Ceiling.
13. Li the rst Roof Outer onto Inner Ceiling.
14. Posion the three clips on the Roof Outer so they
engage with the Apex Brackets, pivot the roof down
pushing against the Apex Brackets.
15. Lower the Roof Outer down onto the rear push
ngs, located on the Inner Ceiling. Once in locaon
push down on the Outer roof to engage the xings
16. Complete the roof assembly by
ng the other Outer roof panel on the opposite side
17. Check that the Arm, Inmidate Panel and Roof are
in line and level.
18. Complete Jensen Hut by installing the table.
Chapel Lane, High Wycombe, Buckinghamshire HP12 4BG
t: +44 (0) 1494 448000 w: verco.co.uk

Other Verco Indoor Furnishing manuals

Verco Apollo User manual

Verco

Verco Apollo User manual

Verco Kurt Booth User manual

Verco

Verco Kurt Booth User manual

Verco Maya User manual

Verco

Verco Maya User manual

Verco Breathe User manual

Verco

Verco Breathe User manual

Verco VISUAL Two User manual

Verco

Verco VISUAL Two User manual

Verco V Smart User manual

Verco

Verco V Smart User manual

Verco Oblique Visual OVRT 0806 User manual

Verco

Verco Oblique Visual OVRT 0806 User manual

Verco Spyne User manual

Verco

Verco Spyne User manual

Verco Oblique Adapt User manual

Verco

Verco Oblique Adapt User manual

Verco Profile User manual

Verco

Verco Profile User manual

Verco Select 24 User manual

Verco

Verco Select 24 User manual

Verco Scanform 4 User manual

Verco

Verco Scanform 4 User manual

Verco Vibe User manual

Verco

Verco Vibe User manual

Verco Look User manual

Verco

Verco Look User manual

Verco Buzz User manual

Verco

Verco Buzz User manual

Verco MD2010 User manual

Verco

Verco MD2010 User manual

Verco DNA DD 1206 User manual

Verco

Verco DNA DD 1206 User manual

Verco Visual Two V2ICD 1612 User manual

Verco

Verco Visual Two V2ICD 1612 User manual

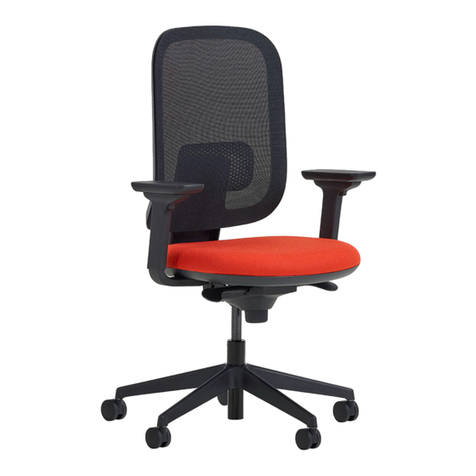
Verco Workchair User manual

Verco

Verco Workchair User manual

Verco DNA DB 22/2 User manual

Verco

Verco DNA DB 22/2 User manual

Verco VISUAL Desking VSST1020 User manual
Verco

Verco VISUAL Desking VSST1020 User manual

Popular Indoor Furnishing manuals by other brands

Hewi 477 Series Mounting instructions

Hewi

Hewi 477 Series Mounting instructions

BIG FURNITURE WAREHOUSE Columbia 111 quick start guide

BIG FURNITURE WAREHOUSE

BIG FURNITURE WAREHOUSE Columbia 111 quick start guide

Collection C LEONARDO living CURVE Assembly instruction

Collection C

Collection C LEONARDO living CURVE Assembly instruction

Trinity 3-Tier Slat Shelving Rack owner's manual

Trinity

Trinity 3-Tier Slat Shelving Rack owner's manual

Mainstays Albany MS16-301-001-12 Assembly instruction

Mainstays

Mainstays Albany MS16-301-001-12 Assembly instruction

Serta Motion Slim Owner's manual and reference guide

Serta

Serta Motion Slim Owner's manual and reference guide

Floyd Chaise instructions

Floyd

Floyd Chaise instructions

EastPoint Springfield 32101 Assembly instructions

EastPoint

EastPoint Springfield 32101 Assembly instructions

Kohler PARADOX K-15050T installation instructions

Kohler

Kohler PARADOX K-15050T installation instructions

Kleton FI520 quick start guide

Kleton

Kleton FI520 quick start guide

Wampat D01D1072 Assembly instructions

Wampat

Wampat D01D1072 Assembly instructions

Bestway 101 quick start guide

Bestway

Bestway 101 quick start guide

Nightingale SXO 6100 CH user guide

Nightingale

Nightingale SXO 6100 CH user guide

R82 Wombat Solo user guide

R82

R82 Wombat Solo user guide

Vivo DESK-SF02W instruction manual

Vivo

Vivo DESK-SF02W instruction manual

Walker Edison AF44JNCVCT Assembly instructions

Walker Edison

Walker Edison AF44JNCVCT Assembly instructions

HomLux X002TZLIND manual

HomLux

HomLux X002TZLIND manual

Home Decorators Collection RYAN 21122-M24-MG Assembly instructions

Home Decorators Collection

Home Decorators Collection RYAN 21122-M24-MG Assembly instructions

manuals.online logo
manuals.online logoBrands
  • About & Mission
  • Contact us
  • Privacy Policy
  • Terms and Conditions

Copyright 2025 Manuals.Online. All Rights Reserved.