manuals.online logo
Brands
  1. Home
  2. •
  3. Brands
  4. •
  5. Verco
  6. •
  7. Indoor Furnishing
  8. •
  9. Verco Visual Two V2ICD 1612 User manual

Verco Visual Two V2ICD 1612 User manual

Visual Two desking
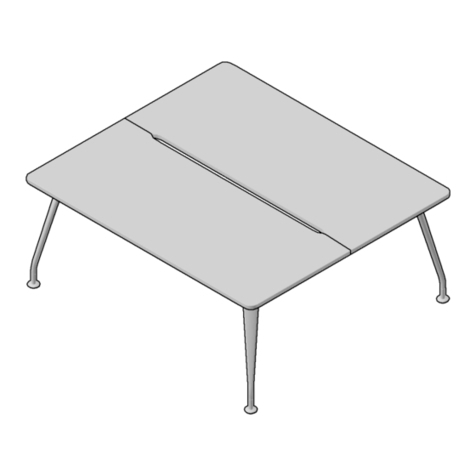
V2 ICD 1612/1812 (left or right)Visual Two free standing crescent desks
2 x V2 ICT L/R 1 x V2LF L
(600/800)
1 x V2 modesty
panel
1 x V2 return
modesty panel
1 x V2LF R
(600/800)
4 mm Allen key
Equipment Required
(not included)
Fixings
(numbers based on a 2 unit bench)
8 x leg
pin ttings
2 x MFC
pin ttings
Phillips-head
screwdriver
Take the cantilever leg and locate
the two threaded holes in the upright
section, these holes sit on the inside of
the leg on the assembled desk. Take
two of the leg pins from the ttings bag
and screw them into the holes using a
Phillips head screwdriver to fully tighten
them.
Repeat the same process with the
corner post leg, ensuring the remaining
holes are positioned to attach to
the return modesty panel. The round
section of the leg should be positioned
to sit on the outside of the modesty
panels.
1 x V2
corner leg
8 x 6mm x 26mm
mush head screws
(1.8 - 2.4m tops)
You will assemble the desk in an
inverted position and then ip it the
right way up once complete. This
makes it easier to access the ttings as
it’s constructed. Before starting check
you have all the items listed above
including the equipment required.
Arrange the large leg, corner leg and
modesty panel in the layout shown
here, with the at section of the leg
closest to the oor and the holes in
the modesty panel facing along the
longer side of the leg. The cutouts in
the panel should sit at its base next to
the at sections of the legs.You may lay
the components down until they are
needed. The desk shown here is right
handed, a left handed desk will be the
inverse of this diagram.
Repeat with the post leg at the other
end of the modesty panel, and then
again with the remaining modesty
panel and leg. Your desk so far should
look like this.
Place your top, up-side down on a
protective surface such as the box that
it came in. Locate the two holes in the
underside of the desk top, about 10cm
and 18cm in from the middle of the
return side and the front side of the desk
top respectively. Take the two MFC pins
and screw these into the pilot holes.
Ensure the barrel xings in the centre of
the modesty panels have the arrows on
their front surface pointing upwards and
away from the closest edge.
Turn the barrel xings in the modesty
panel so that the small arrows on their
faces are pointing directly away from
the edge of the panel. This should allow
you to t the pins into the holes on the
ends of the panels.
Once the panel is fully butted up to
the leg, turn the barrel tting clockwise
through 180 degrees or until it stops
turning freely using a Phillips head
screwdriver. This should pull the panel
tight up against the leg once both
ttings are tightened.
Fix the legs in place by screwing the
mushroom head screws through the
holes in the legs and into the pilot holes
in the top. There should be 3 in each
cantilever leg and two in the corner leg.
Ensure these are full tightened without
over tightening them.
Your desk is complete, with the aid of
another person, turn the desk over so
it’s the right way up. Place the desk in its
desired position. Fine tune how it sits on
the oor by screwing in or unscrewing
the adjustable feet on the bottom of
the legs.
Your completed desks should resemble
the illustration on the left.
Carefully place the leg and modesty
panel construction down onto the top,
locating the pin in the top into the hole
in the centre of the modesty panel
(this will be facing downwards) being
careful not to twist the legs away from
being perpendicular to the modesty
panel. This stage is best done with the
help of another person.
If you are setting up the desk single
handed place the legs and modesty
panels on the top with the pins just
behind the centre of the modesty
panels. Then lift the modesty panel
slightly off the top and by eye position it
over the pins and t over it. Secure the
tting by turning the barrel clockwise as
with the previous ones.

This manual suits for next models

1

Other Verco Indoor Furnishing manuals

Verco Select 24 User manual

Verco

Verco Select 24 User manual

Verco Oblique Adapt User manual

Verco

Verco Oblique Adapt User manual

Verco Kurt Booth User manual

Verco

Verco Kurt Booth User manual

Verco Maya User manual

Verco

Verco Maya User manual

Verco Apollo User manual

Verco

Verco Apollo User manual

Verco Workchair User manual

Verco

Verco Workchair User manual

Verco Look User manual

Verco

Verco Look User manual

Verco Scanform 4 User manual

Verco

Verco Scanform 4 User manual

Verco Profile User manual

Verco

Verco Profile User manual

Verco DNA DB 22/2 User manual

Verco

Verco DNA DB 22/2 User manual
Verco Breathe User manual

Verco

Verco Breathe User manual

Verco VISUAL Desking VSST1020 User manual

Verco

Verco VISUAL Desking VSST1020 User manual

Verco Buzz User manual

Verco

Verco Buzz User manual

Verco JENSEN HUT User manual

Verco

Verco JENSEN HUT User manual

Verco Spyne User manual

Verco

Verco Spyne User manual

Verco VISUAL Two User manual

Verco

Verco VISUAL Two User manual
Verco DNA DD 1206 User manual

Verco

Verco DNA DD 1206 User manual

Verco MD2010 User manual

Verco

Verco MD2010 User manual

Verco Oblique Visual OVRT 0806 User manual

Verco

Verco Oblique Visual OVRT 0806 User manual

Verco Vibe User manual

Verco

Verco Vibe User manual

Verco V Smart User manual

Verco

Verco V Smart User manual
Popular Indoor Furnishing manuals by other brands

Habitat Venus 810047 manual

Habitat

Habitat Venus 810047 manual

Safco 9401 Assembly instructions

Safco

Safco 9401 Assembly instructions

Kvik MH519-060 manual

Kvik

Kvik MH519-060 manual

ASKO-NÁBYTEK NODO NODL01 Assembling Instruction

ASKO-NÁBYTEK

ASKO-NÁBYTEK NODO NODL01 Assembling Instruction

Better Bathrooms BeBa 27580 user manual

Better Bathrooms

Better Bathrooms BeBa 27580 user manual

Coaster Sofa Table Assembly instructions

Coaster

Coaster Sofa Table Assembly instructions

Dorel Home Products DA2023169 Assembly instructions

Dorel Home Products

Dorel Home Products DA2023169 Assembly instructions

Steelcase 2300 Series Assembly instructions

Steelcase

Steelcase 2300 Series Assembly instructions

Hülsta now! 2661 Assembly instruction

Hülsta

Hülsta now! 2661 Assembly instruction

U-Line H-10242 quick start guide

U-Line

U-Line H-10242 quick start guide

Ampro T47818 installation instructions

Ampro

Ampro T47818 installation instructions

mothercare Hampshire user guide

mothercare

mothercare Hampshire user guide

Venjakob 6026 Assembly instructions

Venjakob

Venjakob 6026 Assembly instructions

Canvas ALMA 064-4023-0 Assembly instructions

Canvas

Canvas ALMA 064-4023-0 Assembly instructions

Knight Ergoplan Fixed Return Assembly instructions

Knight

Knight Ergoplan Fixed Return Assembly instructions

Night & Day Furniture Ginger Twin Loft Bunk Bed Assembly instructions

Night & Day Furniture

Night & Day Furniture Ginger Twin Loft Bunk Bed Assembly instructions

Jysk NEDERBY 708-197-1027 manual

Jysk

Jysk NEDERBY 708-197-1027 manual

PARAMOUNT BED PE-6001 instruction manual

PARAMOUNT BED

PARAMOUNT BED PE-6001 instruction manual

manuals.online logo
manuals.online logoBrands
  • About & Mission
  • Contact us
  • Privacy Policy
  • Terms and Conditions

Copyright 2025 Manuals.Online. All Rights Reserved.