manuals.online logo
Brands
  1. Home
  2. •
  3. Brands
  4. •
  5. Verco
  6. •
  7. Indoor Furnishing
  8. •
  9. Verco Oblique Visual OVRT 0806 User manual

Verco Oblique Visual OVRT 0806 User manual

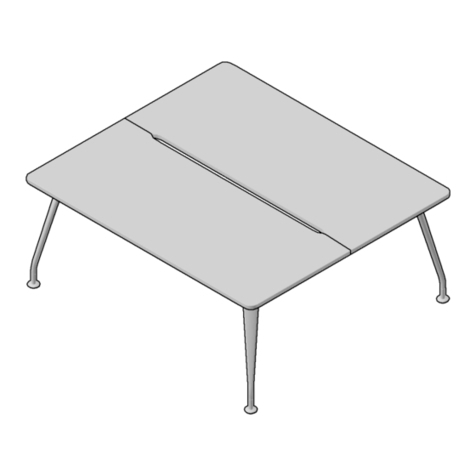
Oblique Visual desking
OVRT 0806/1006/1206/1208/1408/1608/1808/2008/2408
OVWT 1208/1408/1608/1809/2009/2409
4+ unit back to back Oblique Visual
bench using the following tops:
2 x VRT
2 x VTBM/S/L 2 x OSR 24/20/18
(1.8 - 2.4m tops only)
1 x OLF 08 L
/OLF 06 L
1 x OILF 08
/OILF 06
1 x OLF 08 R
/OLF 06 R
4 mm Allen key
Equipment Required
(not included)
Fixings
(numbers based on a 2 unit bench)
4 x 5mm x 85mm
hex bolts
2 x 5mm x 55mm
hex bolts
4 x 5mm x 15mm
hex bolts
Rubber mallet
To start with assemble the intermediate
leg in its entirety; take the leg along with
the wedge shaped spacers and two
55mm bolts. Insert the bolts up though
the holes in the leg frame and into the
threaded holes on the underside of
the spacers. Tighten them so they are
secure but do not over-tighten. You
should not have to use excessive force
to tighten the bolts adequately.
With the intermediate leg assembled,
take one of the beams and insert into
the leg’s bracket as shown by slotting in
and sliding down. The gap in the beam
should face towards the rear of the
desk i.e. the side which it is nearest to.
2 x VWT L/Ror
20 x 6mm x 26mm
mush head screws
(1.8 - 2.4m tops)
Repeat steps 2 to 4 with the remaining
legs and beams. If your bench consists
of multiple desks just keep adding the
sections one by one. It is advisable to
build up the frame in this way so it is
in the desired position for the nished
bench as large benches can be difcult
to move.
Your assembled frame should look
like this (or with as many sections
as your bench consists of). With the
bracket in the centre of each beam
loosened adjust each frame to roughly
t the width of each top using a tape
measure or top placed in front on
the frame to check the width. The
tops will extend to the centre of each
intermediate leg.
Using the mallet secure the end of
the beam fully into the intermediate
leg by tapping at the end so as not to
damage the top of the beam.
Repeat steps 2 & 3 using the
appropriate end leg for the side you
have started on (left hand in this case).
With the assistance of at least 1 other
person, gently lower the top into
position over the frame, resting it on the
spacers and the beam. Once the top is
in position, line up the outside leg more
accurately with the end of the desk
top taking care to avoid knocking the
spacers out of position.
Take the four plastic spacers supplied
with the legs (two with each leg) and
place one over each of the holes in the
leg frame, aligning the holes in each
spacer roughly with the corresponding
hole in the leg. The spacer has a small
lip which should t over the radius on
the edge of the leg.
Note: this step is only for desks
with a support rail only i.e OVRD
1808/2008/2408.
With the desk top turned upside-
down, align the support rail with the
corresponding pilot holes and screw
into position using the 6mm x 26mm
mushroom head screws provided (10
for each top).
Repeat the previous 5 steps using the
remaining leg frame, or if your bench
consists of multiple tops, keep working
along its length in this way ensuring all
xing bolts are securely tightened.
Your nished bench should resemble
the image on the left. Please refer
to further instructions for the tting of
screens and accessories.
Using two 15mm bolts secure the top to
the intermediate leg by placing them
through the holes in the wedge shaped
spacers and into the underside of the
desk top. Fully tighten these bolts.
Now insert one of the 5mm x 85mm
bolts through the bottom of the end leg
frame and the spacer, into the bottom
of the desk top. You may need to shift
the leg slightly in order to get the bolt
through and into the desk top. Screw
in far enough that the bolt holds itself
in position and repeat with the leg
frame’s other bolt. Once both bolts
are in position fully tighten them. Once
the top is secured, x the beam by
tightening the bracket in the centre of
the beam.

This manual suits for next models

14

Other Verco Indoor Furnishing manuals

Verco Visual Two V2ICD 1612 User manual

Verco

Verco Visual Two V2ICD 1612 User manual

Verco MD2010 User manual

Verco

Verco MD2010 User manual

Verco Kurt Booth User manual

Verco

Verco Kurt Booth User manual

Verco Profile User manual

Verco

Verco Profile User manual

Verco Maya User manual

Verco

Verco Maya User manual

Verco DNA DB 22/2 User manual

Verco

Verco DNA DB 22/2 User manual

Verco JENSEN HUT User manual

Verco

Verco JENSEN HUT User manual

Verco Workchair User manual

Verco

Verco Workchair User manual

Verco Spyne User manual

Verco

Verco Spyne User manual

Verco Oblique Adapt User manual

Verco

Verco Oblique Adapt User manual

Verco Select 24 User manual

Verco

Verco Select 24 User manual

Verco Buzz User manual

Verco

Verco Buzz User manual

Verco Vibe User manual

Verco

Verco Vibe User manual

Verco V Smart User manual

Verco

Verco V Smart User manual

Verco Breathe User manual

Verco

Verco Breathe User manual
Verco Scanform 4 User manual

Verco

Verco Scanform 4 User manual

Verco VISUAL Two User manual

Verco

Verco VISUAL Two User manual

Verco VISUAL Desking VSST1020 User manual
Verco

Verco VISUAL Desking VSST1020 User manual

Verco DNA DD 1206 User manual

Verco

Verco DNA DD 1206 User manual

Verco Look User manual

Verco

Verco Look User manual

Verco Apollo User manual

Verco

Verco Apollo User manual

Popular Indoor Furnishing manuals by other brands

Apericovid Keope user manual

Apericovid

Apericovid Keope user manual

Whalen 19WTLD-SPCA manual

Whalen

Whalen 19WTLD-SPCA manual

AKRUS AK 106 vario user manual

AKRUS

AKRUS AK 106 vario user manual

Furniture of America CM6862-CH Assembly instructions

Furniture of America

Furniture of America CM6862-CH Assembly instructions

Baby Relax DL8687 manual

Baby Relax

Baby Relax DL8687 manual

Dorel Home Products S038412 manual

Dorel Home Products

Dorel Home Products S038412 manual

Bonzy Home L6116A51 Assembly instructions

Bonzy Home

Bonzy Home L6116A51 Assembly instructions

Coaster 931218 Assembly instructions

Coaster

Coaster 931218 Assembly instructions

Next ISABELLA 904437 quick start guide

Next

Next ISABELLA 904437 quick start guide

Lumex 5644G manual

Lumex

Lumex 5644G manual

MANCHESTER WOOD SHAKER DESK Assembly instructions

MANCHESTER WOOD

MANCHESTER WOOD SHAKER DESK Assembly instructions

Arthur Berndt Borneo 40 WA Assembly instructions

Arthur Berndt

Arthur Berndt Borneo 40 WA Assembly instructions

Kontax Tensegrity Magnet instructions

Kontax

Kontax Tensegrity Magnet instructions

Sealey APICCOMBOF4 instructions

Sealey

Sealey APICCOMBOF4 instructions

Rauch M0003 Assembly instructions

Rauch

Rauch M0003 Assembly instructions

SUNPAN MILO BED-KING-POLO CLUB STONE-104399 Assembly instructions

SUNPAN

SUNPAN MILO BED-KING-POLO CLUB STONE-104399 Assembly instructions

FURNITUREBOX MIAMI Assembly guide

FURNITUREBOX

FURNITUREBOX MIAMI Assembly guide

Loll Designs LOLLYGAGGER OTTOMAN LC-LO-CG ASSEMBLY INSTRUCTIONS & PRODUCT INFO

Loll Designs

Loll Designs LOLLYGAGGER OTTOMAN LC-LO-CG ASSEMBLY INSTRUCTIONS & PRODUCT INFO

manuals.online logo
manuals.online logoBrands
  • About & Mission
  • Contact us
  • Privacy Policy
  • Terms and Conditions

Copyright 2025 Manuals.Online. All Rights Reserved.