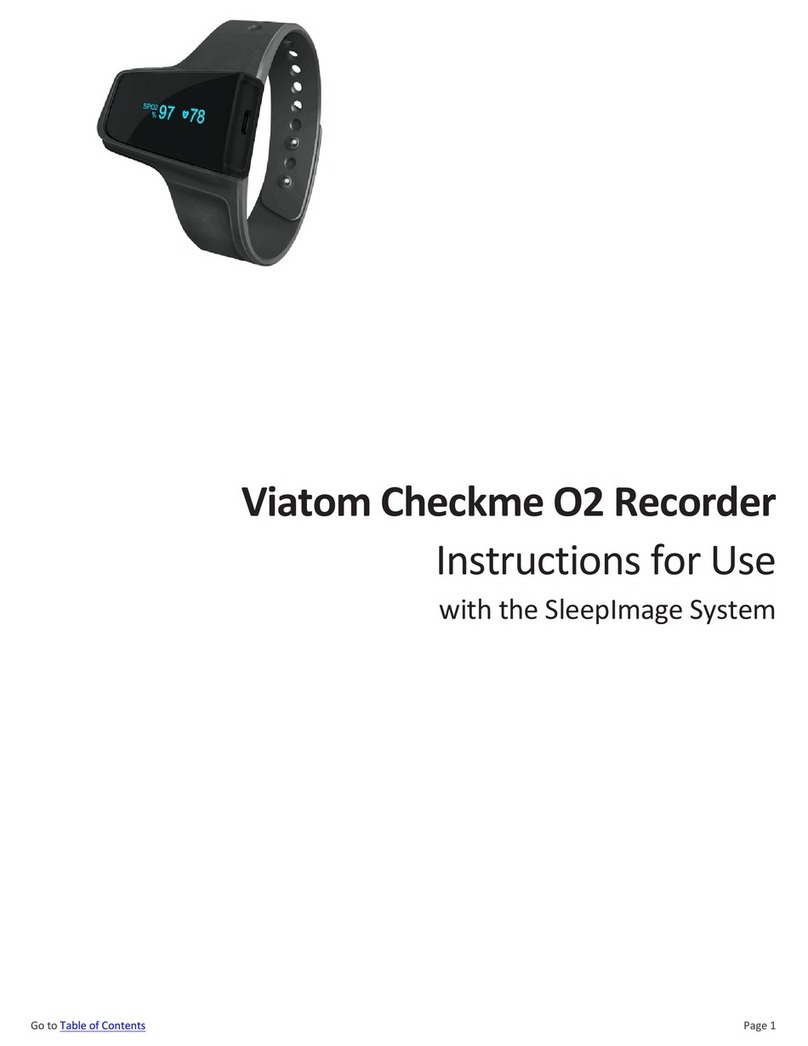
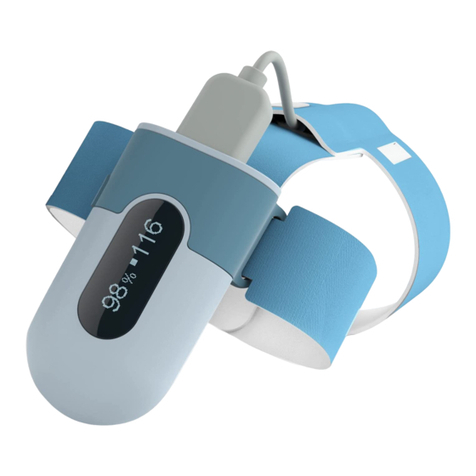
Viatom Visual Oxy User manual

Visual Oxy
Wrist Pulse Oximeter
User Manual
English|Deutsche|Italiano|Español|Français

Contents
User Manual…….…...........…..English 1-13
Benutzerhandbuch...........…...Deutsch 14-26
Manuale d'uso........…..…....…Italiano 27-39
Manual de usuario………….....Español 40-52
Manuel de l'utilisateu........…..Français 53-65

1
User Manual
User’s Manual
Contents
1. Introduction..................................................................2
2 Using the Monitor......................................................... 5
3 PC software (Optional).................................................. 9
4 Maintenance................................................................10
5 Troubleshooting...........................................................10
6 Specifications...............................................................11
7 Electromagnetic Compatibility....................................12

2
1. Introduction
1.1 Intended Use
This product is intended to be used for measuring,
displaying and storing of pulse oxygen saturation
(SpO2),pulse rate and motion in home or healthcare
facilities environment. App can show real-time SpO2,
pulse rate; get record, display results and report.
Note:
The data and results provided by this device are for pre-check
screening purpose only and cannot be directly used for diagnostic
or treatment.
The data provided by the APP and PC software (optional) is not
intended for diagnosis or treatment purpose, always consult your
doctor for any health condition.
Warnings and Cautionary Advices
DO NOT squeeze the sensor or apply excessive force on
the sensor & cable.
Do not use this device during MRI examination.
Never submerge the device in water or other liquids. Do
not clean the device with acetone or other volatile solutions.
Do not place this device in pressure vessels or gas
sterilization device.
Consult your doctor immediately if you experience
symptoms that could indicate acute disease.
Do not self-diagnose or self-medicate on the basis of this
device without consulting your doctor. In particular, do not
start taking any new medication or change the type and/or
dosage of any existing medication without prior approval.
Use only cables, sensors and other accessories specified

3
in this manual.
Prolonged continuous SpO2monitoring may increase the
risk of undesirable changes in skin characteristics, such as
irritation, reddening, blistering or burns.
Check the SpO2sensor application site every 6-8 hours to
determine the positioning of the sensor and the circulation
and skin sensitivity of the patient. Patient sensitivity varies
depending on medical status or skin condition. For patients
with poor peripheral blood circulation or sensitive skin,
inspect the sensor site more frequently.
Functional tester cannot be used to assess the accuracy of
a SpO2sensor or a device.
This device is designed to determine the arterial oxygen
saturation percentage of functional hemoglobin. Factors
that may degrade pulse oximeter performance or affect the
accuracy of the measurement include the following:
- excess ambient light
- excessive motion
- electrosurgical interference
- blood flow restrictors
(arterial catheters, blood pressure cuffs, infusion lines,
etc.)
- moisture in the sensor
- improperly applied sensor
- incorrect sensor type
- poor pulse quality
- venous pulsations
- anemia or low hemoglobin -concentrations
- cardiogreen and other -intravascular dyes
- carboxyhemoglobin
- methemoglobin
- dysfunctional hemoglobin

4
1.2 Guide to Symbols
1.3 Unpacking
Main Unit × 1
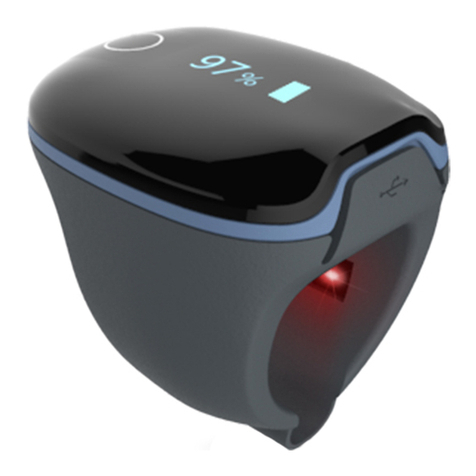
Ring Sensor × 1
Cable × 1
User Manual × 1
Symbol
Description
Type BF-Applied Part
Manufacturer
European authorized representative
CE0197
CE Marking indicating conformance to
EC directive No. 93/42/EEC concerning
medical devices.
MRI unsafe. Presents hazards in all MR
environments as device contains
strongly ferromagnetic materials.
Indicate separate collection for electrical
and electronic equipment (WEEE).
IP22
Protected against spraying water and
against access to hazardous parts with a
tool, per IEC 60529.
Follow Instructions for Use.
Warning and Caution!
SN
Serial number
No alarm system.

5
2 Using the Monitor
2.1 Charging
Charge the battery before using.
Use the charge cable to charge the battery of device in
the USB Port of the computer or with USB charging
adapter.
After being fully charged, the device will power off
automatically.
2.2 POWER ON/OFF
POWER ON:
Press the button for 1 second to turn on the device.
POWER OFF:
Automatically power off: The device will turn off
automatically in 2 minutes if no measurement, no
operation or without App connection.
Manually power off: You can press the button for about
2 seconds to turn off.
2.3 TAKE THE FIRST RECORDING
START. Wear the device and the Ring Sensor, press
the button to power on. And keep
yourself in the quiet environment.
(For the sake of clarity, recommendelly
the user wear the Checkme 02 watch
on their left wrist and put the ring
sensor on the thumb. If it is too tight, try another
finger. Avoid being loose.)
STOP. After the record, take off the Ring Sensor (and
the device), the recording will be save
after the countdown. (If the working
time is less than 1 minute, the data

6
will not be saved.)
Note:
The device can also work as a clock and pedometer
without ring sensor, and the steps will restart counting
after the ring sensor plugged in.
Please avoid excessive motion for the sensed finger
during recording and avoid any strong ambient light
condition.
We recommend using the classic monitor mode in daily
environments and the sleep mode when you want to
sleep.
2.4 Stop monitoring & sync data
Take off the sensor, the countdown will
begin.
During the countdown, if you wear the sensor again, the
record will be resumed.
After the countdown, the data will be ready for sync.
Note:
1. The duration of the recording is 1mins~10 hours.
And the device can Collect and store maximum 4
recording, when the 5th recording coming, the first
recording will be will covered.
Sync data to the ViHealth App
You can Sync the data to your app after
the countdown or next time after you
turn on the device.
Note: Refer the ViHealth app manual for more details.
2.4.1 How to find the Serial Number?
1)Detach the the main unit from wristband.

7
2)Flip the main unit over, the series number is
printed on the label of product.
Note:
The SN Serial number is on the back of the device
2.5 How to synchronize the time of the device
The time of the Checkme 02 will be automatically
synchronized with the network time on your smart
device after connected with the app.
Note: Refer the ViHealth app manual for more details.
2.6 Operation Mode Navigation
The device has two operation modes: Sleep Mode
and Monitor Mode.
Turn on the device, during the icon blinking, press the
button to switch between two modes.
Sleep Mode
Monitor Mode
Parameters
SpO2, PR, Motion
SpO2, PR, Steps
Screen
Activated by button
Always on
The Sensor
Vibrates
When SpO2is
lower than
threshold set
When SpO2is lower
than threshold set;
Or when step goal is
met
Bluetooth
On when the
screen lights up
Always on
Report
Sleep report
Monitor report

8
2.7 Smart Vibration
The vibrator in the ring sensor will be activated when
the SpO2fall below the preset value (Threshold). The
vibration will stop when the SpO2recover to normal
level or you can press the button to stop it.
You can customize the vibration to help you sleep better
via app or PC(Only for the Checkme 02 Pro).
2.8 Download App
App name: ViHealth
iOS: App Store
Android: Google Play
Compatibility
The device is compatible with iOS versions 9.0+ and
Android versions 5.0+. Refer the ViHealth app manual
for more details.
2.9 Bluetooth Connection
The device Bluetooth will be enabled automatically only
when the screen lights up.
Note: when the Checkme O2 is pairing with the smart
device, keep the screen lights up.
Note: DO NOT PAIR in the settings of your smart
device.
2.10 Display
Time, Remaining battery capacity
Sleep Mode
Monitor Mode
MODE
MODE
18:45
Z
Z
M

9
During measurement, press the button, you can switch
different displays.
3 PC software (Optional)
Note: PC software is only available for Checkme O2 Pro.
3.1 Download the PC Software
PC Software: O2 Insight Pro
Download from: www.viatomtech.com/support
Install the software on Windows PC or Mac.
3.2 How to connect the Checkme O2 Pro to PC
1. Turn on device, connect the device to PC USB
port with the supplied Cable of data.
2. Open the PC software, download data from the
device.
3. With the optional PC software, you can customize
each report.
4. You can view and print sleep report, which can also
be exported as PDF or CSV files.
3.3 How to connect the Checkme 02 Pro to Mac
1. Before the conection, make sure your device with
any conection with App. Then turn on device, and
turn on the bluetooth of the Mac.
2. Open the “O2 Insight Pro” software, and Click the
SPO2
Blood oxygen saturation
Pulse rate in Sleep Mode
Pulse rate in Monitor Mode
Wear the sensor
Steps
O2 Score, SpO2drop times
O2 7.5
13
Z

10
“download” on the screen. Then the data report
will sync with your MAC.
3. With the optional PC software, you can customize
each report.
4. You can view and print sleep report, which can also
be exported as PDF or CSV files.
4 Maintenance
4.1 Cleaning
Use a soft cloth moistened with water or alcohol to
clean the device surface.
4.2 Battery
To keep the battery in good condition, charge the
battery every 6 months when the device is not in use.
5 Troubleshooting
Problem
Possible Cause
Possible Solution
Device
does not
turn on
or no
response
.
Battery may be low.
Charge battery and try
again.
Unexpected
software condition
Press the button for about
10 seconds to reset
Device might be
damaged.
Please contact your local
distributor.
The app
cannot
find the
device.
The Bluetooth of
your phone is off.
Turn on the Bluetooth in
the phone.
The device
Bluetooth is off in
Sleep Mode.
Press the button, the
Bluetooth will be turned on
when the screen lights up.

11
6 Specifications
Classifications
EC Directive
MDD, 93/42/EEC
R&TTE, 1999/5/EC
ROHS 2.0, 2011/65/EU
Degree protection
against electrical
shock
Type BF
Environmental
Item
Operating
Storage
Temperature
5 to 40°C
-25 to 70°C
Relative humidity
(noncondensing)
10% to 95%
10% to 95%
Barometric
700 to 1060
hPa
700 to 1060 hPa
Degree of dust &
water resistance
IP22
Physical
Weight
12 g (main unit)
Display
OLED
Wireless
Bluetooth 4.0 BLE
Vibrator
Built in
Power Supply
Charge input:
DC 5V ±10%
Battery type
Rechargeable lithium-polymer battery
Charge time
2~3 hours
SpO2
Standards
Meet standards of ISO 80601-2-61
Measurement accuracy verification: The SpO2accuracy
has been verified in human experiments by comparing with
arterial blood sample reference measured with a CO-
oximeter. The pulse rate accuracy has been verified by
Emulator. Pulse oximeter measurement are statistically
distributed and about two-thirds of the measurements are
expected to come within the specified accuracy range
compared to CO-oximeter measurements.
SpO2range
70% to 100%

12
SpO2Accuracy
(Arms)
80-100%:±2%, 70-79%:±3%
PR range
30 to 250 bpm
PR accuracy
±2 bpm or ±2%,whichever is greater
Wave length
660-940nm
Output power
Red/Infrared: 3mW max. avg.
Pedometer
Range
0 to 99999 steps
Storage
Capacity
4 records,10 hours for each
Sleep analysis
Record
parameters
SpO2, pulse rate, motion
Record interval
4s
Drop analysis
Yes
Mobile APP
iOS
iOS 9.0 or above, iPhone 4s/iPad 3 or
above
Android
Android 5.0 or above, with Bluetooth
4.0 BLE
7 Electromagnetic Compatibility
The device meets the requirements of EN 60601-1-2.
Warnings and Cautions
Using accessories other than those specified in this manual may
result in increased electromagnetic emission or decreased
electromagnetic immunity of the equipment.
The device or its components should not be used adjacent to or
stacked with other equipment.
The device needs special precautions regarding EMC and needs
to be installed and put into service according to the EMC
information provided below.
Other devices may interfere with this device even though they
meet the requirements of CISPR.
When the inputted signal is below the minimum amplitude
provided in technical specifications, erroneous measurements

13
could result.
Portable and mobile communication equipment may affect the
performance of this device.
Other devices that have RF transmitter or source may affect this
device (e.g. cell phones, PDAs, and PCs with wireless function).
EMC table information is listed on our website:
https://api.viatomtech.com.cn/documents/2017/emc_en.pdf

14
Benutzerhandbuch
Inhalt
1 Einführung................................................................... 15
2 Verwenden des Monitors............................................18
3 Optionale PC-Software ...............................................22
4 Instandhaltung.............................................................23
5 Fehlerbehebung.......................................................... 23
6 Spezifikationen............................................................ 24
7 Elektromagnetische Verträglichkeit............................26

15
1. Einleitung
1.1 Verwendungszweck
Dieses Produkt ist für die Messung, die Anzeige und das
Speichern der Werte für die Sauerstoffsättigung (SpO2) und die
Pulsfrequenz in privaten Haushalten oder
Gesundheitseinrichtungen bestimmt.
Die von diesem Gerät gelieferten Daten und Ergebnisse
dienen ausschließlich der Beobachtung vor
Vorsorgeuntersuchungen und können nicht direkt für die
Diagnose oder Behandlung verwendet werden.
Warnungen und Warnhinweise
Verwenden Sie dieses Gerät nicht während der MRT-Untersuchung.
Tauchen Sie das Gerät niemals in Wasser oder andere Flüssigkeiten
ein. Reinigen Sie das Gerät nicht mit Aceton oder anderen flüchtigen
Lösungen.
Stellen Sie dieses Gerät nicht in Druckbehälter oder
Gassterilisationsgeräte.
Messungen von Vitalwerten, wie sie dieses Gerät zur Verfügung stellt,
dienen nicht zu Identifizierung von Krankheiten. Unabhängig von den
mit diesem Gerät durchgeführten Messungen sollten Sie unverzüglich
Ihren Arzt konsultieren, wenn Sie Symptome haben, die auf eine
akute Erkrankung hinweisen könnten.
Führen Sie niemals eine Selbstdiagnose oder Selbstmedikation auf
der Grundlage dieses Geräts und ohne Rücksprache mit Ihrem Arzt
durch. Nehmen Sie insbesondere keine neuen Medikamente oder
ändern Sie ohne vorherige Absprache mit Ihrem Arzt nicht die Art
und/oder Dosierung Ihre bestehenden Medikamenteneinnahme.
Verwenden Sie ausschließlich Kabel, Sensoren und anderes Zubehör,
das in diesem Handbuch aufgeführt ist.
Längeres kontinuierliches SpO2-Monitoring kann das Risiko
unerwünschter Veränderungen der Haut wie zum Beispiel Reizung,
Rötung, Blasenbildung oder Verbrennungen erhöhen.
Überprüfen Sie die Anwendungsstelle des SpO2-Sensors alle 6-8

16
Stunden, um die Position des Sensors und die Durchblutung und
Hautempfindlichkeit des Patienten zu bestimmen. Die
Patientensensitivität variiert je nach medizinischem Status oder
Hautzustand. Bei Patienten mit peripheren Durchblutungsstörungen
oder empfindlicher Haut muss die Sensorstelle häufiger kontrolliert
werden.
Der Funktionstester kann nicht für die Bewertung der Genauigkeit
eines SpO2-Sensors oder eines Geräts verwendet werden.
Dieses Gerät ist zur Bestimmung des arteriellen
Sauerstoffsättigungsprozentsatzes von funktionellem Hämoglobin
bestimmt. Faktoren, die die Leistung des Pulsoximeters oder die
Genauigkeit der Messung beeinträchtigen können, sind unter
anderem:
- übermäßiges
Umgebungslicht
- übermäßige Bewegung
- elektrochirurgische
Interferenz
- Blutflussbegrenzer
Arterienkatheter,Blutdruckm
(Arterienkatheter,Blutdruc
kmanschetten,Infusionsle
itungen usw.)
- Feuchtigkeit im Sensor
- falsch angebrachter Sensor
- falscher Sensortyp
- schlechte Pulsqualität
- venöse Pulsationen
- Anämie oder niedrige
Hämoglobin-Konzentrationen
- Cardiogreen und andere
intravaskuläre Farbstoffe
- Carboxyhämoglobin
- Methämoglobin
- dysfunktionales Hämoglobin
- Künstliche Nägel und
Fingernagellack

17
1.2 Leitfaden zu Symbolen
Symbol
Beschreibung
Typ BF-Anwendungsteil
Hersteller
Europäischer Bevollmächtigter
CE0197
CE-Kennzeichnung, die die Einhaltung der EG-
Richtlinie Nr. 93/42/EWG für Medizinprodukte bestätigt.
MRT bedenklich. Stellt Gefährdungen in allen MR-
Umgebungen dar, da das Gerät stark ferromagnetische
Materialien enthält.
Weist auf eine getrennte Sammlung für Elektro- und
Elektronikgeräte (WEEE) hin.
IP22
Geschützt gegen Spritzwasser und gegen den Zugang
zu gefährlichen Teilen mit einem Werkzeug gemäß IEC
60529.
Gebrauchsanweisung befolgen.
Warnungen und Warnhinweise!
SN
Seriennummer
Kein Alarmsystem.
1.3 Auspacken
Die Verpackung hat den folgenden Inhalt:
Haupteinheit × 1
SpO2Sensor × 1
Ladekabel × 1
Benutzerhandbuch × 1
Sollte eine Position, die auf dieser Liste aufgeführt ist, fehlen
oder beschädigt sein, wenden Sie sich an den Händler.

18
2. Den Monitor anwenden
2.1 Aufladen
Laden Sie den Akku vor dem Gebrauch auf.
Verwenden Sie das Ladekabel, um den Akku des Geräts am
USB-Anschluss des Computers oder mit einem USB-
Ladeadapter zu laden.
Nach dem vollständigen Aufladen wird das Gerät automatisch
ausgeschaltet.
2.2 EIN / AUS
EIN:
Drücken Sie die Taste 1 Sekunde lang, um das Gerät
einzuschalten.
AUSSCHALTEN:
Automatisch ausschalten: Das Gerät schaltet sich innerhalb
von 2 Minuten automatisch aus, wenn keine Messung, kein
Betrieb oder keine App-Verbindung besteht.
Manuelles Ausschalten: Zum Ausschalten können Sie die
Taste ca. 2 Sekunden lang drücken.
2.3 Nehmen Sie die erste Aufnahme auf
ANFANG. Tragen Sie das Gerät und den
Ringsensor und drücken Sie die Taste, um
das Gerät einzuschalten. Und halten Sie
sich in der ruhigen Umgebung.
(Aus Gründen der Klarheit empfehlen wir
dem Benutzer, die Checkme 02-Uhr am linken Handgelenk zu
tragen und den Ringsensor auf den Daumen zu legen. Wenn
er zu fest ist, versuchen Sie es mit einem anderen Finger.
Vermeiden Sie es, locker zu sein.)
HALT. Nehmen Sie nach der
Aufzeichnung den Ringsensor (und das
Gerät) ab. Die Aufzeichnung wird nach
This manual suits for next models
1
Table of contents
Languages:
Other Viatom Medical Equipment manuals
Viatom
Viatom Wellue WearO2 User manual

Viatom
Viatom Checkme O2 User manual

Viatom
Viatom Checkme O2 User manual

Viatom
Viatom OxySmart PC-60FW User manual
Viatom
Viatom FS10C User manual

Viatom
Viatom Wellue POD-2 User manual

Viatom
Viatom PB-20 User manual

Viatom
Viatom OxySmart PC-60F User manual

Viatom
Viatom Checkme Pro User manual

Viatom
Viatom Wellue User manual