manuals.online logo
Brands
  1. Home
  2. •
  3. Brands
  4. •
  5. Vimar
  6. •
  7. Intercom System
  8. •
  9. Vimar Due Fili Plus 7509/M User guide

Vimar Due Fili Plus 7509/M User guide

7509/M
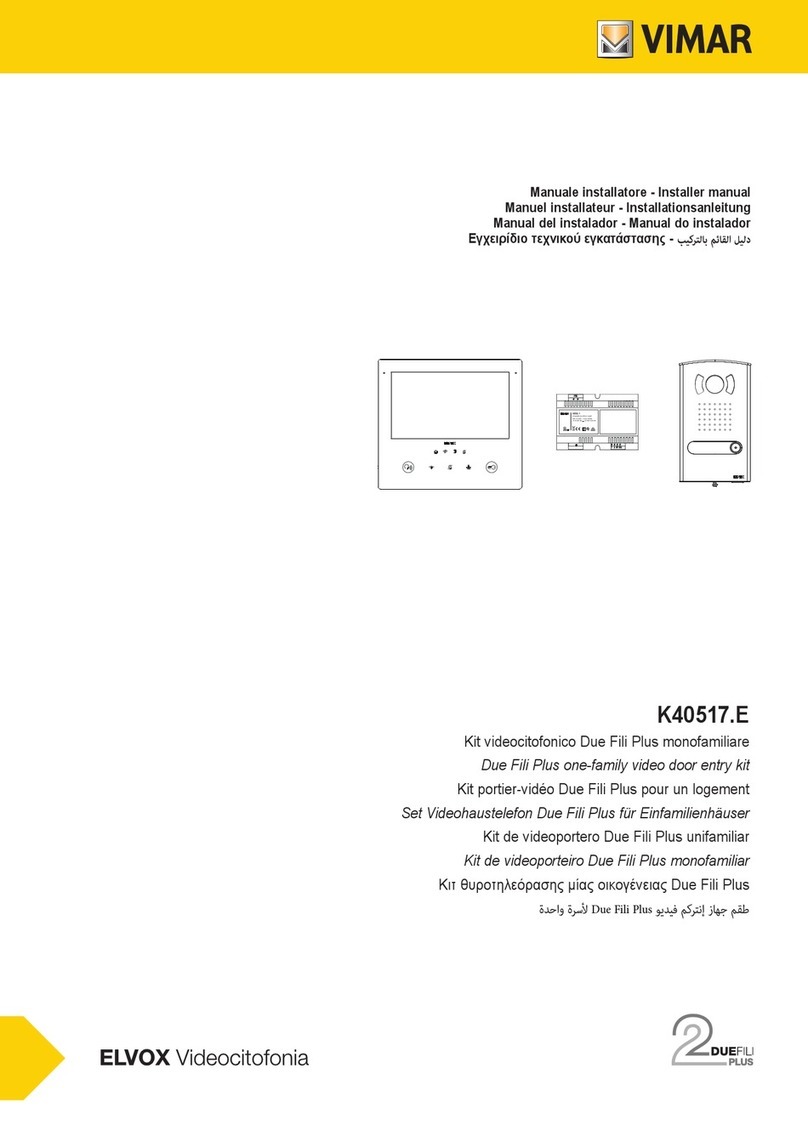
Kit citofonico Due Fili Plus monofamiliare
Due Fili Plus one-family entryphone kit
Kit portier Due Fili Plus pour un logement
Haustelefon-Set Due Fili Plus für Einfamilienhäuser
Kit de portero automático Due Fili Plus unifamiliar
Kit de intercomunicador Due Fili Plus monofamiliar
Κιτ θυροτηλέφωνου μίας οικογένειας οικογενειών Due Fili Plus
  Due Fili Plus     
Manuale installatore - Installer manual
Manuel installateur - Installationsanleitung
Manual del instalador - Manual do instalador
  
2
7509/M
1
7509/M
Indice
• Kit citofonico 7509/M ............................................................. 2
- Contenuto della confezione ............................................... 3
• Citofono 7509 ........................................................................ 4
• Targa 13K1 ............................................................................ 19
• Unità elettronica 13F1 ........................................................... 20
• Alimentatore 40100 ............................................................... 30
• Schemi di collegamento ........................................................ 33
• Conformità normative e avvertenze ...................................... 35
Index
• Entryphone kit 7509/M .......................................................... 2
- Package Contents .............................................................. 3
• Entryphone 7509 ................................................................... 4
• Entrance panel 13K1 ............................................................. 19
• Electronic unit 13F1 ............................................................... 20
• Power supply unit 40100 ....................................................... 30
• Wiring diagrams .................................................................... 33
• Regulatory compliance and warnings ................................... 35
Sommaire
• Kit portier 7509/M .................................................................. 2
- Contenu de l'emballage ...................................................... 3
• Interphone 7509 .................................................................... 4
• Platine 13K1 .......................................................................... 19
• Unité électronique 13F1 ......................................................... 20
• Alimentation 40100 ................................................................ 30
• Schémas de raccordement ................................................... 33
• Conformité aux normes et recommandations ....................... 35
Inhalt
• Haustelefon-Set 7509/M ........................................................ 2
- Verpackungsinhalt............................................................... 3
• Haustelefon 7509 .................................................................. 4
• Klingeltableau 13K1 ............................................................... 19
• Elektronikeinheit 13F1............................................................ 20
• Netzteil 40100 ........................................................................ 30
• Anschlusspläne ...................................................................... 33
• Normkonformität und Hinweise .............................................. 35
Índice
• Kit de portero automático 7509/M
............................................. 2
- Contenido del paquete......................................................... 3
• Portero automático 7509 ...................................................... 4
• Placa 13K1 ............................................................................ 19
• Unidad electrónica 13F1 ....................................................... 20
• Alimentador 40100 ................................................................ 30
• Esquemas de conexión ......................................................... 33
• Conformidad a las normas y advertencias ............................ 35
Índice
• Kit de intercomunicador 7509/M ............................................. 2
- Conteúdo da embalagem ................................................... 3
• Intercomunicador 7509 .......................................................... 4
• Botoneira 13K1 ...................................................................... 19
• Unidade eletrónica 13F1 ....................................................... 20
• Alimentador 40100 ................................................................ 30
• Esquemas de ligação ............................................................ 33
• Conformidade normativa e advertências ............................... 35

• Κιτ θυροτηλέφωνου 7509/M .................................................. 2
- Περιεχόμενο συσκευασίας ................................................. 3
• Θυροτηλέφωνο 7509 ............................................................. 4
• Μπουτονιέρα 13K1 ................................................................ 19
• Ηλεκτρονική μονάδα 13F1 .................................................... 20
• Τροφοδοτικό 40100 ............................................................... 30
• Διαγράμματα σύνδεσης ......................................................... 33
• Συμμόρφωση με τα πρότυπα και προειδοποιήσεις ............... 35

•2 ............................................................................. 7509/M      •3 ...........................................................................................................    - •4 ................................................................................................. 7509     •19 ....................................................................................................................... 13K1  •20 ........................................................................................................ 13F1   •30 .............................................................................................................. 40100   •33 .............................................................................................................   •35 ..............................................................................................   
2
7509/M
• Kit citofonico
• Entryphone kit
• Kit portier
• Haustelefon-Set
• Kit de portero automático
• Kit de intercomunicador
• 
•    
Kit citofonico Due Fili Plus monofamiliare
I componenti del kit sono forniti con codice identicativo ID, già
precongurato.
Nel caso di installazione del Kit citofonico in un impianto più esteso
per esempio aggiunta di un posto esterno e/o di posti interni sup-
plementari e per eventuali congurazioni avanzate/opzionali (per
esempio programmazione di tasti per funzioni ausiliarie o chia-
mate intercomunicanti), fare riferimento ai manuali istruzioni del
citofono, dell’unità elettronica e di sistema Due Fili Plus, disponibili
sul sito www.vimar.com.
Due Fili Plus one-family entryphone kit
The kit parts come with a pre-congured ID code.
When installing the entryphone kit in a larger system, such as
adding an outdoor station and/or additional indoor stations and
for advanced/optional conguration (e.g. programming buttons for
auxiliary functions or intercom calls), refer to the instruction manu-
als of the entryphone, electronic unit and Due Fili Plus system,
available on the website www.vimar.com.
Kit portier Due Fili Plus pour un logement
Les composants du kit sont livrés avec un code d’identication ID
préconguré.
Si le kit portier est installé dans un circuit plus étendu, quand on
souhaite, par exemple, ajouter un poste extérieur et/ou des postes
intérieurs supplémentaires, et pour les congurations avancées/
options (notamment, la programmation des touches pour les fonc-
tions auxiliaires ou les appels intercommunicants), se référer aux
manuels d’instruction de l’interphone, de l’unité électronique et du
système Due Fili Plus, disponibles sur le site www.vimar.com.
Haustelefon-Set Due Fili Plus für Einfamilienhäuser
Die Bestandteile des Sets werden mit vorkongurierter ID-Kenn-
nummer geliefert.
Bei Installation des Haustelefon-Sets in eine erweiterte Anlage,
zum Beispiel Ergänzung einer Außenstelle und/oder zusätzlicher
Innenstellen, und für etwaige erweiterte/optionale Kongurationen
(zum Beispiel Programmierung der Tasten für Zusatzfunktionen
oder Internrufe) siehe die auf der Website www.vimar.com ver-
fügbaren Bedienungsanleitungen von Haustelefon, Elektronikein-
heit und System Due Fili Plus.
Kit de portero automático Due Fili Plus unifamiliar
Los componentes del kit se suministran con código de identica-
ción ID precongurado.
En caso de instalación del kit de portero automático en una ins-
talación más amplia, por ejemplo con el añadido de un aparato
externo y/o aparatos internos adicionales y posibles conguracio-
nes avanzadas/opcionales (por ejemplo, programación de teclas
para funciones auxiliares o llamadas intercomunicantes), consulte
los manuales de instrucciones del portero automático, la unidad
electrónica y el sistema Due Fili Plus, disponibles en la página
www.vimar.com.
Kit de intercomunicador Due Fili Plus monofamiliar
Os componentes do kit são fornecidos com código identicativo
ID, já pré-congurado.
Em caso de instalação do Kit de intercomunicador num sistema
mais alargado, por exemplo, adição de um posto externo e/ou de
postos internos suplementares e para eventuais congurações
avançadas/opcionais (por exemplo, programação de teclas para
funções auxiliares ou chamadas intercomunicantes), consulte os
manuais de instruções do intercomunicador, da unidade eletrónica
e de sistema Due Fili Plus, disponíveis no site www.vimar.com.

Τα εξαρτήματα του κιτ παρέχονται με ήδη προδιαμορφωμένο ανα-
γνωριστικό κωδικό ID.
Στην περίπτωση εγκατάστασης του κιτ θυροτηλέφωνου σε πιο
εκτεταμένη εγκατάσταση, για παράδειγμα, προσθήκη εξωτερικού
σταθμού ή/και συμπληρωματικών εσωτερικών σταθμών και για
τυχόν προηγμένες/προαιρετικές διαμορφώσεις (για παράδειγμα,
προγραμματισμός πλήκτρων για βοηθητικές λειτουργίες ή κλήσεις
ενδοεπικοινωνίας), ανατρέξτε στα εγχειρίδια οδηγιών του θυροτη-
λέφωνου, της ηλεκτρονικής μονάδας και του συστήματος Due Fili
Plus που διατίθενται στην ιστοσελίδα www.vimar.com.
  Due Fili Plus     
.   ID      
            
     /       /
 (        
 )      
 Due Fili Plus     www.vimar.com.
3
7509/M
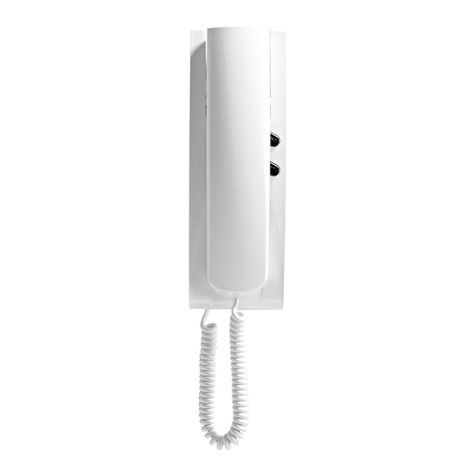
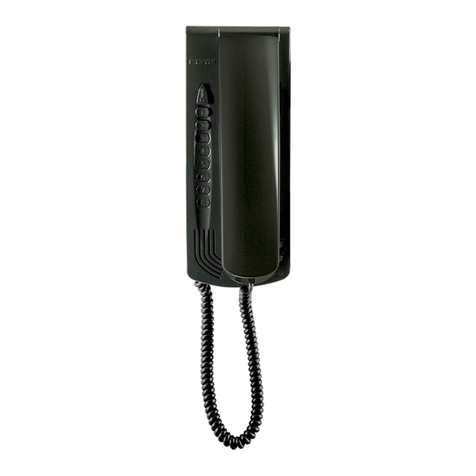
• Citofono serie Tab 7509
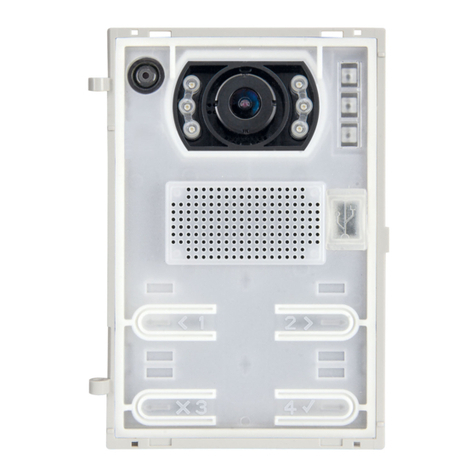
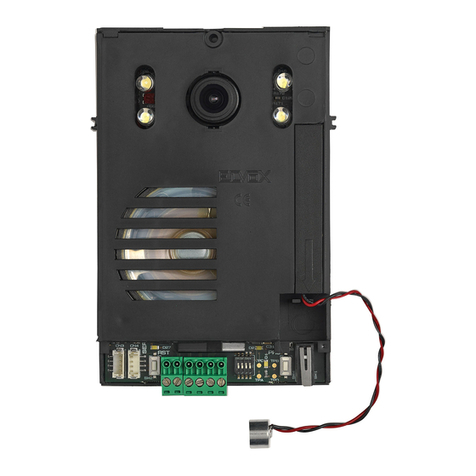
• Targa esterna 13K1 (1 pulsante), con unità elettronica 13F1.
- Scatola da incasso. Da utilizzare solo per installazione della targa in
modalità da incasso parete, in questo caso escludere la scatola da
esterno parete.
- Sacchetto con due viti di ssaggio e tasselli per eventuale ssaggio a
parete.
• Unita elettronica audio-video 13F1
• Alimentatore di sistema Due Fili Plus 40100:
• Manuale di installazione e utilizzo
• Contenuto della confezione
• Package contents
• Contenu de l’emballage
• Verpackungsinhalt
• Contenido del paquete
• Conteúdo da embalagem
• 
• 
*
*
Scatola da incasso (da utilizzare solo per installazione della targa ad incasso parete).
Flush mounting box (use only for ush mounting the panel).
Boîte d’encastrement (réservée à l’installation encastrée de la platine).
Unterputzdose (nur zur Unterputzinstallation des Klingeltableaus zu verwenden).
Caja de empotrar (se utiliza solo para montar la placa empotrada).
Caixa de embeber (a utilizar apenas para a instalação da botoneira de embeber na parede).
Χωνευτό κουτί (πρέπει να χρησιμοποιείται μόνο για χωνευτή εγκατάσταση της μπουτονιέρας στον τοίχο).
.(          )    
• Tab series entryphone 7509
• Entrance panel 13K1 (1 push button), with electronic unit 13F1.
- Flush mounting box. Use only for ush surface mounting the entrance
panel, in this case exclude the external surface mounting box.
- Bag with two xing screws and wall plugs for possible surface
mounting.
• Audio-video electronic unit 13F1
• Due Fili Plus system power supply unit 40100:
• Installation and user manual
• Interphone série Tab 7509
• Platine 13K1 (1 bouton) avec unité électronique 13F1
- Boîte d'encastrement. À utiliser uniquement pour la pose de la platine
par encastrement. Dans ce cas, exclure la boîte pour la pose en saillie.
- Sachet avec deux vis de xation et goujons pour une éventuelle
xation en saillie.
• Unité électronique audio-vidéo 13F1
• Alimentation système Due Fili Plus 40100 :
• Manuel d'installation et d’utilisation
• Portero automático serie Tab 7509
• Placa externa 13K1 (1 pulsador), con unidad electrónica 13F1.
- Caja de empotrar. Se utiliza solo para el montaje de la placa
empotrada, en este caso no se emplea la caja de supercie.
- Bolsita con dos tornillos de jación y tacos para posible montaje de
supercie.
• Unidad electrónica audio-vídeo 13F1
• Alimentador del sistema Due Fili Plus 40100:
• Manual de instalación y utilización
• Intercomunicador da série Tab 7509
• Botoneira externa 13K1 (1 botão), com unidade eletrónica 13F1.
- Caixa de embeber. A utilizar apenas para a instalação da botoneira no
modo de embeber na parede; neste caso, excluir a caixa de montagem
saliente.
- Saco com dois parafusos de xação e buchas para a eventual xação
à parede.
• Unidade eletrónica áudio/vídeo 13F1
• Alimentador de sistema Due Fili Plus 40100:
• Manual de instalação e utilização
• Θυροτηλέφωνο σειράς Tab 7509
• Εξωτερική μπουτονιέρα 13K1 (1 μπουτόν), με ηλεκτρονική μονάδα 13F1.
- Χωνευτό κουτί. Πρέπει να χρησιμοποιείται μόνο για χωνευτή
εγκατάσταση της μπουτονιέρας στον τοίχο. Σε αυτήν την περίπτωση,
αφαιρέστε το κουτί από τον εξωτερικό τοίχο.
- Σακούλα με δύο βίδες στερέωσης και ούπα για ενδεχόμενη επιτοίχια
στερέωση.
• Ηλεκτρονική μονάδα ήχου-εικόνας 13F1
• Τροφοδοτικό συστήματος Due Fili Plus 40100:
• Εγχειρίδιο εγκατάστασης και χρήσης
• Haustelefon Serie Tab 7509
• Klingeltableau 13K1 (1 Taste) mit Elektronikeinheit 13F1.
- Unterputzdose. Nur zur Installation des Klingeltableaus in
Unterputzversion zu verwenden; in diesem Fall die Aufputzdose
aussondern.
- Beutel mit zwei Befestigungsschrauben und Dübeln zur etwaigen
Wandbefestigung.
• Audio-/Video-Elektronikeinheit 13F1
• Netzteil für das System Due Fili Plus 40100:
• Installations- und Bedienungsanleitung
Tab 7509 /    •
.13F1    ( 13K1 (1   •
              .   -
. 
.         -
13F1 /   •
:Due Fili Plus 40100   •
   •
4
7509/M
• Dati dimensionali
• Dimensional data
• Dimensions
• Maßangaben
• Medidas
• Dados dimensionais
• 
• 
• Citofono 7509
• Entryphone 7509
• Interphone 7509
• Haustelefon 7509
• Portero automático 7509
• Intercomunicador 7509
• 
•7509    
• Altezza consigliata salvo diversa normativa vigente.
• Recommended height, unless different regulations are specified.
• Hauteur recommandée sauf autre norme en vigueur.
• Empfohlene Höhe, falls die gesetzlichen Vorschriften nichts anderes vorschreiben.
• Altura recomendada salvo normativa vigente diferente
• Altura recomendada, salvo normativa vigente em contrário.
• Συνιστώμενο ύψος εκτός εάν ισχύει διαφορετική νομοθεσία.
•.           
160/165 cm
120 cm
105 mm
180 mm
35 mm
5
7509/M
• Installazione
• Installation
• Installation
• Installation
• Montaje
• Instalação
• 
•
• L’installazione deve essere effettuata da personale qualicato
con l’osservanza delle disposizioni regolanti l’installazione
del materiale elettrico in vigore nel paese dove i prodotti sono
installati.
• Installation should be carried out by qualied personnel
in compliance with the current regulations regarding the
installation of electrical equipment in the country where the
products are installed.
• L’installation doit être conée à des techniciens qualiés et
effectuée dans le respect des dispositions réglant l'installation
du matériel électrique en vigueur dans le pays dans lequel les
produits sont installés.
• Die Installation muss durch Fachpersonal gemäß den im
Anwendungsland des Produkts geltenden Vorschriften zur
Installation elektrischen Materials erfolgen.
• El montaje debe ser realizado por personal cualicado
cumpliendo con las correspondientes disposiciones en vigor.
• A instalação deve ser efetuada por pessoal qualicado de
acordo com as disposições que regulam a instalação de
material elétrico, vigentes no país em que os produtos são
instalados.
• Η εγκατάσταση πρέπει να πραγματοποιείται από εξειδικευμένο
προσωπικό σύμφωνα με τις ισχύουσες ρυθμιστικές διατάξεις.
•           
    
6
7509/M
Montaggio da esterno parete
- Installare il citofono lontano da fonti luminose e di calore.
- Per aprire il citofono sollevare il coperchio facendo leva con
le dita sulla parte inferiore, eventualmente agendo con un
cacciavite nei due punti di incastro posti sotto al citofono per
separare il coperchio dal fondo.
- Fissare il fondo del citofono: direttamente alla parete mediante
due tasselli oppure ad una scatola da incasso rettangolare
unificata a tre moduli (tipo Vimar V71303) installata
verticalmente oppure ad una scatola da incasso rotonda
(da 60 o 70 mm). In dotazione vengono forniti: 2 tasselli da
utilizzare nel caso di fissaggio direttamente a parete e due viti
da utilizzare nel caso di fissaggio su scatola rotonda.
- Eseguire il cablaggio secondo gli schemi di collegamento alla
morsettiera connessa al fondo del citofono.
- Chiudere il citofono alloggiando il coperchio, prima nella parte
superiore e poi facendo una leggera pressione sulla parte
inferiore, fino all’aggancio al fondo.
External surface mounting
- Install the entryphone away from light and heat sources.
- To open the entryphone lever off the cover with the fingers
and if necessary push a screwdriver into the two slots on the
bottom of the entryphone to separate the cover from the base.
- Fix the bottom of the entryphone: directly to the wall using
two wall plugs or to a unified three-module rectangular flush
mounting box (Vimar V71303 type) installed vertically or
to a round flush mounting box (60 or 70 mm). Supplied as
standard: 2 wall plugs for fixing directly to the wall and two
screws to use for fixing using the round mounting box.
- Ensure that the wiring to the terminal block connected to the
entryphone base is done as shown in the wiring diagrams.
- Fit the entryphone cover: first position the top part and then
push the bottom part gently, until it clicks into place.
Montage en saillie
- Installer l’interphone loin de sources lumineuses et de chaleur.
- Pour ouvrir l’interphone, soulever le couvercle en retenant la
partie inférieure avec les doigts ; introduire éventuellement un
tournevis dans les deux points d’encastrement présents sous
l’interphone pour séparer le couvercle du fond.
- Fixer le fond de l’interphone : directement au mur à l’aide de
deux goujons ou à une boîte d’encastrement rectangulaire
unifiée à trois modules (type Vimar V71303) installée
verticalement ou à une boîte d’encastrement ronde (de 60
ou 70 mm). L’emballage comprend : 2 goujons à utiliser pour
la fixation en saillie et deux vis à utiliser pour la fixation sur la
boîte ronde.
- Réaliser le câblage à partir des schémas de connexion au
bornier branché au fond de l’interphone.
- Fermer le poste en emboîtant le couvercle, d'abord sur la
partie supérieure puis en appuyant légèrement sur la partie
inférieure, jusqu'à ce qu'il s'emboîte sur le fond.
Aufputzmontage
- Das Haustelefon fern von Licht- und Wärmequellen installieren.
- Zum Öffnen des Haustelefons das Oberteil mithilfe der
Finger an der Unterseite aushebeln, gegebenenfalls einen
Schraubendreher in die beiden Einrastungen unter dem
Haustelefon einführen, um Ober- und Unterteil zu trennen.
- Das Unterteil des Haustelefons mit zwei Dübeln direkt an
der Wand oder an einer genormten rechteckigen, vertikal
installierten 3-Modul-Dose (Typ Vimar V71303) bzw. an einer
runden Unterputzdose (mit 60 oder 70 mm) befestigen.
Im Lieferumfang sind enthalten: 2 Dübel für die direkte
Wandbefestigung und zwei Schrauben zur Befestigung an der
runden Dose.
- Die Verkabelung lt. Anschlussplänen an der Klemmenleiste im
Unterteil des Haustelefons vornehmen.
- Das Haustelefon schließen, dazu das Oberteil erst oben
einsetzen, dann unten leicht eindrücken, bis es am Unterteil
einrastet.
Montaje de superficie
- Instale el portero automático lejos de fuentes luminosas y de
calor.
- Para abrir el portero automático, levante la tapa presionando
con los dedos en su parte inferior o bien introduzca un
destornillador en los dos puntos de encaje debajo del aparato
para separar la tapa del fondo.
- Sujete el fondo del portero automático: directamente a
la pared con dos tacos o bien a una caja de empotrar
rectangular unificada de tres módulos (tipo Vimar V71303)
instalada verticalmente o una caja de empotrar redonda (de
60 o 70 mm). Se suministran en dotación: 2 tacos para fijación
directamente a la pared y 2 tornillos para fijación en caja
redonda.
- Realice el cableado según los esquemas de conexión a la caja
de bornes conectada al fondo del portero automático.
- Cierre el portero automático sujetando la tapa, primero en la
parte superior y luego ejerciendo una ligera presión en la parte
inferior, hasta enganchar con el fondo.
Montagem saliente
- Instale o intercomunicador longe de fontes luminosas e de
calor.
- Para abrir o intercomunicador, levante a tampa pressionando,
com os dedos, a parte inferior eventualmente com uma chave
de fendas nos dois pontos de encaixe situados por baixo do
intercomunicador para separar a tampa da base.
- Fixe a base do intercomunicador: diretamente à parede com
duas buchas ou a uma caixa de embeber retangular unificada
de três módulos (tipo Vimar V71303) instalada na vertical ou
a uma caixa de embeber redonda (de 60 ou 70 mm). São
fornecidos: 2 buchas a utilizar em caso de fixação diretamente
à parede e dois parafusos a utilizar em caso de fixação numa
caixa redonda.
- Execute a cablagem segundo os esquemas de ligação à placa
de terminais ligada à base do intercomunicador.
- Feche o intercomunicador colocando a tampa, primeiro na
parte superior e depois fazendo uma ligeira pressão na parte
inferior, até ela encaixar na base.
7
7509/M

- Εγκαταστήστε το θυροτηλέφωνο μακριά από πηγές φωτός και
θερμότητας.
- Για να ανοίξετε το θυροτηλέφωνο, ανασηκώστε το καπάκι
χρησιμοποιώντας τα δάχτυλά σας ως μοχλό στο πάνω μέρος,
ενδεχομένως τοποθετώντας ένα κατσαβίδι στα σημεία σύνδεσης
που υπάρχουν κάτω από το θυροτηλέφωνο, για να διαχωρίσετε το
καπάκι από το πίσω μέρος.
- Στερεώστε το πίσω μέρος του θυροτηλέφωνου: απευθείας στον
τοίχο μέσω δύο ούπα ή σε ορθογώνιο ενιαίο χωνευτό κουτί
τριών μονάδων (τύπου V71303) εγκατεστημένο κατακόρυφα ή σε
στρογγυλό χωνευτό κουτί (60 ή 70 mm). Με το προϊόν παρέχονται
τα εξής: 2 ούπα που πρέπει να χρησιμοποιούνται στην περίπτωση
απευθείας στερέωσης σε τοίχοι και δύο βίδες που πρέπει να
χρησιμοποιούνται στην περίπτωση στερέωσης σε στρογγυλό
κουτί.
- Εκτελέστε την καλωδίωση σύμφωνα με τα διαγράμματα
σύνδεσης στην κλέμα που είναι συνδεδεμένη στο πίσω μέρος του
θυροτηλέφωνου.
- Κλείστε το θυροτηλέφωνο τοποθετώντας το καπάκι, πρώτα στο
πάνω μέρος και μετά πιέζοντας ελαφρώς στο κάτω τμήμα, μέχρι
να συνδεθεί στο πίσω μέρος.
    
.     ()    -
              -
.         
       2     :   -
.( 70  60 )       (Vimar V71303   )
    2        2 : 
.   
              -
.   
                -
.       
• Smontaggio
• Disassembly
• Démontage
• Ausbau
• Desmontaje
• Desmontagem
• 
•
8
7509/M
• Citofono da esterno parete in ABS con finitura lucida a
specchio sul frontale.
• Predisposto per installazione da esterno parete per il fissaggio
alla parete o ad una scatola (applicabile direttamente al muro
con tasselli oppure ad una scatola da incasso rettangolare
unificata 3 moduli tipo Vimar V71303 o scatole da incasso
rotonde da 60 o 70 mm).
• E’ possibile l’installazione in versione da tavolo mediante
l’accessorio base da tavolo 753A e la borchia di
interconnessione 753B (acquistabili separatamente).
• Tastiera a sfioramento.
• Alimentazione da bus Due Fili
• Assorbimento:
- in standby: 7mA
- corrente massima in conversazione: 60mA
- corrente di picco limitata al tempo di chiamata: 100mA
• Temperatura di funzionamento: -5° ÷ 40°C
• Suoneria elettronica: con diversificazione delle melodie tra
chiamata da posto esterno, intercomunicante e fuoriporta.
• Le suonerie sono selezionabili tra 10 melodie diverse.
• Uscita per suoneria supplementare Art. 860A o relè art.
0170/101.
• Ingresso per chiamata fuori porta.
• Surface-mounted outdoor entryphone in ABS with mirror
gloss finish on front panel.
• Designed for external surface-mounting or fixing to a wall or
box (can be mounted directly on the wall using wall plugs or
to a Vimar V71303 type unified 3-module rectangular flush-
mounting box or a 60 or 70 mm round flush-mounting box).
• Desktop installation is possible with the desktop base
accessory 753A and the interconnecting stud 753B (sold
separately).
• Touch-sensitive keypad.
• Due Fili bus power supply
• Power consumption:
- in standby: 7mA
- maximum conversation current: 60mA
- peak current limited to call time: 100mA
• Operating temperature: -5° to 40°C
• Electronic ringtone: different ringtones for panel call, intercom
call and door call.
• 10 different ringtones can be selected.
• Output for additional ringtone Art. 860A or relay art. 0170/101.
• Input for landing call.
• Interphone d'extérieur en saillie en ABS, finition brillante
miroitée en façade.
• Pré-équipé pour installation à l'extérieur en saillie ou dans
un boîtier (peut être appliqué directement sur le mur avec
des goujons ou dans une boîte d’encastrement rectangulaire
unifiée 3 modules type Vimar V71303 ou dans des boîtes
d’encastrement rondes de 60 ou 70 mm).
• L'installation est possible en version de table grâce à la
base de table 753A et à la borne de réseau 753B (à acheter
séparément).
• Clavier tactile
• Alimentation par bus Due Fili
• Absorption :
- en mode veille : 7mA
- Courant maximum en conversation : 60mA
- Courant de pointe limité au temps de l'appel : 100mA
• Température de fonctionnement : -5 °C ÷ 40 °C
• Sonnerie électronique : avec diversification des mélodies
entre appel depuis platine, intercommunicant et palier.
• Possibilité de sélectionner les sonneries parmi 10 mélodies
différentes.
• Sortie pour sonnerie supplémentaire art. 860A ou relais art.
0170/101.
• Entrée pour appel de palier.
• Haustelefon für Aufputzmontage aus ABS mit spiegelblanker
Optik an der Vorderseite.
• Vorbereitung für Aufputzmontage zur Befestigung an der
Wand oder in einer Dose (kann mit Dübeln direkt an der Wand
oder in einer genormten rechteckigen AP-Dose für 3 Module
Typ Vimar V71303 oder in runden UP-Dosen mit 60 oder 70
mm angebracht werden).
• Installation als Tischgerät mithilfe des Tischzubehörs 753A
und der Anschlussbuchse 753B (separat erhältlich).
• Touch-Tastatur.
• Spannungsversorgung über Bus Due Fili
• Stromaufnahme:
- Standby: 7mA
- max. Stromaufnahme während des Gesprächs: 60mA
- Auf die Rufdauer begrenzter Spitzenstrom: 100mA
• Betriebstemperatur: -5° ÷ 40°C
• Elektronisches Läutwerk: mit Einstellung von verschiedenen
Melodien für Klingeltableau-, Intern- und Etagenrufe.
• Für die Ruftöne stehen 10 verschiedene Melodien zur Wahl.
• Ausgang für Zusatzläutwerk Art. 860A oder Relais Art.
0170/101.
• Eingang für Etagenruf.
• Portero automático de superficie de ABS con acabado pulido
de espejo en el frente.
• Preparado para montaje de superficie con fijación a la pared
o a una caja (que se puede colocar directamente en la
pared con tacos o bien en una caja de empotrar rectangular
unificada de 3 módulos tipo Vimar V71303 o en caja de
empotrar redonda de 60 o 70 mm).
• El montaje en versión de sobremesa es posible gracias al
correspondiente accesorio 753A y al botón de interconexión
753B (pueden comprarse por separado).
• Teclado táctil.
• Alimentación por bus Due Fili
• Absorción:
- en standby: 7mA
- corriente máxima durante la comunicación: 60mA
- corriente de pico limitada al tiempo de llamada: 100mA
• Temperatura de funcionamiento: -5° ÷ 40°C
• Timbre electrónico: con distinción de melodía entre llamada
desde placa, intercomunicante y desde fuera de la puerta.
• Se puede elegir entre 10 melodías distintas.
• Salida para timbre adicional art. 860A o relé art. 0170/101.
• Entrada para llamada fuera de la puerta.
• Intercomunicador de montagem saliente em ABS com
acabamento brilhante tipo espelho na parte frontal.
• Preparado para uma instalação de montagem saliente para
a fixação à parede ou a uma caixa (aplicável diretamente à
parede com buchas ou a uma caixa de embeber retangular
unificada de 3 módulos tipo Vimar V71303 ou caixas de
embeber redondas de 60 ou 70 mm).
• É possível a instalação na versão de mesa através do
acessório base de mesa 753A e da tomada de interligação
753B (adquiridos separadamente).
• Teclado sensível ao toque.
• Alimentação de Bus Due Fili
• Consumo:
- em standby: 7mA
- corrente máxima em conversação: 60mA
- corrente de pico limitada ao tempo de chamada: 100mA
• Temperatura de funcionamento: -5° ÷ 40°C
• Toque eletrónico: com diversificação das melodias entre
chamada da botoneira, intercomunicante e de patamar.
• Os toques podem ser selecionados entre 10 melodias
distintas.
• Saída para toque suplementar Art. 860A ou relé art. 0170/101.
• Entrada para chamada de patamar.
• Caratteristiche tecniche
• Technical characteristics
• Caractéristiques techniques
• Technische Merkmale
• Características técnicas

 •
9
7509/M
• Funzione di audiofrequenza per protesi acustiche
(Teleloop)
Il videocitofono è utilizzabile da parte dei portatori di protesi acustiche.
Per un corretto funzionamento dell’apparecchio acustico, fare
riferimento al relativo manuale di istruzioni. La presenza di oggetti
metallici o apparecchi elettronici, può compromettere la qualità del
suono percepito sull’apparecchio acustico.
• Audio frequency function for hearing aids (Teleloop)
The video entryphone can be used by people wearing hearing aids.
For correct functioning of the hearing aid, please refer to its instruction
manual. Any metal objects or electronic equipment in the vicinity may
affect the quality of the sound received by the hearing aid.
• Fonction audiofréquence pour prothèses auditives
(Téléboucle)
Le portier-vidéo est adapté aux porteurs de prothèses auditives.
Pour utiliser correctement l'appareil acoustique, consulter son mode
d'emploi. La présence d'objets métalliques ou d'appareils électroniques
peut compromettre la qualité de la réception sur l’appareil acoustique.
• Tonfrequenz-Funktion für Hörgeräte (Teleschlinge)
Das Videohaustelefon eignet sich für Hörgeräteträger.
Für den korrekten Betrieb des Hörgeräts wird auf die entsprechende
Bedienungsanleitung verwiesen. Eventuell vorhandene Gegenstände
aus Metall oder elektronische Geräte können die am Hörgerät
empfangene Tonqualität beeinträchtigen.
• Función de audiofrecuencia para audífonos
(transmisor inductivo)
El videoportero puede ser utilizado por personas con audífono.
Para el correcto funcionamiento del audífono, consulte el
correspondiente manual de instrucciones. La presencia de objetos
metálicos o aparatos electrónicos puede perjudicar la calidad del sonido
percibido con el audífono.
• Função de audiofrequência para próteses auditivas
(Teleloop)
O videoporteiro pode ser utilizado pelos portadores de próteses
auditivas.
Para um funcionamento correto do aparelho auditivo, consulte o
respetivo manual de instruções. A presença de objetos metálicos ou
aparelhos eletrónicos pode comprometer a qualidade do som recebido
no aparelho auditivo.
• 

Η θυροτηλεόραση μπορεί να χρησιμοποιηθεί από άτομα με βοηθήματα
ακοής.
Για τη σωστή λειτουργία του βοηθήματος ακοής, ανατρέξτε στο σχετικό
εγχειρίδιο οδηγιών. Τα μεταλλικά αντικείμενα ή οι ηλεκτρονικές
συσκευές μπορεί να επηρεάσουν την ποιότητα του ήχου που
λαμβάνεται από το βοήθημα ακοής.
•(Teleloop)       
.           
.           
             
.   
• Εξωτερικό, επιτοίχιο θυροτηλέφωνο από ABS με γυαλιστερό
φινίρισμα καθρέφτη στην μπροστινή πλευρά.
• Προδιαμορφωμένο για εξωτερική, επιτοίχια εγκατάσταση
για στερέωση στον τοίχο ή σε κουτί (μπορεί να τοποθετηθεί
απευθείας στον τοίχο με ούπα ή σε ορθογώνιο ενιαίο χωνευτό
κουτί 3 μονάδων τύπου Vimar V71303 ή σε στρογγυλά
χωνευτά κουτιά 60 ή 70 mm).
• Μπορεί να εγκατασταθεί στην επιτραπέζια έκδοση μέσω
του εξαρτήματος επιτραπέζιας βάσης 753A και του κρίκου
διασύνδεσης 753B (μπορείτε να τα αγοράσετε ξεχωριστά).
• Πληκτρολόγιο αφής.
• Τροφοδοσία από bus Due Fili
• Απορρόφηση:
- σε κατάσταση αναμονής: 7mA
- μέγιστο ρεύμα σε κατάσταση συνομιλίας: 60mA
- ρεύμα αιχμής κατά τη διάρκεια της κλήσης: 100mA
• Θερμοκρασία λειτουργίας: -5° ÷ 40°C
• Ηλεκτρονικό κουδούνι: με διαφοροποίηση των κλήσεων από
μπουτονιέρα, συσκευή ενδοεπικοινωνίας και εξώπορτα.
• Μπορείτε να επιλέξετε μία από τις 10 διαφορετικές μελωδίες
για τα κουδούνια.
• Έξοδος για συμπληρωματικό κουδούνι κωδ. 860A ή ρελέ
κωδ. 0170/101.
• Είσοδος για κλήση από εξώπορτα.
.     ABS      •
 )              •
              
( 70  60      Vimar V71303
 753A           •
.(  ) 753B  
.   •
.   •
:  •
 stand-by: 7    -
 60 :       -
 100 :      -
  40 ÷   -5 :   •
            :  •
. 
.  10       •
.101/0170    860A     •
.    •
10
7509/M
• Vista frontale
• Front view
• Vue de face
• Frontansicht
• Vista frontal
• Vista frontal
• 
•  

• Nel caso il citofono sia a riposo o in occupa-
to, i tasti devono essere premuti per almeno
0.4 s. In qualunque altro stato sono “rapidi”.
• If the entryphone is in stand-by or busy, the
keys must be pressed for at least 0.4 s. In
any other state they are “rapid”.
• Lorsque l’interphone est au repos ou
occupé, appuyer sur les touches au moins
0,4 s. Dans les autres cas, il suffit d’appuyer
« rapidement » sur les touches.
• Bei Haustelefon im Ruhe- oder
Besetztstatus müssen die Tasten min-
destens für 0,4 s gedrückt werden. In
jedem anderen Status haben die Tasten
“Schnellaktion”.
• Si el portero automático está en reposo
o bien comunicando, los botones deben
pulsarse durante al menos 0,4 segundos.
En cualquier otro estado la presión de los
botones es rápida.
• Caso o intercomunicador esteja em repouso
ou ocupado, as teclas devem ser premidas
durante pelo menos 0,4 segundos. Em
qualquer outro estado são “rápidas”.
• Εάντοθυροτηλέφωνοβρίσκεταισε
κατάστασηαδράνειαςήεάνείναικατειλημ-
μένο,ταπλήκτραπρέπειναπατηθούνγια
τουλάχιστον0,4δευτ.Σεοποιαδήποτεάλλη
κατάστασηείναι«ταχείαςεπιλογής»”.
         •
   0.4     
.“"   
A
C
D
B
E4
E3
E2
E1
G
F
A Autoaccensione: per l’autoinserimento/autoaccensione del citofono (di default verso il posto esterno Master).
BEsclusione della suoneria: Disattiva/Attiva la suoneria. Durante una chiamata, disattiva la suoneria per la chiamata corrente e per
tutte le successive.
In conversazione commuta l’amplificazione dell’audio ricevuto di + 3 dB. Permane anche spegnendo il citofono. Funziona per tutte
le chiamate.
(programmazione modificabile solo con software SaveProg)
CSerratura: comando per l’apertura serratura (programmazione modificabile solo con software SaveProg).
DAusiliario 1 (Luce scale): Per servizio ausiliario (di default attiva l’attuatore 1 del relè 69RH o 69PH).
E1 Pulsante 1: Pulsante programmabile per attivazione servizio ausiliario o chiamata intercomunicante (di default attiva l’attuatore 2
del relè 69RH o 69PH).
E2 Pulsante 2: Pulsante programmabile per attivazione servizio ausiliario o chiamata intercomunicante.
E3 Pulsante 3: Pulsante programmabile per attivazione servizio ausiliario o chiamata intercomunicante (di default attiva la funzione F1
del posto esterno, l’ultimo chiamante).
E4 Pulsante 4: Pulsante programmabile per attivazione servizio ausiliario o chiamata intercomunicante (di default attiva la funzione F2
del posto esterno, l’ultimo chiamante).
11
7509/M
A Self-start: to self-start the entryphone (by default towards the Master outdoor station).
BRingtone mute: Disables/Enables the ringtone. During a call, the ringtone is disabled for the call in progress and for all subsequent
calls.
During a conversation, it switches the amplification of the audio received by + 3 dB. Applies even when the entryphone is switched
off. It works for all calls.
(programming can only be edited using the SaveProg software)
CLock: control to release the lock (programming can only be edited using the SaveProg software).
DAuxiliary 1 (stair light): For auxiliary service (actuator 1 of relay 69RH or 69PH activated by default).
E1 Push button 1: Programmable push button to activate auxiliary service or intercom call (actuator 2 of relay 69RH or 69PH
activated by default).
E2 Push button 2: Programmable push button to activate auxiliary service or intercom call.
E3 Push button 3: Programmable push button for auxiliary service or intercom call activation (by default it activates function F1 of the
outdoor station, the last caller).
E4 Push button 4: Programmable push button for auxiliary service or intercom call activation (by default it activates function F2 of the
outdoor station, the last caller).
A Auto-allumage : pour l’auto-insertion/auto-allumage de l’interphone (par défaut vers le poste extérieur Maître).
BExclusion de la sonnerie : Désactiver/Activer la sonnerie. Au cours d’un appel, elle désactive la sonnerie pour l’appel en cours et
pour tous les appels suivants.
En conversation, elle commute l’amplification du signal audio reçu de + 3 dB. La condition dure après avoir éteint l’interphone.
Fonctionne pour tous les appels.
(programmation modifiable uniquement avec le logiciel SaveProg)
CGâche : commande pour l’ouverture de la gâche (programmation modifiable uniquement avec le logiciel SaveProg).
DAuxiliaire 1 (Éclairage escaliers) : Pour service auxiliaire (par défaut, valide l'actuateur 1 du relais 69RH ou 69PH)
E1 Bouton 1 : Bouton programmable pour valider le service auxiliaire ou l’appel intercommunicant (par défaut, valide l'actuateur 2 du
relais 69RH ou 69PH).
E2 Bouton 2 : Bouton programmable pour la validation du service auxiliaire ou appel intercommunicant.
E3 Poussoir 3 : Poussoir programmable pour valider le service auxiliaire ou l’appel intercommunicant (par défaut, valide la fonction F1
du poste extérieur, le dernier poste ayant effectué l’appel).
E4 Poussoir 4 : Poussoir programmable pour valider le service auxiliaire ou l’appel intercommunicant (par défaut, valide la fonction F2
du poste extérieur, le dernier poste ayant effectué l’appel).
A Selbsteinschaltung: für die Selbsteinschaltung des Haustelefons (werkseitig zur Master-Außenstelle).
BRuftonabschaltung: Deaktiviert/aktiviert den Rufton. Deaktiviert beim Ruf den Rufton für den ablaufenden Ruf und für alle
darauffolgenden Rufe.
Schaltet beim Gespräch die Verstärkung des eingehenden Audiosignals auf + 3 dB. Diese Einstellung verbleibt auch beim
Ausschalten des Haustelefons. Gilt für alle Anrufe.
(Programmierung nur über Software SaveProg änderbar)
CTüröffner: Befehl zur Öffnung des Türschlosses (Programmierung nur über Software SaveProg änderbar).
DZusatzfunktion 1 (Treppenhausbeleuchtung): Für Zusatzfunktion (aktiviert werkseitig den Aktor 1 des Relais 69RH oder 69PH).
E1 Taste 1: Für die Aktivierung von Zusatzfunktionen oder für Internrufe programmierbare Taste (aktiviert werkseitig den Aktor 2 des
Relais 69RH oder 69PH).
E2 Taste 2: Für die Aktivierung von Zusatzfunktionen oder für Internrufe programmierbare Taste.
E3 Taste 3: Für die Aktivierung von Zusatzfunktionen oder für Internrufe programmierbare Taste (aktiviert werkseitig die Funktion F1
der Außenstelle, der zuletzt anrufenden Außenstelle).
E4 Taste 4: Für die Aktivierung von Zusatzfunktionen oder für Internrufe programmierbare Taste (aktiviert werkseitig die Funktion F2
der Außenstelle, der zuletzt anrufenden Außenstelle).
12
7509/M
A Autoencendido: Para la autoconexión/autoencendido del portero automático (predeterminado: hacia el aparato externo Master).
BExclusión del timbre: Desactiva/activa el timbre. Durante una llamada, desactiva el timbre para la llamada actual y para todas las
siguientes.
Durante la comunicación conmuta la amplificación del audio recibido a + 3 dB. Permanece aunque se desconecte el portero
automático. Funciona para todas las llamadas.
(la programación se puede modificar solo con software SaveProg)
CCerradura: Mando abrepuertas (la programación se puede modificar solo con software SaveProg).
DAuxiliar 1 (luz de escalera): Para servicio auxiliar (predeterminado: activación del actuador 1 del relé 69RH o 69PH).
E1 Botón 1: Botón programable para la activación del servicio auxiliar o llamada intercomunicante (predeterminado: activación del
actuador 2 del relé 69RH o 69PH).
E2 Botón 2: Botón programable para la activación del servicio auxiliar o llamada intercomunicante.
E3 Botón 3: Botón programable para la activación del servicio auxiliar o llamada intercomunicante (predeterminado: activa la función
F1 del aparato externo, el último que ha llamado).
E4 Botón 4: Botón programable para la activación del servicio auxiliar o llamada intercomunicante (predeterminado: activa la función
F2 del aparato externo, el último que ha llamado).

• Nel caso il citofono sia a riposo o in occupa-
to, i tasti devono essere premuti per almeno
0.4 s. In qualunque altro stato sono “rapidi”.
• If the entryphone is in stand-by or busy, the
keys must be pressed for at least 0.4 s. In
any other state they are “rapid”.
• Lorsque l’interphone est au repos ou
occupé, appuyer sur les touches au moins
0,4 s. Dans les autres cas, il suffit d’appuyer
« rapidement » sur les touches.
• Bei Haustelefon im Ruhe- oder
Besetztstatus müssen die Tasten min-
destens für 0,4 s gedrückt werden. In
jedem anderen Status haben die Tasten
“Schnellaktion”.
• Si el portero automático está en reposo
o bien comunicando, los botones deben
pulsarse durante al menos 0,4 segundos.
En cualquier otro estado la presión de los
botones es rápida.
• Caso o intercomunicador esteja em repouso
ou ocupado, as teclas devem ser premidas
durante pelo menos 0,4 segundos. Em
qualquer outro estado são “rápidas”.
• Εάντοθυροτηλέφωνοβρίσκεταισε
κατάστασηαδράνειαςήεάνείναικατειλημ-
μένο,ταπλήκτραπρέπειναπατηθούνγια
τουλάχιστον0,4δευτ.Σεοποιαδήποτεάλλη
κατάστασηείναι«ταχείαςεπιλογής»”.
         •
   0.4     
.“"   
A
C
D
B
E4
E3
E2
E1
G
F
• Vista frontale
• Front view
• Vue de face
• Frontansicht
• Vista frontal
• Vista frontal
• 
•  
13
7509/M
A: για αυτόματη ενεργοποίηση του θυροτηλέφωνου (προς τον εξωτερικό σταθμό Master βάσει
προεπιλογής).
B: Απενεργοποιεί/ενεργοποιεί το κουδούνι. Κατά τη διάρκεια της κλήσης, απενεργοποιεί το κουδούνι
για την τρέχουσα κλήση και για όλες τις επόμενες.
Κατά τη συνομιλία, ενεργοποιεί την ενίσχυση του ήχου που λαμβάνεται + 3 dB. Διατηρείται ακόμη και όταν απενεργοποιηθεί το
θυροτηλέφωνο. Λειτουργεί για όλες τις κλήσεις.
(ο προγραμματισμός μπορεί να τροποποιηθεί μόνο με το λογισμικό SaveProg)
C: εντολή για το άνοιγμα της κλειδαριάς (ο προγραμματισμός μπορεί να τροποποιηθεί μόνο με το λογισμικό SaveProg).
D: Για βοηθητική λειτουργία (ενεργοποιεί βάσει προεπιλογής τον εκκινητή 1 του
ρελέ 69RH ή 69PH).
E1  1: Μπουτόν που μπορεί να προγραμματιστεί για την ενεργοποίηση της βοηθητικής λειτουργίας ή της κλήσης
ενδοεπικοινωνίας (ενεργοποιεί βάσει προεπιλογής τον εκκινητή 2 του ρελέ 69RH ή 69PH).
E2  2: Μπουτόν που μπορεί να προγραμματιστεί για την ενεργοποίηση της βοηθητικής λειτουργίας ή της κλήσης
ενδοεπικοινωνίας.
E3  3: Μπουτόν που μπορεί να προγραμματιστεί για την ενεργοποίηση της βοηθητικής λειτουργίας ή της κλήσης
ενδοεπικοινωνίας (ενεργοποιεί βάσει προεπιλογής τη λειτουργία F1 του εξωτερικού σταθμού, της τελευταίας κλήσης).
E4 : Μπουτόν που μπορεί να προγραμματιστεί για την ενεργοποίηση της βοηθητικής λειτουργίας ή της κλήσης
ενδοεπικοινωνίας (ενεργοποιεί βάσει προεπιλογής τη λειτουργία F2 του εξωτερικού σταθμού, της τελευταίας κλήσης).
A.(    )       : 
B
.         . / : 
.    .      .dB 3 +       
(SaveProg       )
C
.(SaveProg       )     :
D
.(69PH  69RH  1    )   :( ) 1 
E1
.(69PH  69RH  2   )          :1
E2.         :2
E3
.(     F1    )          :3
E4
.(     F2    )          :4 
A Autoaccensione: per l’autoinserimento/autoaccensione del citofono (di default verso il posto esterno Master).
BEsclusione della suoneria: Disattiva/Attiva la suoneria. Durante una chiamata, disattiva la suoneria per la chiamata corrente e per
tutte le successive.
Em conversação, comuta a amplificação do áudio recebido de + 3 dB. Permanece mesmo desligando o intercomunicador.
Funciona para todas as chamadas.
(programmazione modificabile solo con software SaveProg)
CSerratura: comando per l’apertura serratura (programmazione modificabile solo con software SaveProg).
DAuxiliar 1 (Luz das escadas): Para serviço auxiliar (por defeito, ativa o atuador 1 do relé 69RH ou 69PH).
E1 Botão 1: Botão programável para ativação do serviço auxiliar ou chamada intercomunicante (por defeito, ativa o atuador 2 do relé
69RH ou 69PH).
E2 Botão 2: Botão programável para ativação do serviço auxiliar ou chamada intercomunicante.
E3 Pulsante 3: Pulsante programmabile per attivazione servizio ausiliario o chiamata intercomunicante (di default attiva la funzione F1
del posto esterno, l’ultimo chiamante).
E4 Pulsante 4: Pulsante programmabile per attivazione servizio ausiliario o chiamata intercomunicante (di default attiva la funzione F2
del posto esterno, l’ultimo chiamante).
14
7509/M
• Vista frontale
• Front view
• Vue de face
• Frontansicht
• Vista frontal
• Vista frontal
• 
•  

FIn funzionamento normale:
- Luce lampeggiante: segnala che il citofono sta
ricevendo una chiamata entrante.
- Luce fissa: suoneria esclusa.
Se configurato da tramite SaveProg:
- Chiamate perse: luce lampeggiante (1 s spento, 9 s
acceso, ciclo 10 s).
- Utente assente: luce lampeggiante (0.1 s acceso,
0.9 s spento, ciclo 1 s).
In configurazione:
- Luce lampeggiante: segnala che si è in stato di
configurazione.
GIn funzionamento normale:
- Luce fissa: segnalazione di porta aperta se almeno
in un posto esterno è stato installato il sensore e
collegato tra i morsetti PA e M.
- Luce lampeggiante: segnalazione “Allerta”.
In funzionamento regolazione:
- Luce lampeggiante: segnala che il citofono è in
fase di regolazione del volume della suoneria o
scelta della melodia.
FIn standard operation:
- Flashing light: indicates that the entryphone is
receiving an incoming call.
- Permanent light: ringtone muted.
If configured via SaveProg:
- Calls lost: flashing light (1 s off, 9 s on, 10 s cycle).
- User away: flashing light (0.1 s on, 0.9 s off, 1 s
cycle).
In configuration:
- Flashing light: indicates that the device is in the
configuration state.
GIn standard operation:
- Permanent light: door open indicator if the sensor
has been installed and connected between terminals
PA and M in at least one outdoor station.
- Flashing lamp: “Alert” indicator.
During adjustment:
- Flashing light: indicates that the entryphone
ringtone volume is being adjusted or the melody
selected.
A
C
D
B
E4
E3
E2
E1
G
F
15
7509/M
FEn fonctionnement normal :
- Clignotante : indique que l’interphone reçoit un
appel entrant.
- Allumée : exclusion de la sonnerie.
Configuré avec SaveProg :
- Appels manqués : lumière clignotante (1 s éteinte, 9
s allumée, cycle de 10 s).
- Utilisateur absent : lumière clignotante (0,1 s
allumée, 0,9 s éteinte, cycle de 1 s).
En configuration :
- Clignotante : indique que l'on est en phase de
configuration.
GEn fonctionnement normal :
- Allumée : signale la porte ouverte si au moins un
poste extérieur dispose du capteur relié entre les
bornes PA et M.
- Clignotante : signal d’ « Alerte ».
En mode réglage :
- Clignotante : indique que l’interphone est en phase
de réglage du volume de la sonnerie ou du choix de
la mélodie.
FBeim normalen Betrieb:
- Blinkimpulse: Das Haustelefon empfängt einen
Anruf.
- Erleuchtet: Rufton abgeschaltet.
Falls über SaveProg konfiguriert:
- Verpasste Anrufe: blinkend (1 s aus, 9 s ein, Zyklus
10 s).
- Benutzer abwesend: blinkend (0,1 s aus, 0,9 s ein,
Zyklus 1 s).
Bei Konfiguration:
- Blinkimpulse: Meldet den ablaufenden
Konfigurationsstatus.
GBeim normalen Betrieb:
- Erleuchtet: Anzeige Tür offen, wenn der Sensor
mindestens in einer Außenstelle installiert und
zwischen den Klemmen PA und M angeschlossen
ist.
- Blinkimpulse: “Warnmeldung”.
Beim Einstellen:
- Blinkimpulse: Am Haustelefon wird gerade die
Ruftonlautstärke oder die Melodie eingestellt.
FFuncionamiento normal:
- Luz parpadeante: indica que el portero automático
está recibiendo una llamada entrante.
- Luz fija: timbre excluido.
Si se configura mediante SaveProg:
- Llamadas perdidas: luz parpadeante (1 s apagado,
9 s encendido, ciclo 10 s).
- Usuario ausente: luz parpadeante (0,1 s apagado,
0,9 s encendido, ciclo 1 s).
Configuración:
- Luz parpadeante: indica que se encuentra en
estado de configuración.
GFuncionamiento normal:
- Luz fija: indica que la puerta está abierta si al
menos en un aparato externo está instalado el
sensor y está conectado entre los bornes PA y M.
- Luz parpadeante: señalización de “Alerta”.
Funcionamiento en ajuste:
- Luz parpadeante: indica que el portero
automático está en fase de ajuste del volumen
del timbre o selección del tono.
FNo funcionamento normal:
- Luce lampeggiante: segnala che il citofono sta
ricevendo una chiamata entrante.
- Luce fissa: suoneria esclusa.
Se configurato da tramite SaveProg:
- Chiamate perse: luce lampeggiante (1 s spento, 9 s
acceso, ciclo 10 s).
- Utente assente: luce lampeggiante (0.1 s acceso,
0.9 s spento, ciclo 1 s).
In configurazione:
- Luce lampeggiante: segnala che si è in stato di
configurazione.
GNo funcionamento normal:
- Luce fissa: segnalazione di porta aperta se almeno
in un posto esterno è stato installato il sensore e
collegato tra i morsetti PA e M.
- Luce lampeggiante: segnalazione “Allerta”.
No funcionamento de regulação:
- Luz intermitente: assinala que o intercomunicador
está na fase de regulação do volume do toque ou
de escolha da melodia.
FΣτην κανονική λειτουργία:
 : υποδεικνύει ότι το
θυροτηλέφωνο λαμβάνει εισερχόμενη κλήση.
 : το κουδούνι είναι
απενεργοποιημένο.
Εάν έχει διαμορφωθεί από το SaveProg:
- Αναπάντητες κλήσεις: η λυχνία αναβοσβήνει (1 δευτ.
σβηστή, 9 δευτ. αναμμένη, κύκλος 10 δευτ.).
- Απουσία χρήστη: η λυχνία αναβοσβήνει (0,1 δευτ.
αναμμένη, 0,9 δευτ. σβηστή, κύκλος 1 δευτ.).
Κατά τη διαμόρφωση:
 : υποδεικνύει ότι βρίσκεται
σε κατάσταση διαμόρφωσης.
GΣτην κανονική λειτουργία:
 : επισήμανση ανοικτής
πόρτας, εάν σε τουλάχιστον έναν εξωτερικό σταθμό
έχει εγκατασταθεί ο αισθητήρας και έχει συνδεθεί
μεταξύ των επαφών κλέμας PA και M.
 : επισήμανση
«Συναγερμού».
Στη λειτουργία ρύθμισης:
 : υποδεικνύει εάν το
θυροτηλέφωνο βρίσκεται στη φάση ρύθμισης της
έντασης ήχου του κουδουνιού ή επιλογής της
μελωδίας.
F:  
.         :  -
.  :  -
:SaveProg    
.( 10    9  1)   :  -
.( 1    0.9  1)   :  -
: 
.       :  -
G
:  
            :  -
.M  PA        
.“”  :  -
:   
           :  -
.
16
7509/M
1, 2 Due coppie di morsetti per bus Due Fili.
12V Collegamento suoneria supplementare (riferimento positivo
12V).
CH Collegamento suoneria supplementare (ripetizione di chiamata)
oppure segnalazione “Allerta” (vedere il relativo paragrafo).
FP Ingresso per pulsante di chiamata fuoriporta (con riferimento al
morsetto M).
La distanza massima del collegamento è 10 m.
Tramite configurazione eseguita da SaveProg può essere
utilizzato come ingresso per la funzione Allerta (vedere il relativo
paragrafo).
MRiferimento massa.
Morsettiera di collegamento
Connection terminal block
Bornier de connexion
Anschlussklemmenleiste
Regleta de conexión
Placa de terminais de ligação
Κλέμα σύνδεσης
  
1, 2 Two pairs of terminals for Due Fili bus.
12V Connection of additional ringtone (positive reference 12V).
CH Connection of additional ringtone (repeat call) or “Alert” signal
(see relative paragraph).
FP Input for landing call button (with reference to terminal M).
The maximum connection distance is 10 m.
With configuration using SaveProg, this input can be used for
the Alert function (see relative paragraph).
MEarth reference.
1, 2 Deux paires de bornes pour Bus Due Fili.
12V Raccordement sonnerie supplémentaire (référence positif 12
V).
CH Connexion sonnerie supplémentaire (répétition d’appel) ou
signalisation « Alerte » (consulter le paragraphe correspondant).
FP Entréepour appel palier local (référence à la borne M).
La distance maximale de connexion est de 10 m.
Après avoir procédé à sa configuration via SaveProg, il est
possible de l'utiliser comme entrée pour la fonction Alerte
(consulter le paragraphe correspondant).
MRéférence masse.
1, 2 Zwei Klemmenpaare für Bus Due Fili.
12V Anschluss eines Zusatzläutwerks (Plus-Bezugspotenzial 12V).
CH Anschluss eines Zusatzläutwerks (Rufwiederholung) oder
Anzeige “Warnmeldung” (siehe entsprechenden Abschnitt).
FP Eingang für Etagenruftaste (Bezug Klemme M).
Die max. Anschlusslänge beträgt 10 m.
Kann mittels Konfiguration über SaveProg als Eingang für
die Funktion Warnmeldung verwendet werden (siehe
entsprechenden Abschnitt).
MMassesignal.
• Morsettiera di collegamento
• Connection terminal block
• Bornier de connexion
• Anschlussklemmleiste
• Caja de bornes de conexión
• Placa de terminais de ligação
• 
•  
17
7509/M
1, 2 Dos pares de bornes para Bus Due Fili.
12V Conexión timbre adicional (referencia positivo 12 V).
CH Conexión timbre adicional (repetición de llamada) o bien
señalización de “Alerta” (consulte el apartado correspondiente).
FP Entrada para pulsador de llamada desde fuera de la puerta
(referencia al borne M).
La distancia máxima de conexión es de 10 m.
Mediante la configuración realizada por SaveProg se puede
utilizar como entrada para la función Alerta (consulte el
apartado correspondiente).
M Referencia a masa.
1, 2 Dois pares de terminais para bus Due Fili.
12V Ligação de toque suplementar (referência positiva 12V).
CH Ligação de toque suplementar (repetição de chamada) ou sinal
de “Alerta” (ver o respetivo parágrafo).
FP Entrada para botão de chamada de patamar (com referência ao
terminal M).
A distância máxima da ligação é 10 m.
Através da configuração executada a partir do SaveProg pode
ser utilizada como entrada para a função de Alerta (ver o
respetivo parágrafo).
M Referência de massa.
1, 2 Δύο ζεύγη επαφών κλέμας για bus Due Fili.
12V Σύνδεση συμπληρωματικού κουδουνιού (αναφορά στη θετική
επαφή 12V).
CH Σύνδεση συμπληρωματικού κουδουνιού (επανάληψη κλήσης)
ή επισήμανση «Συναγερμού» (ανατρέξτε στη σχετική
παράγραφο).
FP Είσοδος για μπουτόν κλήσης από εξώπορτα (με αναφορά στην
επαφή κλέμας M).
Η μέγιστη απόσταση σύνδεσης είναι 10 m.
Μέσω διαμόρφωσης που εκτελείται με το SaveProg μπορεί
να χρησιμοποιηθεί ως είσοδος για τη λειτουργία συναγερμού.
(ανατρέξτε στη σχετική παράγραφο).
M Αναφορά γείωσης.
.        2 ,1
.(12V  )    12
""   ( )    CH
.(   )
.(M    )      FP
10    
     SaveProg       
(   )
.  M
18
7509/M
Terminazione Bus
Bus termination
Terminaison bus
Busabschluss
Terminación Bus
Terminação Bus

 
AOPEN
OPEN
100
50
OPEN
100
50
OPEN
100
50
B100 Ω
OPEN
100
50
OPEN
100
50
OPEN
100
50
C50 Ω
OPEN
100
50
OPEN
100
50
OPEN
100
50
Terminazione Bus per stabilizzazione del segnale video
All’interno del citofono è presente un “connettore di terminazione
BUS” A-B-C (OPEN-100-50) per la stabilizzazione del segnale
video.
A seconda della congurazione di collegamento (posti interni
collegati in serie o derivati ad un distributore) settare il ponticello
sul connettore A-B-C (OPEN-100-50) come descritto nella nota
“Terminazione bus per impianti DUE FILI ELVOX” riportata in
seguito, nella sezione schemi di collegamento.
Bus termination for video signal stabilisation
The entryphone is provided with a connector A-B-C (OPEN-100-
50) for video signal stabilisation.
Depending on the connection conguration (indoor stations
connected in series or tap-o󰀨s to a distributor) set the jumper to
connector A-B-C (OPEN-100-50) as described in the note “Bus
termination for ELVOX DUE FILI systems” provided below, in the
wiring diagrams section.
Terminaison bus pour la stabilisation du signal vidéo
Un connecteur de terminaison bus A-B-C (OPEN-100-50) est
installé à l'intérieur de l'interphone pour la stabilisation du signal
vidéo.
Selon la conguration de la connexion (postes intérieurs reliés
en série ou en dérivation à un distributeur), régler le pontet sur
le connecteur A-B-C (OPEN-100-50) en suivant les indications
de la remarque « Terminaison bus pour installations DUE FILI
ELVOX » ci-dessous, dans la section dédiée aux schémas de
connexion.
Busabschluss für die Stabilisierung des Videosignals
Im Videohaustelefon ist ein "Steckverbinder BUS-Abschluss"
A-B-C (OPEN-100-50) für die Stabilisierung des Videosignals
integriert.
Entsprechend der Anschlusskonfiguration (Innenstellen
in Reihenschaltung oder Ableitung eines Verteilers) ist lt.
nachstehender Anmerkung "BUS-Abschluss für Anlagen DUE
FILI ELVOX” im Abschnitt Anschlusspläne der Jumper am
Steckverbinder A-B-C (OPEN-100-50) zu setzen.
Terminación Bus para la estabilización de la señal de
vídeo
En el interior del portero automático hay un “conector de
terminación BUS” A-B-C (OPEN-100-50) para la estabilización
de la señal de vídeo.
Según la configuración de conexión (aparatos externos
conectados en serie o derivados a un distribuidor), puentee el
conector A-B-C (OPEN-100-50) como se describe en la nota
“Terminación BUS para instalaciones DUE FILI ELVOX” incluida
en el apartado de esquemas de conexión.
Terminação Bus para estabilização do sinal de vídeo
No interior do intercomunicador está presente um "conector de
terminação BUS" A-B-C (OPEN-100-50) para a estabilização do
sinal de vídeo.
A seconda della congurazione di collegamento (posti interni
collegati in serie o derivati ad un distributore) settare il ponticello
sul connettore A-B-C (OPEN-100-50) come descritto nella nota
“Terminazione bus per impianti DUE FILI ELVOX” riportata in
seguito, nella sezione schemi di collegamento.
     

Στο εσωτερικό του θυροτηλέφωνου υπάρχει ένας «συνδετήρας
τερματισμού BUS» A-B-C (OPEN-100-50) για τη σταθεροποίηση
του σήματος εικόνας.
Ανάλογα με τη διαμόρφωση σύνδεσης (εξωτερικοί σταθμοί
συνδεδεμένοι σε σειρά ή διακλαδιζόμενοι σε διανομέα),
ρυθμίστε τη γέφυρα στον συνδετήρα A-B-C (OPEN-100-50),
όπως περιγράφεται στη σημείωση «Τερματισμός bus για
εγκαταστάσεις DUE FILI ELVOX» που αναφέρεται παρακάτω,
στην ενότητα διαγραμμάτων σύνδεσης.
      
A-B-C "  "    
.   (50-100 - )
  (        )   
  "      (50-100 - ) A-B-C  
.       "DUE FILI ELVOX 

Other Vimar Intercom System manuals

Vimar Elvox 13F3 User manual

Vimar

Vimar Elvox 13F3 User manual

Vimar Elvox 6584 Assembly instructions

Vimar

Vimar Elvox 6584 Assembly instructions

Vimar Elvox 68TU/93V Assembly instructions

Vimar

Vimar Elvox 68TU/93V Assembly instructions

Vimar ELVOX 7549 User manual

Vimar

Vimar ELVOX 7549 User manual

Vimar Eikon 20296 User manual

Vimar

Vimar Eikon 20296 User manual

Vimar ELVOX 6200 User manual

Vimar

Vimar ELVOX 6200 User manual

Vimar TAB 40517 User manual

Vimar

Vimar TAB 40517 User manual

Vimar ELVOX Videocitofonia 7539 User manual

Vimar

Vimar ELVOX Videocitofonia 7539 User manual

Vimar ELVOX PIXEL UP: 40415.S User guide

Vimar

Vimar ELVOX PIXEL UP: 40415.S User guide

Vimar ELVOX 13F1 Assembly instructions

Vimar

Vimar ELVOX 13F1 Assembly instructions

Vimar TAB 40515 User guide

Vimar

Vimar TAB 40515 User guide

Vimar ELVOX 1283 Assembly instructions

Vimar

Vimar ELVOX 1283 Assembly instructions

Vimar ELVOX K40945 User manual

Vimar

Vimar ELVOX K40945 User manual

Vimar Pixel Series Assembly instructions

Vimar

Vimar Pixel Series Assembly instructions

Vimar Elvox 692D/2 Assembly instructions

Vimar

Vimar Elvox 692D/2 Assembly instructions

Vimar ELVOX 885H/S Assembly instructions

Vimar

Vimar ELVOX 885H/S Assembly instructions

Vimar Elvox 40920.P1 User manual

Vimar

Vimar Elvox 40920.P1 User manual

Vimar ELVOX Roxie 40170 User guide

Vimar

Vimar ELVOX Roxie 40170 User guide

Vimar ELVOX 930A User manual

Vimar

Vimar ELVOX 930A User manual

Vimar 6600 SERIES User manual

Vimar

Vimar 6600 SERIES User manual

Vimar ELVOX PIXEL UP 40405 User manual

Vimar

Vimar ELVOX PIXEL UP 40405 User manual

Vimar 6341 User manual

Vimar

Vimar 6341 User manual

Vimar ELVOX 884G/S Assembly instructions

Vimar

Vimar ELVOX 884G/S Assembly instructions

Vimar ELVOX 6611/AU User manual

Vimar

Vimar ELVOX 6611/AU User manual

Popular Intercom System manuals by other brands

Fasttel FT600W instruction manual

Fasttel

Fasttel FT600W instruction manual

Eyevision Intelli Series manual

Eyevision

Eyevision Intelli Series manual

sks DS 2010-FS Audio operating instructions

sks

sks DS 2010-FS Audio operating instructions

urmet domus SIGNO 1740 user manual

urmet domus

urmet domus SIGNO 1740 user manual

Panasonic VL-VN1700 operating manual

Panasonic

Panasonic VL-VN1700 operating manual

RTS KP-98-7 installation instructions

RTS

RTS KP-98-7 installation instructions

2easy DMR21/D32/F1 Technical manual

2easy

2easy DMR21/D32/F1 Technical manual

SSS Siedle NG 402-03 Product information

SSS Siedle

SSS Siedle NG 402-03 Product information

LEGRAND Easy Kit Connected installation manual

LEGRAND

LEGRAND Easy Kit Connected installation manual

Cyfral PC-4000RV Operating, Installation and Programming Manual

Cyfral

Cyfral PC-4000RV Operating, Installation and Programming Manual

Axis I8016-LVE Repainting instructions

Axis

Axis I8016-LVE Repainting instructions

DTS Icom2 Operating instructions manual

DTS

DTS Icom2 Operating instructions manual

Valet SmartCentre installation manual

Valet

Valet SmartCentre installation manual

LEGRAND Bticino Terraneo 342911 instruction sheet

LEGRAND

LEGRAND Bticino Terraneo 342911 instruction sheet

PS Engineering PM1000 II Operator and installation manual

PS Engineering

PS Engineering PM1000 II Operator and installation manual

Comelit SIMPLEBUS 2 8472MB Technical manual

Comelit

Comelit SIMPLEBUS 2 8472MB Technical manual

ERA Products CONNECTA User's installation guide

ERA Products

ERA Products CONNECTA User's installation guide

DoorBird A1061 Series installation manual

DoorBird

DoorBird A1061 Series installation manual

manuals.online logo
manuals.online logoBrands
  • About & Mission
  • Contact us
  • Privacy Policy
  • Terms and Conditions

Copyright 2025 Manuals.Online. All Rights Reserved.